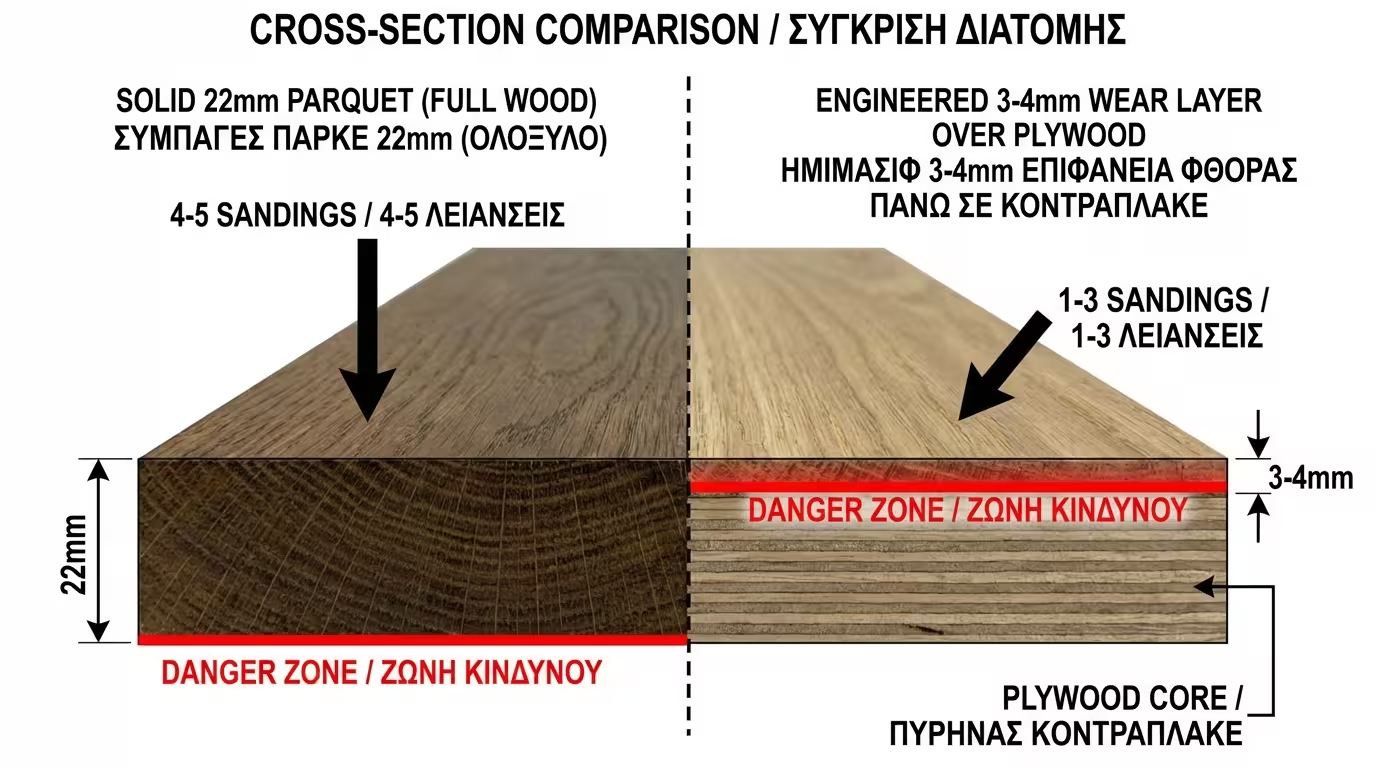
🪵 Solid Parquet (22mm)
Composed of a single piece of wood. Due to the thickness above the tongue and groove, it can withstand 4-6 deep sandings. With proper maintenance, it can last over 100 years.
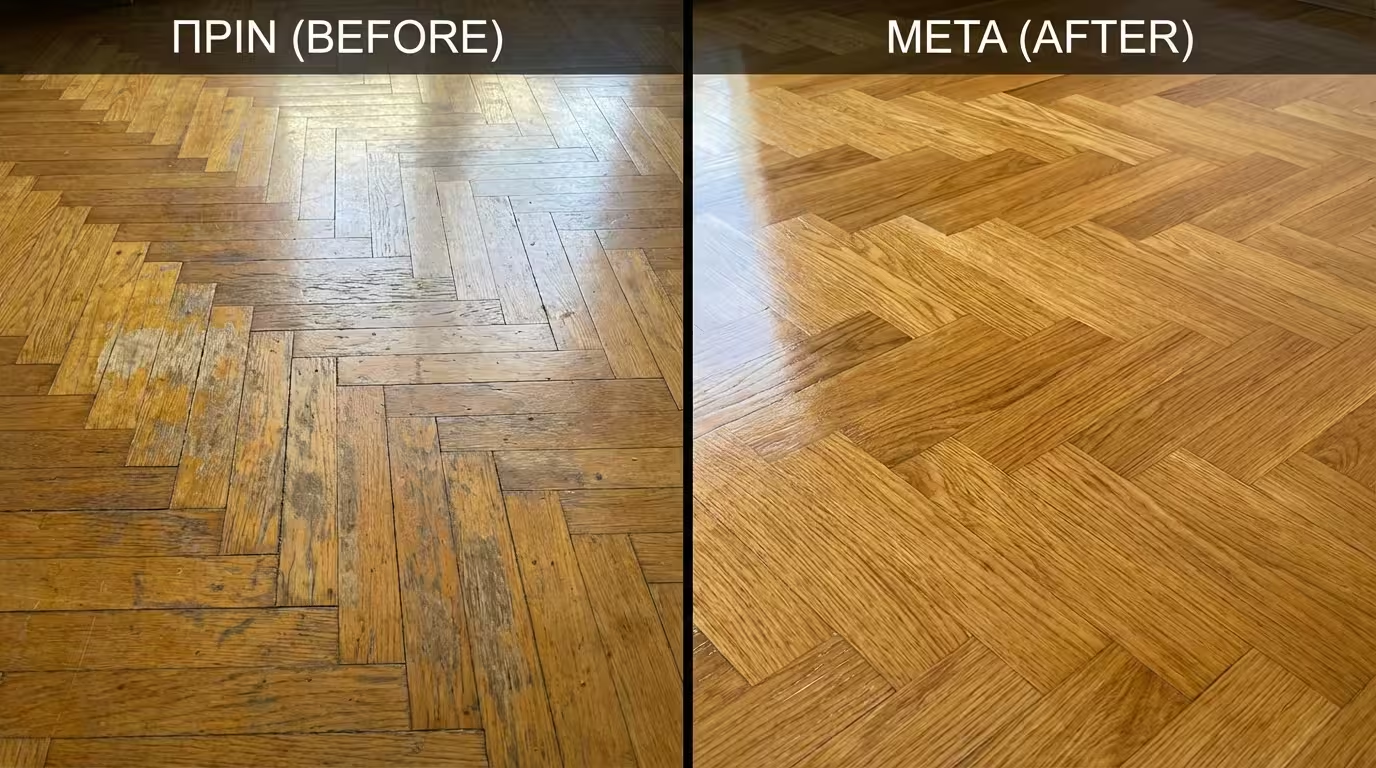
An old wood floor is not a worn-out material, but a treasure waiting to be revealed. Refinishing can transform a space without the cost and disruption of replacement.
We analyze the difference between solid and engineered floors, the importance of correct grit sequencing, and the professional fillers that make the final result look like a brand new masterpiece.
The floor type determines how much "depth" you can remove:
Composed of a single piece of wood. Due to the thickness above the tongue and groove, it can withstand 4-6 deep sandings. With proper maintenance, it can last over 100 years.
Features a wear layer (3-4mm) over a plywood base. It allows for 1-2 careful sandings. If the wear layer is below 2mm, drum sanding is strictly prohibited.
Sanding is done with heavy drum machines. The golden rule: progress gradually, never skip.
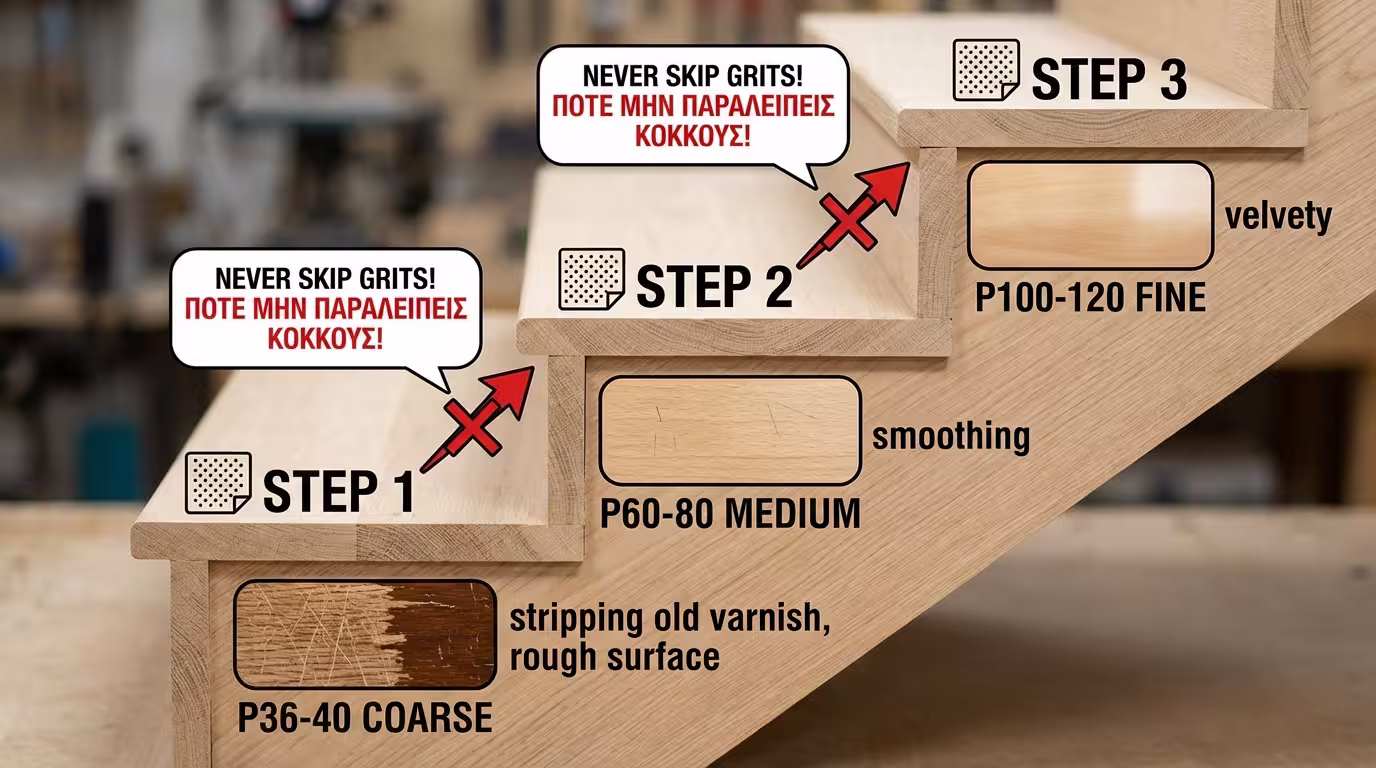
The "reveal" stage. Removes old oxidized varnish and levels the floor. If there is significant warping (cupping), the first pass is done diagonally (45°).
The bridge between removal and smoothing. Erases the deep scratches from the 40 grit and prepares the surface to receive the wood filler in the joints.
The finish. The surface becomes velvet-smooth. We often use three-disc planetary machines (Trio) at this stage for absolute flatness without "swirls" or shadows.
⚠️ Never skip more than one grit number per pass!
Over the years, wood shrinks creating gaps (joints) between the boards.
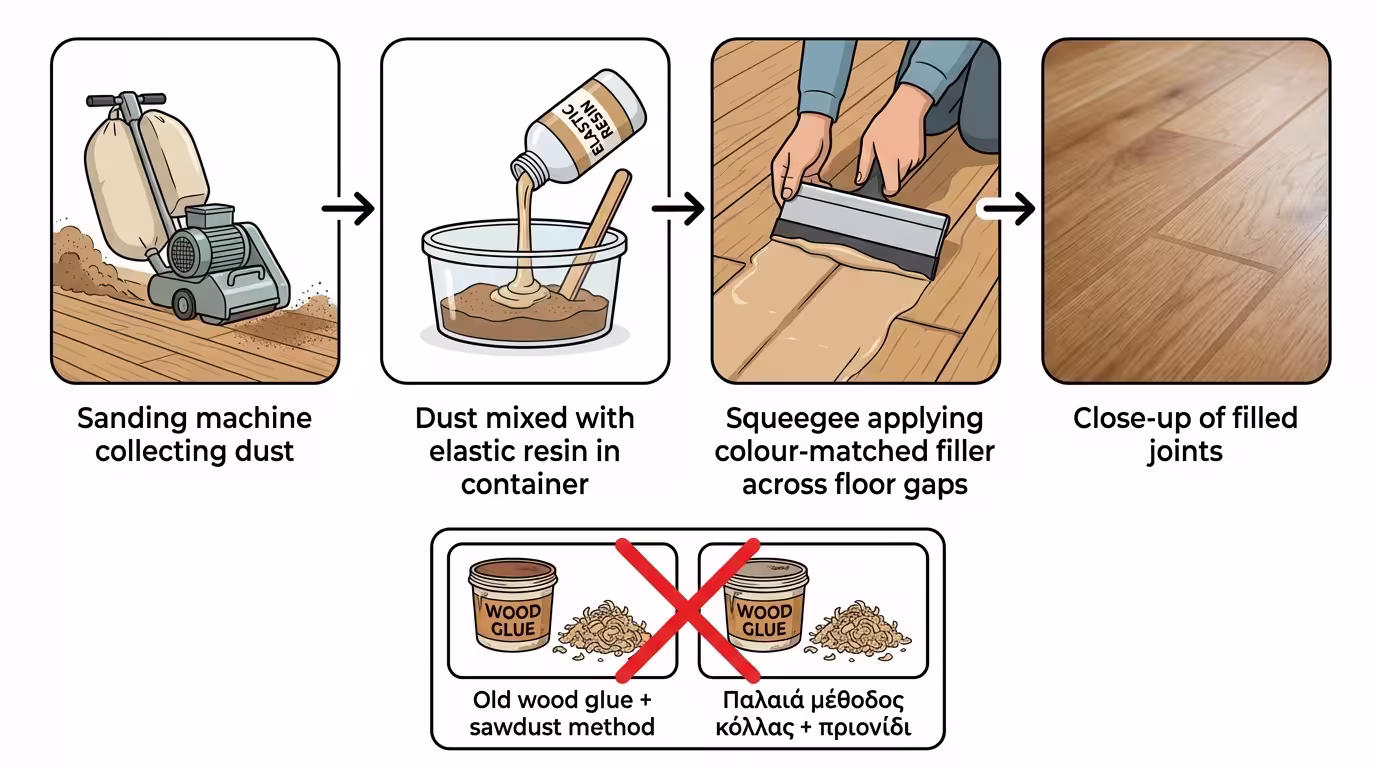
Filling gaps with wood glue and sawdust creates a very hard filler that lacks elasticity. With the wood's first winter contraction, the filler will crack and pop out of the joint.
We use a specialized elastic resin binder mixed with very fine wood flour from the 80 grit sanding. This ensures perfect colour matching and resistance to the wood's natural movement.
Renting a floor sander seems economical, but hides enormous risks:
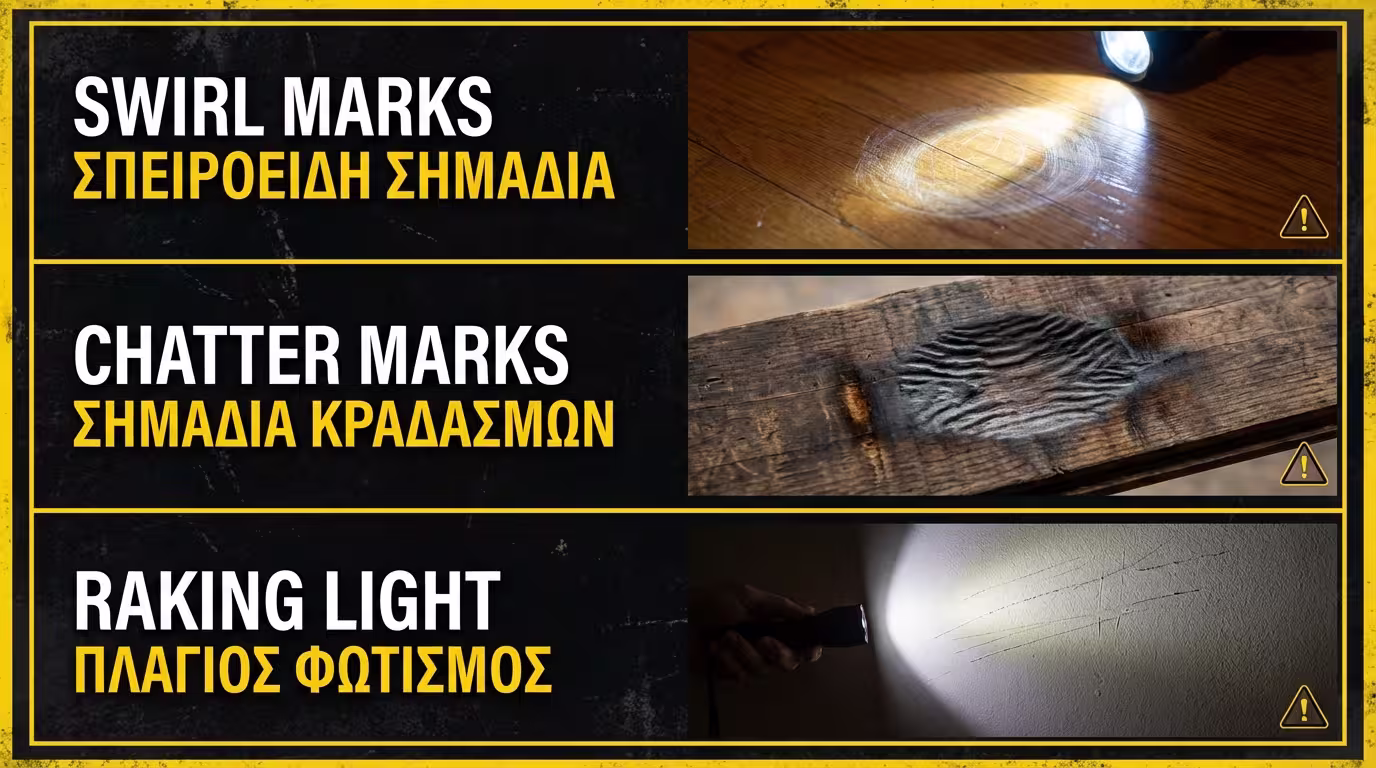
Appear after varnishing if you skipped grits (e.g. 40 → 100) or a pebble got trapped under the sander.
The drum sander stopped in one spot for even 2 seconds - it "digs" dips that cannot be fixed.
💡 Tip: Lights off → torch low and parallel to the floor (raking light) → reveals every imperfection before varnishing.
When specifying materials for renovations, the chemistry demands attention:
In modern renovations, using machines with connected high-powered vacuums (HEPA filters) is mandatory. Wood dust is carcinogenic, and avoiding contamination of the space is critical.
Before applying any varnish, the Moisture Content (MC) of the wood must be checked. If moisture is >12%, the varnish will trap vapours, leading to clouding or peeling.
For high-traffic areas like museums or retail centres, we specify 2K PU systems that withstand thousands of daily passes, ensuring maximum ROI for the investment.
Return to category.
Go to categoryReturn to the central guide.
Go to guide