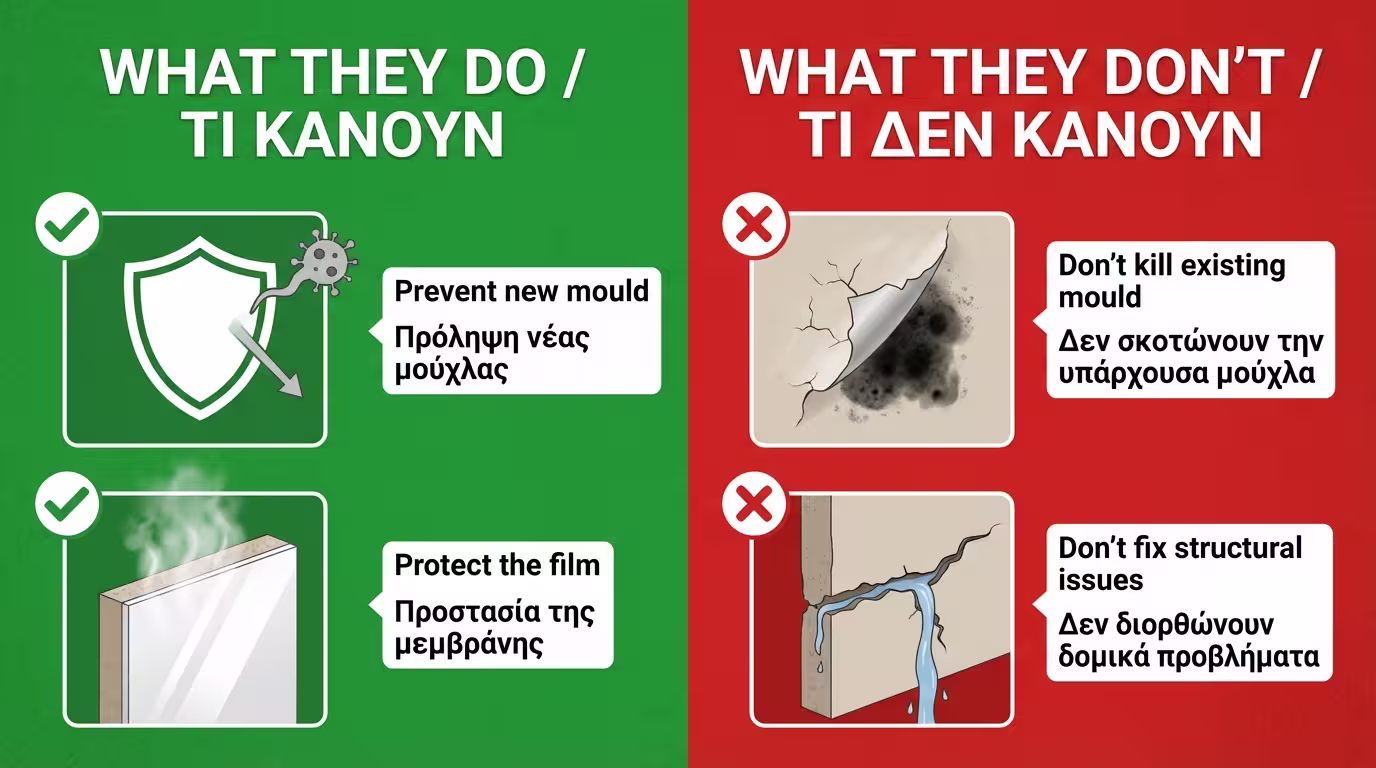
✓ Prevent New Mould
Special additives make the wall surface "hostile" to fungal spores - blocking new mould from forming.
Black spots on the bathroom ceiling or in the corners of north-facing walls - every homeowner's nightmare. Mould doesn't just ruin aesthetics; it's a serious health risk, especially for allergy and asthma sufferers. In this guide we cover everything from chemical composition to correct application.
The biggest misconception: anti-mould paint is not a magic filter that eliminates damp problems.
Special additives make the wall surface "hostile" to fungal spores - blocking new mould from forming.
Keep the coating spotless in rooms with occasional high humidity (bathroom after a shower, kitchen steam).
Painting over a black spot? The mould feeds under the film and will soon peel it off.
Broken pipe, roof leak, rising damp? No paint will save you - they work surface-level only.
Not all "anti-mould" paints are the same - three entirely different approaches:
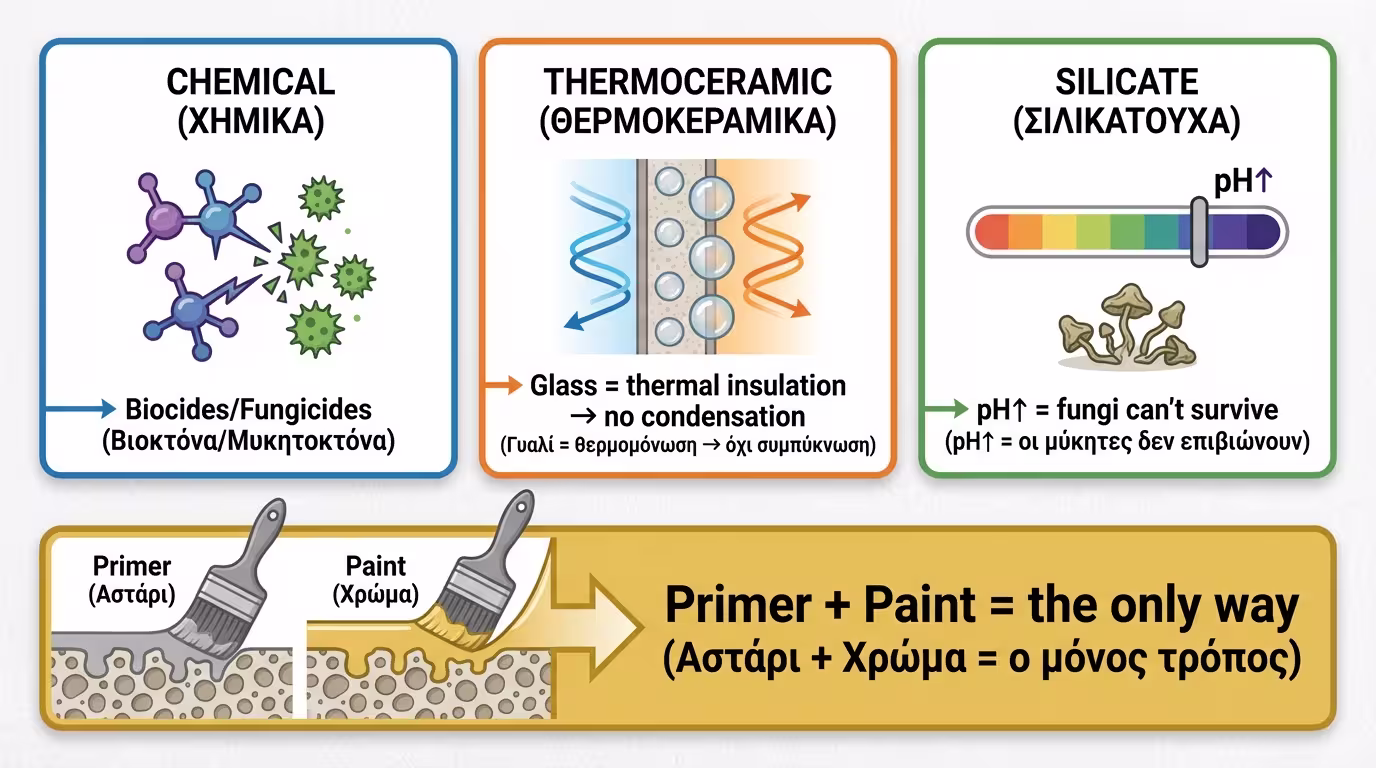
Acrylics with biocides/fungicides. They poison spores on contact. Ideal for domestic bathrooms.
Microscopic glass bubbles = light insulation. Keep the wall warmer → no condensation → no mould.
Potassium silicate = high pH. Fungi can't survive in alkaline environments. No biocides, maximum breathability (Sd < 0.05m).
Primer: penetrates deep, kills "roots." Paint: hard surface shield. In "tough" rooms, the combination is the only sure solution.
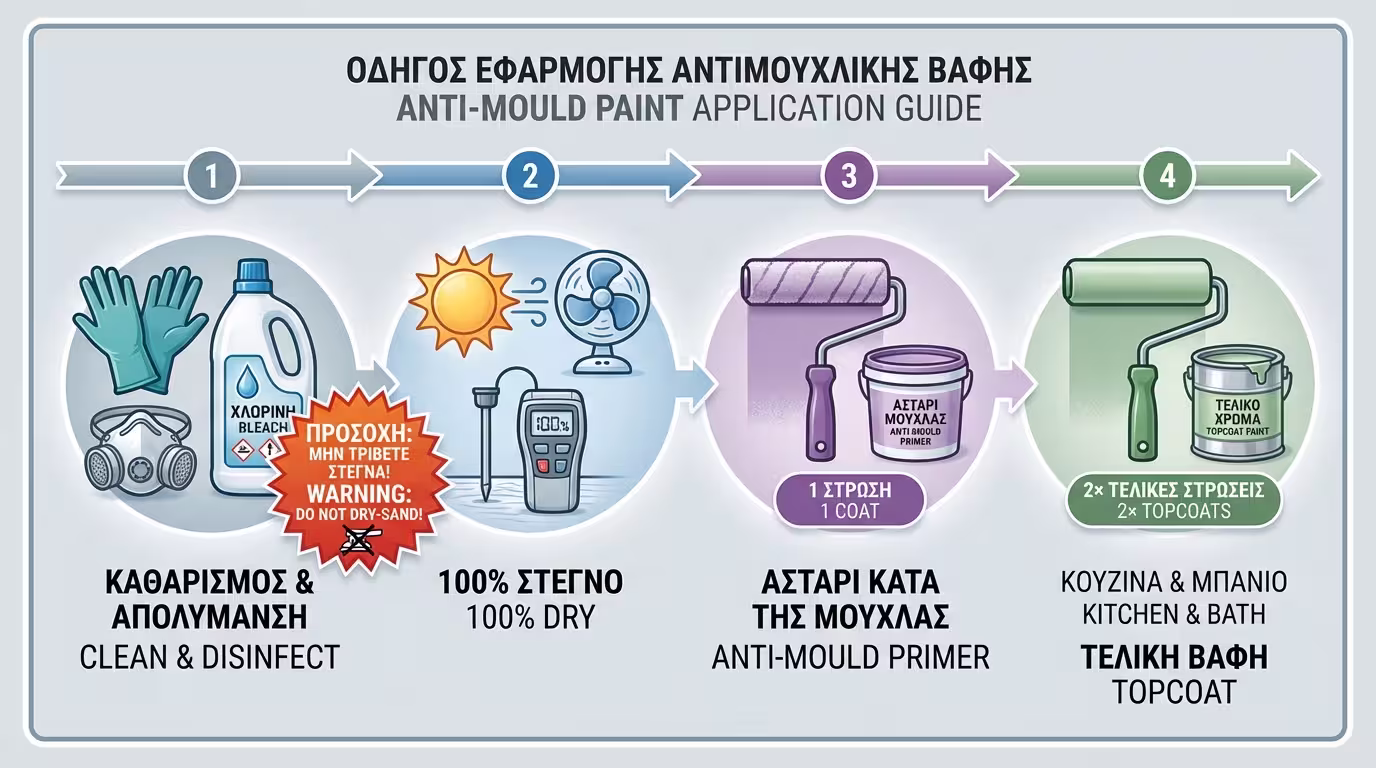
Preparation is everything - if you just open the tin and paint straight away, you'll fail:
Gloves + mask. Bleach solution (1:3) or biocide wash. Never dry-sand live mould - you'll scatter spores everywhere.
Trapped moisture = destruction of the new coat. Wait until the wall is completely dry.
One coat of anti-mould primer - penetrates deep into pores, seals and kills the "roots."
Two coats of quality anti-mould paint (Kitchen & Bath) - tough, washable film.
For engineers and professionals - the standards and chemistry behind anti-mould coatings:
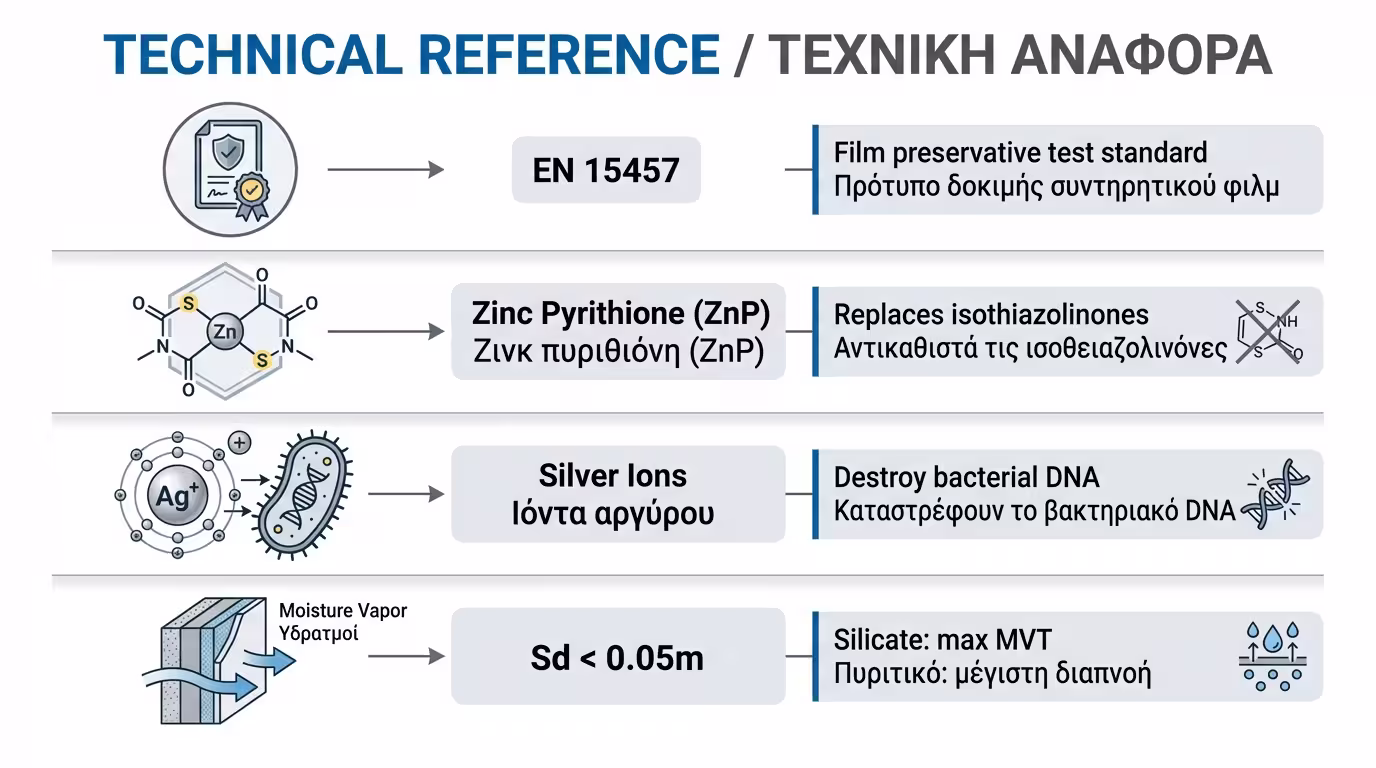
| Parameter | Description | Why It Matters |
|---|---|---|
| EN 15457 | Standard for testing film preservatives against fungi | Proves biostatic/biocidal action (Class 0–1) |
| Zinc Pyrithione (ZnP) | Broad antimicrobial spectrum - replaces isothiazolinones | New generation, fewer allergens |
| Silver ions (Ag⁺) | Embedded in nanoclays - destroy bacterial DNA | No microbial resistance development |
| Sd Value (Breathability) | Silicates: Sd < 0.05m → maximum MVT | Prevents moisture trapping behind film |
Choosing the right anti-mould system requires diagnosis. Poor ventilation? Conventional or anti-condensation. Historic building with trapped moisture? Silicate. Remember: paint is the last line of defence - good ventilation and no leaks come first.
Return to category.
Go to categoryReturn to the central guide.
Go to guide