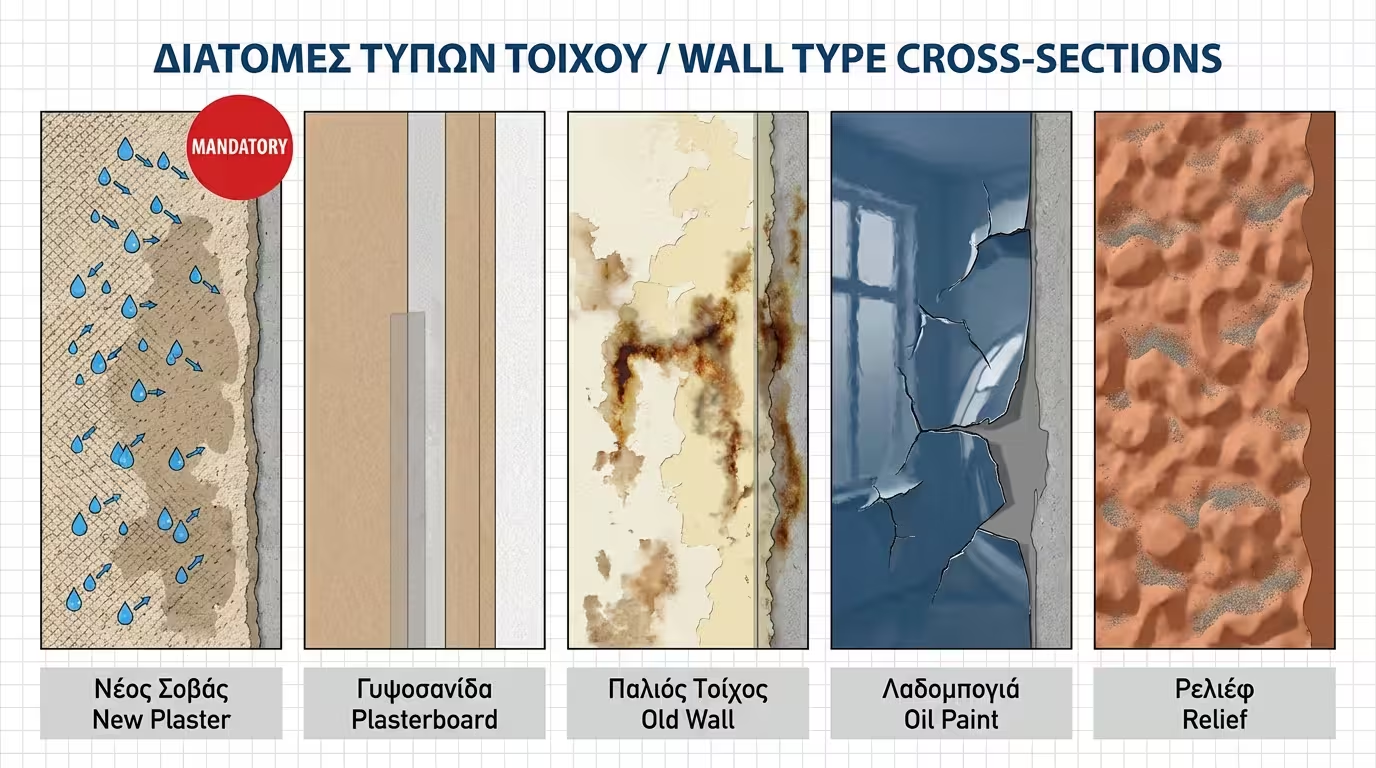
① New Plaster / Concrete
Extremely porous and alkaline. Without primer the wall absorbs the resin unevenly, causing shadows and future peeling. Primer is absolutely mandatory.
In the world of renovation there's a golden rule: a perfect paint job is 80 % preparation and 20 % paint application. At the heart of that preparation sits the primer - the "unsung hero" of every painting project. It doesn't carry the pigments of the topcoat, but contains specialised resins that create the perfect bonding bridge between wall and paint while sealing the pores.
The material you're painting over dictates whether primer is needed - and which type. Here are the five most common scenarios:
Extremely porous and alkaline. Without primer the wall absorbs the resin unevenly, causing shadows and future peeling. Primer is absolutely mandatory.
A double trap: paper (absorbent) + jointing compound (even more absorbent). Without primer, joints "flash" through the paint. A water-based acrylic primer unifies the surface.
Nicotine, moisture or marker stains? You need a stain-blocker. If the wall is "chalking" (leaving powder on your hand), use a high-penetration primer to stabilise it.
Water-based emulsion won't grip glossy oil paint - it peels off like a film. Solution: sand the surface + apply an adhesion primer (Universal Primer).
The textured surface traps dust and grime. After thorough cleaning, a micronised acrylic primer stabilises the peaks and seals micro-cracks.
At the paint store you'll find three main primer families. Your choice depends on the type of problem:
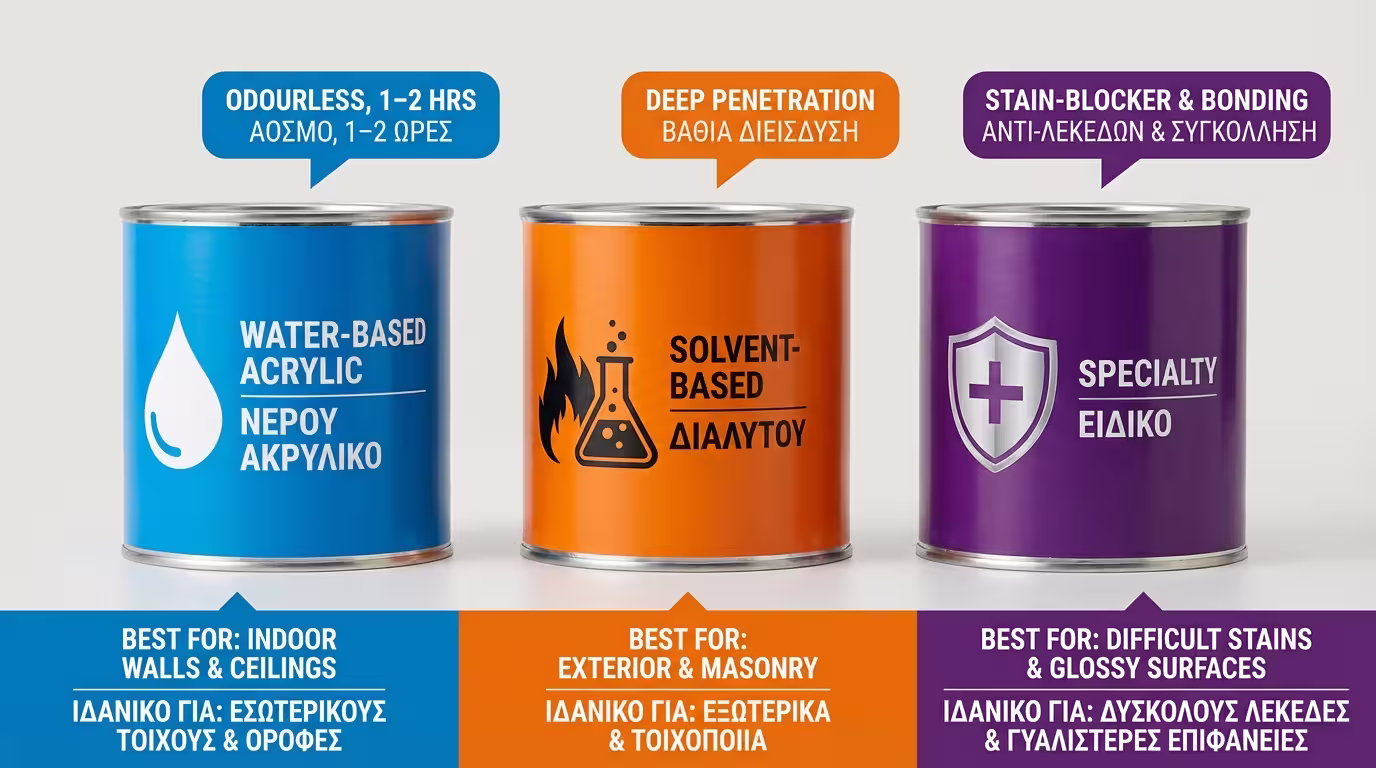
The most popular for interiors. Odourless, dries in 1–2 hours, ideal for new plaster and plasterboard.
Penetrate deeper. Best for crumbling surfaces or old limewash/wallpaper glue residues. Strong odour - good ventilation is essential.
Stain-blockers: lock in smoke and yellowing (often shellac-based). Bonding Primers: grip glossy surfaces (tiles, melamine, oil paints).
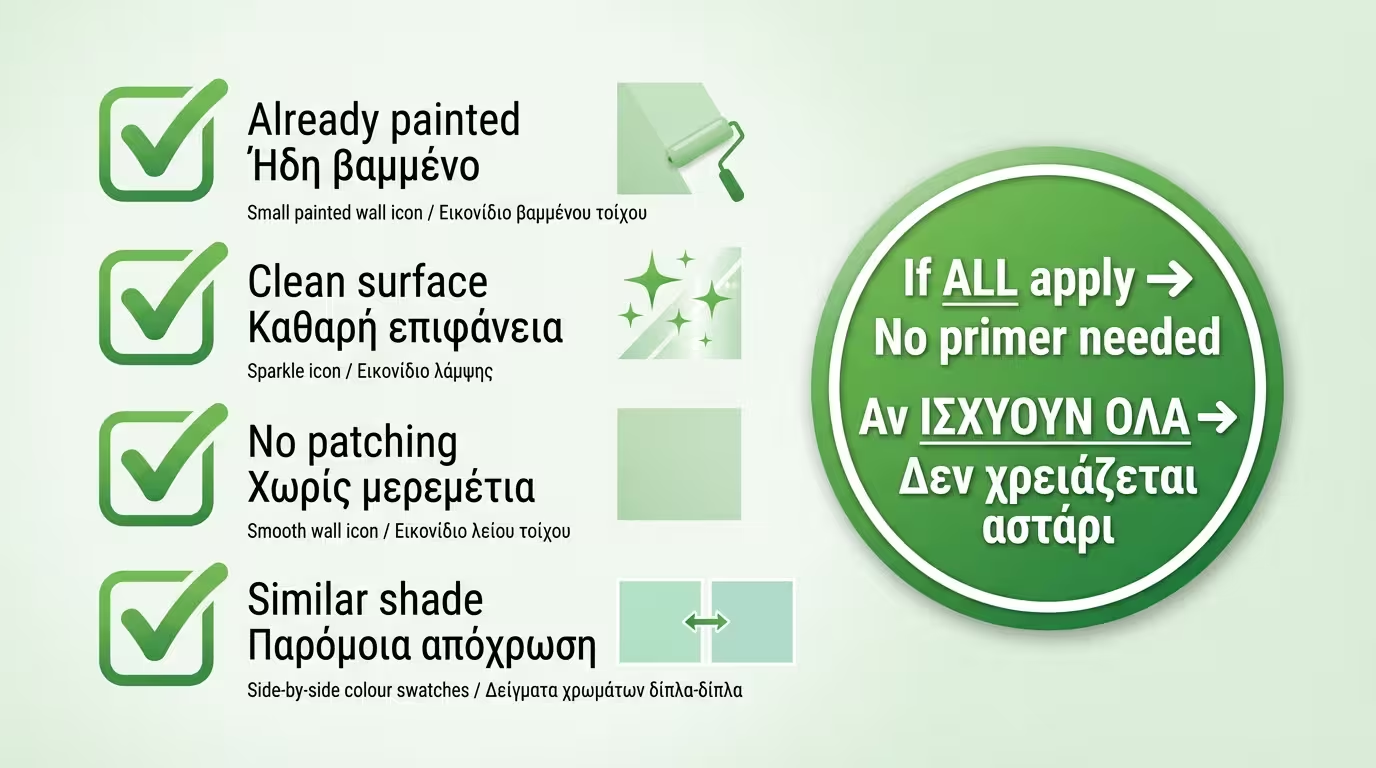
It's not always mandatory. You can skip primer if all of the following apply:
The wall has a standard matte or satin emulsion/acrylic paint in good condition.
No peeling, stains, mould or dust.
No filler repairs that leave bare compound exposed.
The new colour is the same as or darker than the old one.
Self-Priming paints (paint + primer in one) save time on walls in fair condition, but they can't replace a dedicated primer on bare plasterboard, heavy stains or oil-based coatings.
Follow these three steps to always find the right solution:
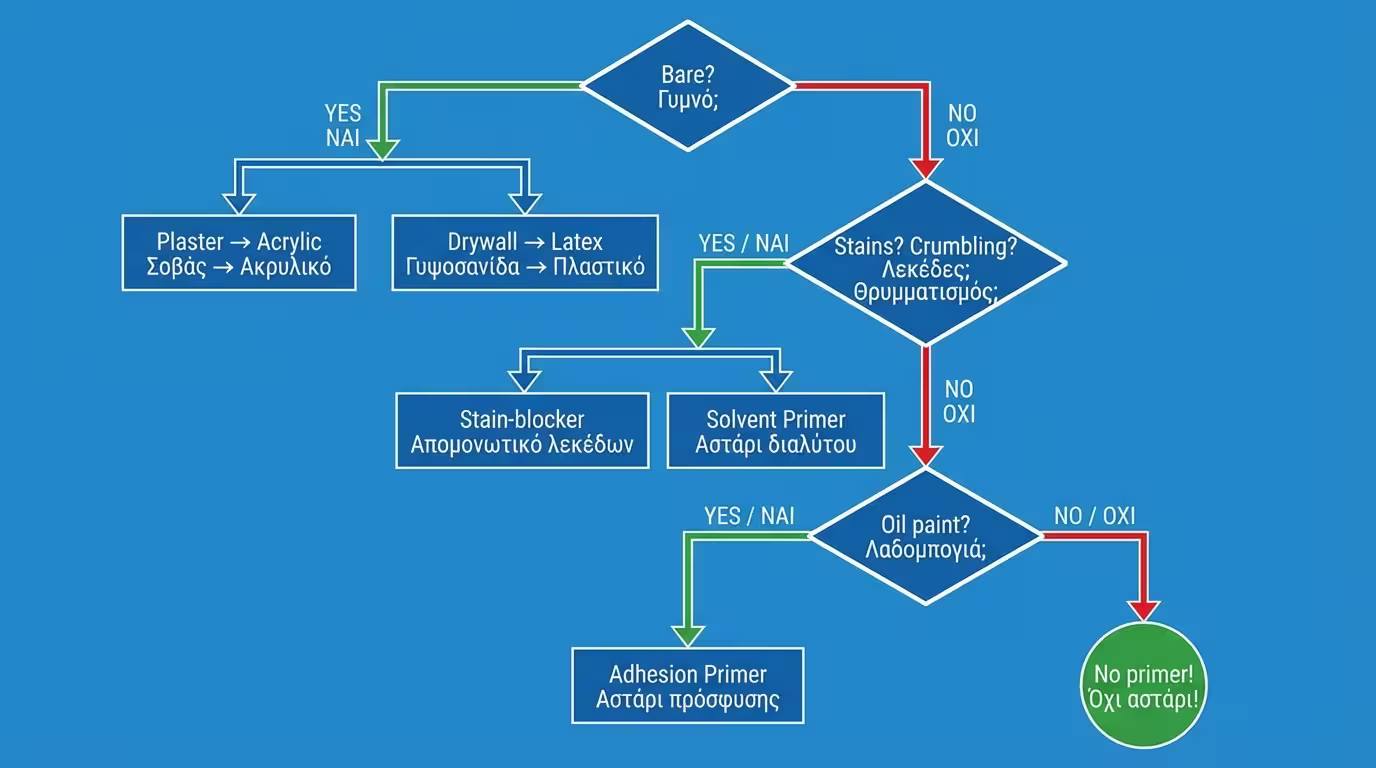
Plaster / Concrete / Filler → micronised acrylic primer. Plasterboard → specialist drywall primer (latex). If already painted, go to Step 2.
Stains (smoke, moisture) → Stain-blocker primer. Chalking / crumbling → solvent-based primer. If stable, go to Step 3.
Glossy oil / enamel → Adhesion Primer (Universal). Standard matte/satin emulsion → no primer needed - proceed to painting!
Primer isn't an "extra coat" - it's insurance for your investment. A tin of quality primer costs far less than the multiple coats of expensive topcoat you'd need without it. Diagnose your wall, follow the algorithm, and the result will reward you with long-lasting durability.
Return to category.
Go to categoryReturn to the central guide.
Go to guide