✅ Perfect Finish
Spraying creates an exceptionally smooth and uniform layer without the streaks and brush marks left by bristles.
Aerosol spray paint can refresh metal objects with a single press of the valve - but is it always the ideal solution? Learn the advantages, pitfalls, and application secrets.
Spray paint offers unique benefits that traditional tools simply cannot match - especially on complex geometries.
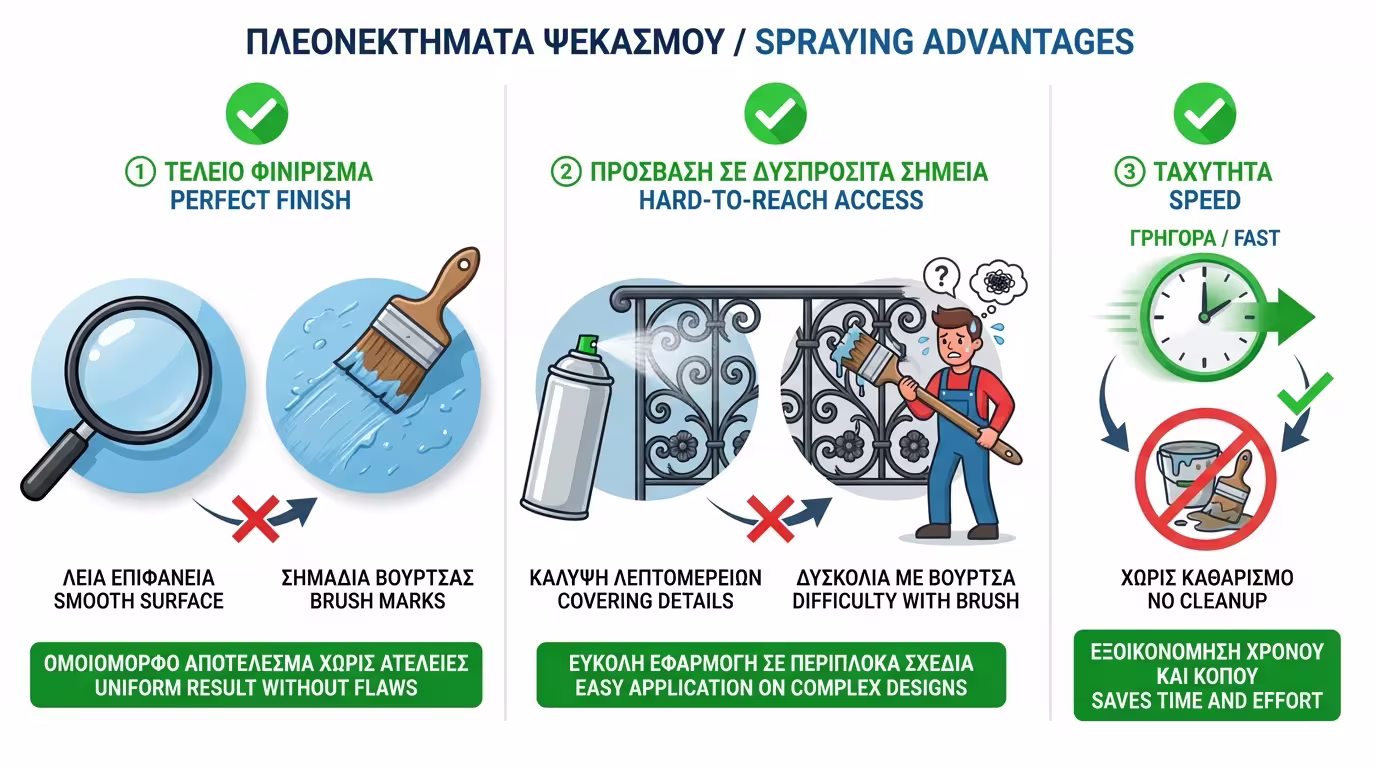
Spraying creates an exceptionally smooth and uniform layer without the streaks and brush marks left by bristles.
On ornate railings, garden furniture, springs, or radiator bodies, spray reaches everywhere with ease.
Covers surfaces much faster. Plus, no tool cleanup (brushes, trays) after the job.
Despite the convenience, spray hides significant traps. If the masking time exceeds the painting time, perhaps a brush or roller is the better choice.
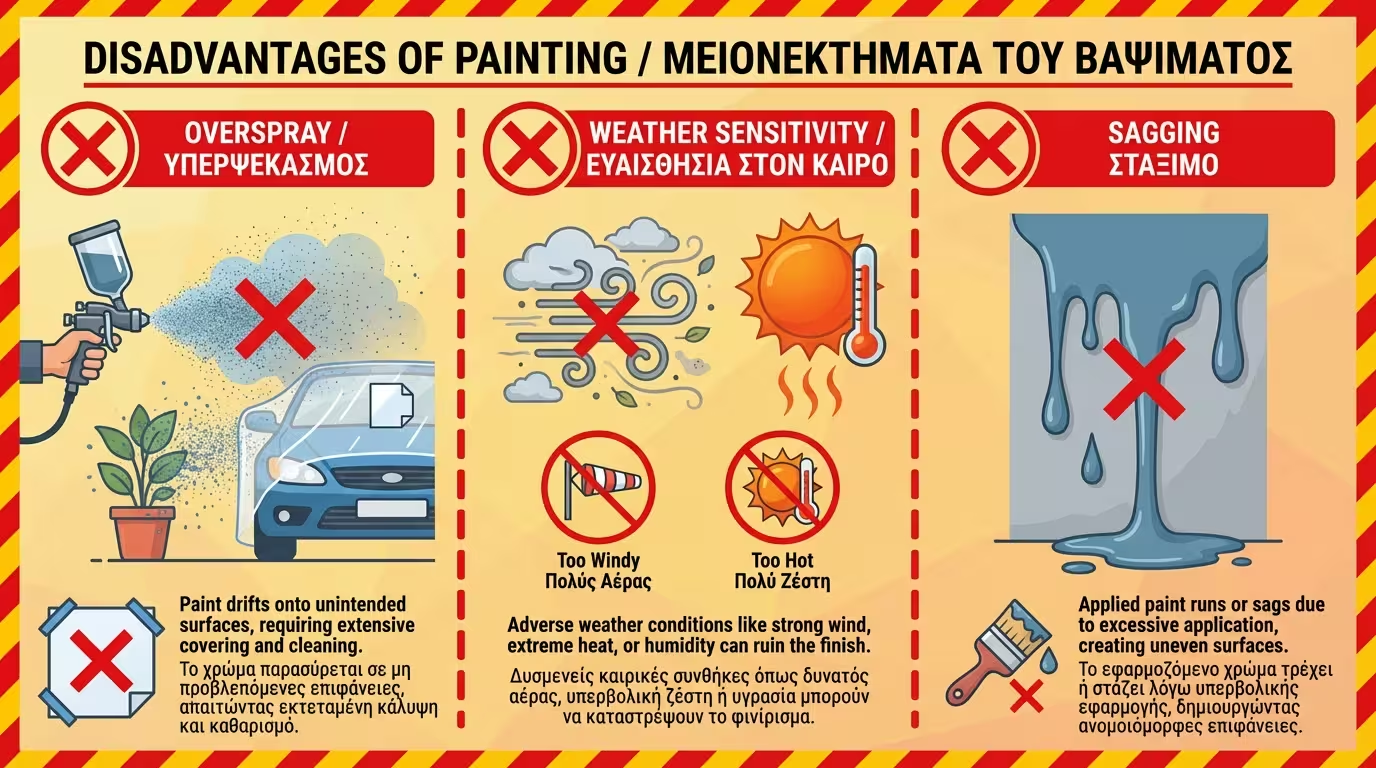
A large percentage of paint is lost to the air. You must thoroughly cover the surrounding area with plastic sheets and tape. If protection time exceeds painting time, a roller is preferable.
If it's windy, the paint drifts. If the surface is in direct sunlight, solvents evaporate too quickly, preventing adhesion.
Spray delivers a large volume of wet paint. If you hold steady on one spot even a fraction of a second too long, the paint will sag and run.
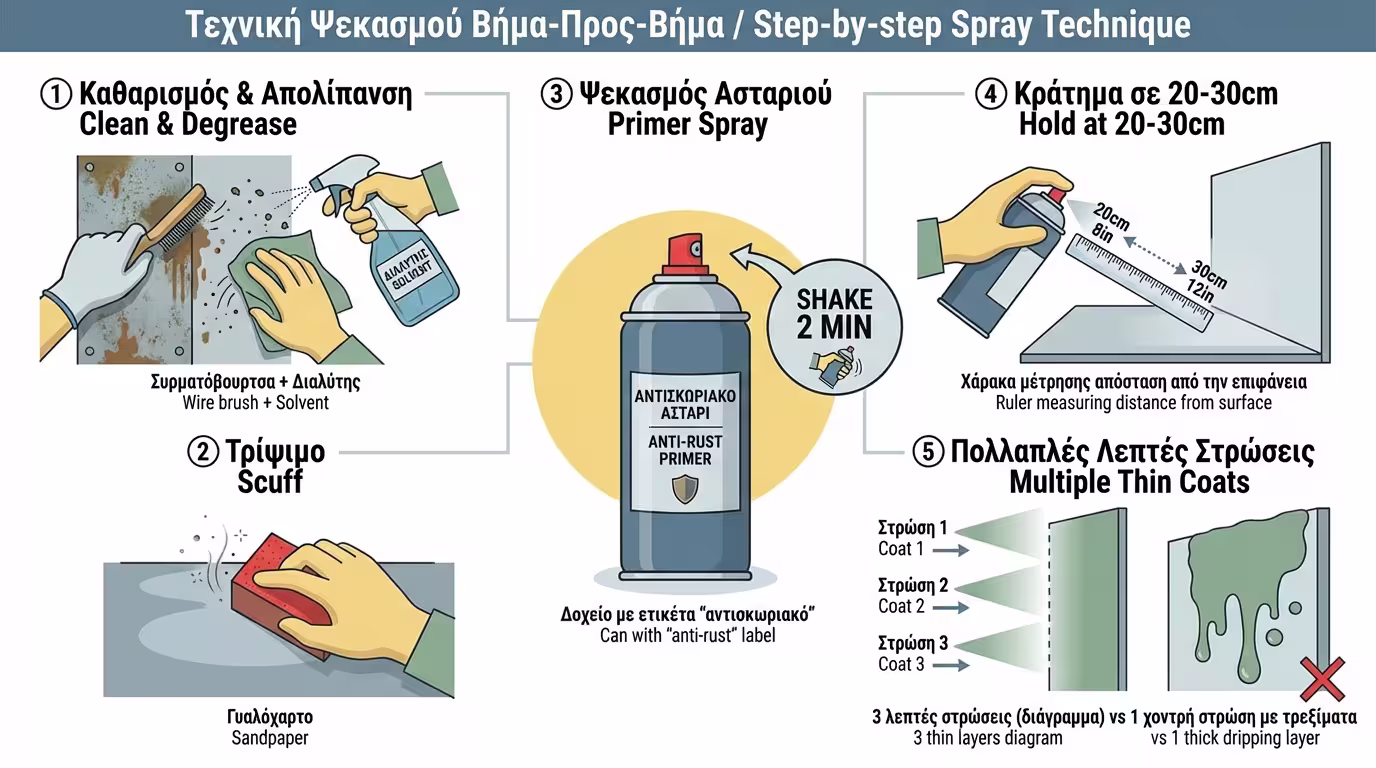
To avoid peeling and achieve a professional result, follow these golden rules of application.
Remove dust and rust with a wire brush or sandpaper. Wipe with solvent to remove oils - this is absolutely essential.
If the metal is already painted and glossy, lightly sand with fine sandpaper to break the gloss.
If you've reached bare metal, spray first with anti-corrosive primer spray.
Shake well. Hold at a steady distance of 20-30 centimetres. Don't spray steadily at one point - move in parallel strokes.
The biggest mistake is trying to cover in one coat. Multiple, very thin passes - waiting for drying between each - prevent sagging.
💡 Tip: Shake the can for at least 2 minutes after hearing the ball. Poor mixing = uneven colour and valve clogging.
For hobbyists, standard acrylic sprays are fine for decoration. But what if you need to paint a motorcycle frame, wheel rims, or anything that takes heavy punishment?
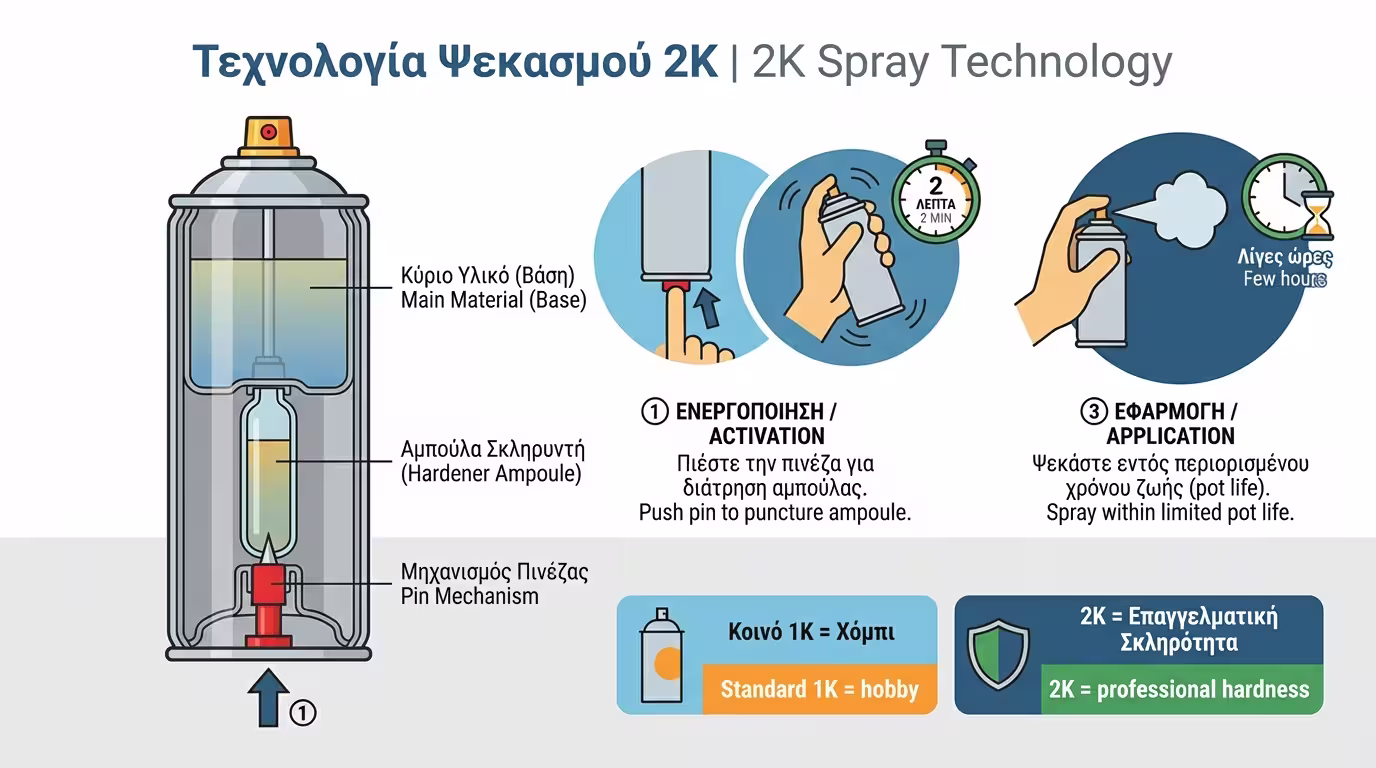
2K (2-Component) Sprays contain an internal hardener ampoule. Before use, you puncture the ampoule (via a pin in the base), shake, and the hardener mixes with the paint.
A finish with extreme hardness, petrol resistance, and mechanical wear - comparable to a professional body shop paint job.
Important: Once the hardener is activated, the spray must be used within a few hours before it solidifies inside the can.
💡 Conclusion: Spray is the "king" of small projects, garden furniture, and objects with complex details. For large flat surfaces, a quality small roller is more efficient. Never forget your respirator mask!
Return to category.
Go to categoryReturn to the central guide.
Go to guide