Why they don't belong inside
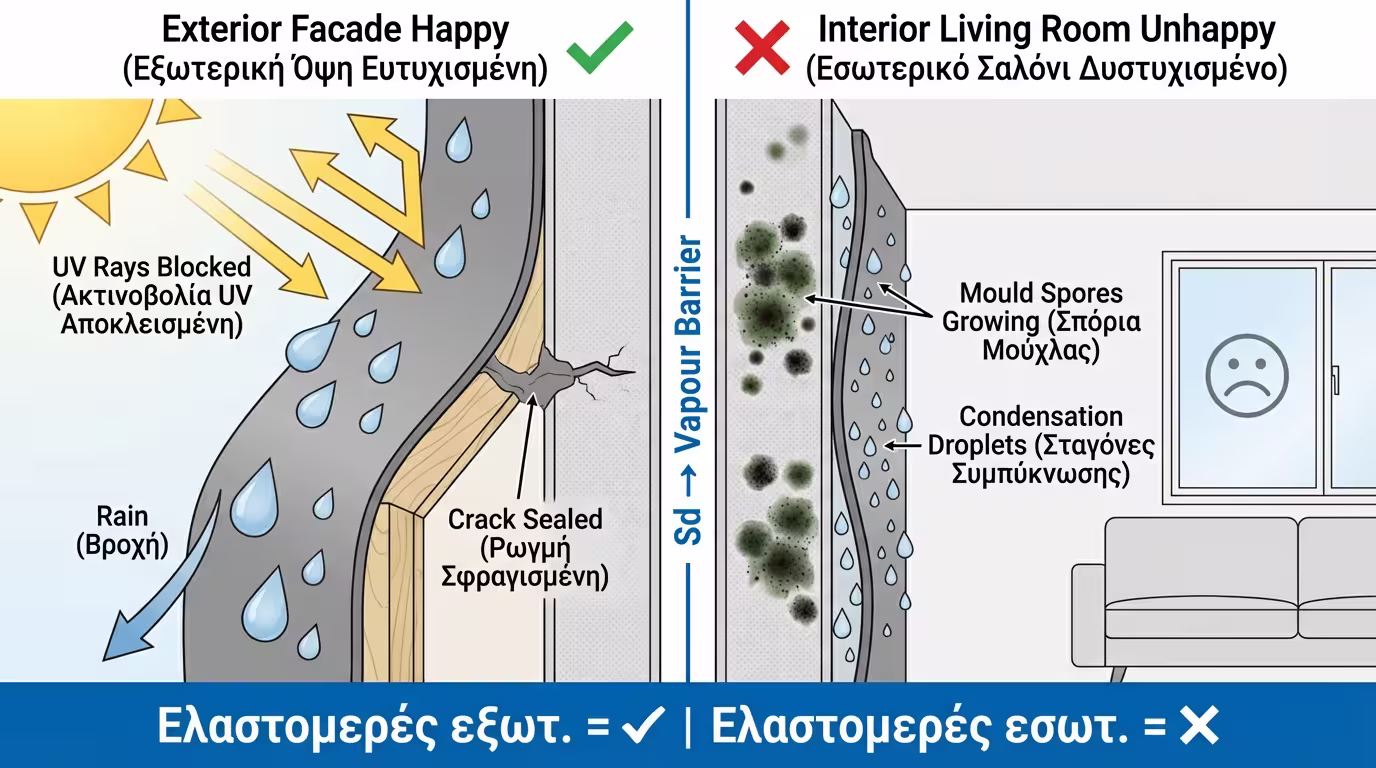
Heavy elastomeric coatings form a thick film that acts as a vapour barrier (very high Sd value). The wall stops "breathing," dramatically raising the risk of mould and condensation.
Cracks on interior walls are one of the most common headaches in any home - from natural settling, thermal expansion, or minor earthquakes. Many homeowners' first thought: "Is there an elastic paint that will make the problem disappear?" The answer isn't a simple yes or no. Let's look at what really works, the hidden traps of using elastomeric coatings indoors, and how to deal with cracks properly.
When we hear "elastomeric," we think mainly of exterior coatings - for facades and flat roofs. But can you use them in your living room?
Heavy elastomeric coatings form a thick film that acts as a vapour barrier (very high Sd value). The wall stops "breathing," dramatically raising the risk of mould and condensation.
In a bedroom or living room, the elastomeric membrane traps moisture behind the wall instead of regulating it. Result: internal dampness, fungal growth and worse long-term problems.
Exterior elastomeric coatings on interior walls = bad idea. The real crack solution lies elsewhere.
For interiors, we don't rely on the paint to bridge the crack. Instead we follow a three-step system:
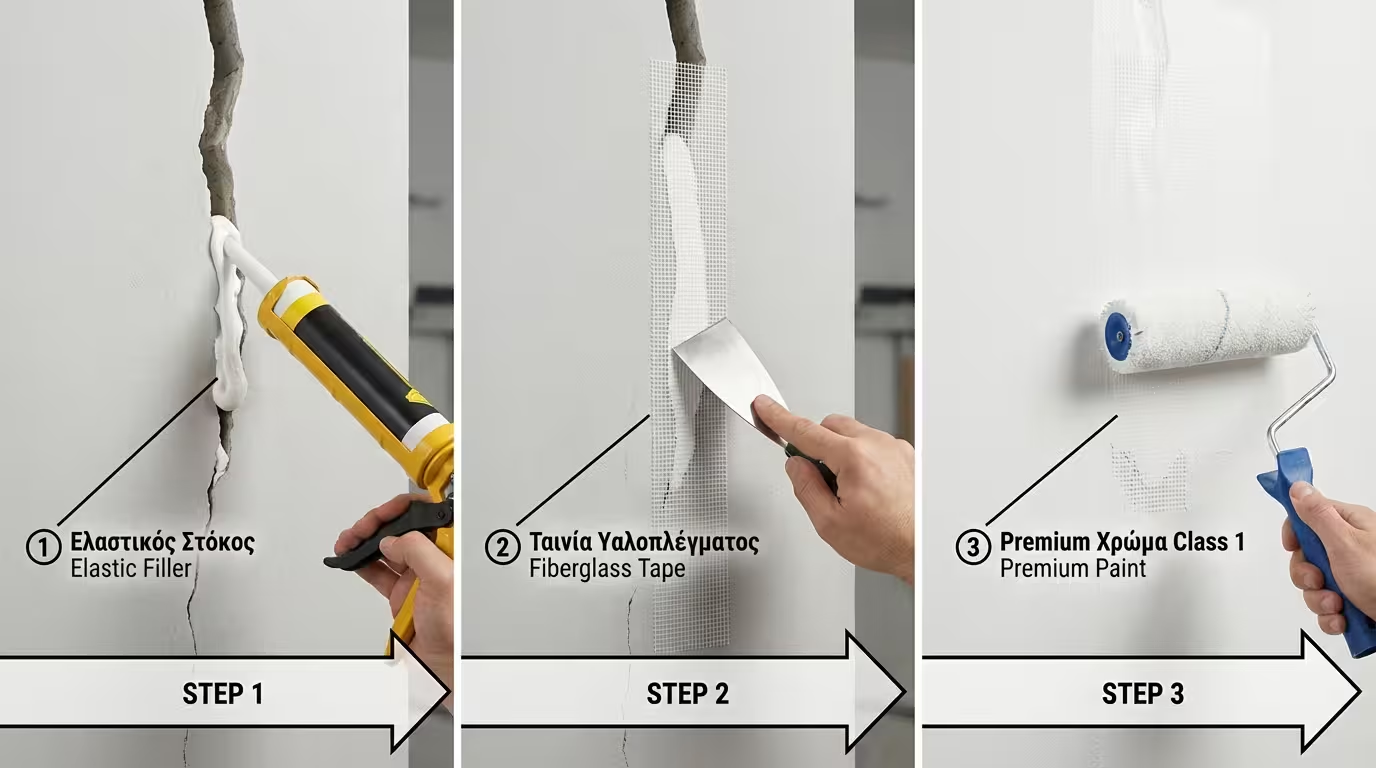
Open the crack into a V-shape with a scraper, then fill it with a specialised, highly elastic acrylic or polyurethane filler. It stays flexible under the paint and absorbs vibrations.
For larger cracks, apply fiberglass mesh tape over the filler. This guarantees the crack won't reopen even if the wall moves.
Once the repair is done, paint with a top-quality acrylic/vinyl emulsion. The best paints have enough natural elasticity - thanks to high resin content - not to crack easily.
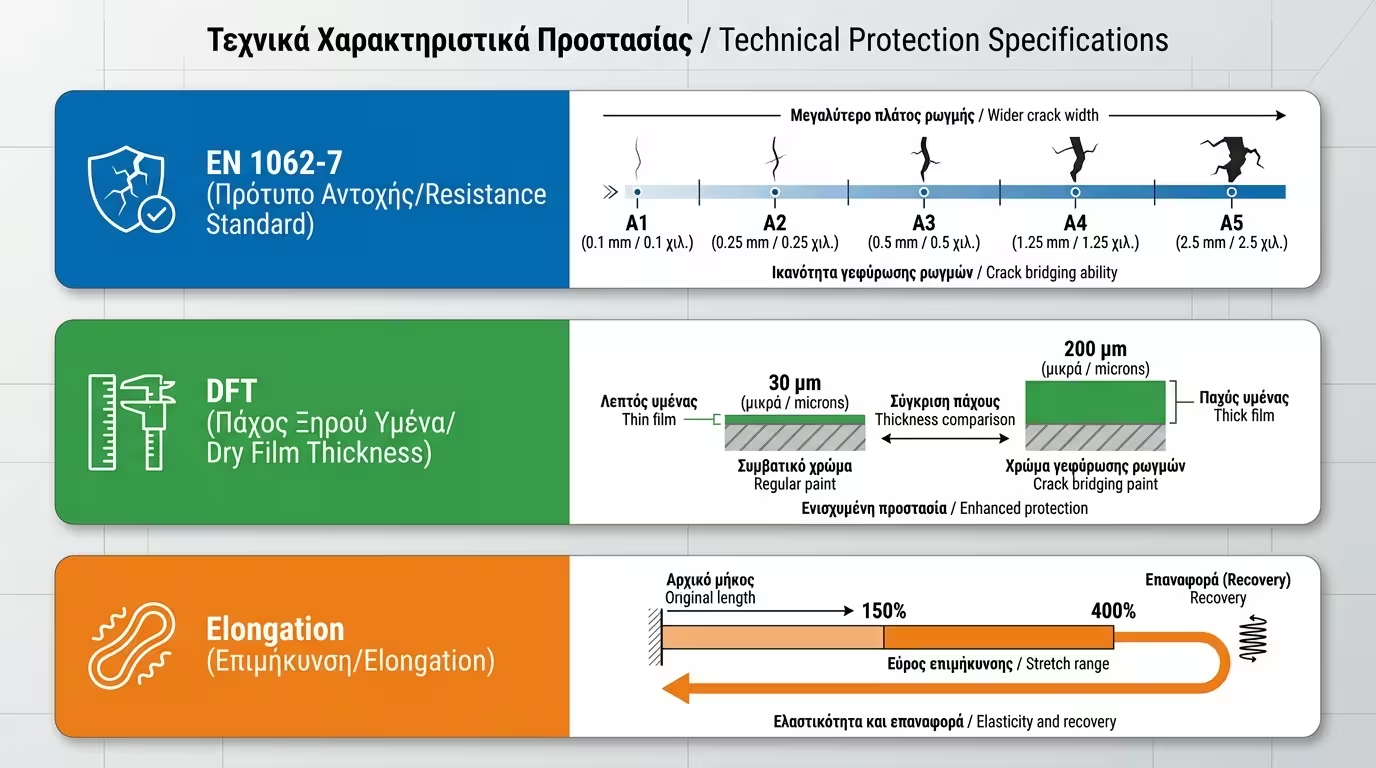
If you're looking for a product that truly bridges cracks, marketing claims aren't enough. Open the TDS and look for three criteria:
| Criterion | What it measures | What to look for |
|---|---|---|
| EN 1062-7 - Crack Bridging | Widest crack the film can span without breaking | A1 (>0.1 mm), A2 (>0.25 mm), A3 (>0.5 mm), A4/A5 for extreme |
| Dry Film Thickness (DFT) | Minimum coat thickness for the bridging claim to hold | Standard emulsion: 30–40 µm · bridging: > 150–200 µm |
| Elongation at Break (ASTM D412) | How much the dry film stretches before tearing (%) | Quality elastomeric: 150–400 % with recovery |
If the TDS simply says "elastic" without an EN 1062-7 class, the elasticity is not officially certified. Always ask for the class number.
There are cases where an elastomeric solution is justified - but they almost always involve exterior surfaces or specialist use:
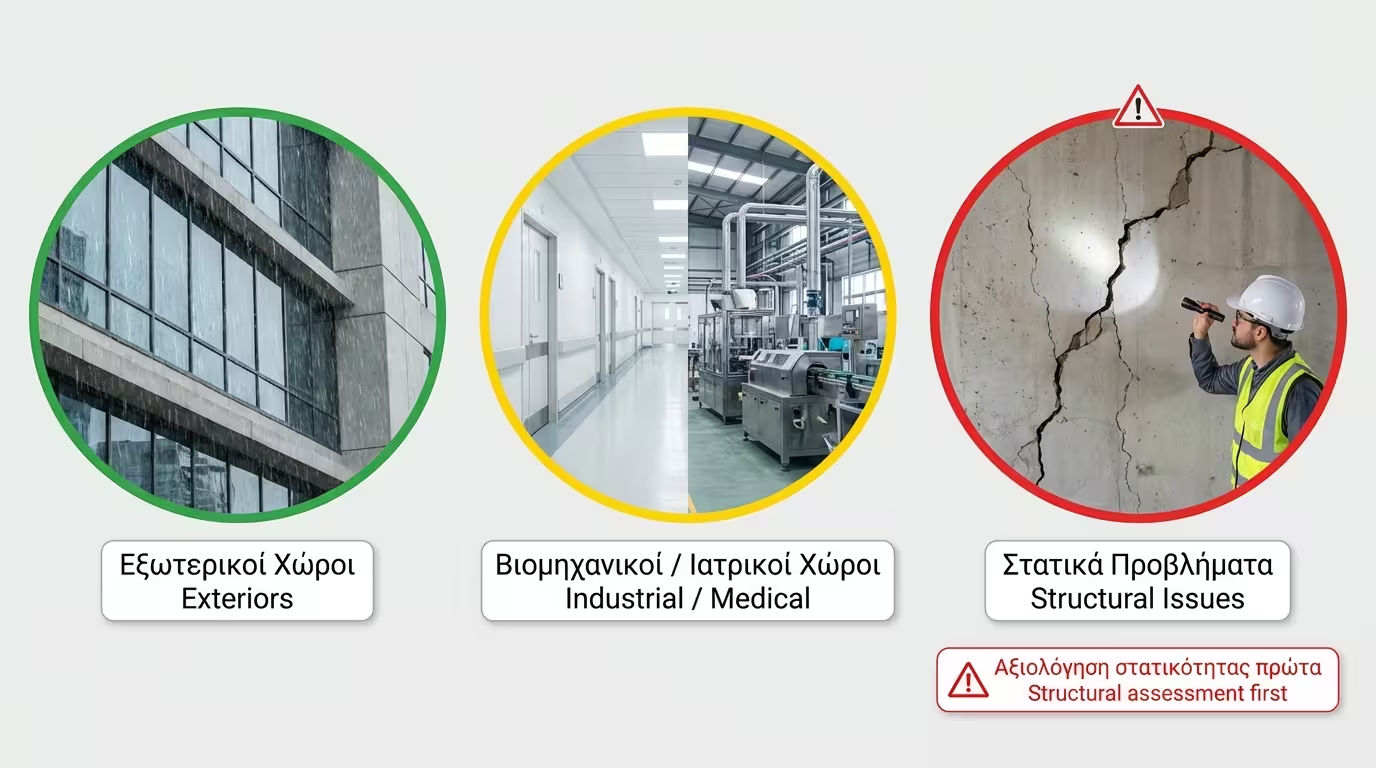
Here elastomeric coatings provide crack bridging and rain-proofing - their primary reason for existing.
Specialised interior systems with certified crack bridging exist (hospitals, factories), but their cost is prohibitive for residential use.
Cracks wider than 1 mm that keep growing need a structural assessment first - no paint can substitute structural reinforcement.
Don't look for the solution in the paint tin alone. Avoid heavy exterior elastomeric coatings on your interior walls - they'll destroy the building's breathability.
The correct approach: open the crack → elastic filler (+ mesh) → premium emulsion. Proper surface preparation is the ultimate secret to never seeing that crack again.
Return to category.
Go to categoryReturn to the central guide.
Go to guide