Trapped moisture
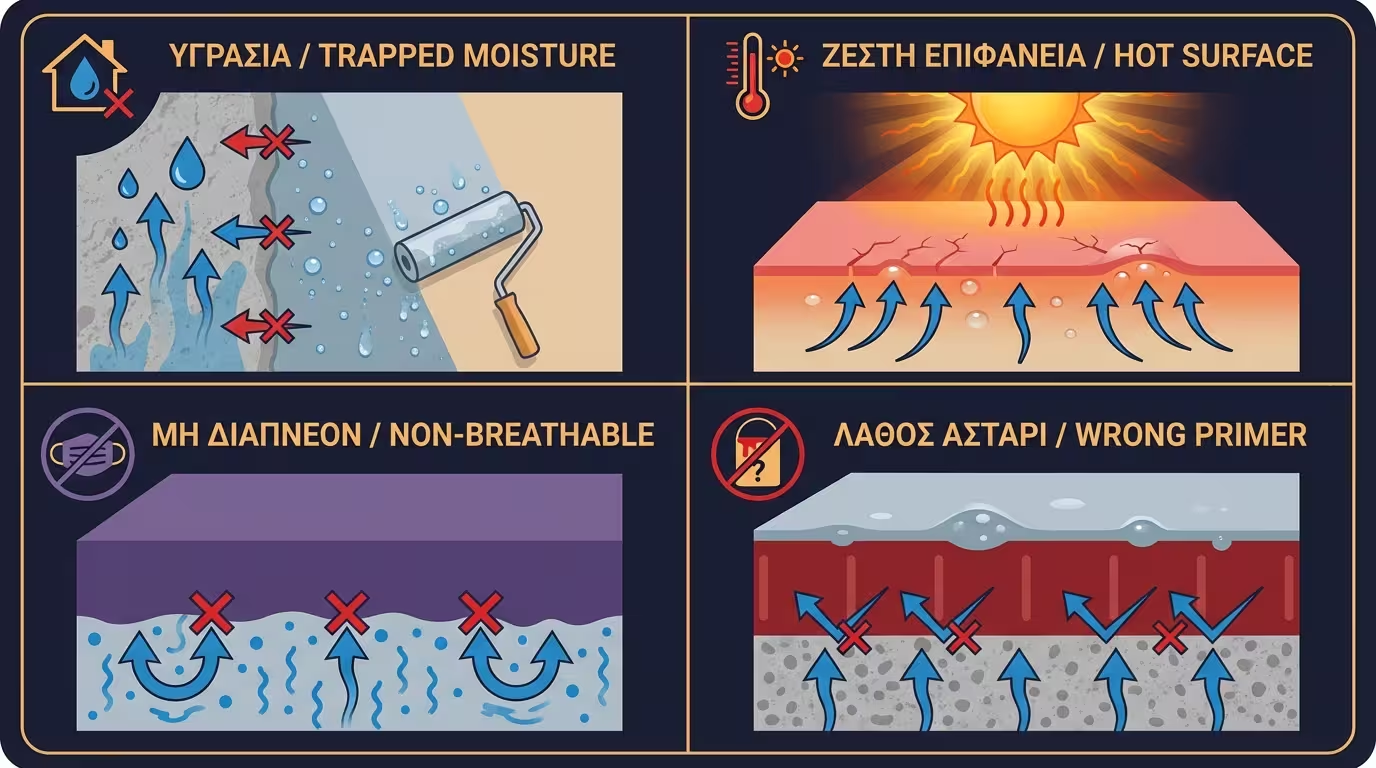
Painting on wet plaster, moisture from cracks, poor roof waterproofing, capillary rise. Water turns to vapour and pushes the film from below.
It's not a cosmetic flaw - it's pressure beneath the film
Blisters appear as small or large "bubbles" on the paint surface. On apartment buildings they're most common on sun-facing facades, near rooftops, in moisture-prone areas - often just months after painting.
The temptation is to blame "cheap paint" or "a bad crew". But blistering isn't a cosmetic defect - it's a sign that something is pushing from underneath the film. And that "something" is almost always moisture or heat.
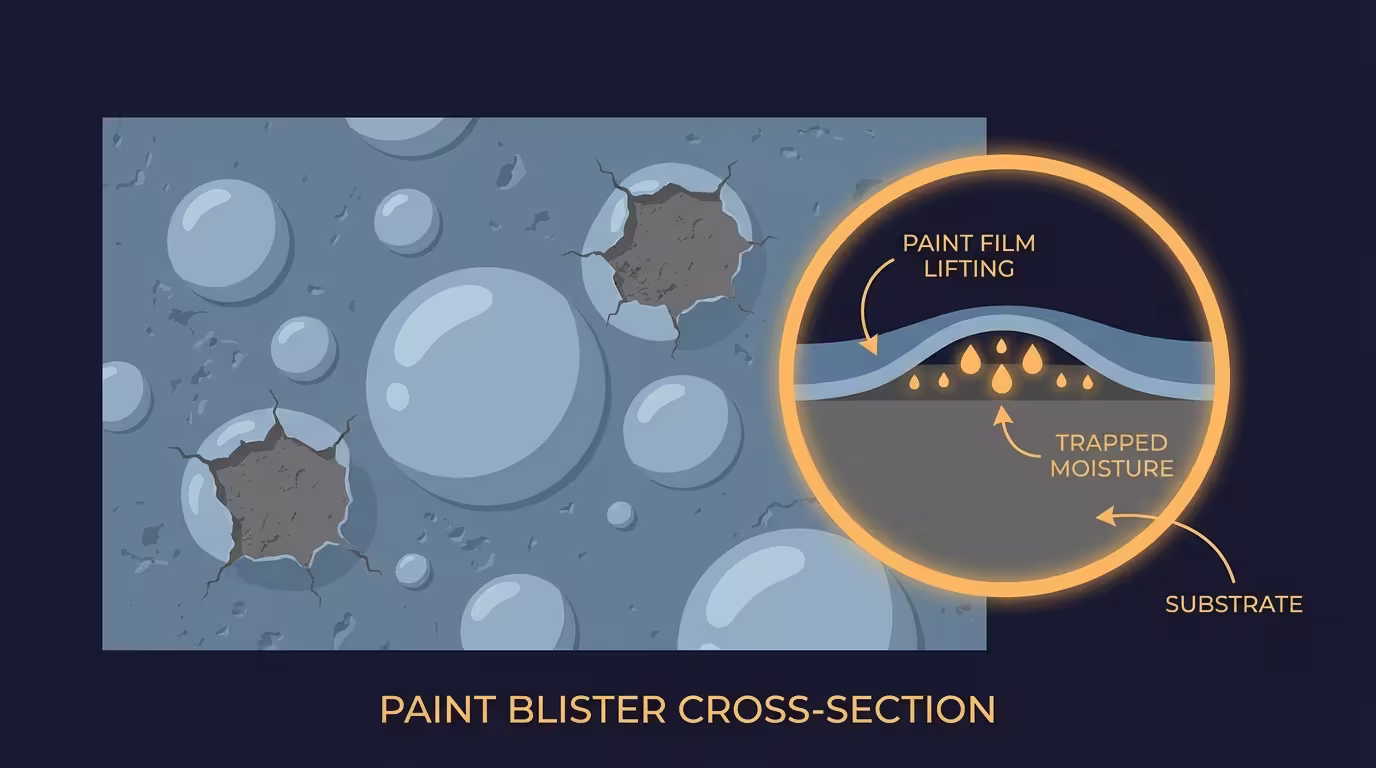
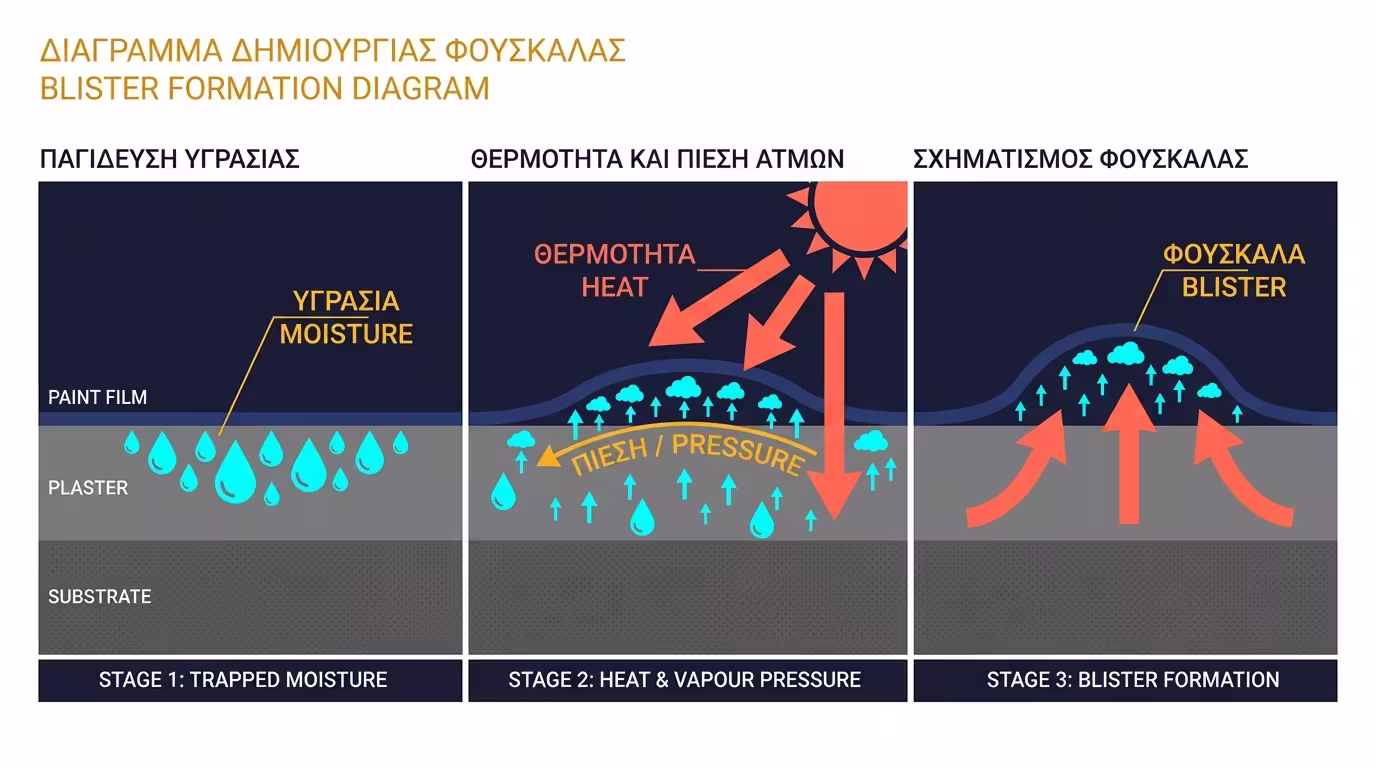
Paint forms a continuous, waterproof film over the wall. That's both its strength and its weakness: if moisture is trapped beneath it, it cannot "breathe".
With heat, the trapped moisture turns to vapour. The vapour exerts pressure. The pressure exceeds the adhesion strength. And then the film lifts - creating the characteristic blister. If the blister bursts, the plaster is exposed to rain and pollutants - and deterioration accelerates.
In every blister we investigate, the cause traces back to one or a combination of four factors. Correct identification determines whether the fix will hold or repeat.
Painting on wet plaster, moisture from cracks, poor roof waterproofing, capillary rise. Water turns to vapour and pushes the film from below.
If the surface is too hot (direct sunlight), the outer layer dries instantly - trapping moisture or solvents under an already hardened film.
When a low-permeability system is applied on a damp substrate, vapour cannot escape. The film becomes a "lid" - and pressure finds its way out.
A primer that creates a waterproof barrier on an absorbent substrate without proper curing. Moisture gets trapped beneath the primer - before the topcoat is even applied.
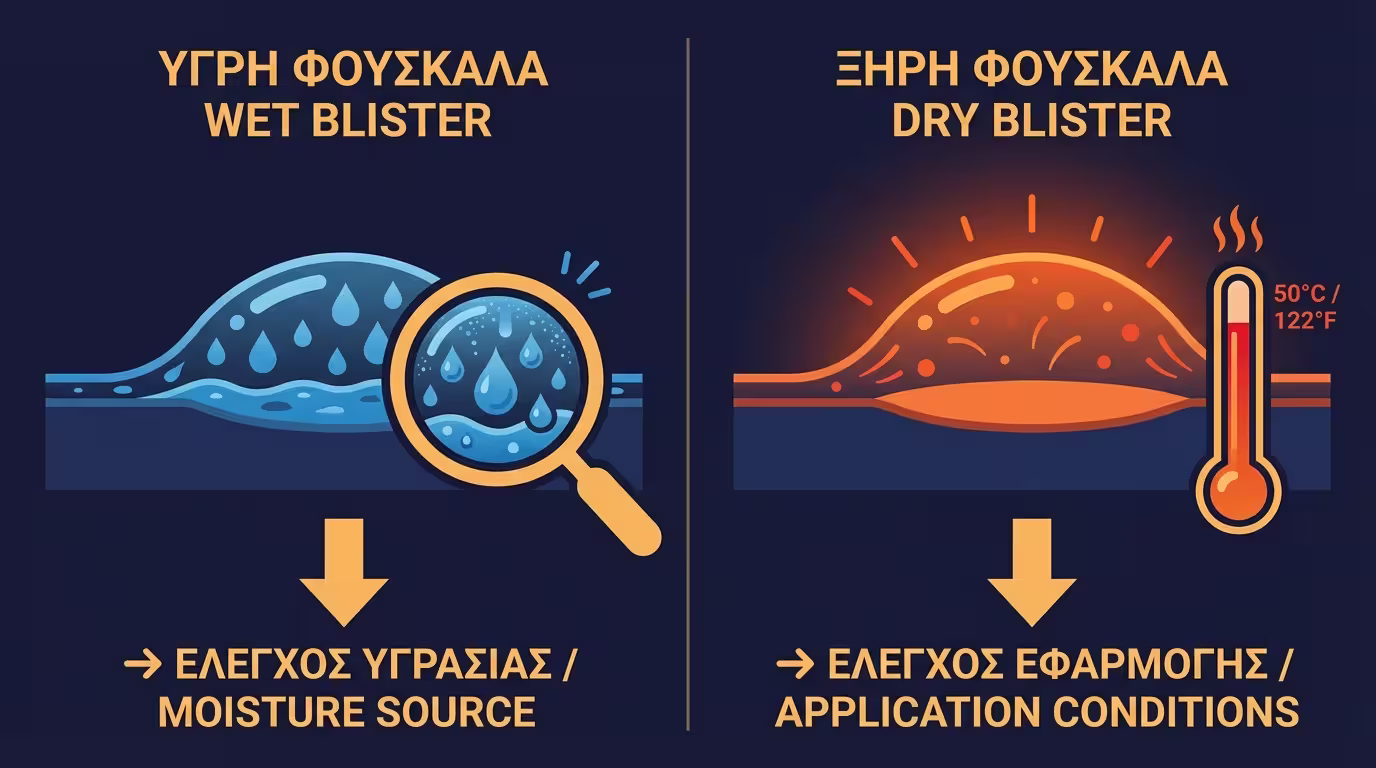
Not all blisters are the same. Diagnosis is straightforward - just puncture one and see what's inside.
| What you find | Type | Cause | Solution |
|---|---|---|---|
| Moisture inside the blister | Wet blister | Trapped moisture in the substrate | Locate and eliminate the water source |
| Dry air inside | Dry blister | Painting in excessive heat or poor technique | Review conditions and application method |
| Only on one facade | Localised | Sun exposure or a specific damp spot | Local remediation + waterproofing |
The diagnosis determines the solution. If you don't know what type of blister you have, every repair is a shot in the dark.
Proper remediation is not a simple patch. A surface fix delays the problem by a few months at best. A technical solution follows a specific sequence.
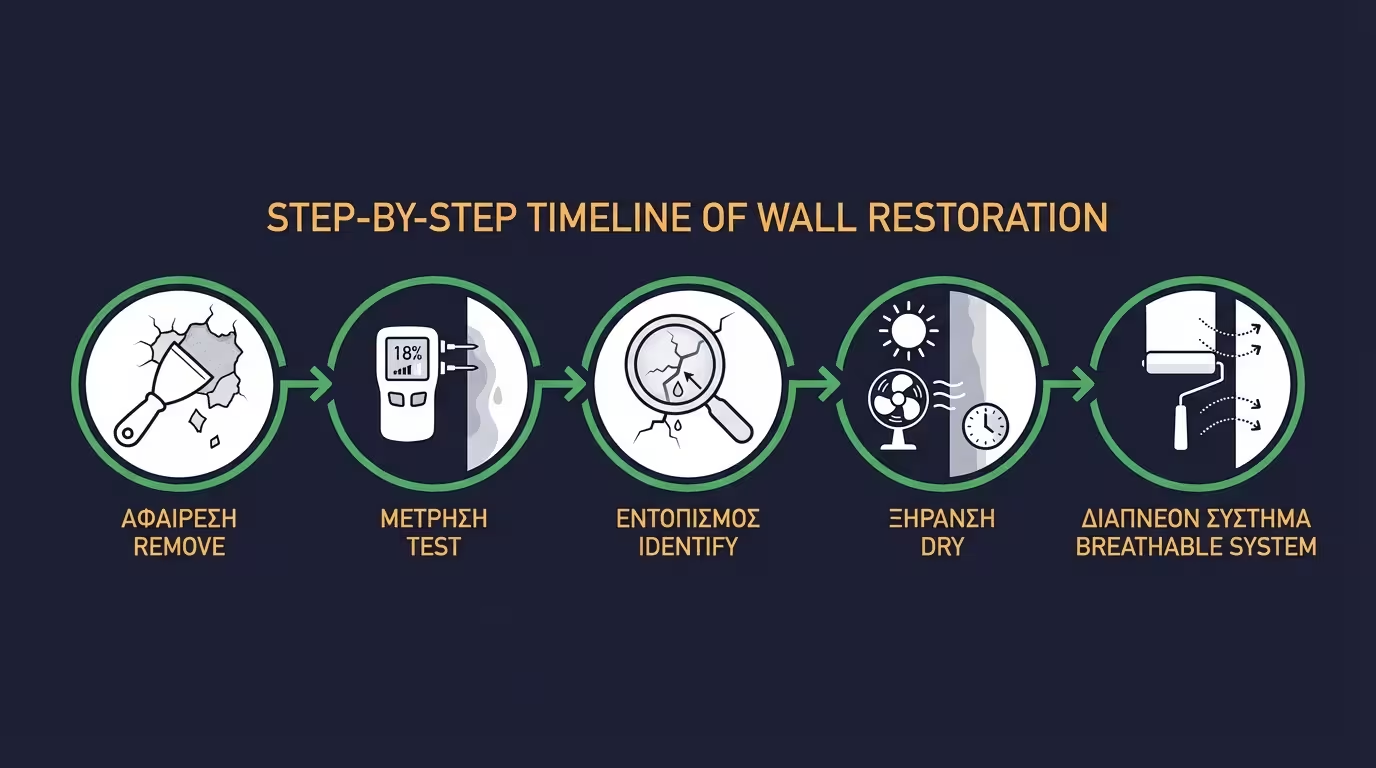
Strip every blistered and delaminated layer. Leaving unstable film behind guarantees the new paint will blister at the same spot.
Use a moisture meter. Readings above 4–5% mean the wall is still too wet to paint.
Cracked waterproofing? Failed insulation? Capillary rise? If the source isn't found, the blister will return.
The wall must dry completely before painting. In some cases this requires weeks or months.
Apply a system that allows vapour to escape rather than trapping it. Silicone or micro-molecular primers are key.
If the moisture source is not eliminated, the problem will return - regardless of how good the paint is.
Blistering is almost always preventable. It doesn't require a more expensive paint - it requires the right process. Four rules that cost less than a remediation job.
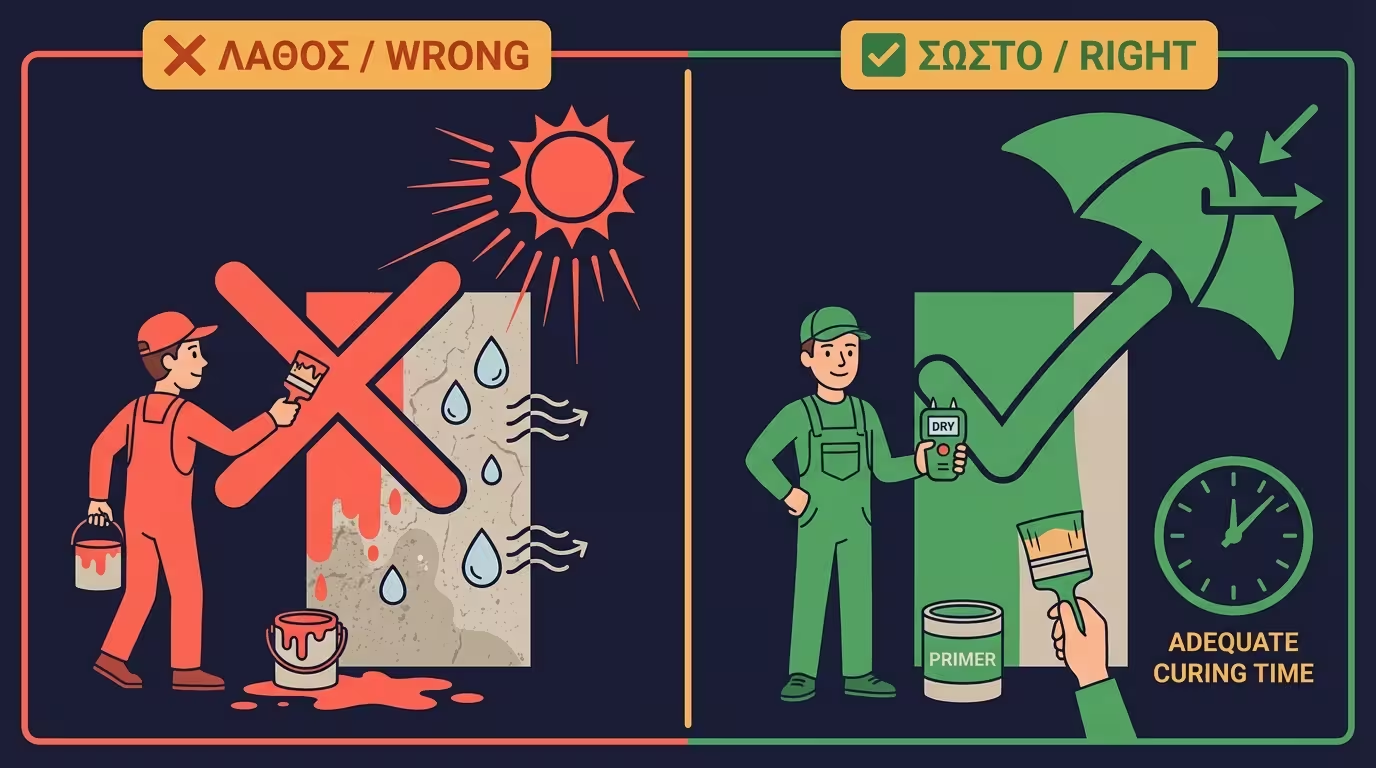
Check moisture before opening a single tin. If the wall is wet, don't paint - full stop.
Don't paint a surface baking in the sun. Apply early morning or late afternoon, never at midday.
Choose a coating system with an adequate Sd value - low enough for the wall to "breathe" without retaining water.
Fresh plaster needs 28+ days of curing before it can accept paint. Rushing guarantees blisters.
Return to category.
Go to categoryReturn to the central guide.
Go to guide