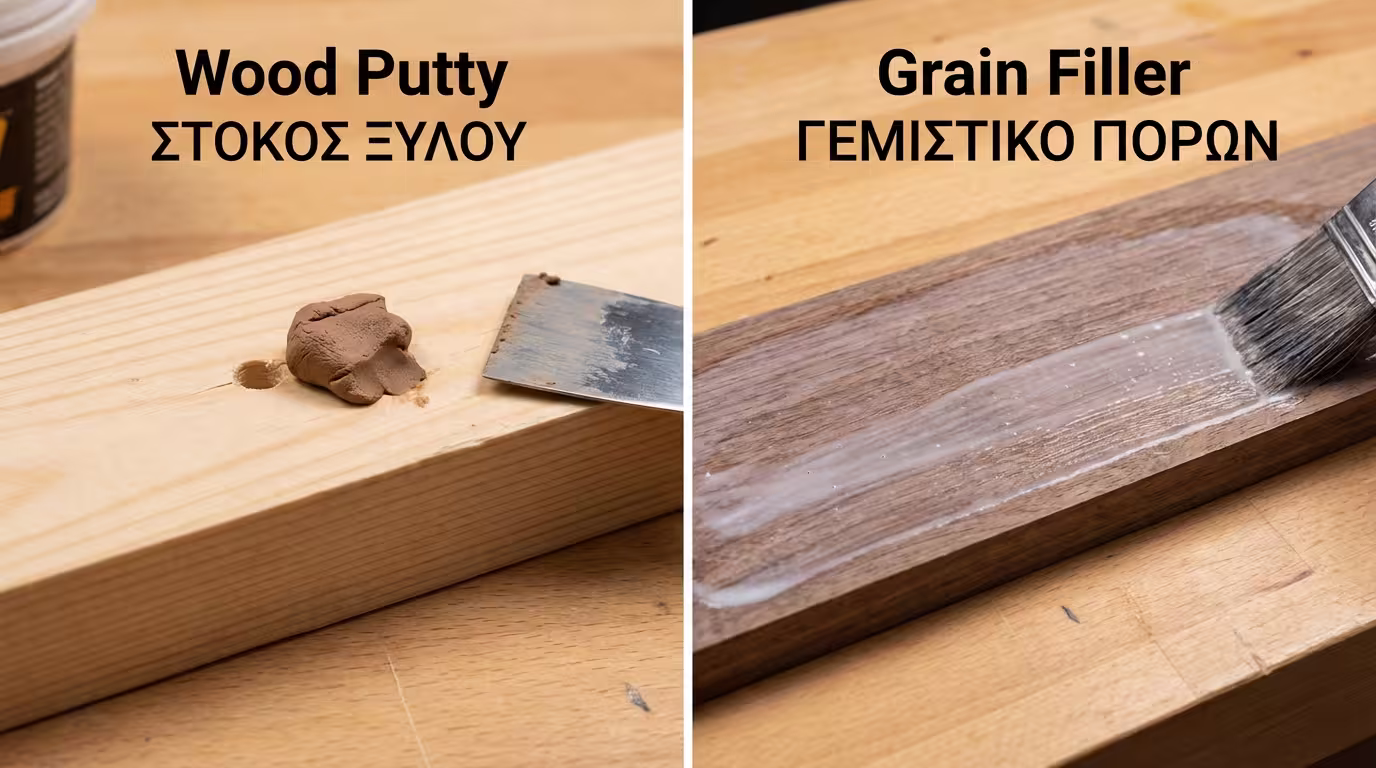
🧱 Wood Putty (Hole Filler)
Clay or plasticine-like texture. Purpose: fill large holes from nails, deep cracks, breaks and construction gaps.
Ever wondered how luxury furniture achieves that flawless, mirror-like surface? The answer is grain filler - the critical intermediate step for oak, mahogany and walnut.
The biggest confusion at the paint shop - both are often called "wood fillers" abroad:
Clay or plasticine-like texture. Purpose: fill large holes from nails, deep cracks, breaks and construction gaps.
A high-solids material based on silica or pumice. It's spread across the entire surface to saturate the wood's hollow vessels via capillary action, creating a non-absorbent, "dead-flat" substrate for the topcoat.
Not all woods need grain filling. The need is determined by the tree's biological anatomy:
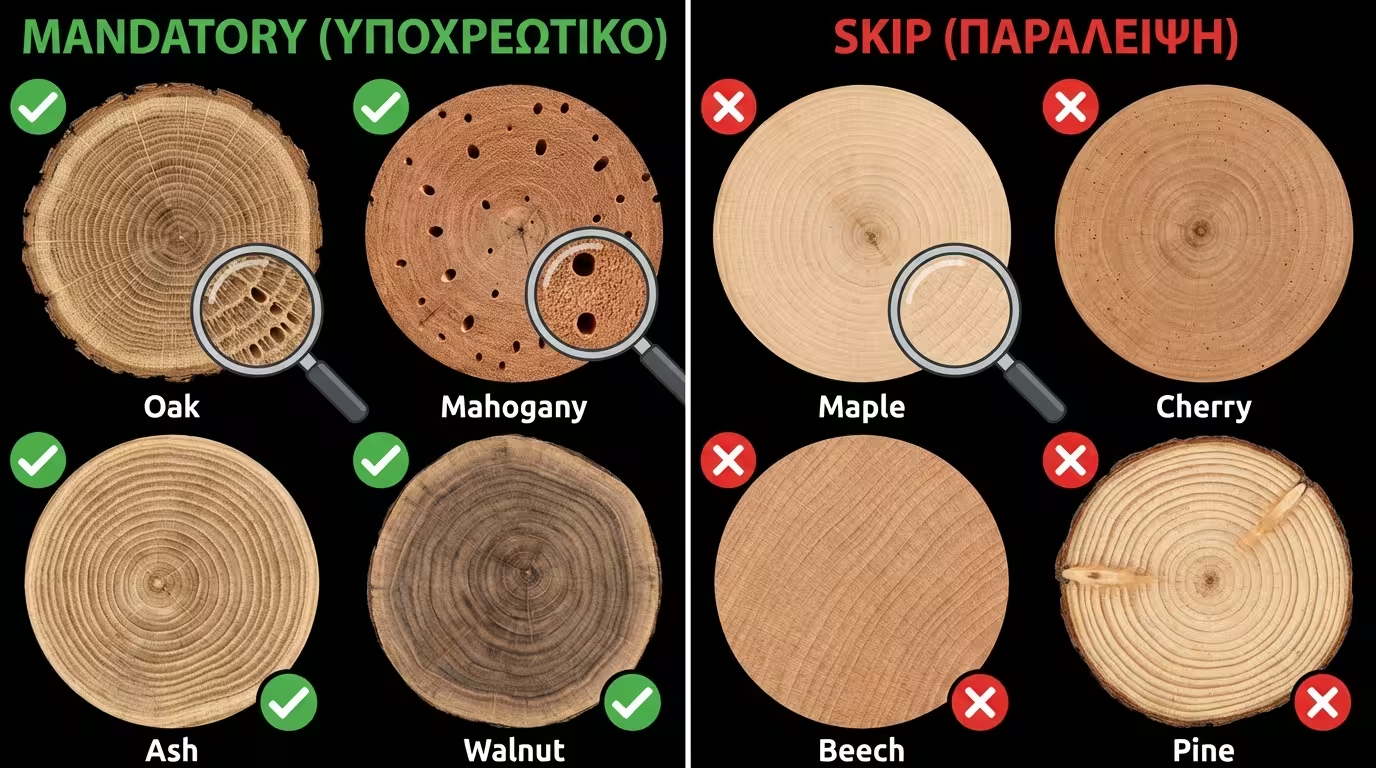
Oak, Mahogany, Ash, Walnut - large, visible pores. Without grain filler, a smooth surface is impossible.
Maple, Cherry, Beech, Pine - very tight texture with imperceptible pores. Filling adds nothing here.
If you apply a high-gloss varnish (e.g. polyurethane) to oak without filler, it will "sink" into the pores → wavy texture. Grain filler levels the surface, letting the varnish sit on top like glass.
A huge DIY trend: renovating 1990s oak kitchens. If you simply paint them white, the oak grain texture shows through prominently. Grain filler before primer "erases" the grain for a smooth, modern factory finish.
Traditional choice. Slow drying → easier application. Minimal shrinkage in pores. Strong odour, requires mineral spirits for clean-up. Perfect pairing with oil-based polyurethane varnishes.
Modern trend using acrylic resins. Due to rapid water evaporation, it exhibits higher volumetric shrinkage. Often requires a second pass to compensate for the material "sinking" into the vessel during the drying process.
Applying grain filler is satisfying but "messy" work. Here's how to do it right:

Sand the wood to P220. Remove all dust completely.
With a brush or cloth, use circular or diagonal motions to force the material deep into the pores.
Plastic spatula (or old credit card) at 45° angle → scrape off all excess, leaving filler only in the pores.
Allow to dry completely.
Fine sandpaper (P220-320) following the grain → reveals clean wood with sealed pores.
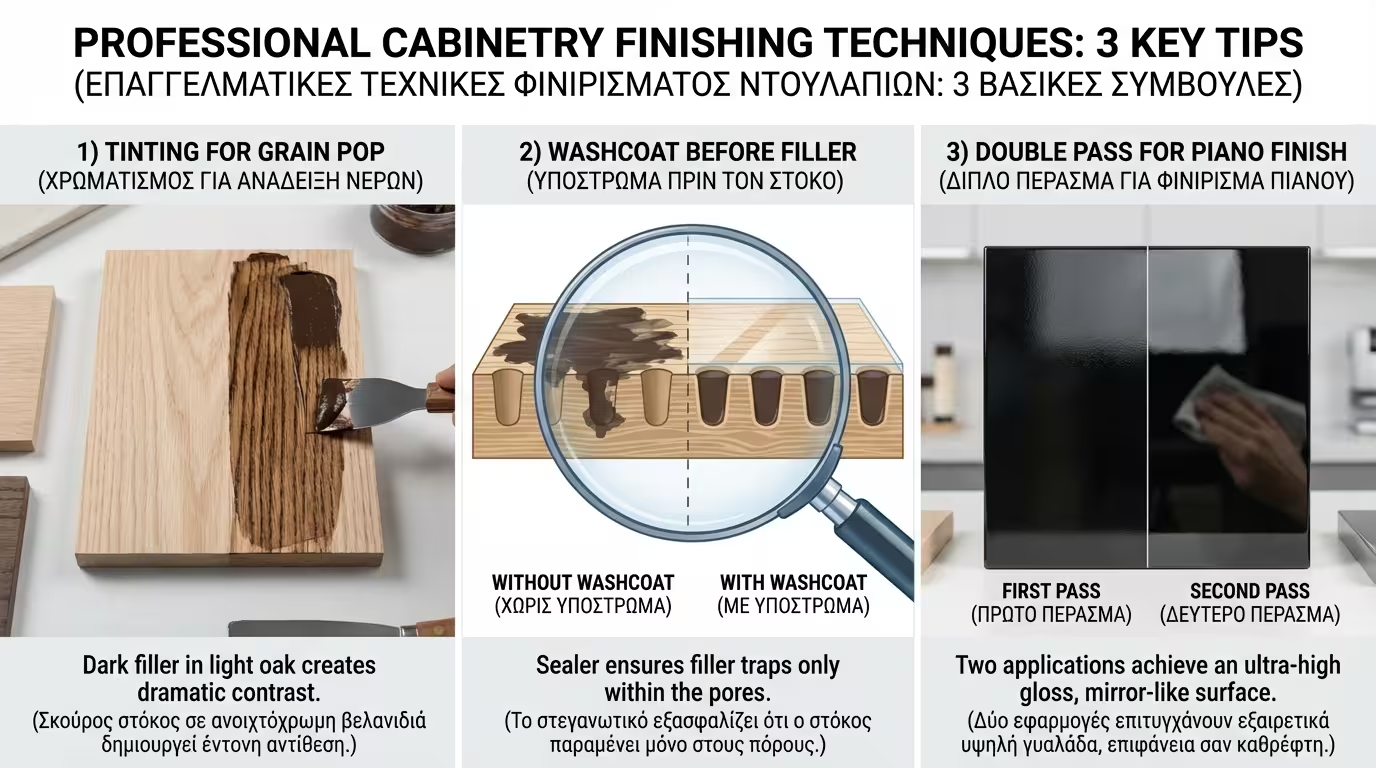
Techniques that separate the amateur from the professional:
Add dark pigment to filler + apply on light wood → dramatic grain "pop" (e.g. dark pores on oak). Stunning aesthetic effect!
A thin coat of shellac or sanding sealer before the grain filler: prevents the filler from staining the natural wood surface, restricting it only to the pores.
For high-end cabinetry: 2× filler + intermediate sanding. This technique ensures that the varnish won't "sink" into the pores months after application, maintaining a mirror-like surface even under harsh angular lighting.
Return to category.
Go to categoryReturn to the central guide.
Go to guide