Impregnation & Wood Preservatives: The Ultimate Protection Guide
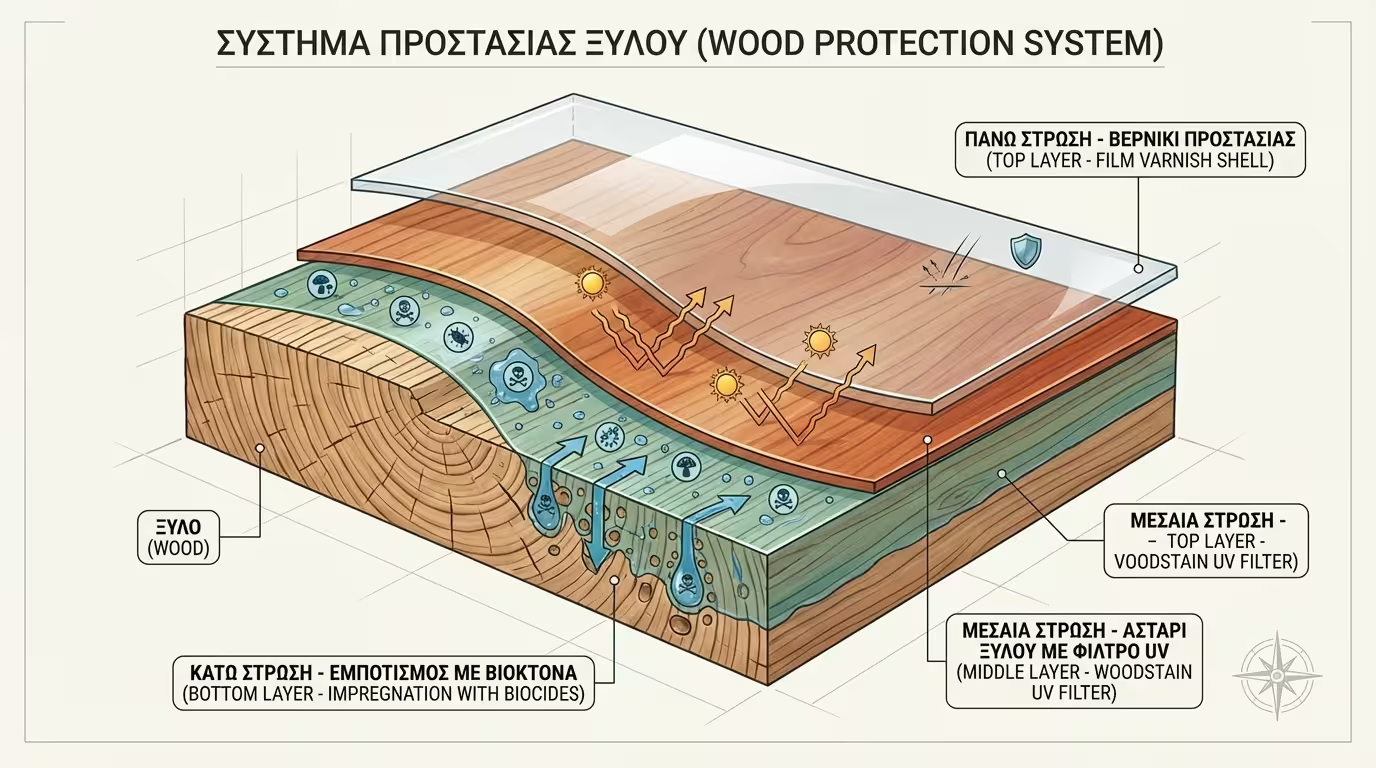
Many homeowners assume that varnish is the only layer of protection wood
needs. However, the harsh truth is that varnish only protects the
surface. The real "immunity" of wood against rot and insects lies in
impregnation-the invisible shield inside the fibers.
If your wood is exposed to rain, soil, or even indoors with a history of
woodworm, a preservative is your most critical step. Let's explore how
they work, what European standards say, and how to apply them correctly
so your structures last for decades.
1. What Are Wood Preservatives?
Many confuse "preservative" with "varnish" - they are completely
different products:
🛡️ Biocides & Fungicides
Unlike regular varnish, a preservative contains active biocidal ingredients. Its goal is to create a "chemical barrier" against fungi (which
cause rot) and insects (woodworm, termites) by "poisoning" their
food source within the wood fibers.
💨 Zero Film / Breathability
Impregnation preservatives are extremely thin and low-viscosity.
They do not form a crust on the surface but are "soaked up" by the
pores. This allows the wood to breathe (vapor permeability),
preventing internal moisture entrapment.
🔎 Adhesion Primer
They also act as excellent adhesion primers. They
prepare the surface so that the final varnish or woodstain can
"anchor" better, drastically reducing the chances of future peeling
or flaking.
⚠️ Preservative alone does not protect from the sun. It must
be sealed with a final varnish (woodstain or film varnish).
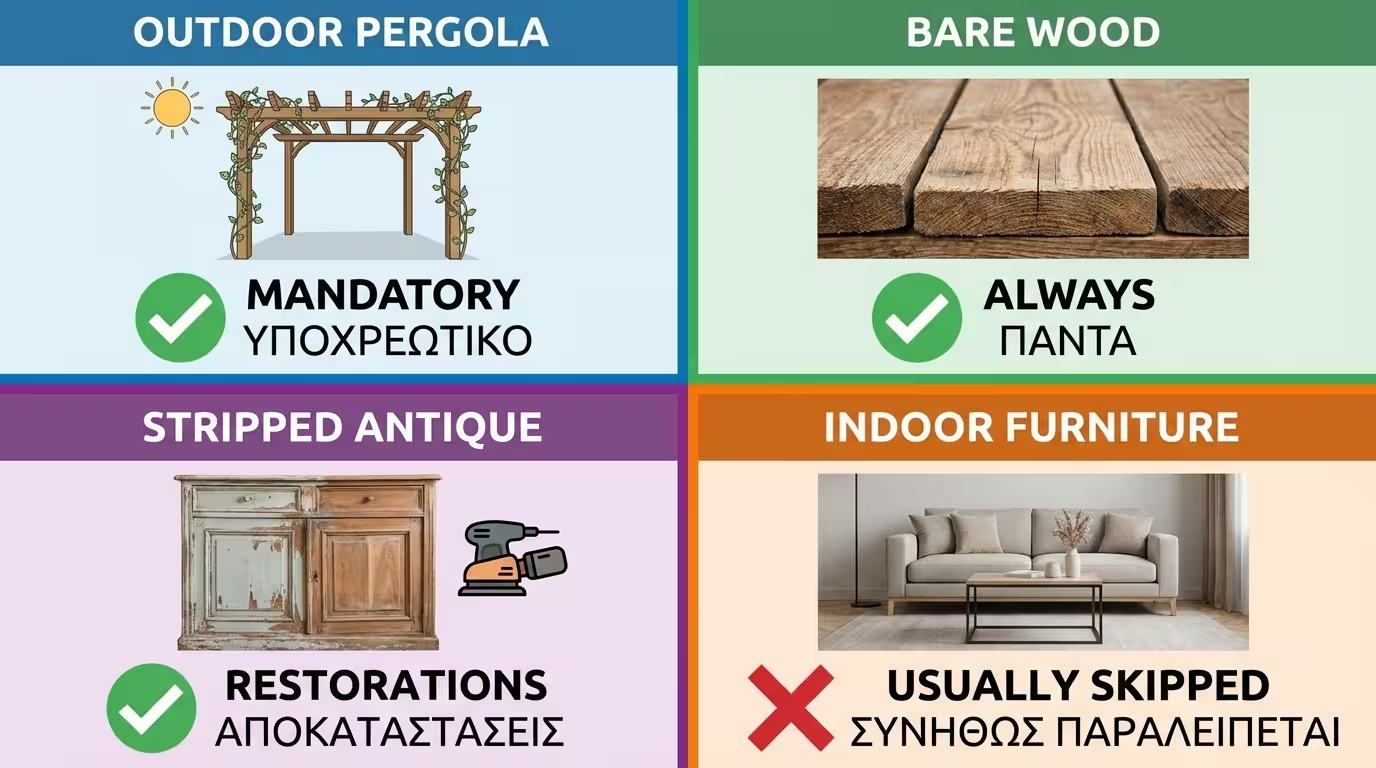
2. When Is It Necessary?
The choice depends on usage and conditions:
🏗️ Outdoor Structures
Pergolas, fences, roofs, and windows. Here, the use of a
preservative is mandatory. Without it, any moisture
penetrating through a micro-crack in the varnish will rot the wood
internally "silently."
🪵 Virgin / Bare Wood
When buying new timber (e.g., pine or fir), the first coat must
always be a preservative. It is your only chance to protect the core
of the wood before it is sealed.
🔄 Restoration Projects
After sanding back to clean wood, a preservative acts
therapeutically, killing any active insect eggs or fungal spores
that may have survived deep in the grain.
🏠 Indoor Use
Necessary only in old houses, wooden roofs, or if visible woodworm
holes are present. For modern indoor furniture, it can usually be
omitted.
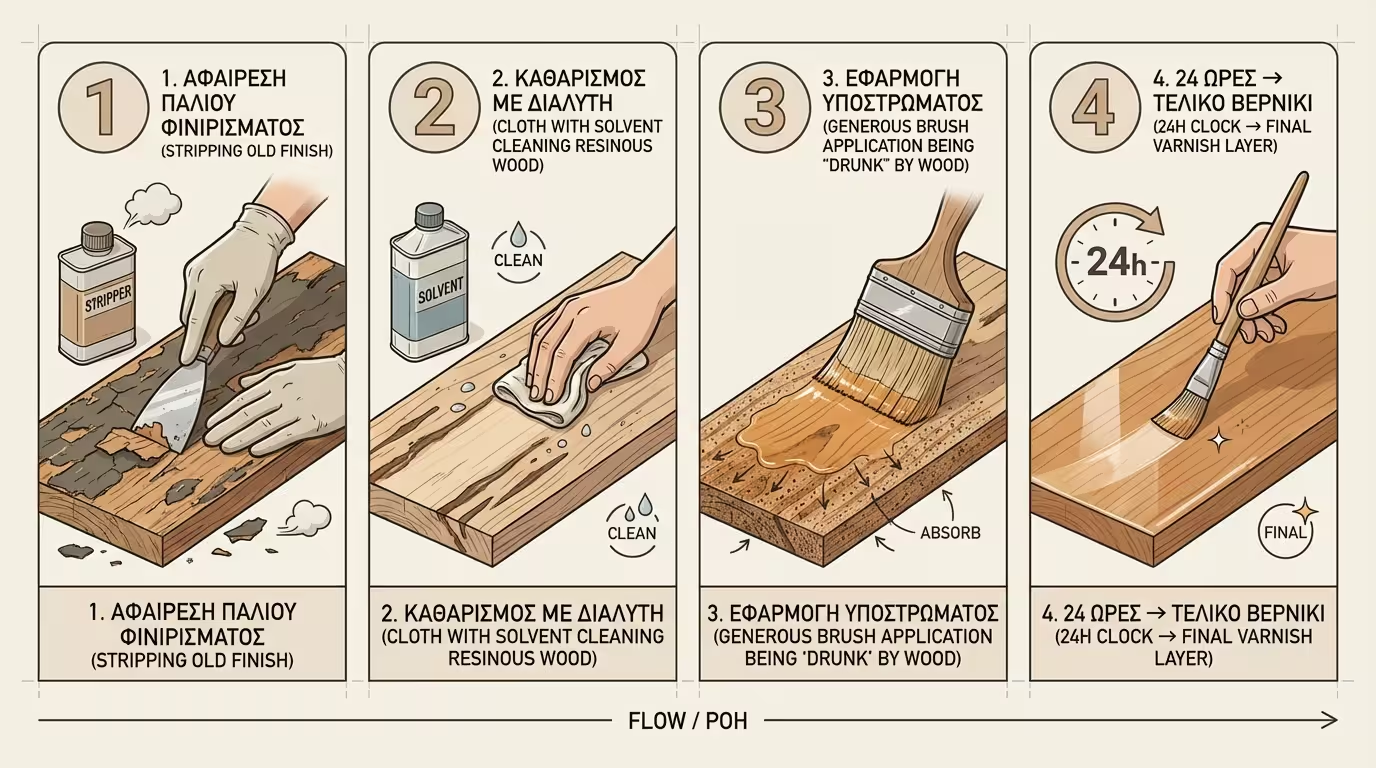
3. DIY Guide: The Correct Process
Skip proper preparation and the final varnish will peel fast:
1️⃣ The Moisture Test
The wood must be dry (moisture <18%). If the
wood is damp, the pores are full of water and the preservative
cannot penetrate, rendering it useless on the surface.
2️⃣ Opening the Pores
On oily woods (teak, iroko) or high-resin pine, a quick wipe with a
cloth dampened with nitro thinners will remove surface
oils and allow the preservative to dive deep.
3️⃣ Rich Application
Apply by brush "to saturation." The wood should look wet. Pay
special attention to the end-grains (the edges), as this
is where most moisture is absorbed.
4️⃣ Waiting for the Seal
Don't rush. Let the preservative dry for at least 12-24 hours. The
biocide must stabilize before being "trapped" by the final film varnish or woodstain.
4. The Engineer's Corner: EN 599-1 & Biocides
Strict European standards and regulations:
📋 EN 599-1 Standard
This is the "European Passport" of effectiveness. A preservative
complying with EN 599-1 has been laboratory-tested against specific
organisms (like Coniophora puteana) ensuring professional results.
🏗️ Use Classes Explained
Class 1: Interior (dry). Class 2: Roofs (occasional moisture). Class 3: Exterior (rain, no ground contact).
⚖️ BPR Regulation
The Biocidal Products Regulation ensures that active ingredients are safe for humans and the environment, having phased out dangerous substances like arsenic
and pentachlorophenol.
Conclusion
A successful wooden construction is like a good building: it needs
strong foundations. Wood preservative is the "foundation" of the paint
system - it ensures healthy wood internally, allowing the varnish to
showcase its beauty for decades.