❌ Air Entrapment Causes
Violent stirring or shaking the container creates micro-bubbles that don't have time to escape. Also, drying under direct sunlight or hot air currents "seals" the surface before internal air can exit.
Applying varnish to a wood floor requires surgical precision. A minor error in preparation or environmental conditions can lead to costly failures.
From bubbles and milky clouding (blushing) to catastrophic peeling, we analyze the chemical and physical causes of these problems. Learn how to control Equilibrium Moisture Content (EMC) and apply professional feathering techniques for a high-standard result.
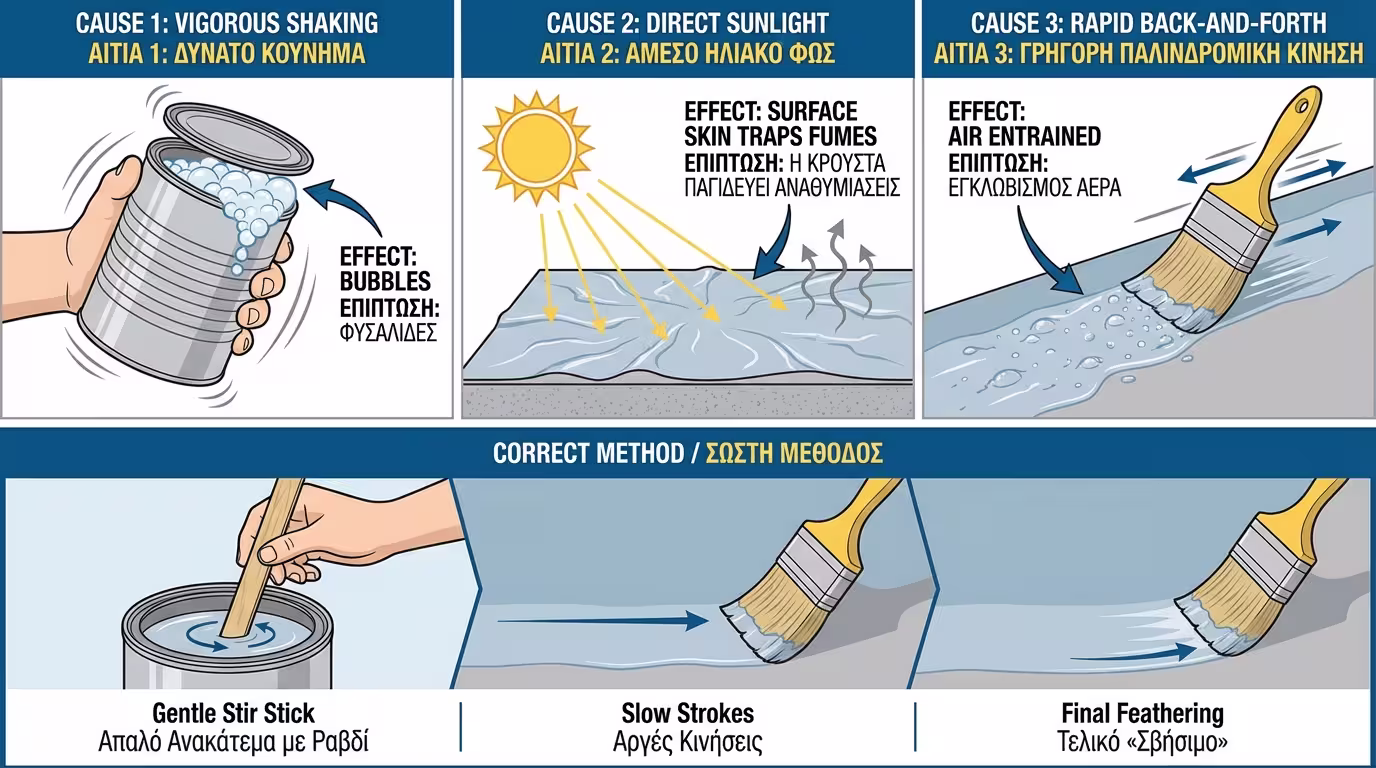
Bubbles are the most common failure - and entirely preventable:
Violent stirring or shaking the container creates micro-bubbles that don't have time to escape. Also, drying under direct sunlight or hot air currents "seals" the surface before internal air can exit.
Stir gently with a wood stick. During application, use the tips of the brush bristles (feathering) to "break" any bubbles while the varnish is still wet. Never over-roll the same spot.
The floor looks "foggy" - milky, clouded:

Occurs when relative humidity is >75% or when the floor is colder than the surroundings (dew point). Vapours become trapped under the film, creating that characteristic foggy appearance.
Only varnish when humidity is 40-60%. If clouding is superficial, it can sometimes be fixed with a light solvent wipe (solvent-based) or by heating the room, but usually requires sanding and re-coating.
The varnish peels off in sheets - catastrophic failure:
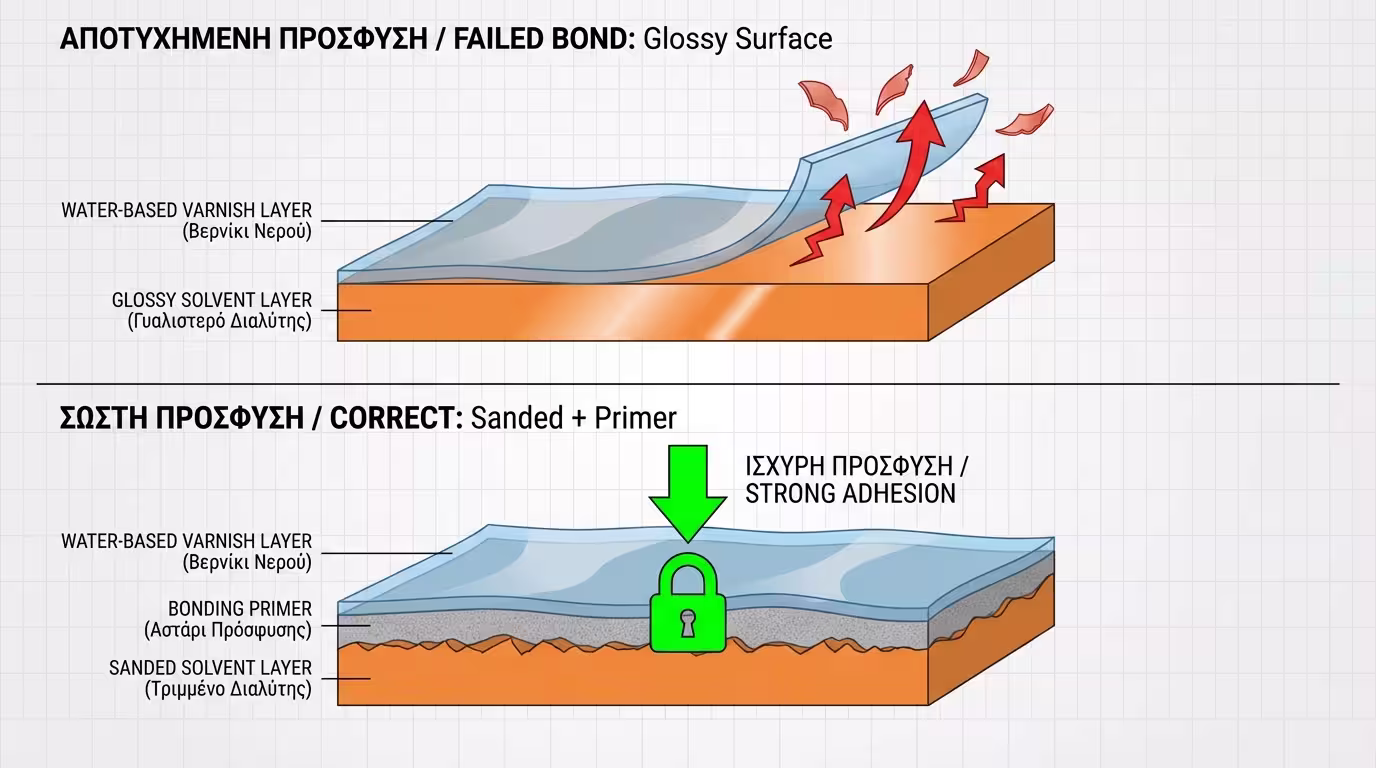
The most common mistake in renovations: applying water-based varnish over old, glossy solvent varnish without prior sanding. The lack of "tooth" leads to delamination that can be peeled by hand.
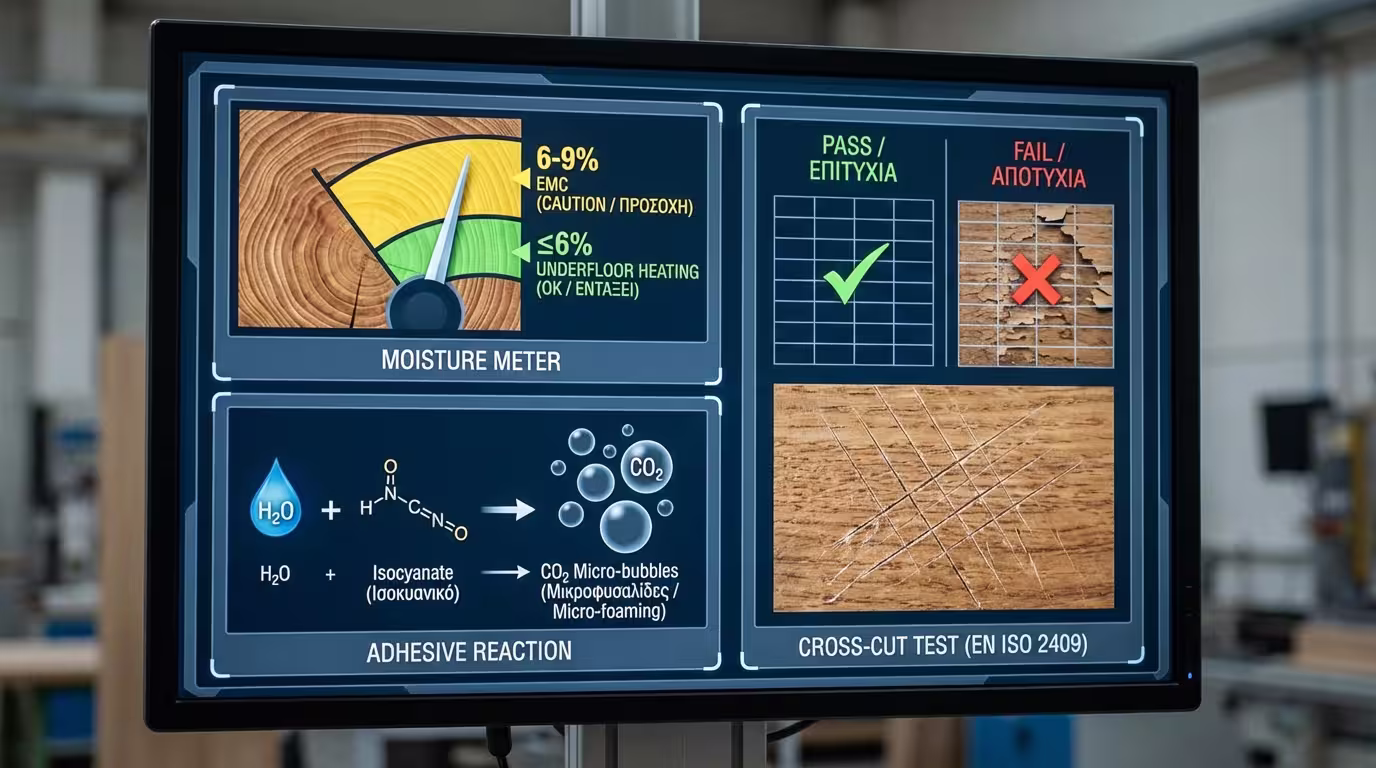
If unsure, perform a test in a corner. Score an "X," apply strong tape, and pull sharply. If the varnish peels, total sanding down to bare wood is mandatory.
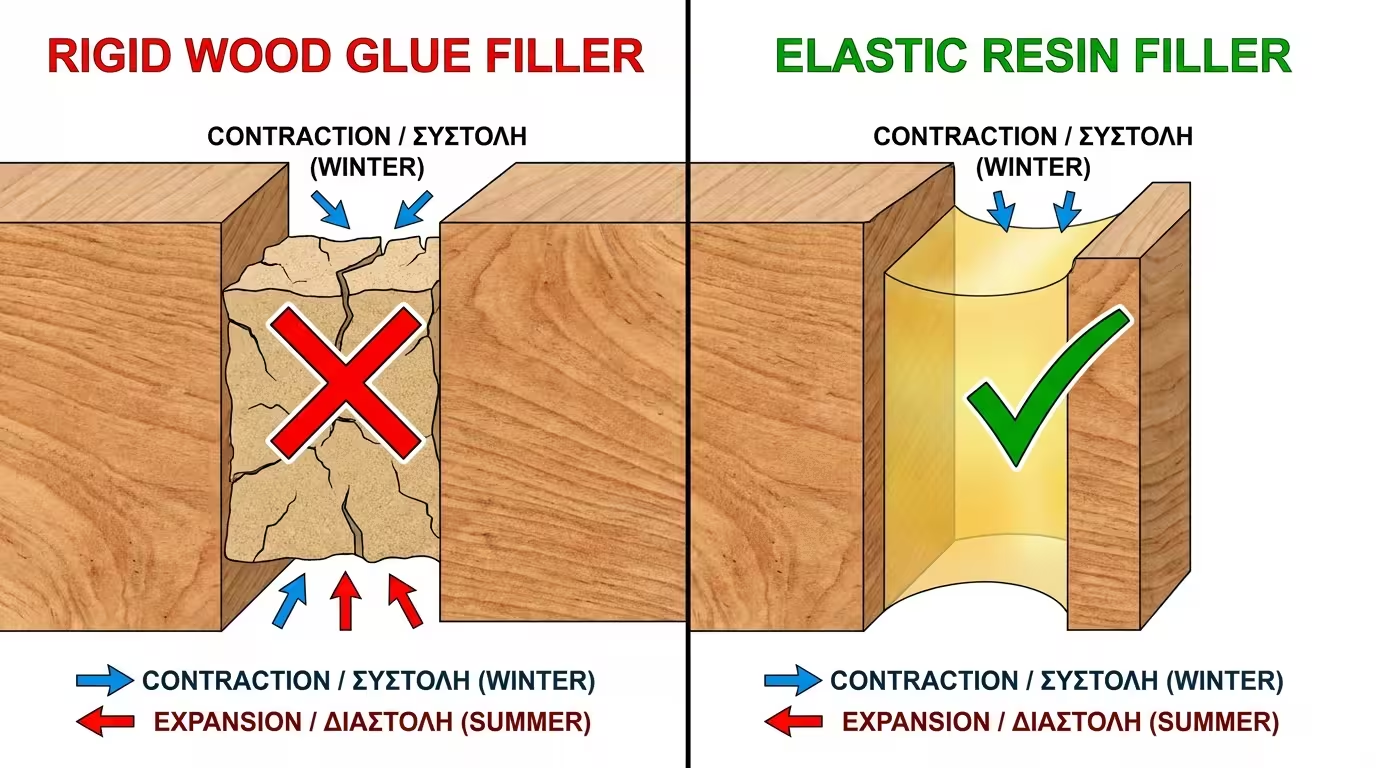
Gaps open in winter - the wrong filler cracks:
Wood glue + sawdust = rigid filler, cracks with seasonal movement.
Elastic resin (acrylic/PU) + sanding dust 80-100 grit = colour-matched, doesn't crack.
Marks that appear after varnishing:
Skipping grits (40 → straight to 100) = swirl marks. Machine stops → "digs" a dip (chatter marks).
Progressive sequence 40 → 60 → 80 → 100 is mandatory. Never stop in one spot.
💡 Lights off → torch low (raking light) → reveals every imperfection before varnishing.
Critical parameters that determine success:
Before sealing, wood must have a moisture content of 6-9%. If you seal wood with higher moisture, it will try to escape, creating bubbles or even board warping.
In 2K systems, the hardener's reaction with moisture produces CO₂. If the wood or air is damp, microscopic foam is created, clouding the finish and reducing durability.
Applying very thick coats prevents solvent/water evaporation. The film remains soft for weeks, is vulnerable to shoe marks, and may develop "crazing" cracks.
Return to category.
Go to categoryReturn to the central guide.
Go to guide