🧼 Degreasing & Washing
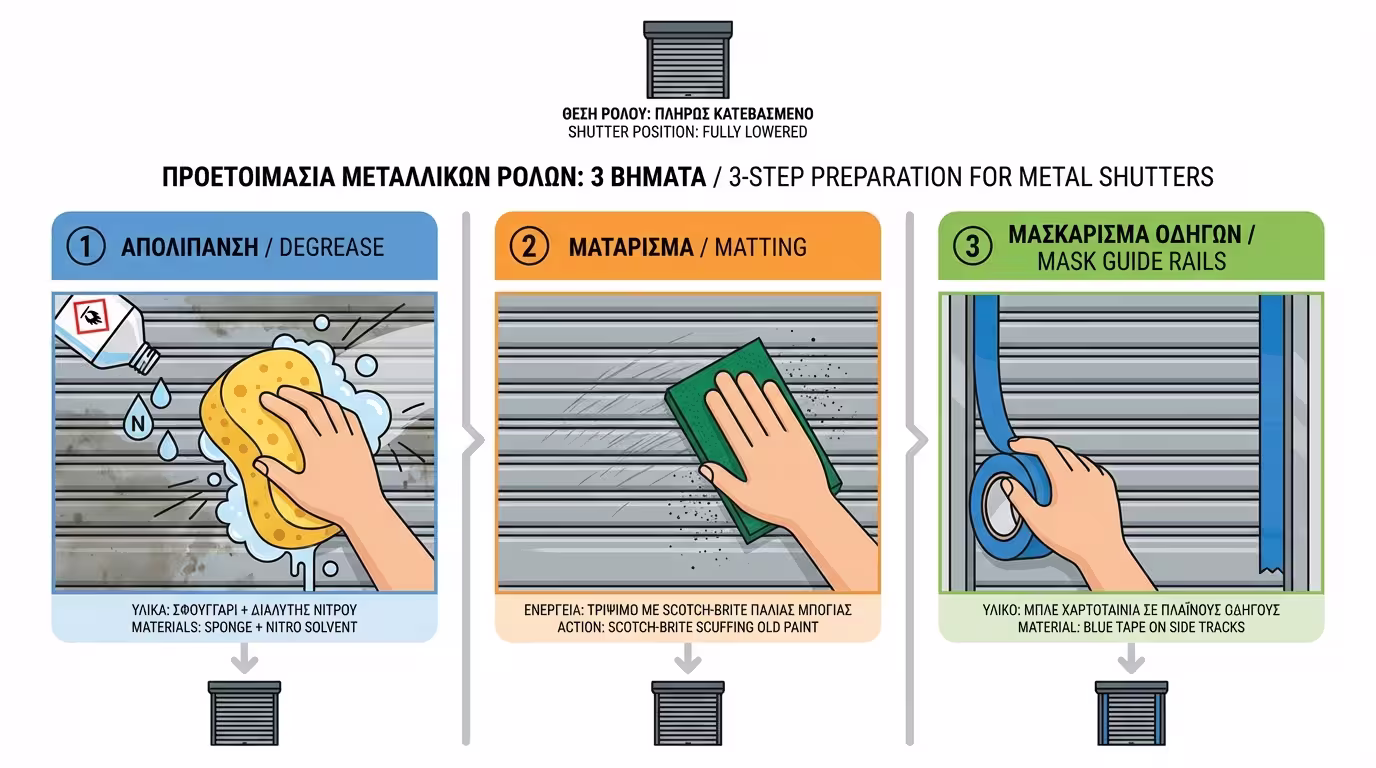
Shutters accumulate exhaust fumes, mechanism oils, and dirt. Wash thoroughly with water and detergent. Wipe the entire surface with nitro solvent. Without degreasing, the paint will peel immediately.
Metal roller shutters and louvers are the building's first line of defence - but painting moving parts hides significant pitfalls. Learn how to avoid the classic mistakes.
90% of the success in painting metal shutters is determined before you even open the paint tin. Proper preparation ensures adhesion and longevity.
Shutters accumulate exhaust fumes, mechanism oils, and dirt. Wash thoroughly with water and detergent. Wipe the entire surface with nitro solvent. Without degreasing, the paint will peel immediately.
Using a Scotch-Brite sanding sponge or fine sandpaper, lightly scuff to break the gloss of the old paint. This creates the pores for the new material to grip.
Mask with tape the side seals and guide rails where the shutter rolls - if paint gets in, it will obstruct operation.
Material choice depends on the metal (galvanised, aluminium, or iron). The key is the flexibility of the paint.
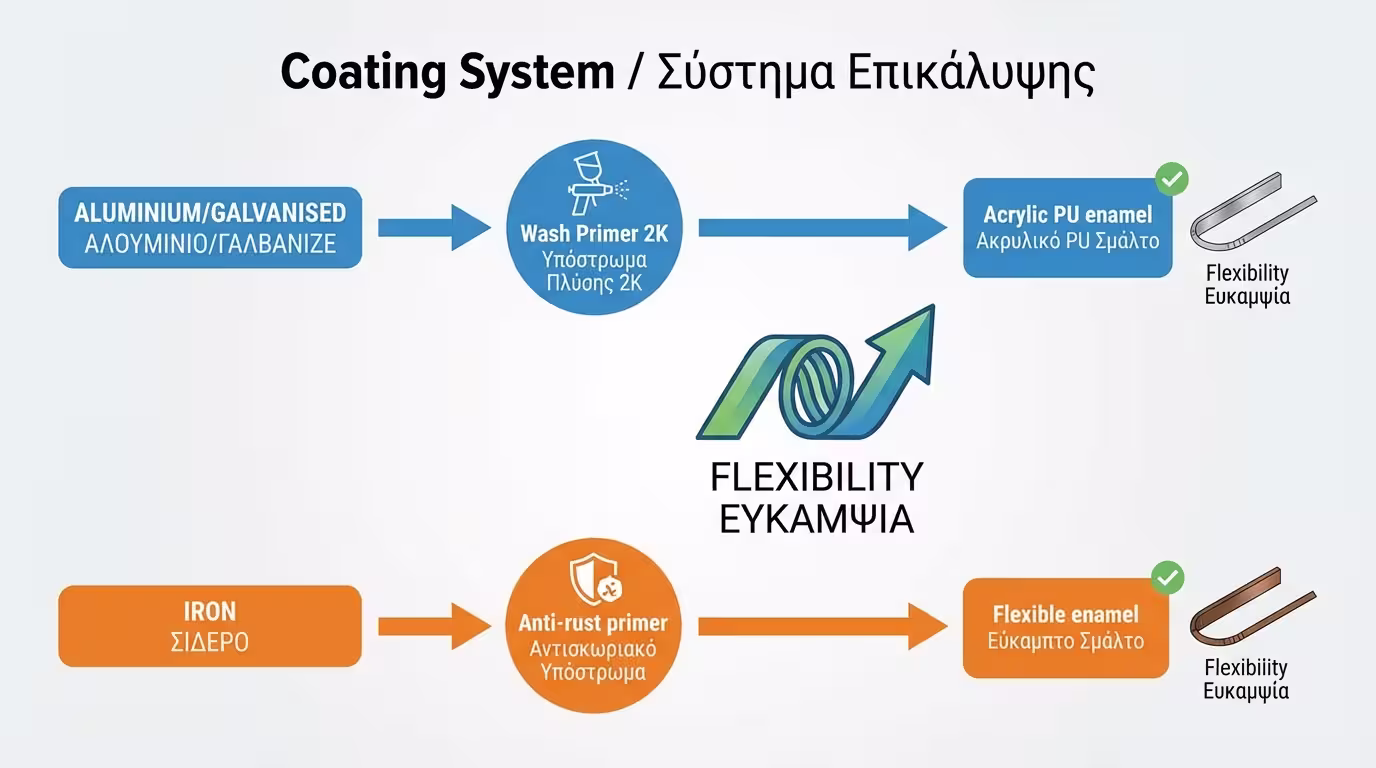
Most modern shutters are aluminium or galvanised - standard enamel won't adhere. A 2-Component Wash Primer that chemically bites the metal is mandatory. For older iron louvers, apply zinc phosphate anti-rust primer.
Choose acrylic polyurethane enamels or exterior epoxies. These offer tremendous flexibility - the slats bend without the paint cracking - and high UV resistance.
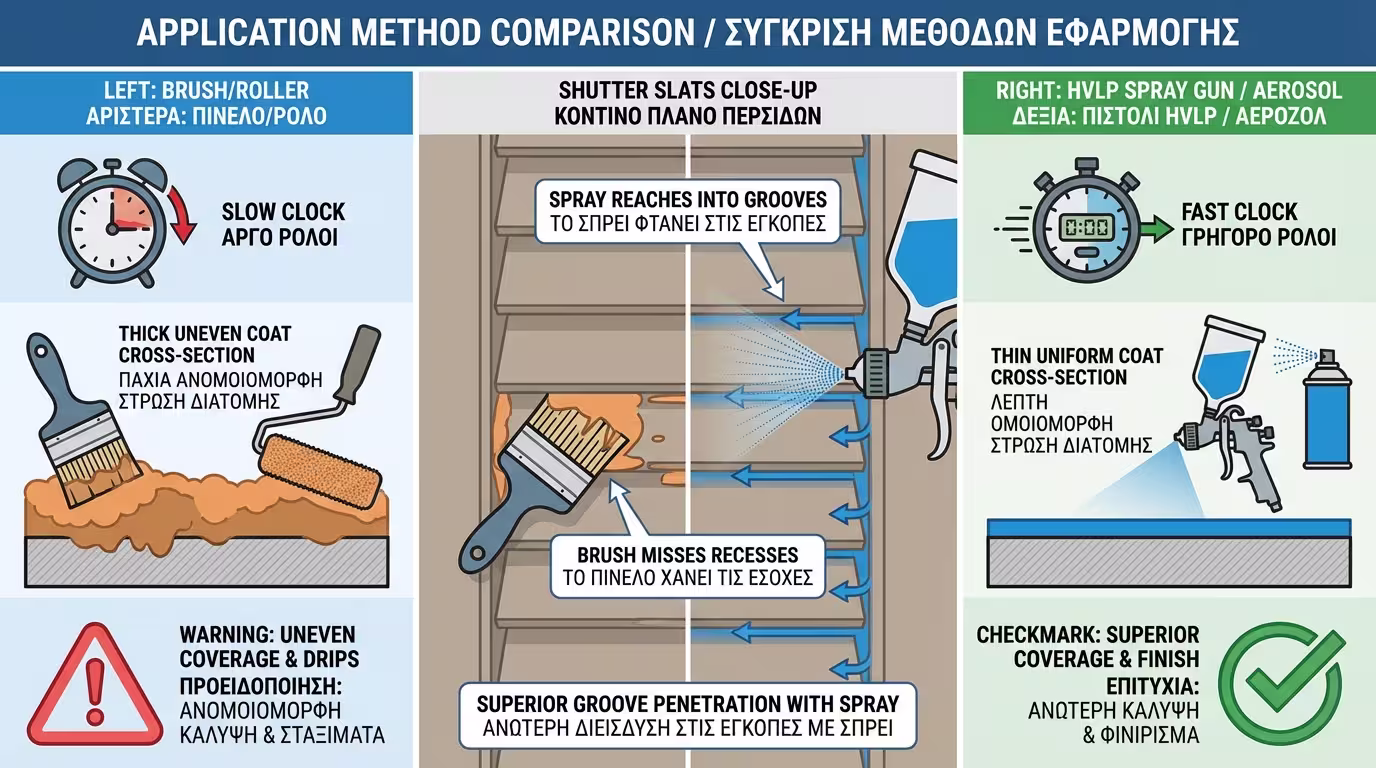
Due to the many recesses and joints between slats, using a brush or roller is time-consuming and leaves an uneven, thick layer. For a professional finish, an HVLP spray gun or aerosol spray is the only way - it ensures a thin, uniform film that doesn't obstruct movement.
Even if you use the right materials, certain mistakes can ruin your work. Avoid these classic traps.
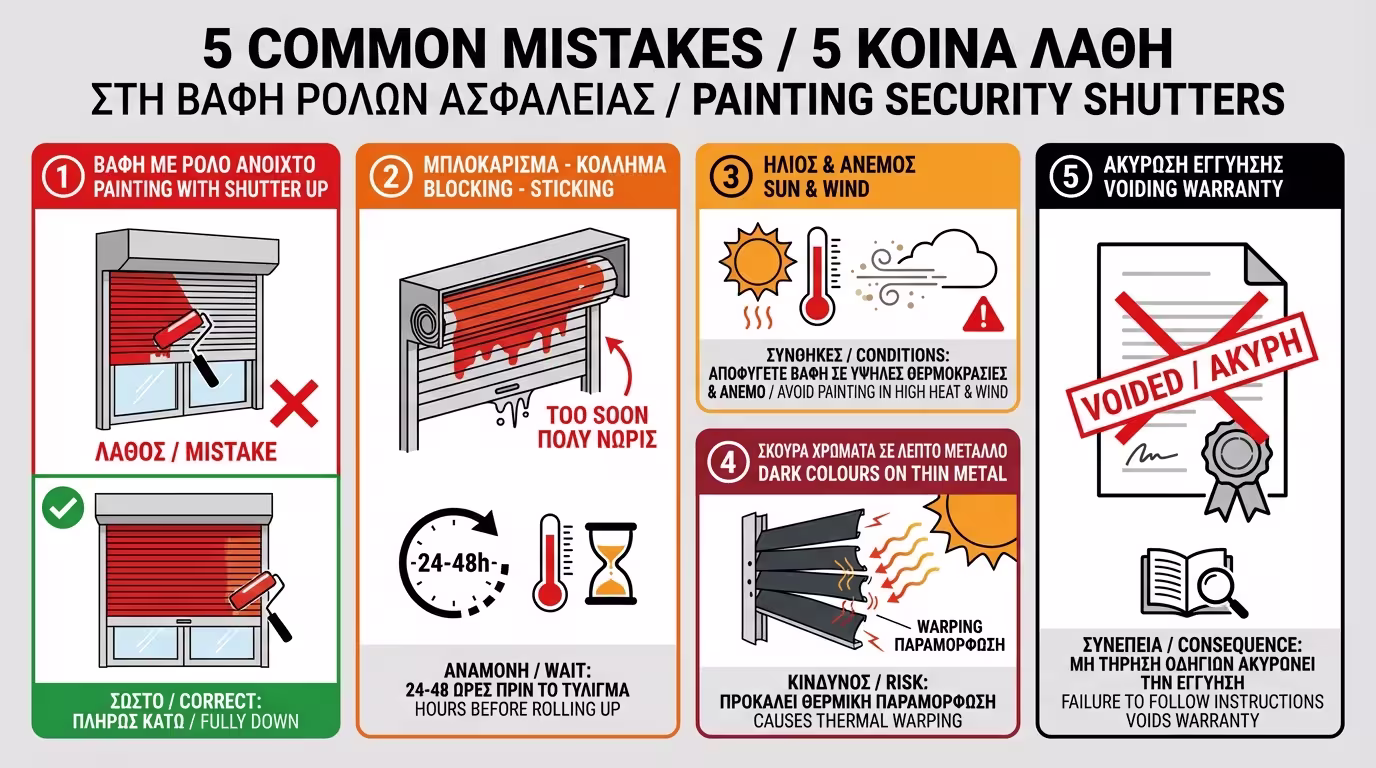
Classic DIY mistake. The shutter must be fully lowered (closed) so the joints stretch out and are painted evenly.
Never raise (roll up) the shutter immediately after it dries. If it hasn't fully cured, the slats will stick together. Leave it lowered for at least 24-48 hours.
Midday sun = the metal overheats, the paint dries too fast and cracks. Wind sticks dust and insects to the fresh paint.
On shutters made of thin metal, avoid black or dark anthracite. Dark colours absorb tremendous heat, causing thermal warping and deformation.
If the shutter is relatively new, check whether painting (modifying the original finish) voids the manufacturer's warranty on the mechanism.
⚠️ Critical: Always use silicone-based spray lubricants (like WD-40 Silicone) on the guide rails - never thick grease, which traps dirt and jams the slats.
Maintenance isn't just about the paint - it's also about keeping the shutter moving smoothly.
Dust and mud in the side guides is the No. 1 cause of shutters sticking or making noise. Clean them regularly with a brush or soapy water.
Don't use thick grease - it traps dirt. Use silicone-based spray lubricants that lubricate perfectly without holding dust.
Never aim a pressure washer inside the motor housing at the top - it can cause short circuits or destroy the mechanism.
Return to category.
Go to categoryReturn to the central guide.
Go to guide