🏖️ Coastal / Islands
Salt spray acts as an abrasive, and UV reflection from the sea increases radiation by 40%. In these zones, maintenance should be performed strictly every 2-3 years to prevent deep degradation.
Exterior wood maintenance isn't a fixed rule, but rather an equation of multiple variables. The species of the timber, the orientation of the structure, and the local humidity levels determine whether you'll need a "refresher" coat in six months or six years.
In this guide, we break down the ideal maintenance schedule based on the products you've chosen, how different micro-climates affect varnish longevity, and the simple diagnostic tests you can perform yourself to see if your wood is "hungry" for protection.
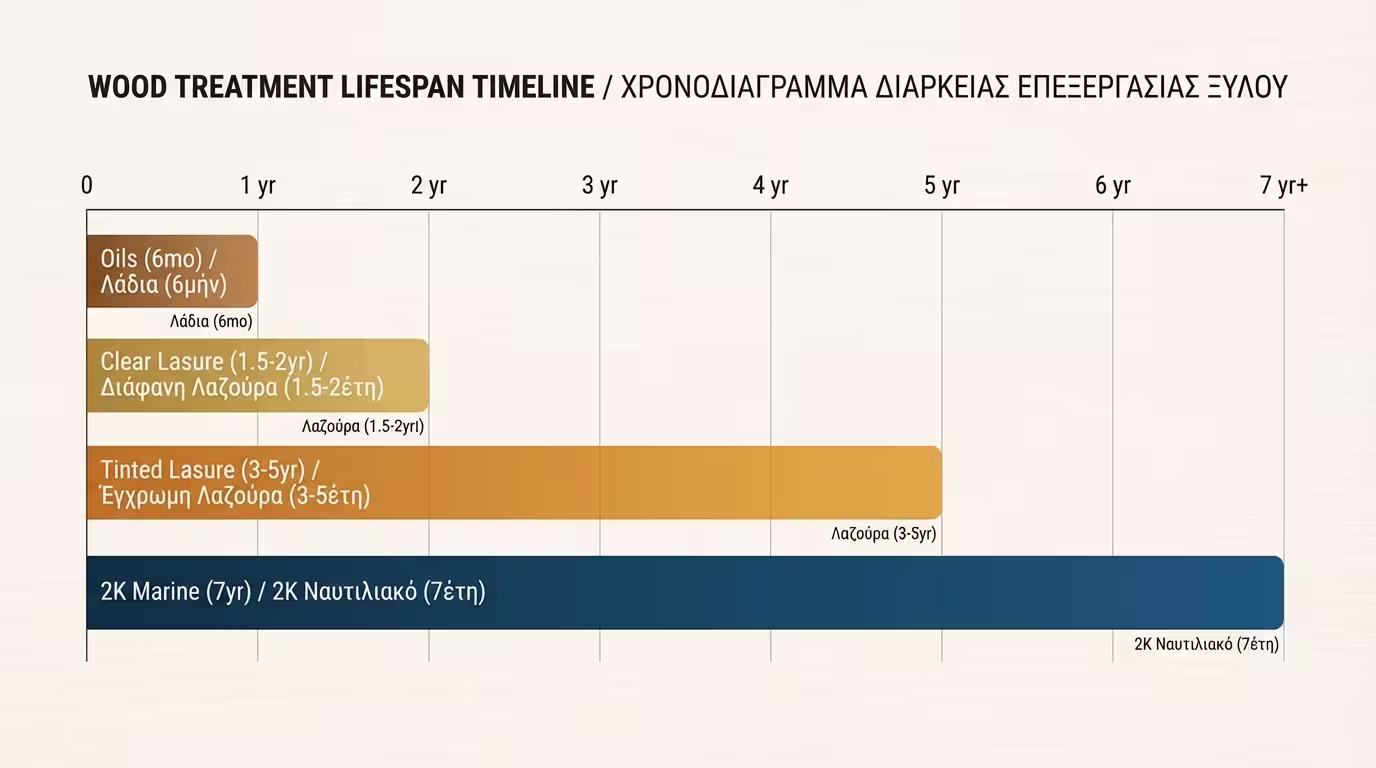
The lifespan of any finish depends largely on its film thickness and pigment concentration. Use this table as a strategic roadmap for your next application:
| Finish Type | Maintenance Cycle | Signs of Wear |
|---|---|---|
| Oils (Teak / Decks) | 1-2 times / year | Dryness, greying fibers |
| Clear Lasure | 1.5 – 2 years | Loss of gloss, water soaking |
| Tinted Lasure | 3 – 5 years | Colour fading, fiber exposure |
| 2K Marine Varnish | Up to 7 years | Hairline cracks, delamination |
Geography determines maintenance cycles:

Salt spray acts as an abrasive, and UV reflection from the sea increases radiation by 40%. In these zones, maintenance should be performed strictly every 2-3 years to prevent deep degradation.
Intense thermal shocks (frost at night, high sun by day) require extreme elasticity. Products must remain supple to avoid the microscopic cracking that happens in high-altitude environments.
Pollution and carbon deposits settle on the film. A simple annual wash with pH-neutral detergent can actually extend the life of your varnish by 1-2 years by removing corrosive acids.
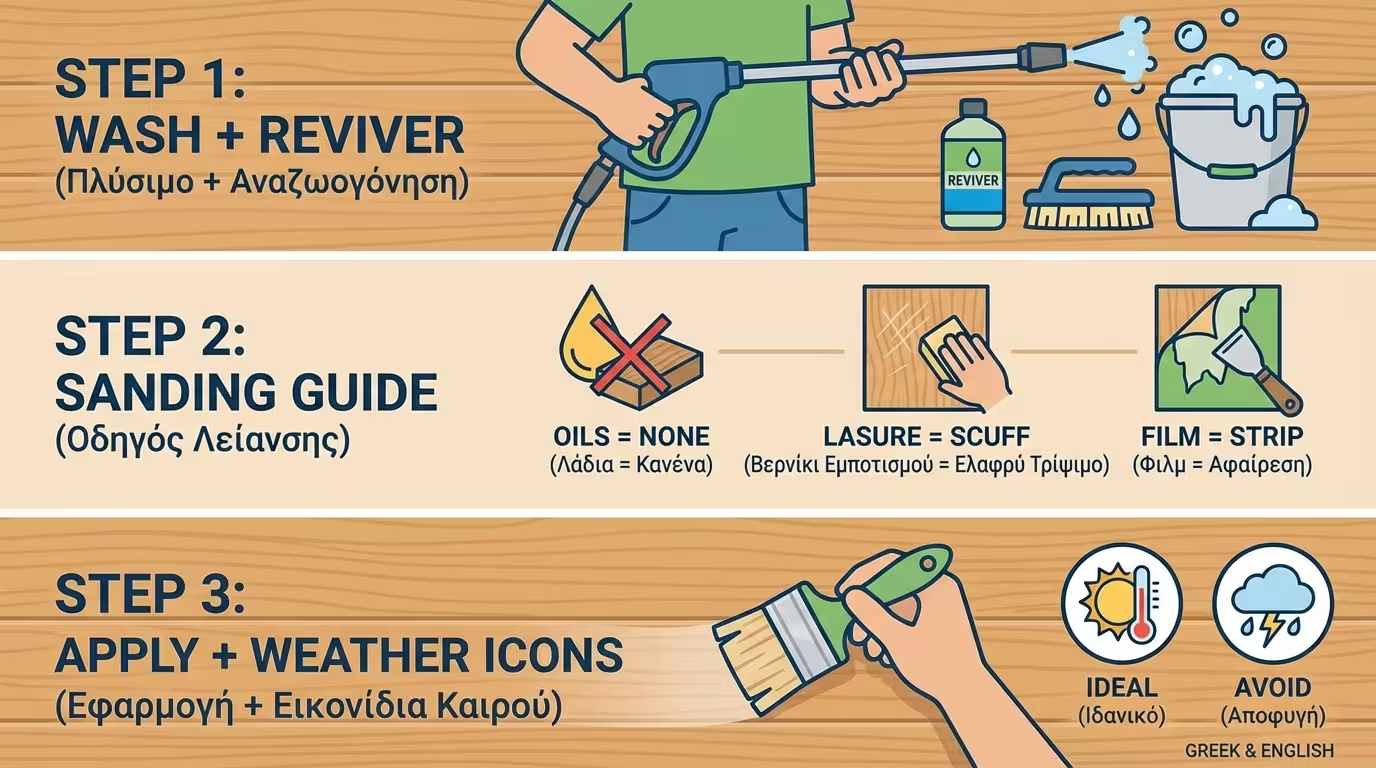
The annual care cycle:
Pour a few drops of water on the surface. If it "beads" on top, the finish is healthy. If the wood rapidly darkens and absorbs the water, the protective barrier is gone and maintenance is urgent.
Wash with low pressure. If the wood has turned grey, use an Oxalic Acid Wood Reviver to pull out the silver oxidized layer and restore the natural honeydew tone without aggressive sanding.
If the old lasure is intact, a light scuff sanding (220 grit) and a single thin coat of the original product are enough. Never wait until the paint starts flaking; by then, the cost of repair triples.
If varnish peels in the first year, the material is rarely at fault. Moisture enters through construction gaps (joints, end-grains) and "pushes" the varnish off.
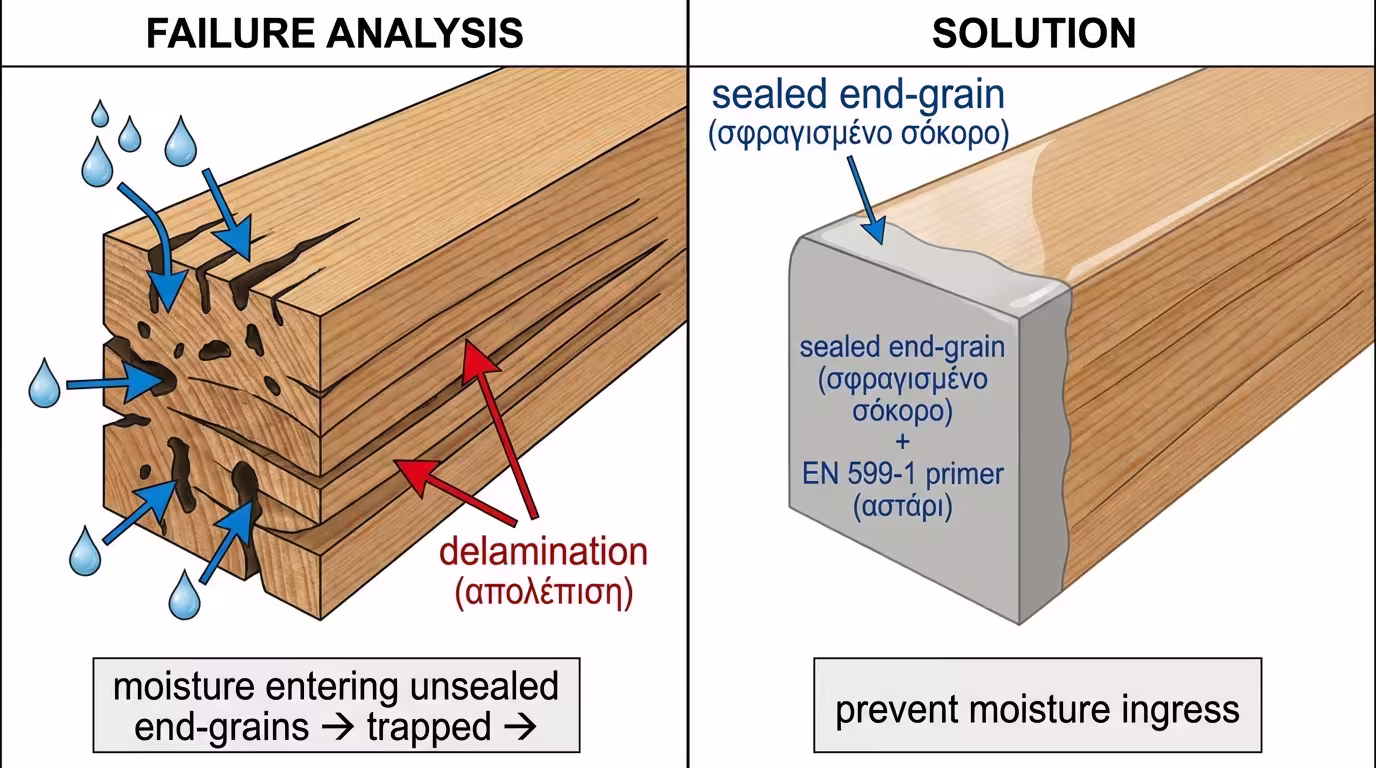
Apply a dedicated End-Grain Sealer or two extra coats of varnish to the cut ends of the timber. 80% of moisture enters through the "straws" of the wood ends, causing the rest of the film to delaminate.
Even during maintenance, if you spot small holes, apply Impregnation Primer (EN 599-1) locally. This "resets" the biological protection of the wood before you seal it again with the topcoat.
The "secret": Oils for decks, Tinted Lasure for pergolas/windows. The ideal balance of durability and easy maintenance.
Return to category.
Go to categoryReturn to the central guide.
Go to guide