💪 Coarse (P40-P80)
Heavy removal: old varnish, paint, initial flattening of very rough wood.
"A perfect finish depends 90% on the sanding" - wrong sanding means the varnish will magnify every flaw.
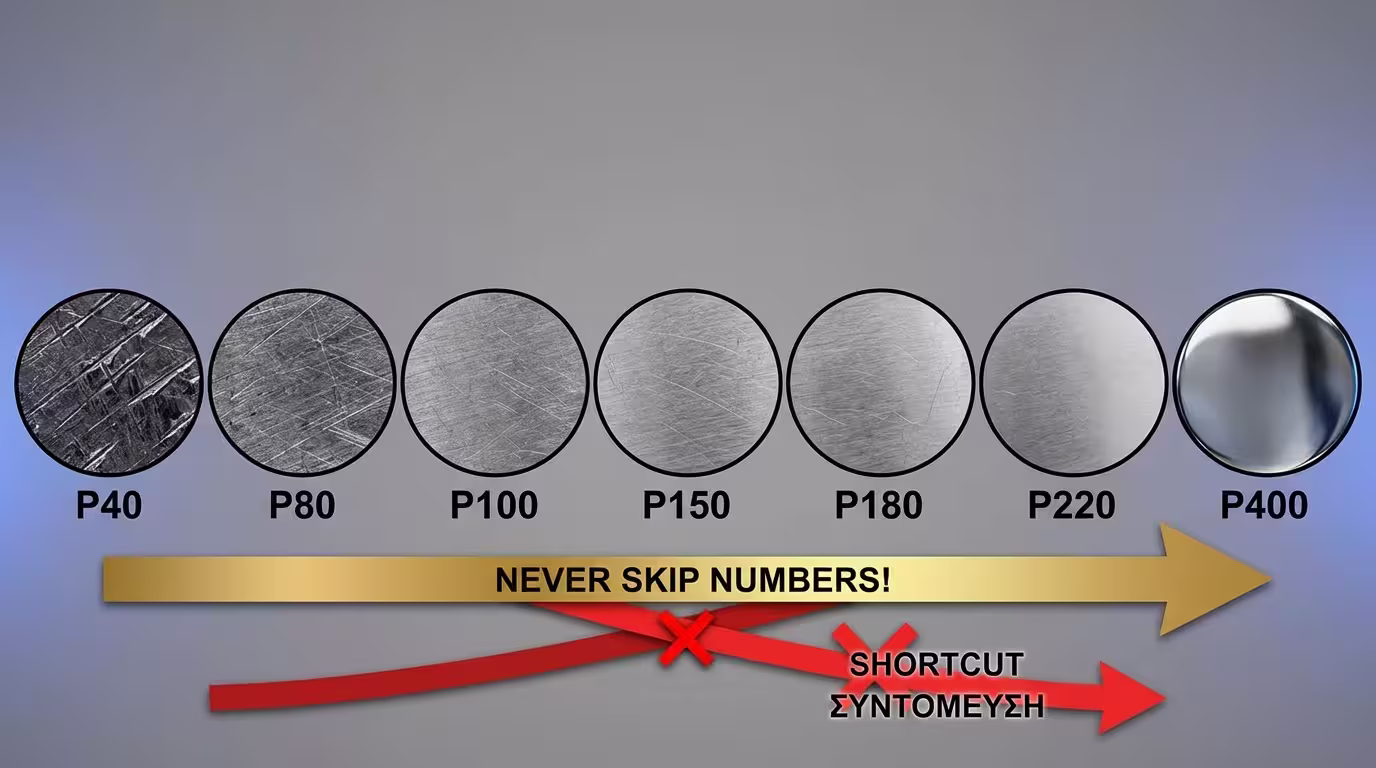
The number on the back (e.g. P80) indicates grain size/density. The lower the number, the more aggressive:
Heavy removal: old varnish, paint, initial flattening of very rough wood.
Surface shaping. Removing deep scratches left by the coarse grits.
Preparing bare wood for primer/finish. Smooth to the touch.
Sanding between coats (cutting "nibs"). Final polishing.
⚠️ Never skip grits! Going P40 → P120 (skipping P60/P80) means swirl marks will only appear after the finish coat.
Not all grains are equal - the abrasive material determines speed and durability:
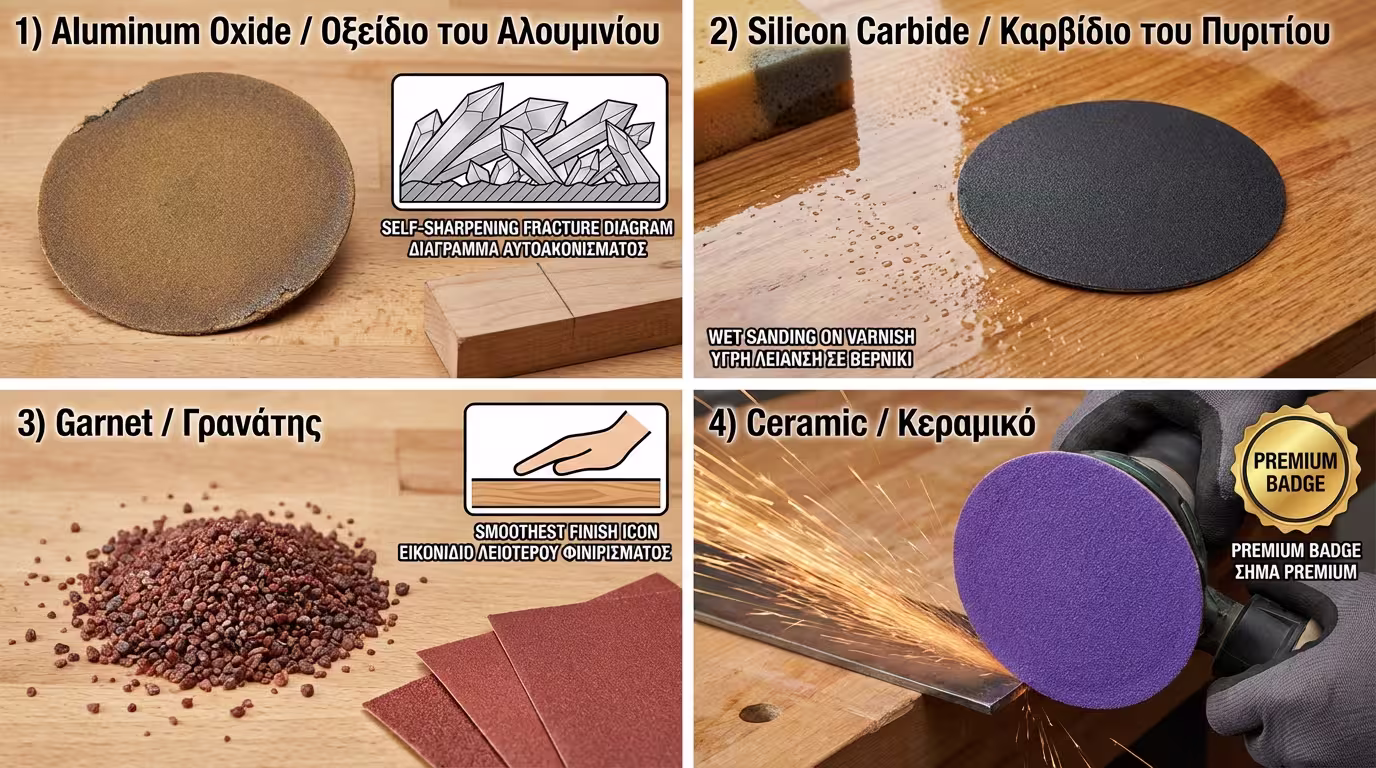
Brown/gold. Self-sharpening (fractures → new edges). Most popular - excellent for hardwoods and old varnish.
Black/grey. Fastest cutting but wears quickly. The absolute choice for wet sanding between coats.
Reddish, natural mineral. Doesn't last long, but creates the smoothest, most beautiful finish on bare wood. Ideal for final hand sanding.
Purple/red. Premium. Extremely hard and durable - mainly for power sanders and heavy-duty material removal on very hard woods (oak, iroko).
Grains cover 50-70% of the backing. They leave gaps for dust to escape. Essential for resinous woods (pine) or removing old finishes that would otherwise "clog" the sandpaper.
100% grain coverage. Larger cutting surface, faster results, but clogs instantly on soft or gummy materials. Ideal for hard, dry hardwoods.
What holds the grain plays a huge role, especially when working with machines:
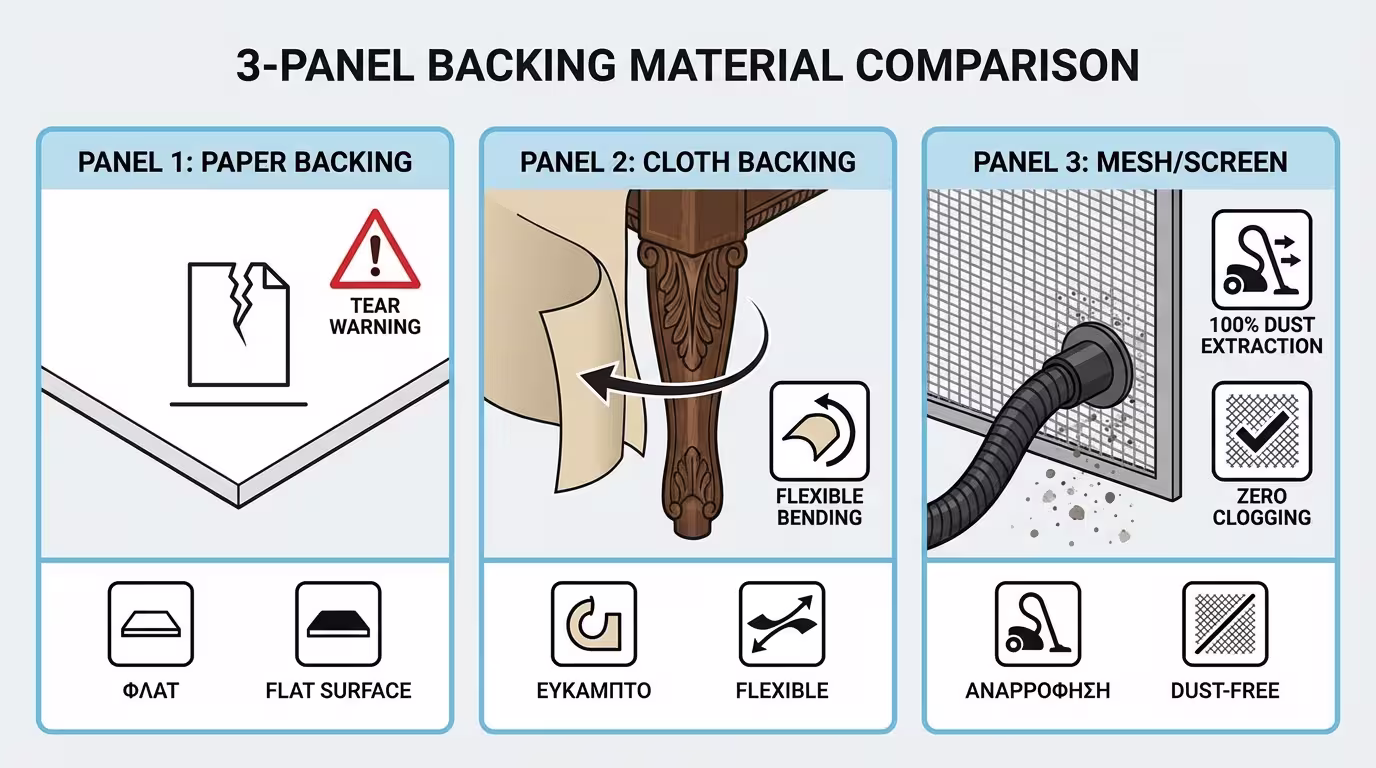
Sharp cut but tears on edges. Best for flat surfaces and finishing.
Very durable, flexible. Sands carved furniture, railings, curves without disintegrating.
Modern revolution: open mesh that never clogs. 100% dust extraction with vacuum. Ideal for resinous finishes/fillers.
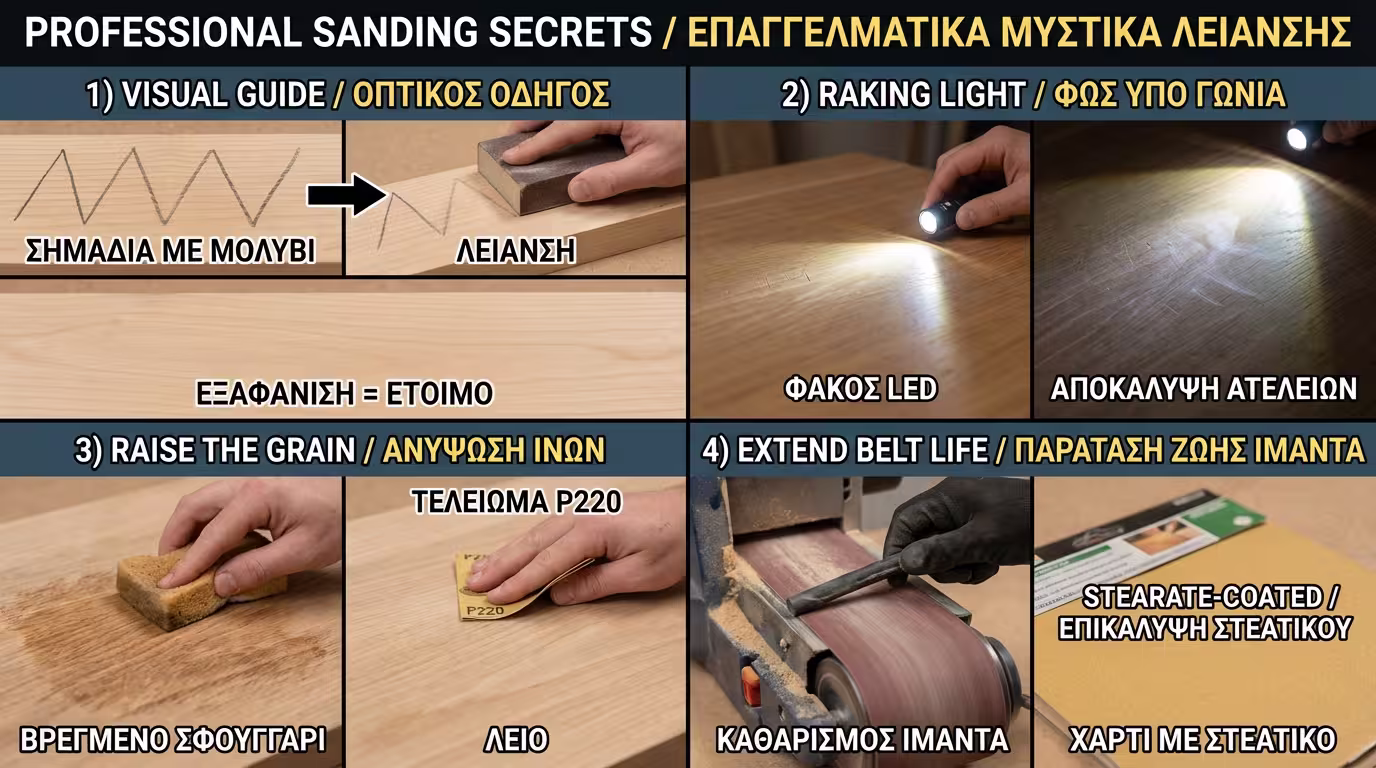
Practices that separate the amateur from the professional:
Draw zigzag pencil lines across the surface. Sand until they vanish = uniform result, ready for the next grit.
Turn off lights, shine a strong LED torch at a very low angle. Shadows instantly reveal every swirl mark that must be erased before the finish.
For water-based finishes: dampen with sponge → dry → P220 → cut raised fibres. The finish will now lie glass-smooth.
Stearate-coated papers (white/yellow coating) triple the lifespan. Rubber cleaning stick pressed against a running belt removes clogged resin in seconds.
Critical technical details:
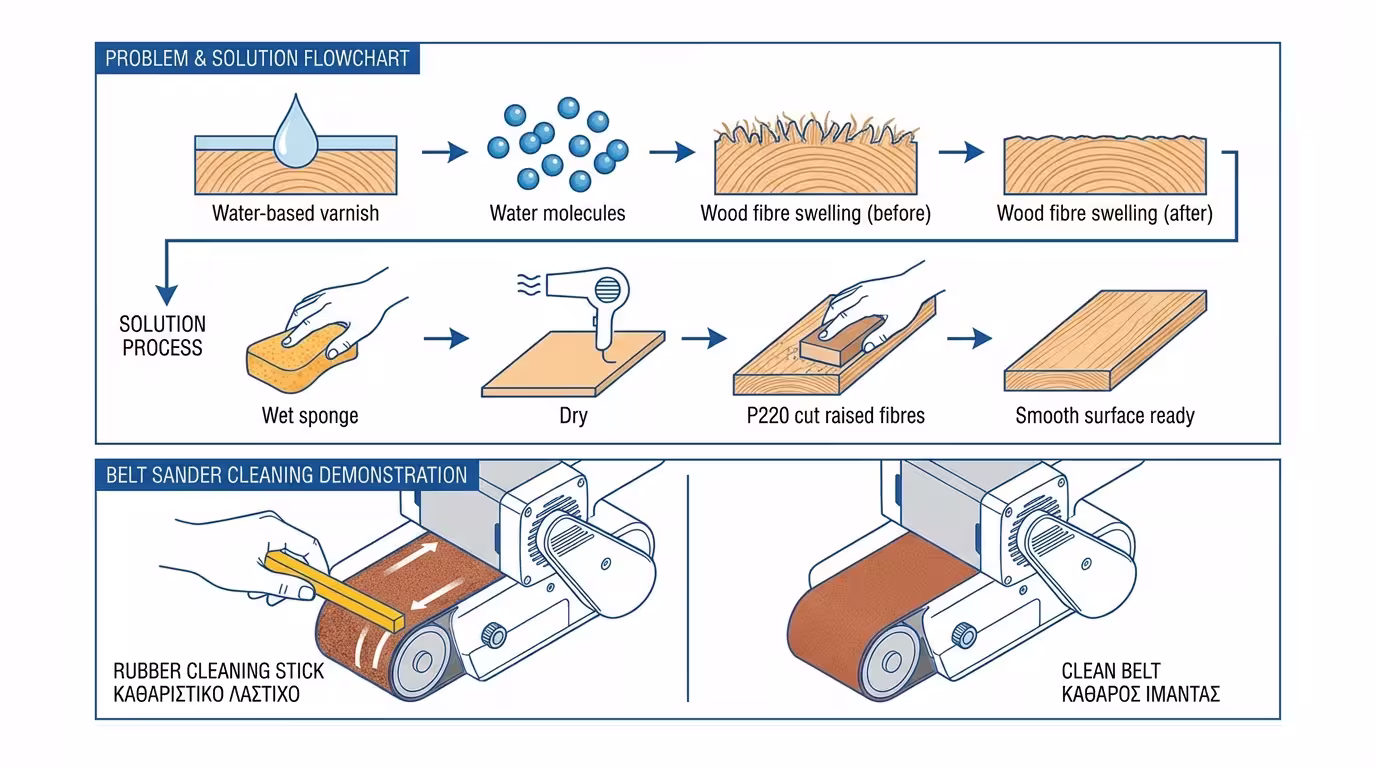
Water-based finishes swell wood micro-pores (fibres). Dampen with distilled water → dry → light P220 to "cut" fibres. Final finish on a smooth base.
Rubber abrasive cleaning stick pressed against the running belt pulls out clogged resin in seconds, saving huge consumable costs.
Skipping grit numbers. A finer grit cannot erase the deep scratches left by a much coarser one. Also, excessive pressure tilts the grains instead of cutting, creating harmful friction heat.
Fine wood dust (especially from Oak and Beech) is a known carcinogen. Use an M-Class vacuum with HEPA filtration. A simple dust mask is insufficient for the micro-particles that hang in the air.
💡 Pro Tip: Don't lean on the sander. The weight of your hand is sufficient. Pressure causes "burnishing" of the wood fibres, closing the pores and preventing the varnish from bonding.
💡 Success in sanding doesn't require force - it requires knowledge. Don't skip grits, and let the sandpaper do the work.
Return to category.
Go to categoryReturn to the central guide.
Go to guide