🛡️ Option A: Shellac Primer
A shellac-based primer (like Zinsser BIN) is the top and most reliable solution. It dries instantly and "locks in" the resin permanently.
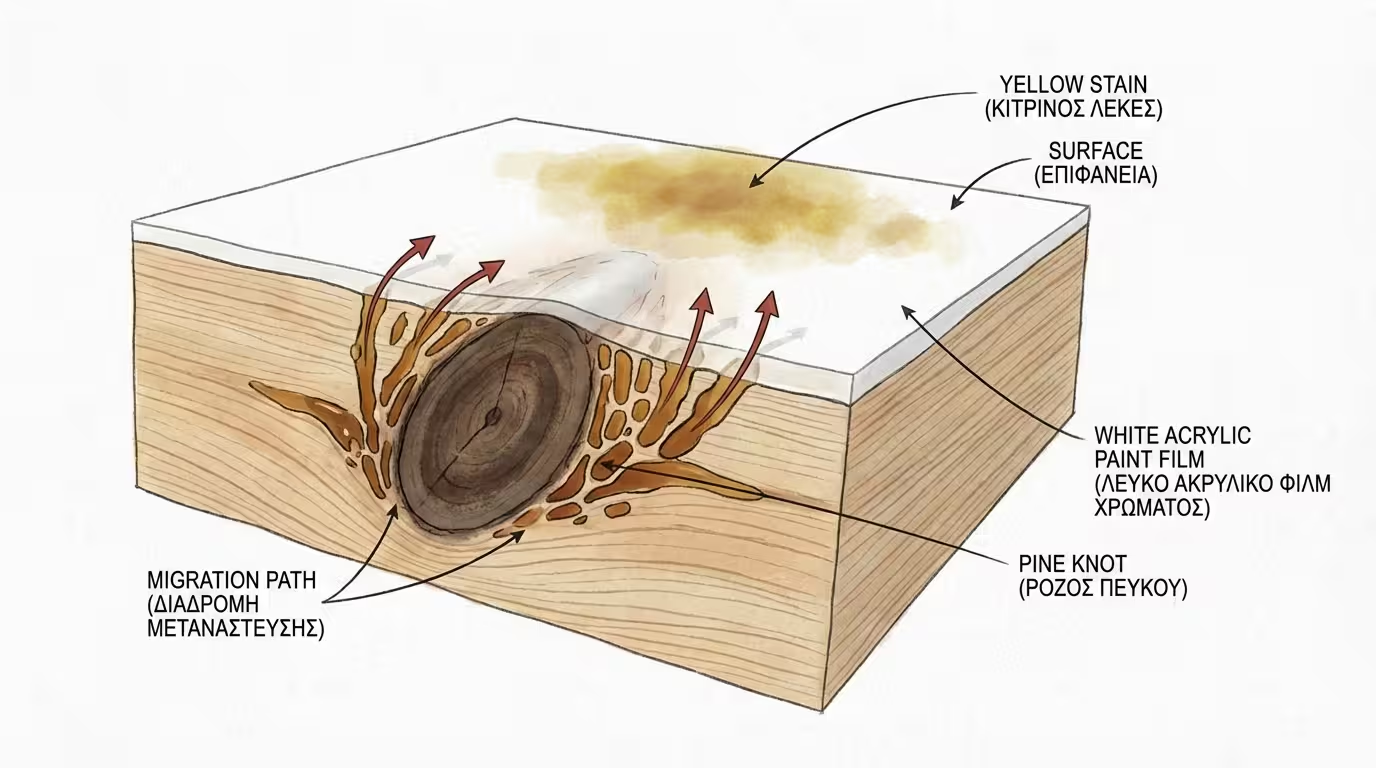
If you've ever tried painting pine with white paint, you've probably seen ugly yellow stains appear above the knots. Learn why - and how to prevent them.
Pine wood contains natural oils, tannins and resin, which are particularly concentrated around the knots.
When you apply a common water-based paint (like an acrylic enamel or chalk paint) directly to bare pine, the water in the paint "pulls" the tannins and resin to the surface. This phenomenon is called migration or bleed-through. Resins contain terpenes (such as turpentine), which are powerful natural solvents that can penetrate almost any conventional water-based film.
⚠️ Even if you apply 5 coats of white paint, the stain will keep appearing, ruining your work.
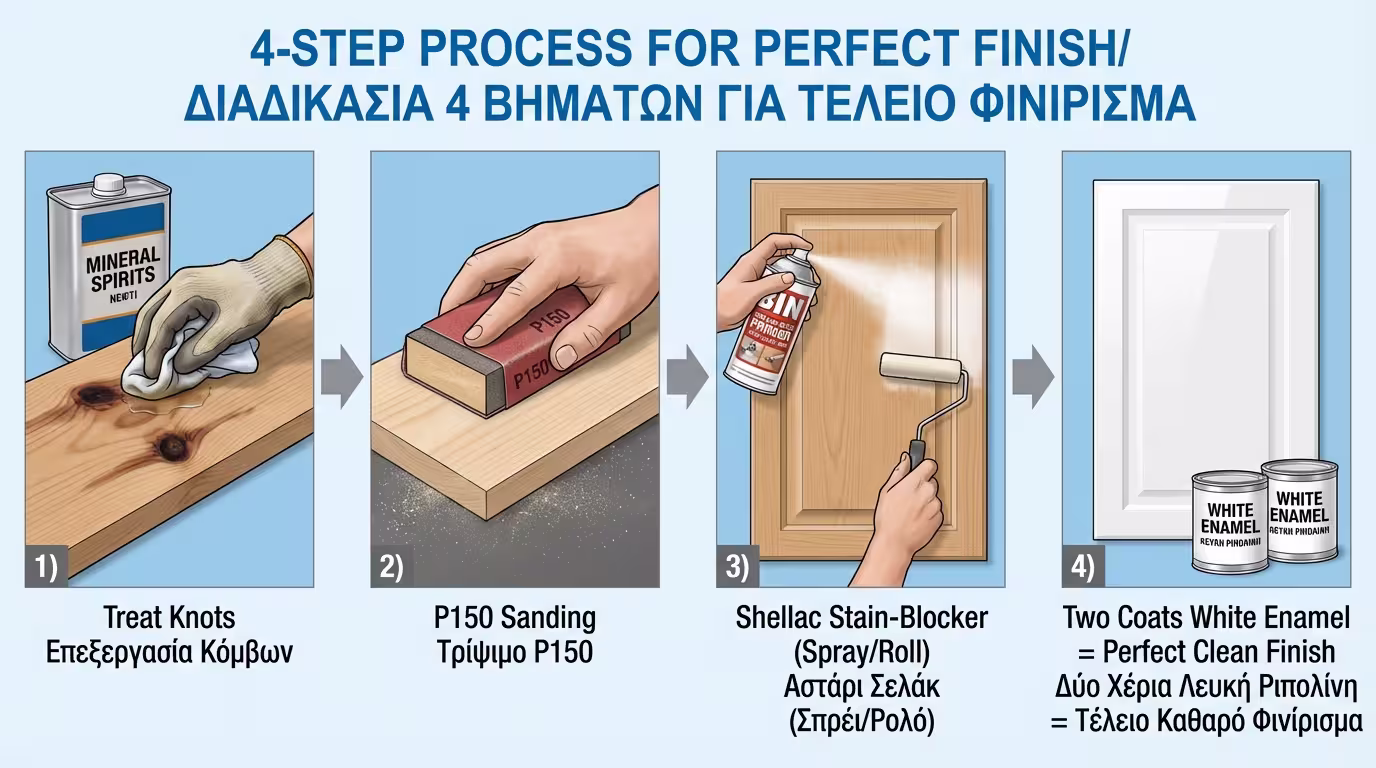
If you want to cover the wood grain and paint pine in a solid colour (e.g. white, grey, blue), the process must be followed religiously:
Step 1: Remove Surface Resin
Pine often "weeps"
resin due to thermal exudation (when heated by the sun,
resin liquefies and expands). Before doing anything else, take a cloth soaked
in mineral spirits and thoroughly wipe the knots and sticky
areas to remove the surface oils.
Step 2: Light Sanding
Sand the entire surface
with medium-to-fine sandpaper (e.g. P150) to open the wood's pores,
then dust off.
Step 3: The Ultimate Shield - Stain-Blocking Primer
A simple water-based white undercoat is not enough
for pine. You need a specialised Stain-Blocking Primer.
A shellac-based primer (like Zinsser BIN) is the top and most reliable solution. It dries instantly and "locks in" the resin permanently.
Specialised acrylic stain-blocking primers designed to block tannins (e.g. Smaltox Hydro).
Step 4: The Final Coat
Once the Stain-Blocker has
dried, you now have a perfectly safe white "canvas". Apply 2 coats of
your chosen acrylic or polyurethane enamel.
What if you want to keep pine's grain but change its shade (e.g. make it look like dark walnut)? Here we face a different problem: Blotchiness (Patches / Mottling).
Pine is a softwood. Its density is extremely uneven (spring wood is very soft, autumn wood is harder). If you apply a liquid stain directly to bare pine, the soft areas will absorb a huge amount of colour and the hard areas almost none. The result is an ugly, dirty and blotchy piece of wood.
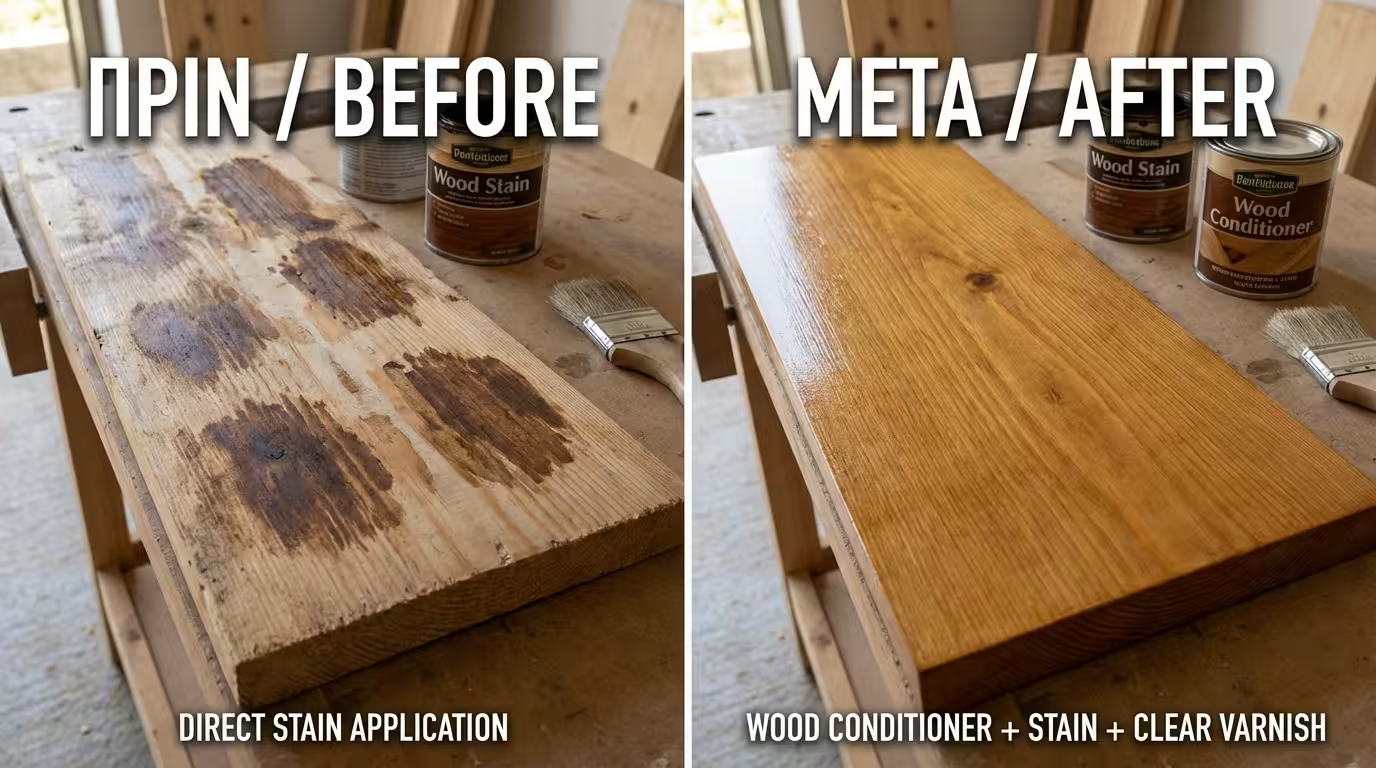
🛠️ The Solution: Wood Conditioner - Before applying the stain, it is mandatory to apply a Wood Conditioner (pre-stain sealer). This material penetrates the pores and partially seals them. This way, absorption becomes absolutely uniform and pine's grain is beautifully highlighted, without ugly dark "stamps". Then seal the result with a clear film varnish.
Processing resinous woods presents specific challenges in the workshop, beyond paint chemistry:
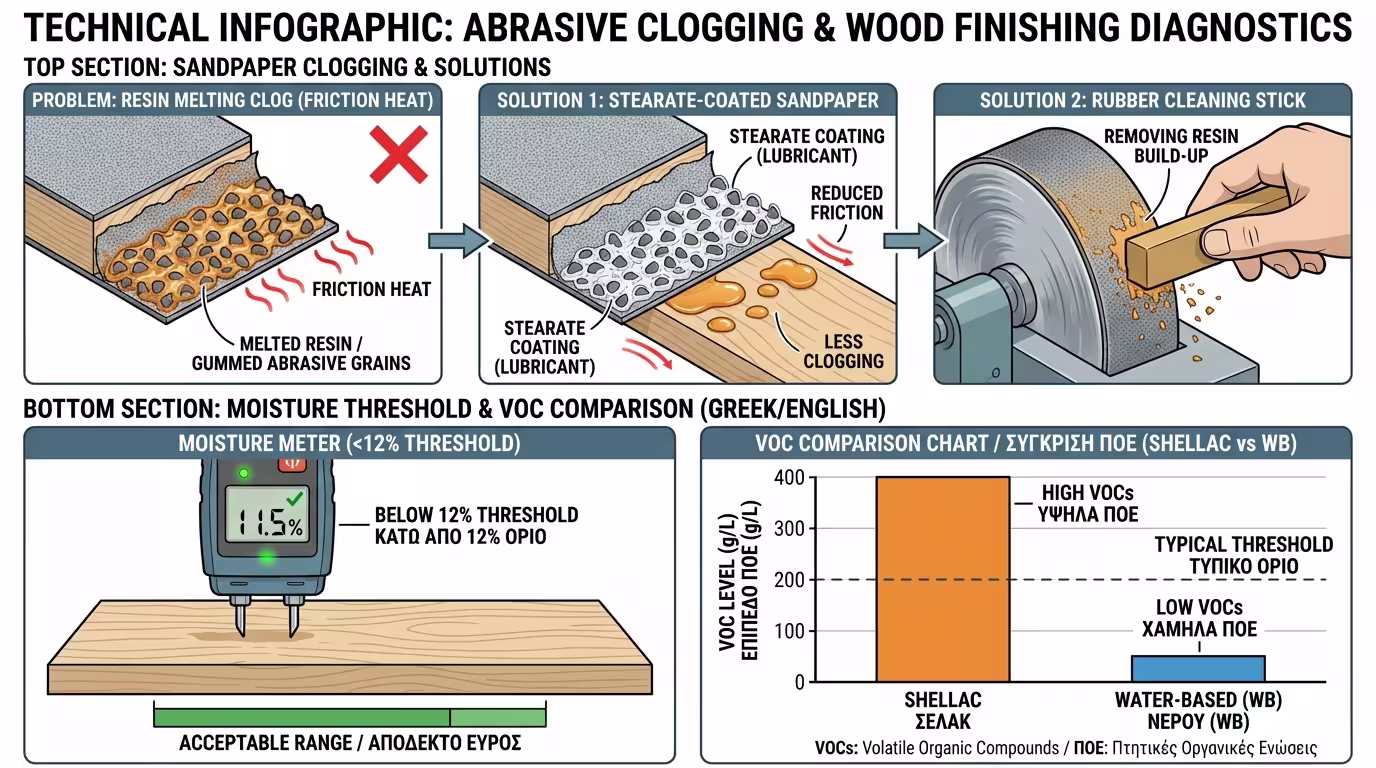
When sanding pine, the resin heats up, melts and sticks to the sandpaper. Solutions: Stearate-coated sandpaper that repels dust, or a Rubber Cleaning Stick that "pulls" stuck resin off the belt.
Resin concentration is significantly higher in heartwood than in sapwood. Painting must not begin if wood moisture hasn't been measured below 12%. High moisture combined with resins can trigger saponification if alkaline primers are used, leading to complete adhesion failure.
Shellac-based primers perform excellently but often have high VOCs. Check if environmental requirements (LEED, BREEAM) mandate water-based acrylic stain-blockers certified Indoor Air Comfort Gold.
💡 In summary: Pine is a wonderful, practical wood - as long as you respect its nature. Dissolve the resins, isolate the knots with the right primer, and you'll never see yellow stains on your furniture again!
Return to category.
Go to categoryReturn to the central guide.
Go to guide