🧱 Insulation destruction
The jackhammer demolishes the insulating material (EPS, mineral wool) between the bricks. The wall's thermal resistance plummets, creating a "frozen window" inside your building envelope.
The manifold cabinet is the "electrical panel" of your plumbing system. Recessing it into a wall requires cutting 10-15 cm deep - and this is where disaster starts if the installer picks the wrong wall.
Chiselling into an exterior wall can cause a thermal bridge, moisture condensation, black mould and corrosion of expensive fittings. Learn where to install it correctly.
Exterior walls (20-25 cm thick, double brick with insulation) are the thermal shield of your home. When the plumber cuts 15 cm deep, they destroy the insulation, leaving just 5 cm of brick between you and the 0°C outside.
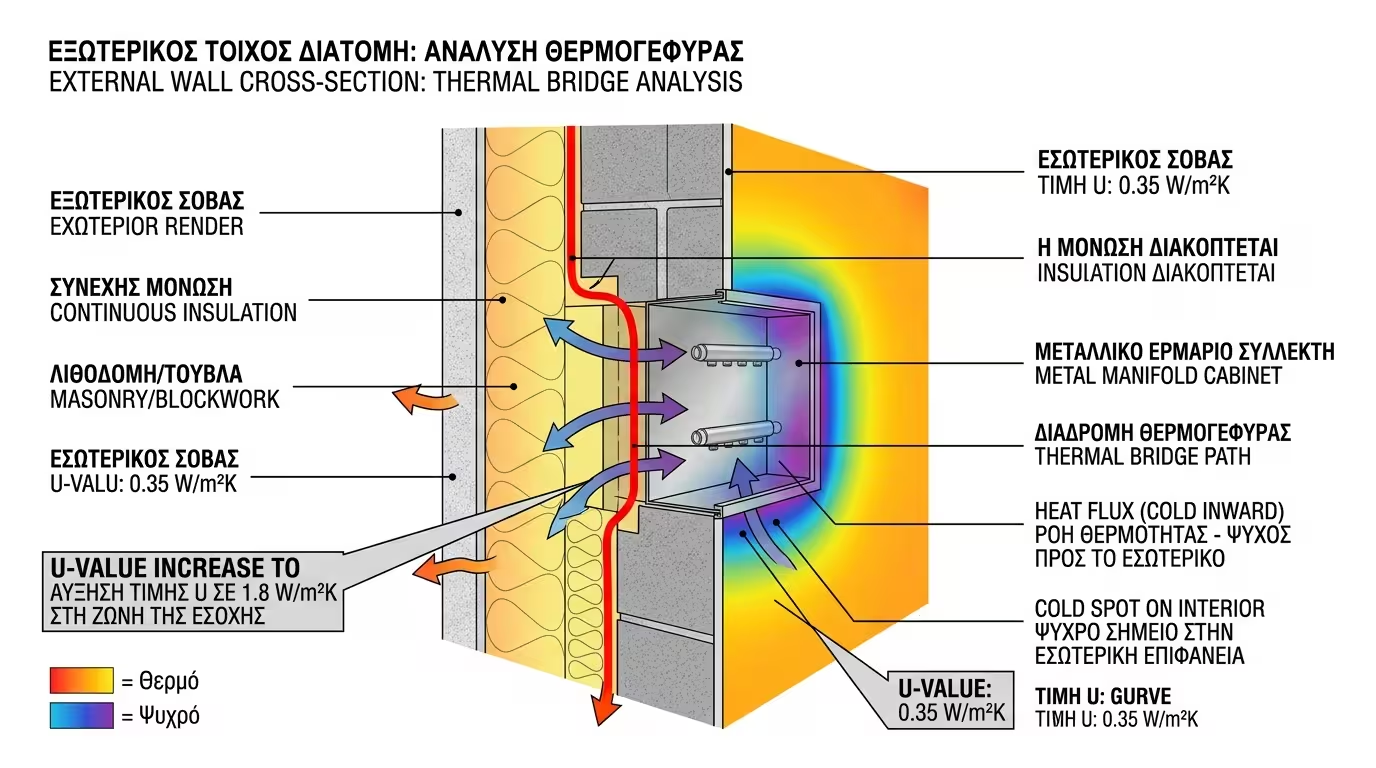
The jackhammer demolishes the insulating material (EPS, mineral wool) between the bricks. The wall's thermal resistance plummets, creating a "frozen window" inside your building envelope.
Behind the manifold's metal cover only a 5 cm brick "skin" remains. In winter, the inner surface drops below the dew point - that's where condensation begins.
In building science a Thermal Bridge is any point in the envelope where insulation is abruptly broken, allowing heat to escape and cold to invade - literally a hole in your "armour".
A 1 m² thermal bridge on the exterior wall can increase local heat losses by 10-15%. The boiler works harder, the energy bill rises - with zero perceptible comfort gain.
A thermal bridge doesn't just mean a bit more cold. It triggers a chain of destruction: condensation, mould growth, plaster crumbling and corrosion of costly manifold components.
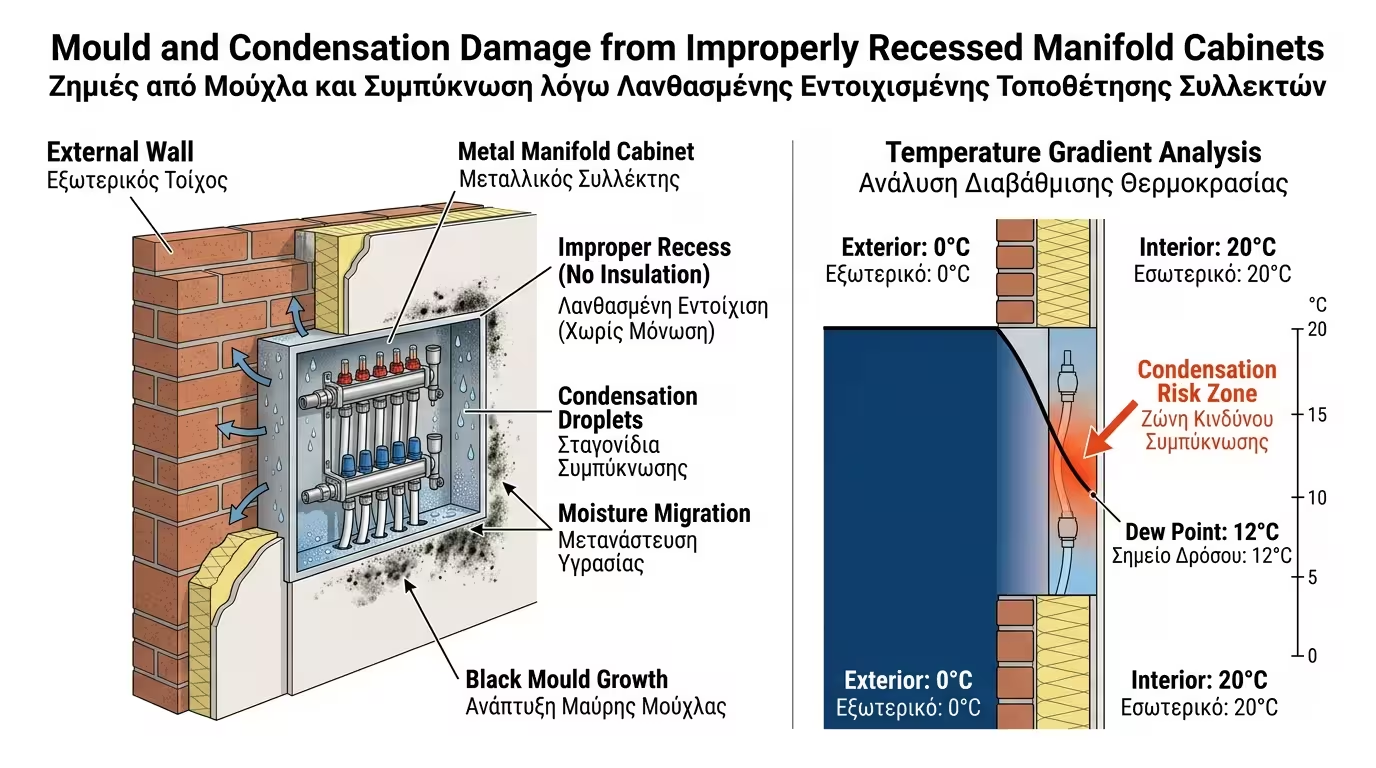
The warm, humid indoor air contacts the freezing metal surface. It condenses instantly - exactly like a cold glass "sweating" in summer. Water runs down into the brickwork.
Within one winter the wall around the manifold blisters, plaster cracks, and large patches of black mould appear - highly toxic, especially dangerous for allergy sufferers and young children.
Expensive Inox or brass fittings soak in constant moisture. Valves seize, air vents clog, and eventually a complete manifold replacement becomes necessary.
Moisture doesn't stop at the plaster. It penetrates reinforced concrete, rusting the steel rebars and spalling bricks. What starts cosmetic ends up structural.
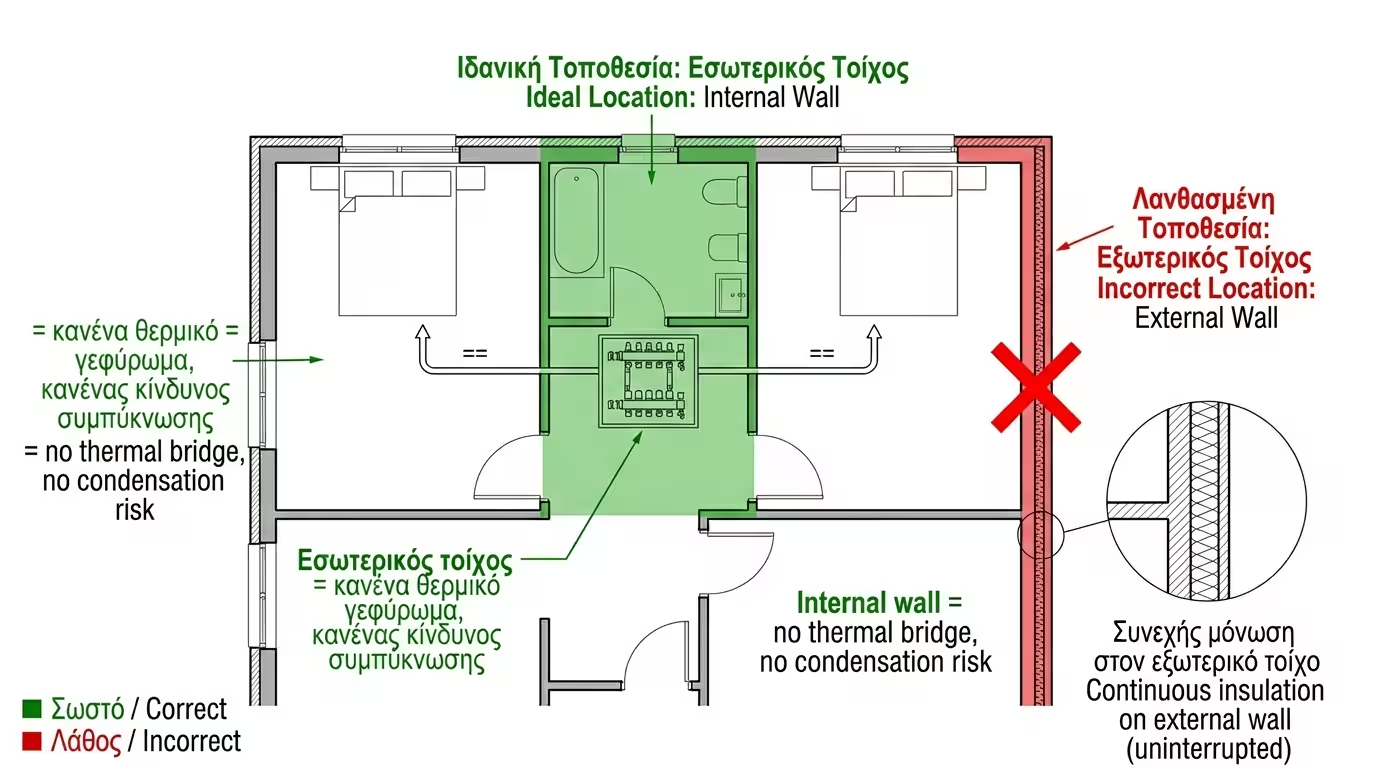
The manifold must always be placed inside the building where both sides of the wall face heated space. Three proven solutions exist:
The ideal position: a thick internal wall (e.g. living room to hallway). Both sides are inside the warm house - zero thermal bridge, zero mould, no matter how deep you cut.
If internal walls are too thin (running-bond 10 cm), don't pierce them. Screw a surface-mounted cabinet on the wall. Hide it under the kitchen counter, inside a bedroom wardrobe, or inside the bathroom vanity.
A dry-lining tradesman builds a 15 cm bulkhead in front of the wall. The manifold recesses into the plasterboard, gets painted to match, and becomes invisible - without touching a single brick.
Wherever it goes, the manifold should be at the centre of gravity of the home. If placed in the storeroom (one end), pipes to the furthest room hit 25 m+, increasing friction and losses dramatically.
The plasterboard method is the most popular in apartments: fast, clean and no jackhammer needed. The manifold door sits flush with the wall and disappears visually.
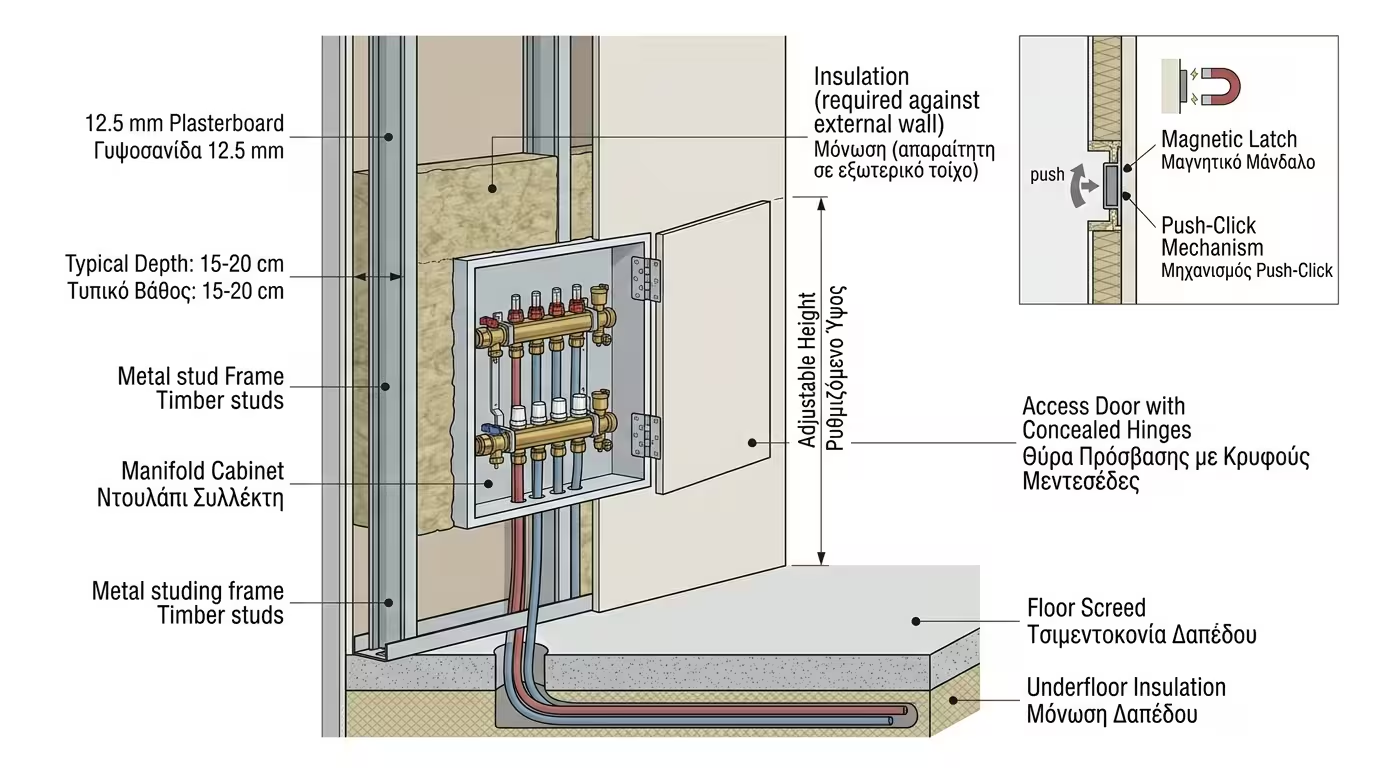
The plasterboard build-out needs just 12-15 cm depth. Enough to fit pipes and the cabinet without taking up significant space in the hallway or entrance hall.
The plasterboard is skim-coated, painted the wall colour, and only a small metal access door betrays the manifold's presence. In luxury homes it can even hide behind a painting.
Behind the plasterboard, mineral wool can be added for acoustic insulation. The faint water-flow noise inside the manifold won't be heard at all in the room.
Place a waterproof membrane (polyethylene) on the floor behind the plasterboard. If anything breaks, the membrane catches the water before it reaches the flooring. Prevention number one.
💡 Cutting into exterior walls for manifolds or electrical panels is a practice from decades past. Today, with thermal insulation being a legal requirement, demand an internal, dry and safe location.
Return to category.
Go to categoryReturn to the central guide.
Go to guide