The Washbasin goes in first
It is the zone with the highest traffic (washing hands, teeth, mirror). Constructively and aesthetically, the sink should be the first thing you see when you open the door.
We've all experienced it in some Greek apartment: You open the bathroom door and it hits directly on the basin. Or, you get out of the shower in the winter and there is literally no free space (not even half a square) to spread your hands and towel off.
The truth is hard but simple: Even the most expensive Italian tiles or designer faucets cannot save a bathroom with the wrong layout. Planning the floor plan is the very first—and most critical—step of any renovation. In this article, we put on the hat of the engineer and the interior designer, and show you how to divide your space intelligently, functionally and without costly plumbing mistakes.
As in the kitchen, so in the bathroom, the design is based on a triangle of movement. The three vertices of this triangle are the Washbasin, the Basin and the Shower (or Bath). The aim is to make movement between these three zones effortless.
Here are the basic placement rules:
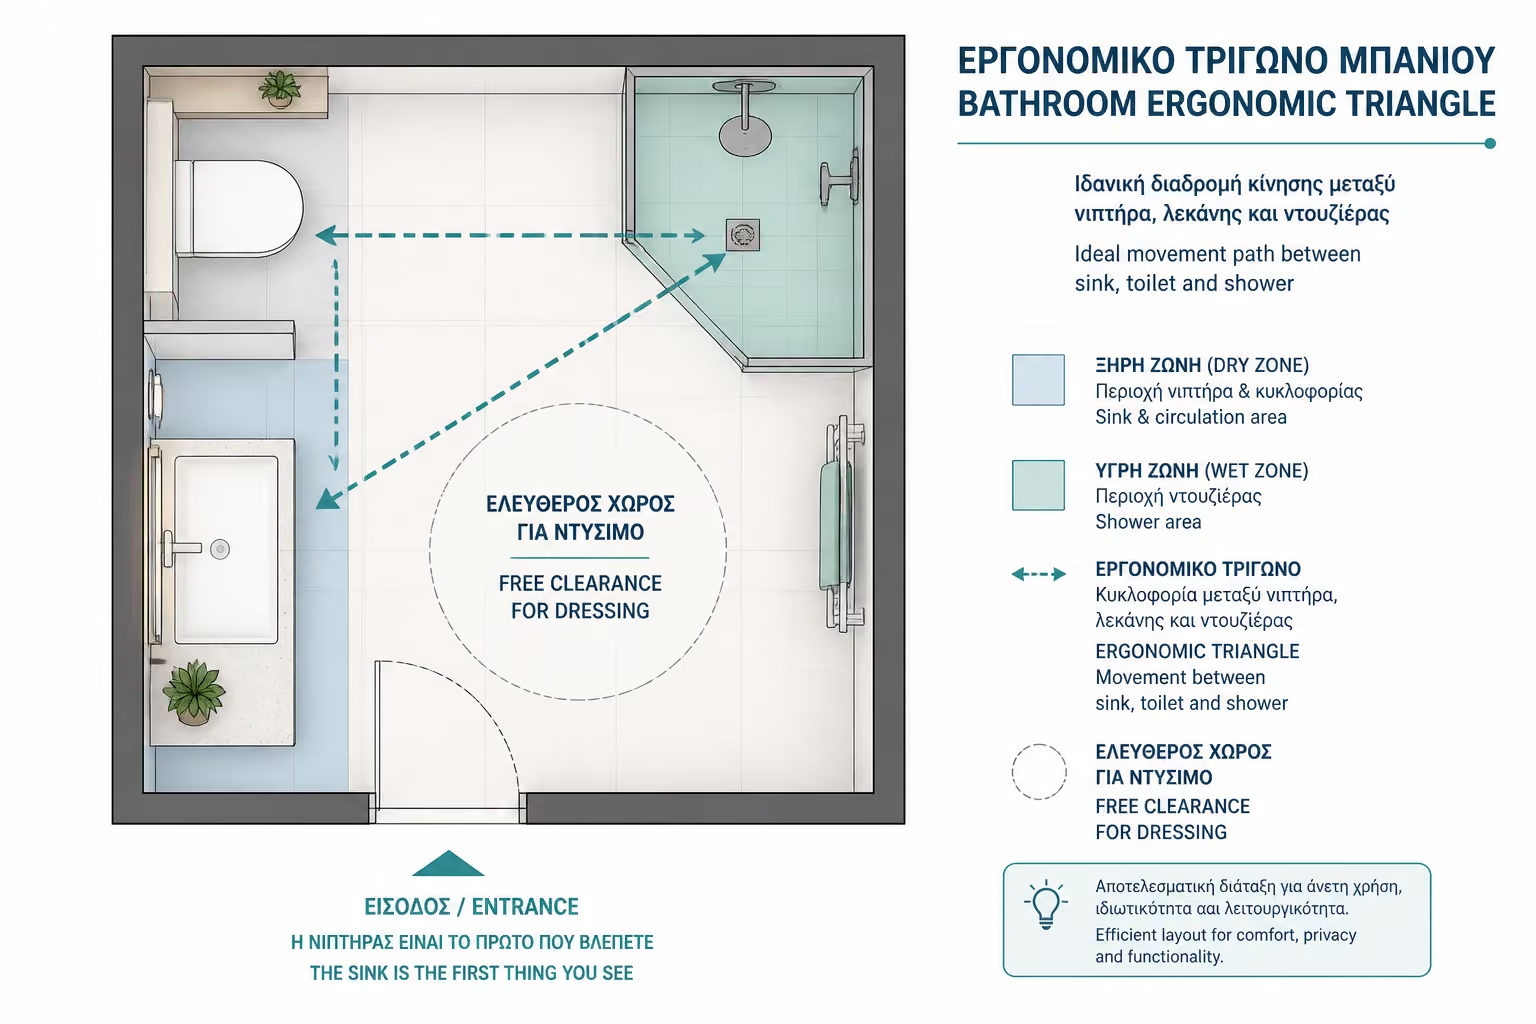
It is the zone with the highest traffic (washing hands, teeth, mirror). Constructively and aesthetically, the sink should be the first thing you see when you open the door.
If the floor plan allows, the basin should not be in direct line of sight when the door is opened. It is often hidden behind the door, next to the vanity unit or behind a low built parapet.
It is usually placed in the farthest corner or in the back of the room. This prevents water from spreading to the rest of the space (dry zone) and takes advantage of the "dead" space of the corners.
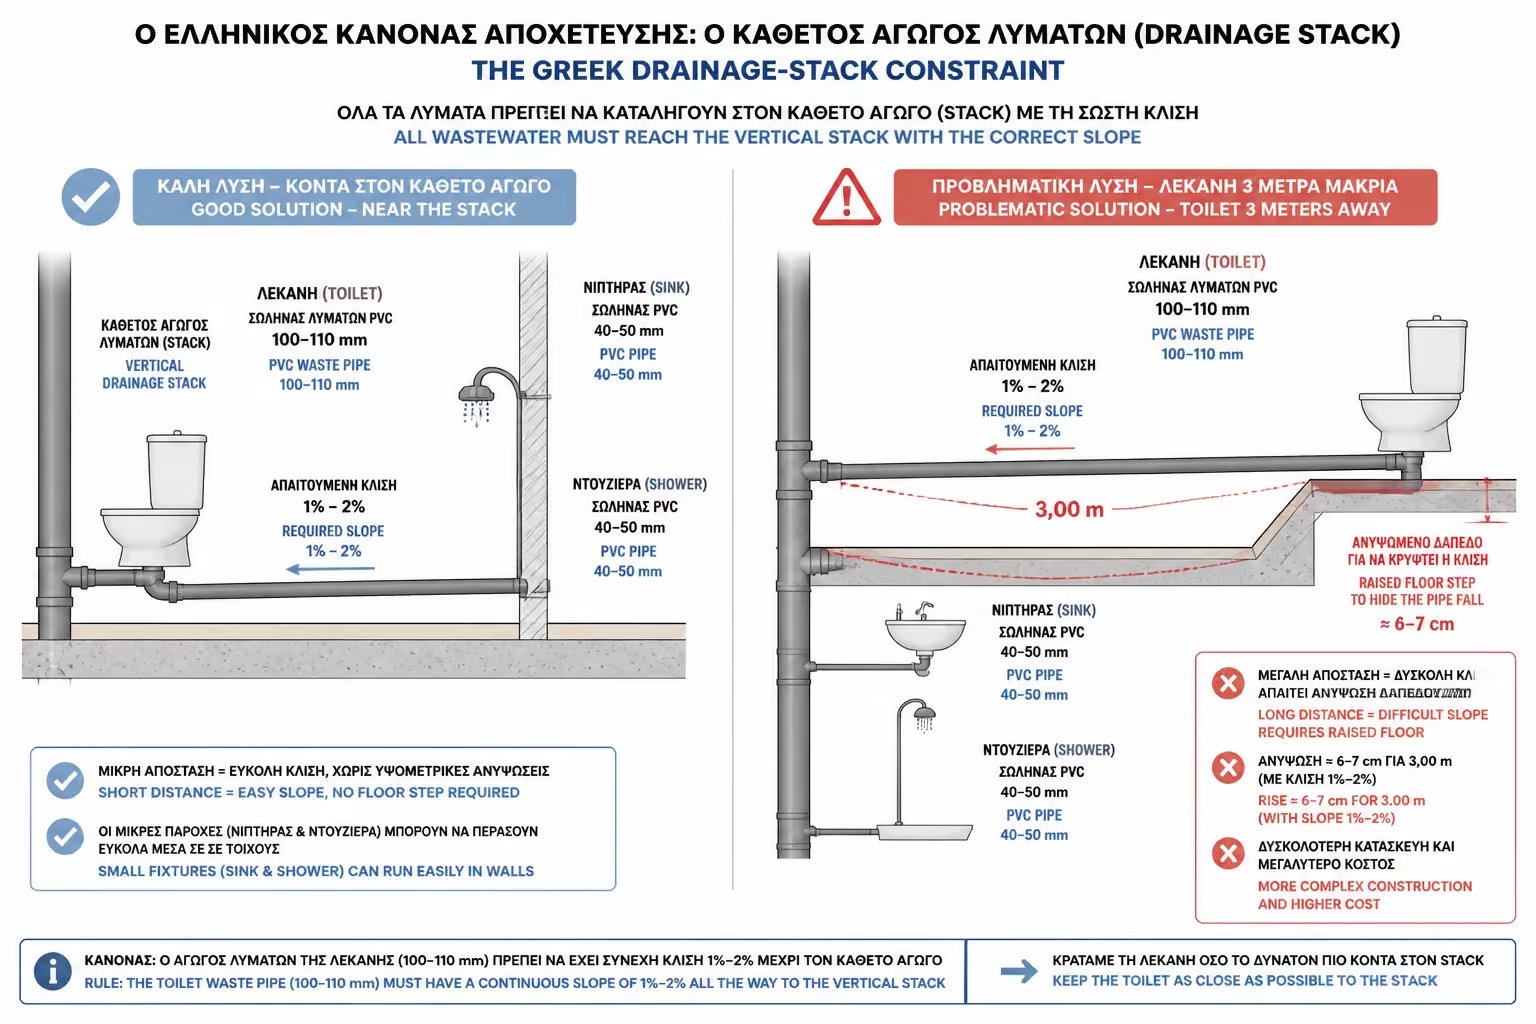
Before you start drawing floor plans on paper, you should be aware of the biggest limitation of Greek apartment buildings: The central vertical drainage column (the "skylight").
The basin is connected to a large PVC pipe (usually Φ100 or Φ110 cross-section). This pipe must reach the central column of the building with a strict slope (flow) of 1% to 2%.
Each space has its own peculiarities. Let's see the most common bathroom shapes in Greece and how to set up the ideal layout:
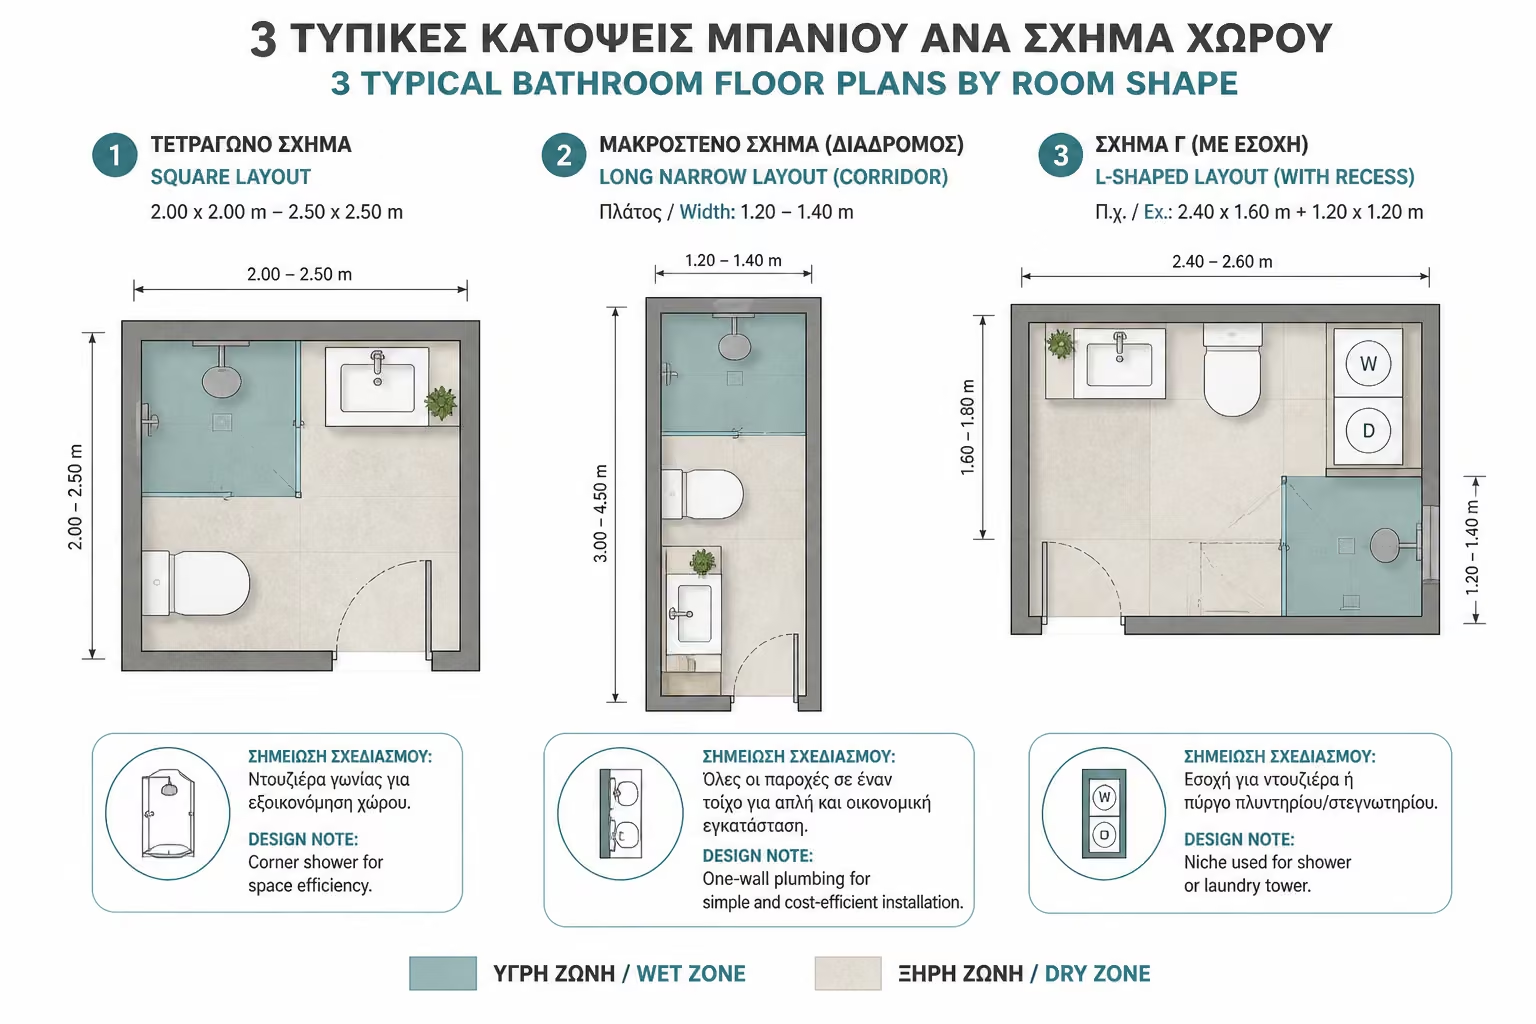
Usually around 2x2 or 2.5x2.5 meters. It is the easiest shape to achieve the perfect triangle. The Layout: The door usually opens in the center. Directly opposite or on one side wall is the washbasin. In one corner (usually diagonally from the door) a corner or semicircular shower cabin is placed, and in the other corner the basin. Pro Tip: Leave the center of the room completely free (clearance) so you can dress comfortably.
Very common in old apartments, with a width of only 1.20m - 1.40m and enough length. The Layout: The only functional solution is the linear layout (all on one wall). This is also ideal for the plumber, as all the supplies "run" into one wall, reducing costs. Pro Tip: Take advantage of the narrow side in the background (opposite the door) to make a spectacular wall-to-wall shower, separating it with a single fixed glass.
A shape that usually arises due to beams or the incorporation of a small corridor. * The Layout: Here, ergonomics dictates the separation of zones. Use the recess (the "foot" of C) to house the shower exclusively (wet zone) or, alternatively, to hide the washing machine and dryer there, making a laundry closet.
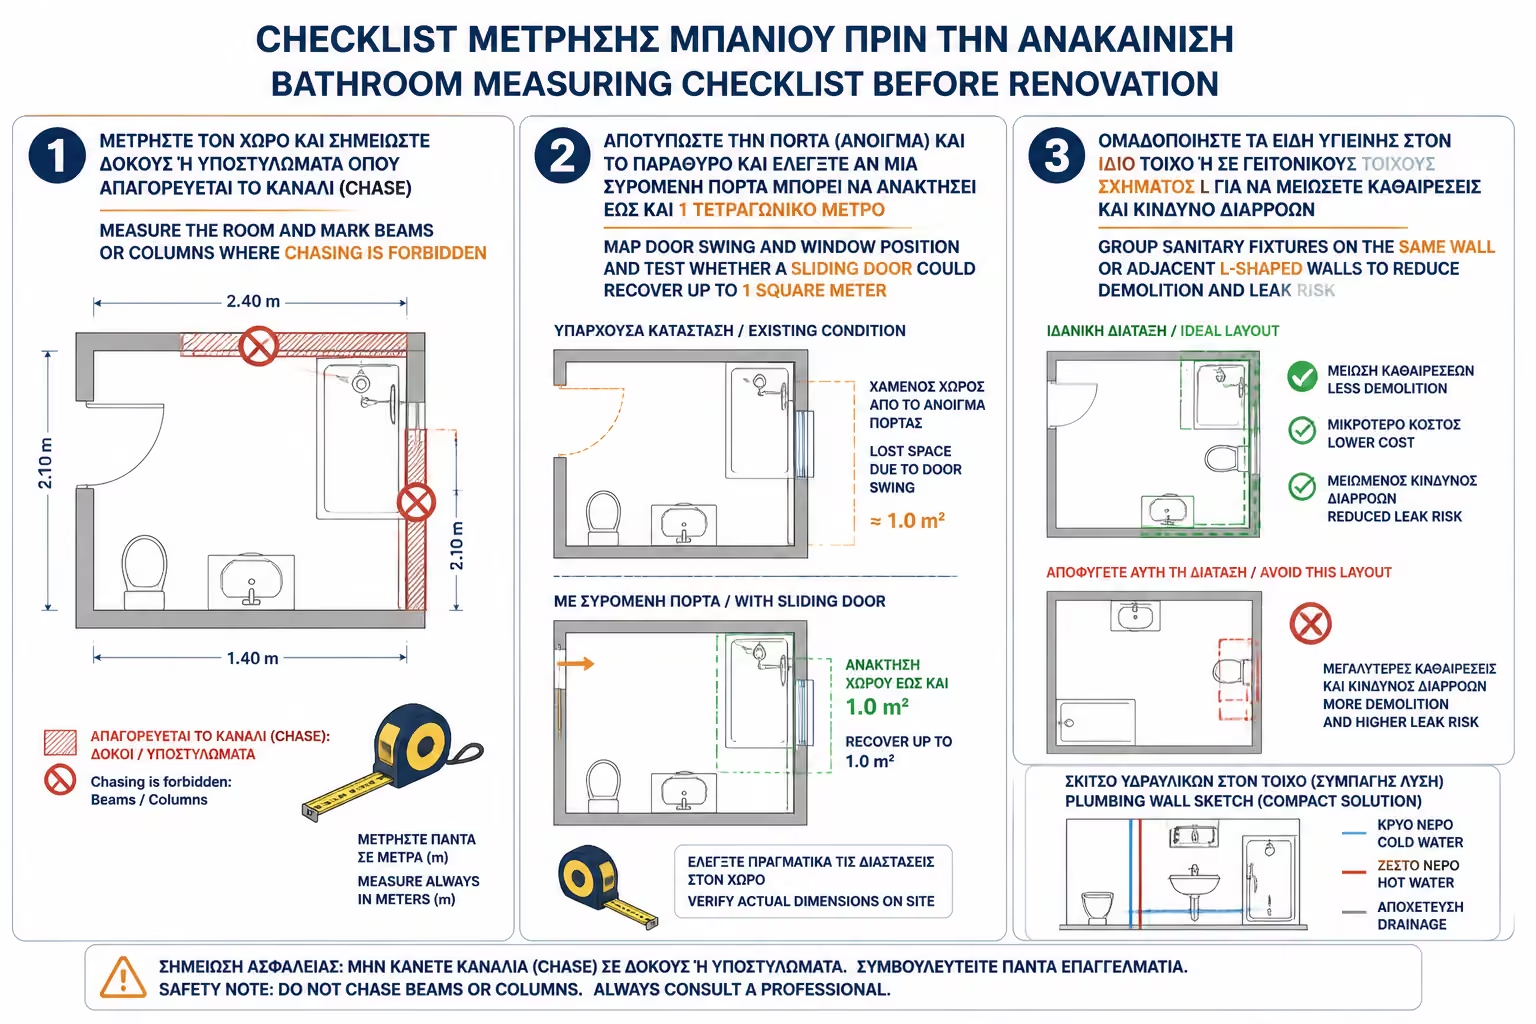
Before calling the engineer or contractor, do the following preparation:
The right arrangement is the "invisible" hero of a beautiful bathroom. Take your time at this stage and experiment with floor plans. In our next article, we'll delve into clever space-saving solutions for ultra-small bathrooms (under 4 sq m), proving that size is no barrier to luxury.
Return to category.
Go to categoryReturn to the central guide.
Go to guide