
Bathroom Fixtures & Water Equipment
Return to category.
Go to categoryIn modern bathrooms, the shower is no longer just a place to bathe. It is one of the key elements that determine the image, ergonomics and feel of the space. Sometimes we want it to disappear behind a clear crystal. Sometimes we want it to be more strongly defined, like a small architectural room in the bathroom. In this second case, the built parapet can be an extremely interesting solution.
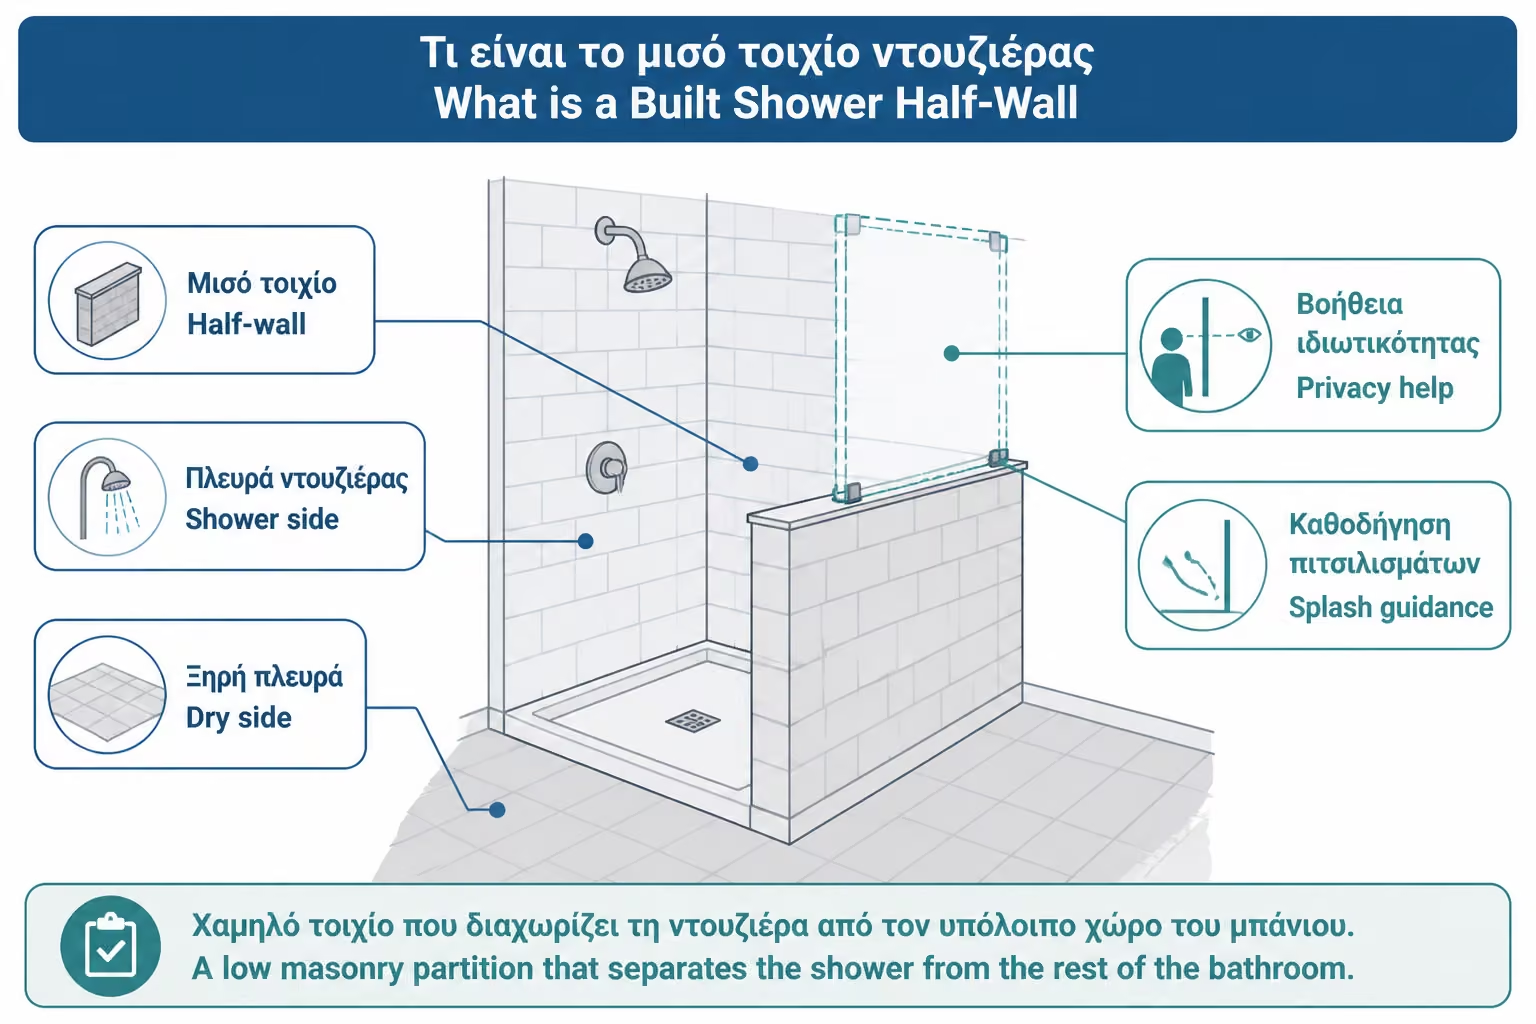
The built-in parapet is a low wall that partially separates the shower zone from the rest of the bathroom. It can be low, about waist height, or higher, depending on the use and design. It can be combined with a fixed crystal on the top, with an open walk-in passage, with a niche, with a bench, with lighting or with a lining from the same bathroom tile.
His choice is not only aesthetic. A properly designed parapet can help limit water, give privacy, hide part of the shower, support glass, create a surface for a niche or shelf and make the bathroom look more "built", more complete. On the other hand, if it is done carelessly, it can make the space smaller, create a dark corner, make cleaning difficult or become a damp spot.
The built parapet is one of the solutions that must be designed from the beginning. It is not a decorative addition that is decided at the end. It affects the gutters, the waterproofing, the cabinet, the entry opening, the tile, and even where the water will fall from the shower head. That is why it is worth seeing it not as a simple wall, but as a small architectural element in the bathroom.
A built-up parapet is a permanent structure usually built of brick, aerated concrete, cement board on a suitable frame or other system suitable for wet areas. It is then covered with tile, pressed, natural stone or other material, depending on the aesthetics and technical requirements.
Unlike an all-glass cabin, the parapet creates a more stable and compact boundary. It is not transparent, it does not disappear visually, but it gives weight and structure to the space. In many cases it is combined with glass on it or next to it, so that we keep the advantages of both solutions: the robustness and privacy of the built element, together with the brightness of the crystal.
Its height may vary. A low parapet of 90–110 cm can act as a protective border and support surface for glass. A higher parapet of 120–150 cm gives more privacy. An almost complete wall can create a more "hidden" shower, but then the feeling of the space changes completely and attention needs to be paid to lighting and ventilation.
The built-in parapet makes sense when we want more than a simple transparent partition. It can be ideal in bathrooms where the shower is close to the basin or sink and we want to visually or practically limit the contact with the rest of the bathroom. It can also help when we don't want a large sheet of glass from floor to ceiling, either for cost or maintenance reasons.
In small bathrooms, a low parapet can partially hide the basin or protect the piece of furniture from splashes, without completely closing off the space. In larger bathrooms, it can give a more architectural feel, especially when the shower is designed as a separate zone with its own tile, niche and lighting.
We also choose it when we want a practical surface. A parapet can accommodate a niche, create a shelf at the top or act as a base for a fixed crystal. Unlike glass, the built element can be coated, combined with lighting and become part of the decoration.
The built-in parapet is not suitable for every bathroom. If the space is very small and already dark, a solid wall can make it look even narrower. There maybe a clear glass panel is a better choice, because it lets the eye and the light through.
It is also not a good choice when proper sealing is not possible. The parapet enters a zone that gets wet. This means that it should be treated as part of the shower, not as a simple interior wall. If built casually and simply tiled, without proper waterproofing on all sides and especially at the top, it can become a point of failure.
It also needs attention if it is going to support glass. It is not enough that it is "built". It must be stable, aligned and suitable for mounting a profile, crystal or bracket. A crooked or weak parapet will create problems in the cab.
One of the great advantages of the built parapet is that it helps control the waters. In an all-glass solution, retention depends on crystal size, head position, wrinkles, and rubbers. A built-in parapet can act as a more stable barrier at a low height, especially where water tends to splash into the rest of the bathroom.
It also gives privacy. This is especially useful in bathrooms where the shower is immediately visible from the door or is next to a basin. A screen does not necessarily close the entire shower, but it can hide the body up to a point and make use more comfortable.
In family bathrooms, this small sense of privacy can be important. In a master bathroom, on the contrary, it can function more as a design element, giving depth and architectural composition.
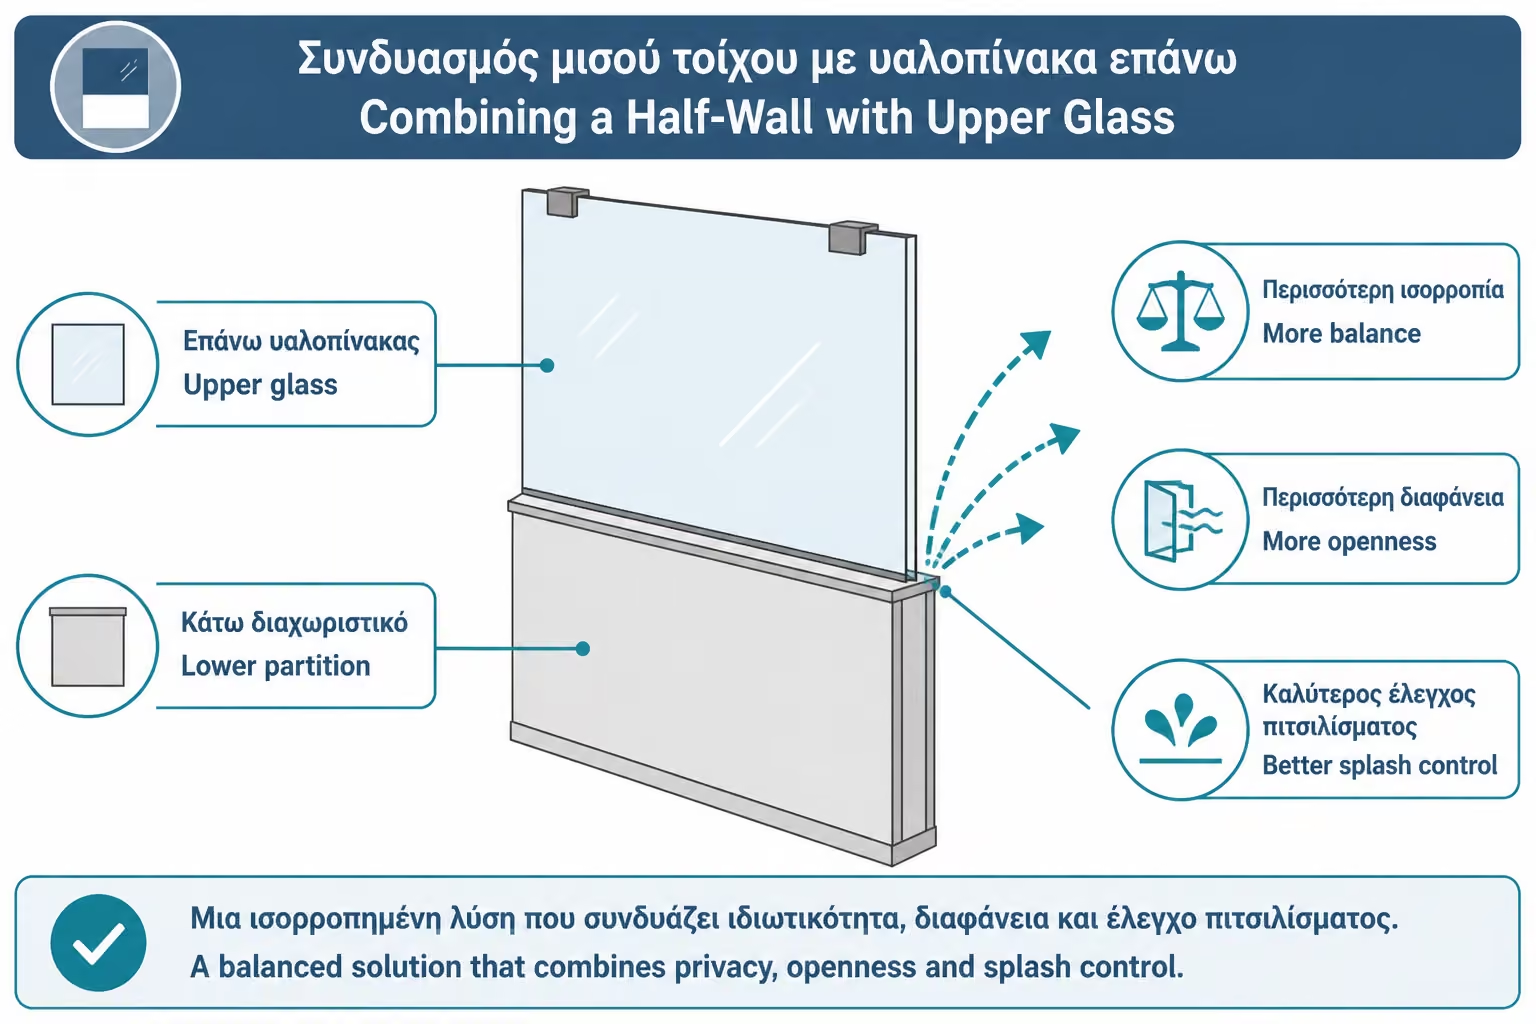
Very often, the best solution is not "either parapet or glass", but a combination. A low built parapet may have fixed crystal on it. So the lower part of the shower becomes more protected and robust, while the upper part remains transparent and bright.
This combination is particularly useful when we want to limit water but do not want the shower to become dark. The glass lets the light through, while the parapet gives the feeling of solid construction. It can also reduce the size of the glass and thus the cost, especially in cases where a large custom crystal would be needed.
But it needs proper detail in the connection. The upper part of the parapet must have a proper slope towards the shower, so that no water remains. The waterproofing must continue to the top. If glass is inserted on the parapet, the holes, profiles and silicones must be made in a way that does not invalidate the waterproofing.
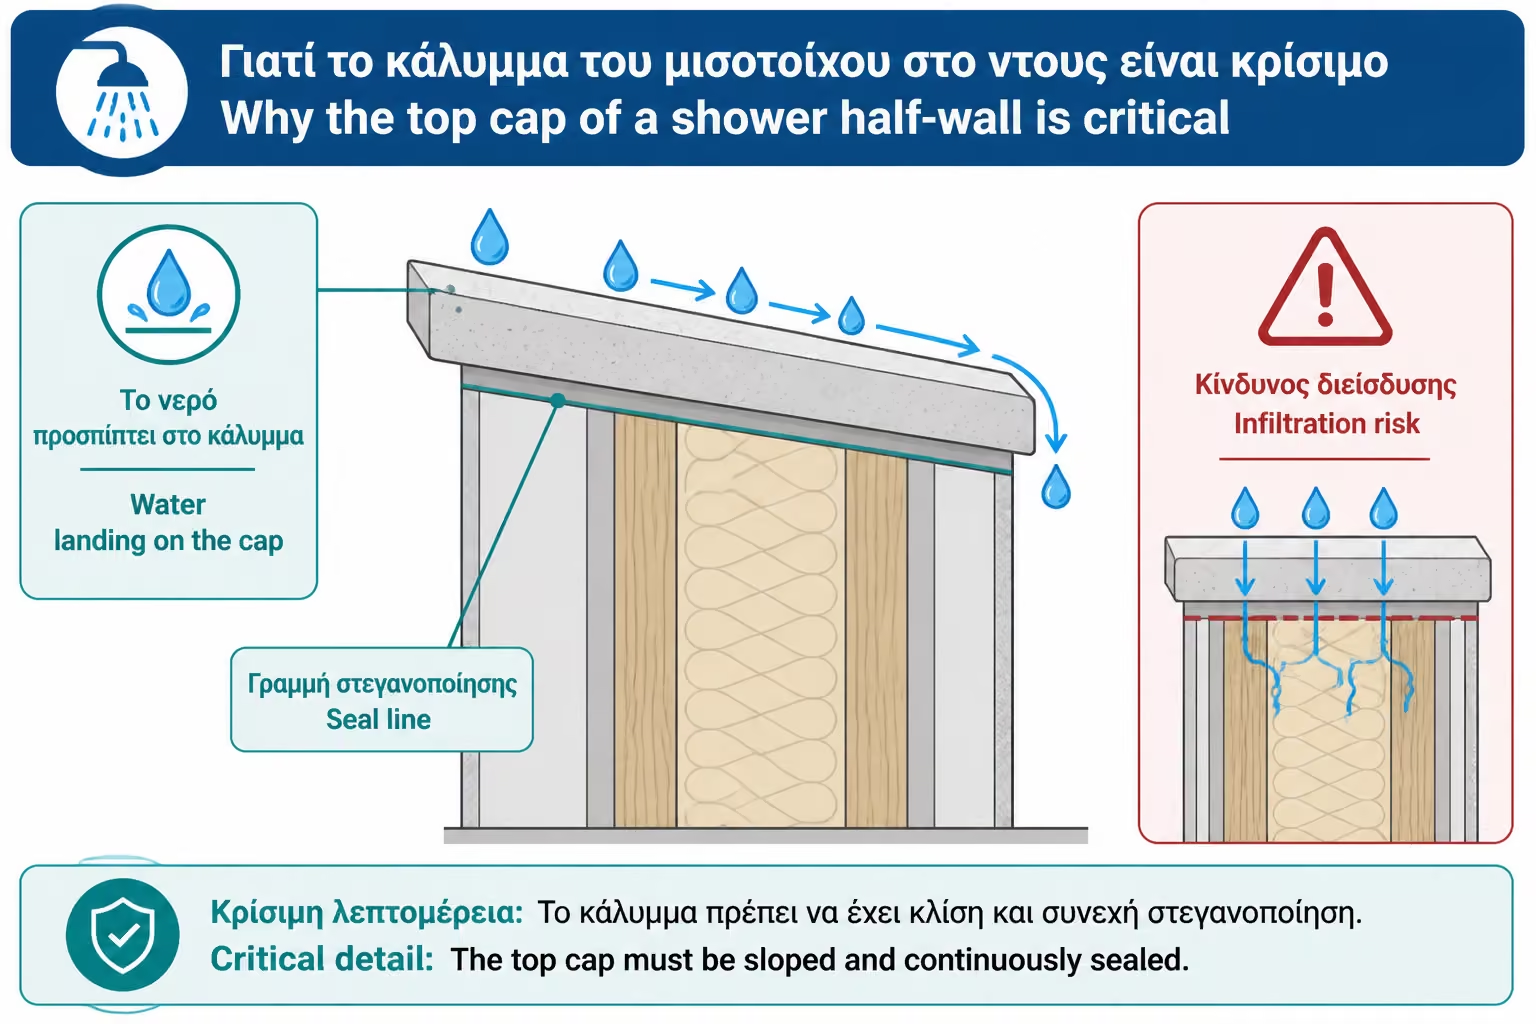
The top of the parapet is one of the places that is often mistaken. Many treat it as a simple horizontal surface. In fact, it is a point that receives water. If it stays perfectly flat or if it slopes outwards, water can pool or drain to the outside.
The correct approach is for the top to have a slight slope towards the shower. Thus, any water that falls on the parapet returns to the catchment area. If the top is covered with tile, stone or marble, attention must be paid to the joints, corners and waterproofing under the covering.
Even better, some applications use a one-piece cap, such as marble, granite, solid surface or a special piece of tile, to reduce joints at the top. This can make the parapet cleaner aesthetically and more practical to maintain.
The built-up parapet must be waterproofed as if it were part of the shower. It is not enough to build, plaster and tile. Water doesn't just go through the floor. It can go through corners, joints, joints, glass holes and through the top of the parapet.
The waterproofing must cover the sides that get wet, the top and the connection to the floor and wall. Corners need elastic sealing strips. If there are passages, supports or screw points, they must be treated with special care.
The most dangerous thing is that a bad seal in the parapet may not be immediately visible. After months, moisture can appear on the outside, swelling on an adjacent wall or blackened joints. That is why hidden materials should not be skimped on.
The lining of the parapet determines the aesthetics a lot. The safest option is to cover it with the same tile that is in the shower or on the floor. Thus the parapet is integrated into the whole and does not look like a foreign body. If we want a calmer image, we continue the same tile from the shower wall onto the parapet.
If we want to highlight it, we can use different material. For example, in a bathroom with calm white tiles, a parapet with a wood effect, terrazzo or concrete look can become a discreet accent. In more luxurious bathrooms, a one-piece marble or solid surface cap can give a very clean finish.
But the choice must be practical. Highly textured tiles on a parapet can hold water and salts. Natural stone needs sealer and maintenance. Dark surfaces show salts more easily. The material must suit not only the design, but also the daily use.
One of the nice advantages of the built parapet is that it can incorporate features. If the thickness and position allow it, it can be combined with a niche for shampoo, with a small shelf or with a surface where we place products.
But there must be caution. The horizontal surfaces inside the shower hold water. If a shelf is created, it must slope towards the inside of the shower and be properly sealed. The same goes for niches. It is not a decorative hole in the wall. It is a point with many corners, so it needs careful waterproofing.
If the screen is designed correctly, it can make the shower much more practical. If designed roughly, it can become a point that collects water, soaps and mold.
Parapet has a different visual effect than glass. The glass opens up the space. The parapet organizes him. If used correctly, it can make the bathroom look more designed, more architectural and more "tidy". If used excessively, it can shrink it.
In a small bathroom, a low parapet can be better than a high one. It gives protection without completely cutting off the light. If combined with glass above, the shower remains bright. In a large bathroom, a taller parapet can create a more private zone and add depth.
Proportion matters a lot. A parapet that is too short may not hold enough water. One that is too tall can look heavy. The ideal height depends on the layout, the position of the shower head and how much privacy we want.
The cost depends on the length, height, construction material, cladding and whether it will support glass. It's not just "a few bricks". Includes building or frame construction, leveling, waterproofing, tiling, cutting, corner caps or finishes, possible capping and sealing.
| Work / Material | Indicative cost |
|---|---|
| Building or constructing a low parapet | 150–400€+ |
| Waterproofing parapet and corners | 80–250€+ |
| Tiled flooring | depending on tile and cuts |
| One-piece lid made of marble / solid surface | 80–300€+ |
| Fixed crystal on or next to the parapet | 250–900€+ |
| Special details / niche / lighting | additional cost |
The prices are indicative. The final cost depends on the size, access, height, type of cladding, whether there is glass and how demanding the waterproofing is.
| Criterion | Built parapet | Full glass cabin |
|---|---|---|
| Privacy | Better | Limited |
| Optical lightness | Moderate | Very good |
| Water restriction | Good on the low end | Depends on cab/tyres |
| Cleaning | Tiles/joints + possible glass | Mainly glass and profiles |
| Design character | More architectural | More minimal |
| Waterproofing | Very critical | Critical to unions |
| Cost | Medium, per details | From medium to high |
| Light | It can cut light | Light comes through |
The first mistake is to build the parapet without planning its waterproofing. If it is treated as a simple interior wall, sooner or later the moisture will find a weak point. The second mistake is the flat top without a slope. Water and salts collect there, and maintenance becomes difficult.
Another common mistake is to make it too tall in a small bathroom. The owner wants privacy, but ends up darkening and making the space smaller. Conversely, a lower parapet with glass above can give better balance.
Finally, the relationship with the cabin is often forgotten. If glass is going to be placed on the parapet, support must be provided in advance. It's not right to build the parapet and then figure out how to screw the glass in without damaging the seal.
| Inquiry | Yes / No |
|---|---|
| Is there a clear reason for the parapet? | Yes / No |
| Do you want privacy or better water control? | Yes / No |
| Is its height designed in relation to the bathroom? | Yes / No |
| Will the top slope towards the shower? | Yes / No |
| Is complete waterproofing provided? | Yes / No |
| Will sealing tape be put in the corners? | Yes / No |
| If glass is inserted, is proper support provided? | Yes / No |
| Is the liner easy to clean? | Yes / No |
| Doesn't the parapet darken the space too much? | Yes / No |
| Have investment and cap costs been calculated? | Yes / No |
In a small bathroom where the shower is next to the basin, a low parapet can create a more comfortable visual and practical dividing line. If a clear fixed crystal is placed over it, the shower is not completely closed, but the water is better contained and the basin does not look so exposed.
In a larger bathroom, a parapet covered with the same floor tile can act as an architectural element. If a niche is added on the inside and lighting, the shower gets a much more premium feel. But there the sealing of the niche and the parapet must be done very carefully.
In a very small and dark bathroom, a high parapet can be a mistake. It can hide the shower, but at the same time cut off light and make the space look cramped. A lower parapet or full glass might be better there.
A built half-wall is an excellent solution when it serves a real purpose: privacy, splash control, glass support, or a stronger architectural composition.
Do not build it just because it “looks nice.” In a small bathroom, it can block light and make the room feel tighter.
The top of the wall should slope back toward the shower, and the waterproofing has to continue across every surface that will get wet.
If glass will be mounted on top of it, design the support before construction starts. Do not drill into it later without knowing exactly how the waterproofing is detailed.
The built-in shower enclosure is a solution that can give the bathroom character, practicality and a more architectural feel. It's not just a cabin alternative. It is a way to organize the space, give privacy, limit the water and create a more complete composition.
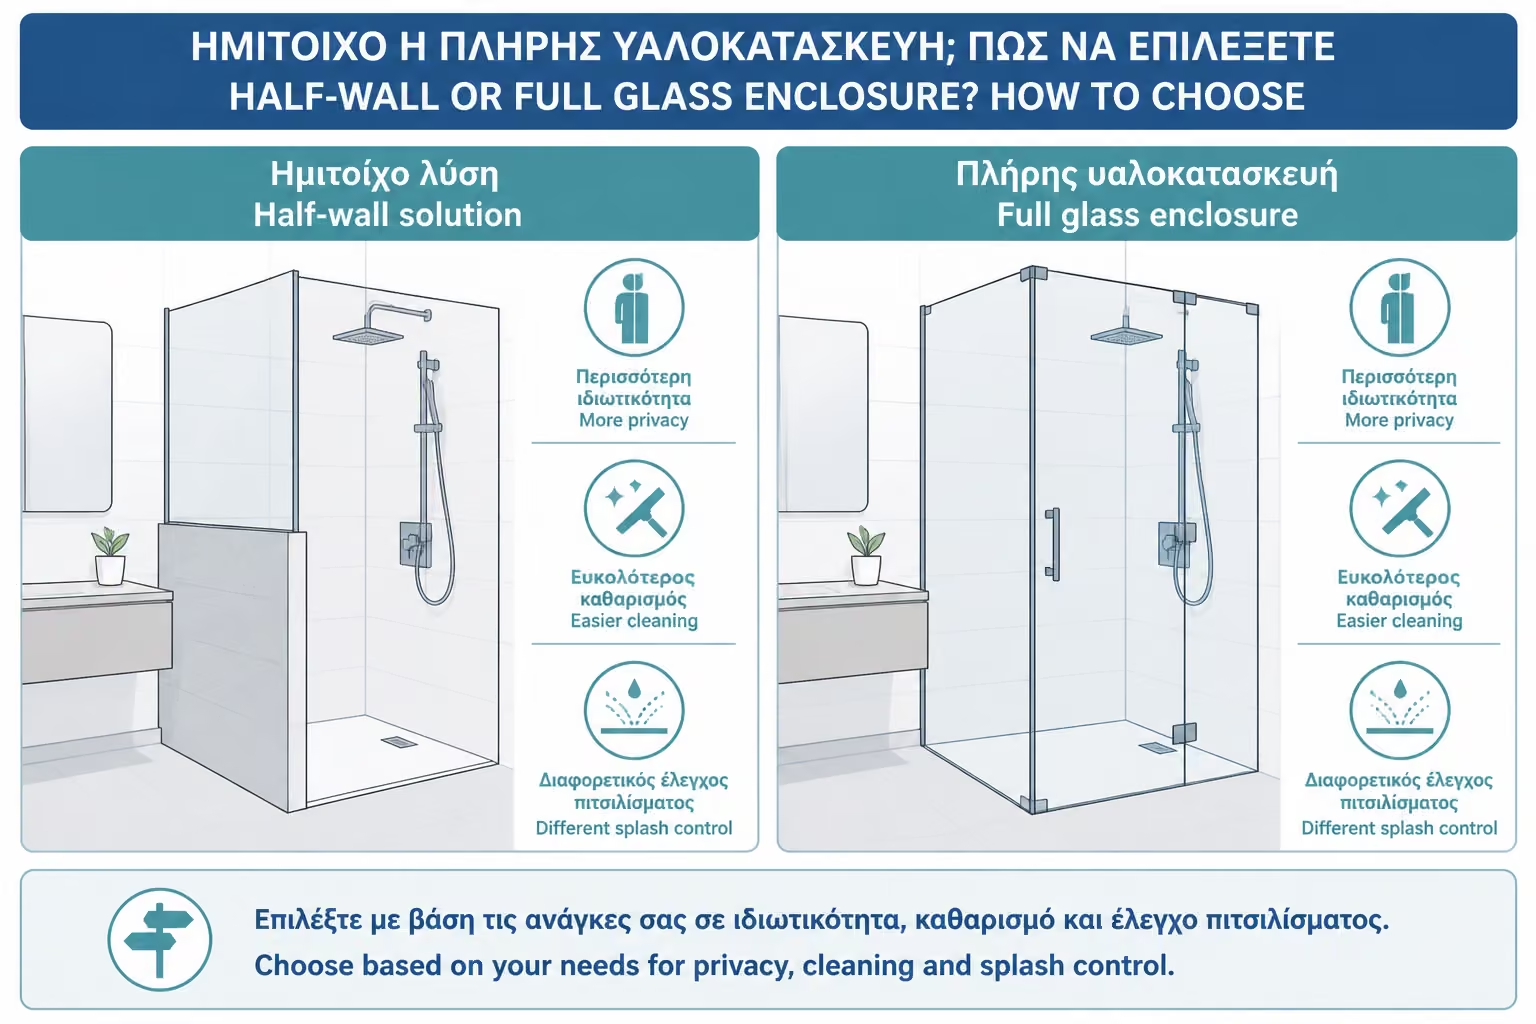
Compared to a fully glass enclosure, the enclosure is more compact, more private and often more practical in the low part of the shower. Glass, on the other hand, opens up the space more and lets light through. That's why combining a built-in parapet with a crystal is often the best solution.
But success is judged in the details. Correct height, correct slope at the top, complete waterproofing, suitable lining, careful connection with glass and easy cleaning. If these are done correctly, the enclosure can really upgrade the shower. If done lightly, it can become another point of moisture and maintenance.
The best choice is the one that balances between design and daily use.
Return to category.
Go to categoryReturn to the central guide.
Go to guide