IP55 / IP65
They protect against dust and water falling under pressure (eg rain or a watering hose). It is the minimum standard for external antennas.
You have perfectly covered the interior of your home. But, in summer we all move outside: to the balcony, to the garden, to the grill or by the pool. And there, we find that the internet is crawling.
Many try to solve this problem by putting the indoor router next to the glass of the balcony door. This rarely works, especially in modern homes, because energy glasses (Low-E) have a thin, invisible metal coating on the inside that reflects heat, but at the same time acts as a perfect "shield" that blocks Wi-Fi!
The only correct solution is to go outside, installing Outdoor Access Points. However, the outdoors is a hostile environment for electronics. As engineers, when designing outdoor networks, our greatest enemy is not distance, but water, sun and lightning. Let's see how to set up your outdoor Wi-Fi to withstand time and weather conditions.
Never, ever, install an indoor Access Point outdoors, even if it's under a covered balcony. The moisture in the air in the morning (dew) will penetrate the board and oxidize it within a few months.
External APs have special enclosures that are rated with the IP Protection Index (Ingress Protection).
The "Hidden" Problem: Ultraviolet Radiation (UV) In addition to water, the outer casing must be made of UV-Stabilized plastic. The Greek sun in summer is relentless. Simple plastics "burn", turn yellow, become brittle like an eggshell and eventually break, allowing water to enter.
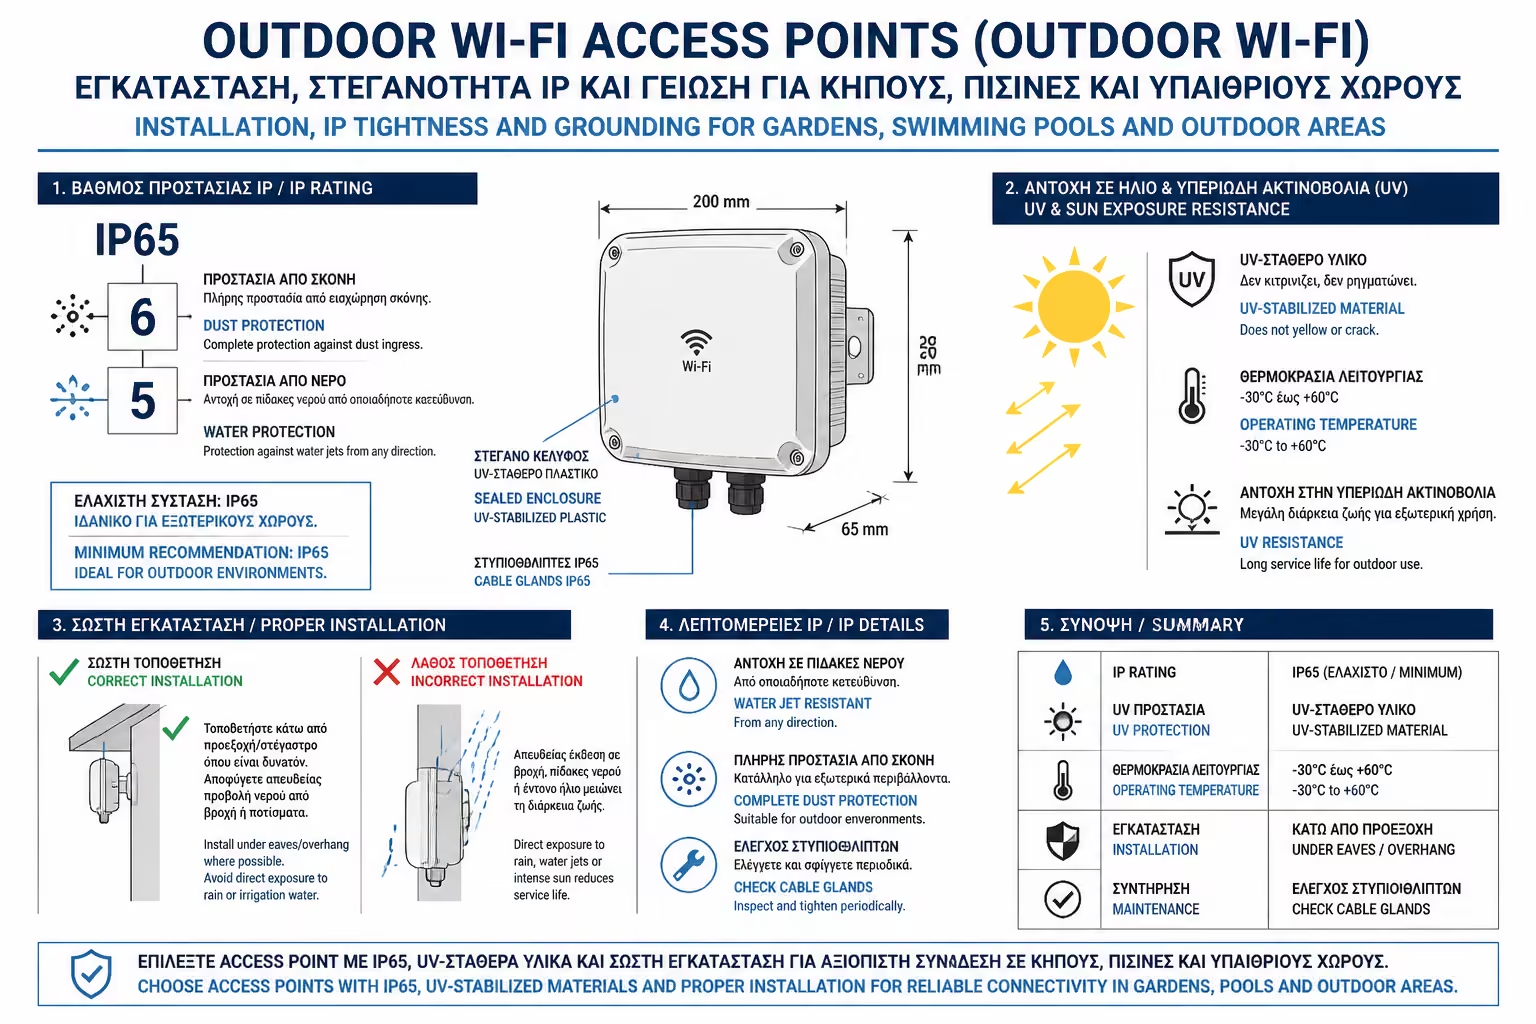
They protect against dust and water falling under pressure (eg rain or a watering hose). It is the minimum standard for external antennas.
They are completely dustproof and withstand even temporary immersion in water.
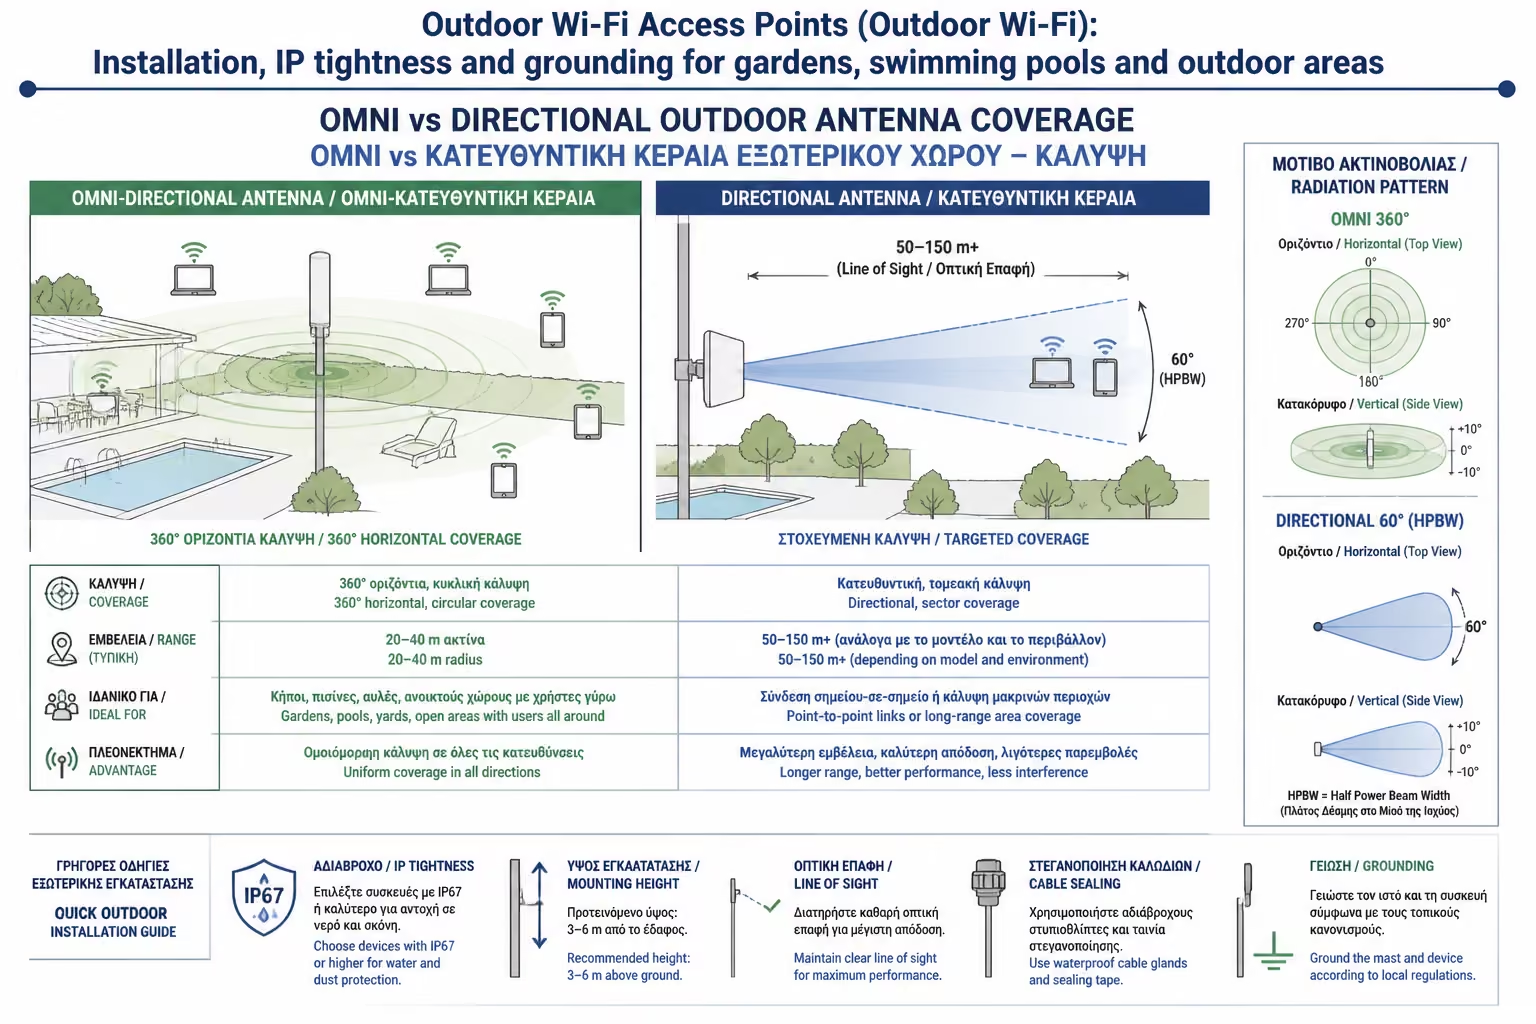
Outdoors, we don't have walls to limit the signal, so the design changes. Depending on your space, you will choose a different antenna shape:
They emit the signal circularly (360 degrees).
Ideal for placing in the center of a yard, on a mast, or in the center of a large pergola, to cover the space evenly around them.
They emit the signal at a specific angle (eg 90° or 120°) throwing all their energy forward, like a spotlight.
They are screwed to the outer wall of the house and "look" towards the garden or the pool. So they don't waste signal towards the wall, but "shoot" it dozens of meters away, reaching the edge of your plot.
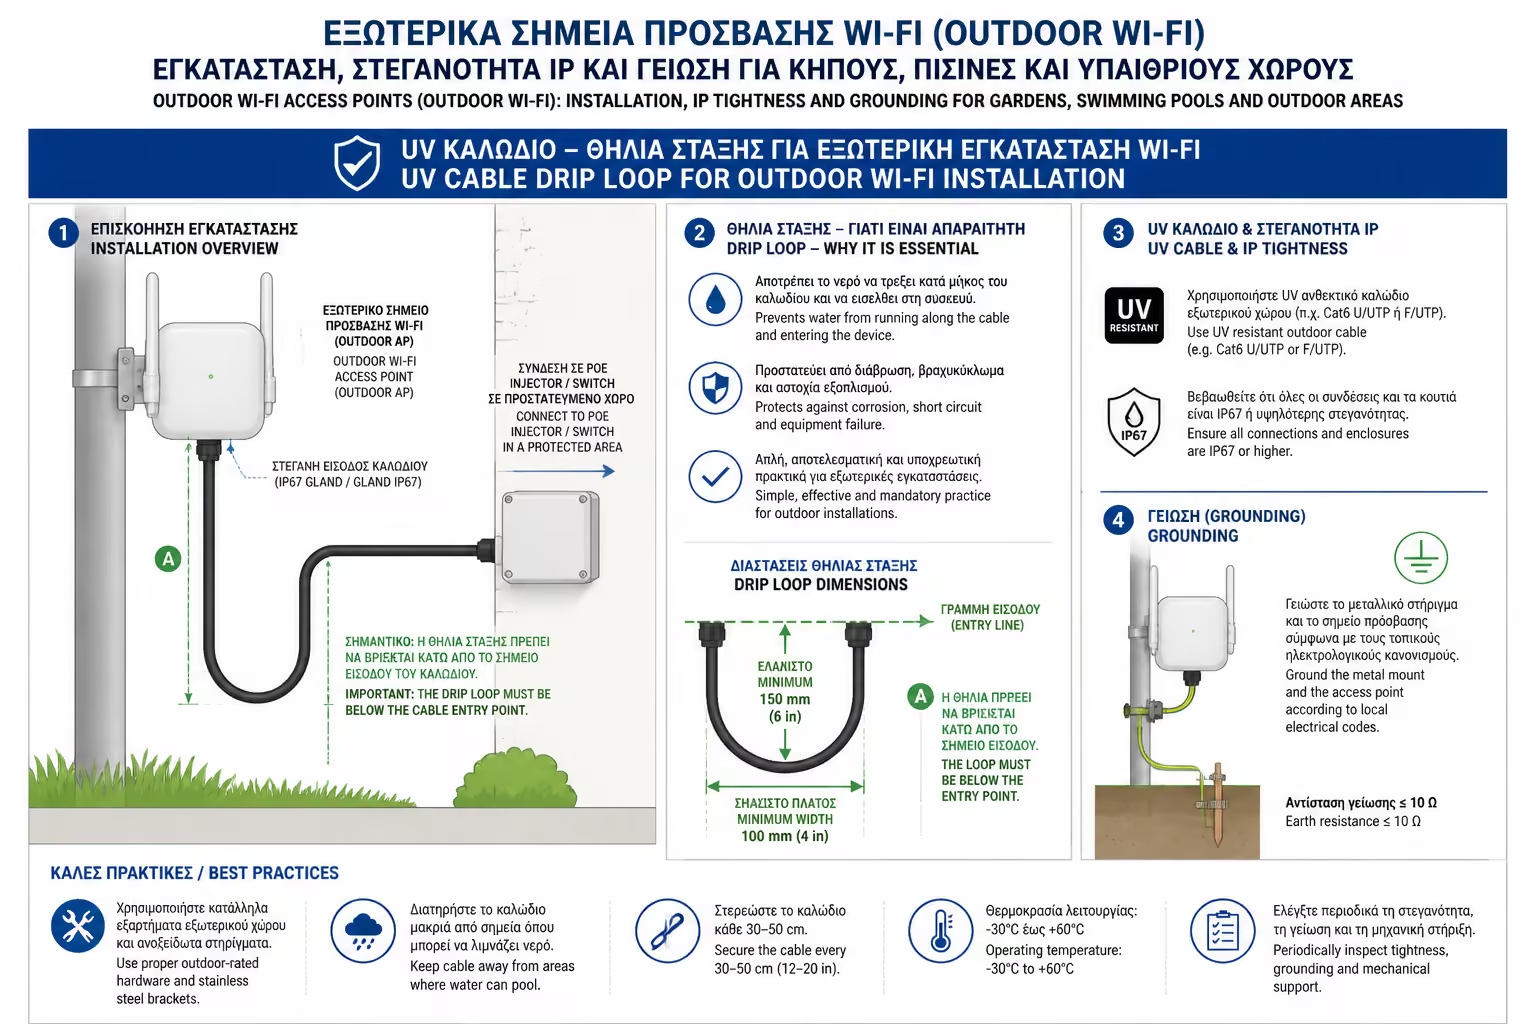
As with the devices, the classic, gray UTP cable (which has a PVC sheath) is prohibited outdoors. The sun will make it peel in a year.
The Drip Loop Rule: This is the old plumbers secret. When the cable reaches the outdoor antenna, it should never come down from above directly into its socket. Rain water will run down the cable and go straight into the network port!
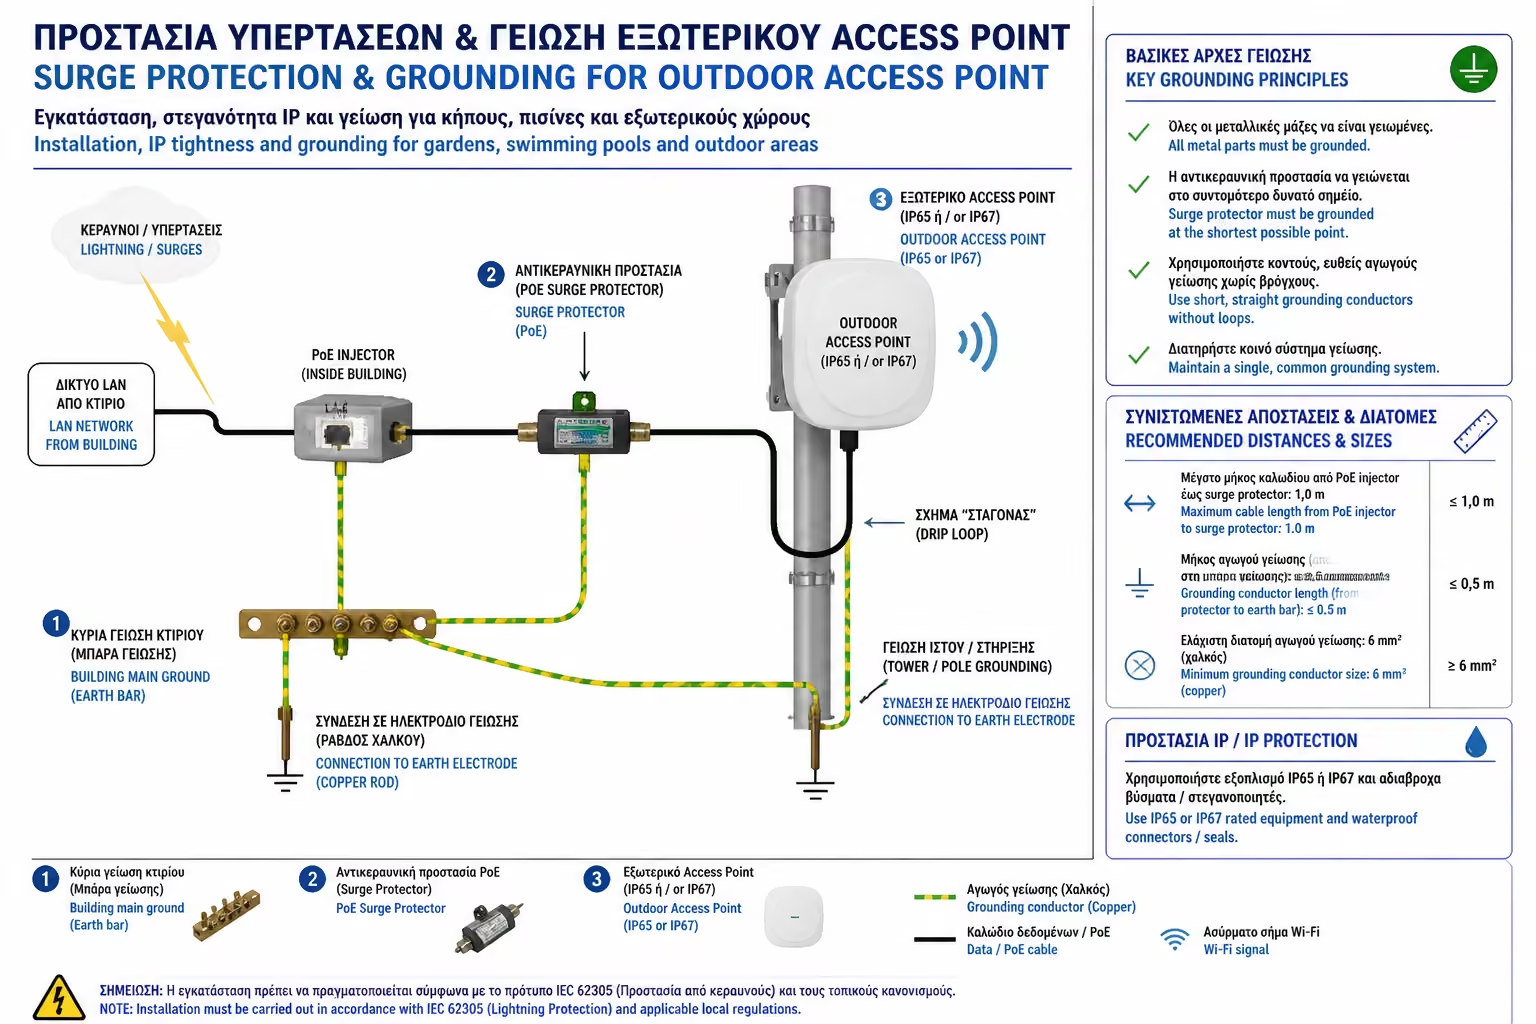
This is the most critical piece of safety, often overlooked in home installations, with disastrous consequences.
When you place an antenna on a mast in the garden or high on the roof, you create an excellent "lightning rod". Even if lightning doesn't strike it directly, a lightning strike 1 kilometer away, or even dry air blowing the plastic of the antenna, creates a huge build-up of Electrostatic Discharge (ESD). If this static electricity travels through the Ethernet cable into your home, it will "burn" your expensive central switch and possibly your server.
The 3 Step Solution:
Installing Wi-Fi in the garden is not just about "moving" an indoor antenna outside. It requires IP65/IP67 rated materials, UV resistant black cables and the strategic "Drip Loops" design for rain water. Most important of all, however, is the installation of Surge Protectors at the boundaries of your building, so that the external network does not become the "Trojan Horse" that will transfer the static electricity of the storm to the sensitive devices of your home.
Next Step: We now know where to put the antennas (inside and outside), which cables to use and how to calculate the walls. But in a large building or hotel, guessing is not enough. How do the engineers know exactly where each antenna should go before the wall is even built?
We continue in the professional "Magic" of networks: Network Heatmaps (Wi-Fi Planning): How professionals plan the perfect coverage without "dead" zones before the building is even built.
Return to category.
Go to categoryReturn to the central guide.
Go to guide