Type GU10 (Works at 230V)
The base of the lamp has two thick, flat pins (like small mushrooms). Snaps on with a slight twist (like the old starters on fluorescent lamps). This is the easy case.
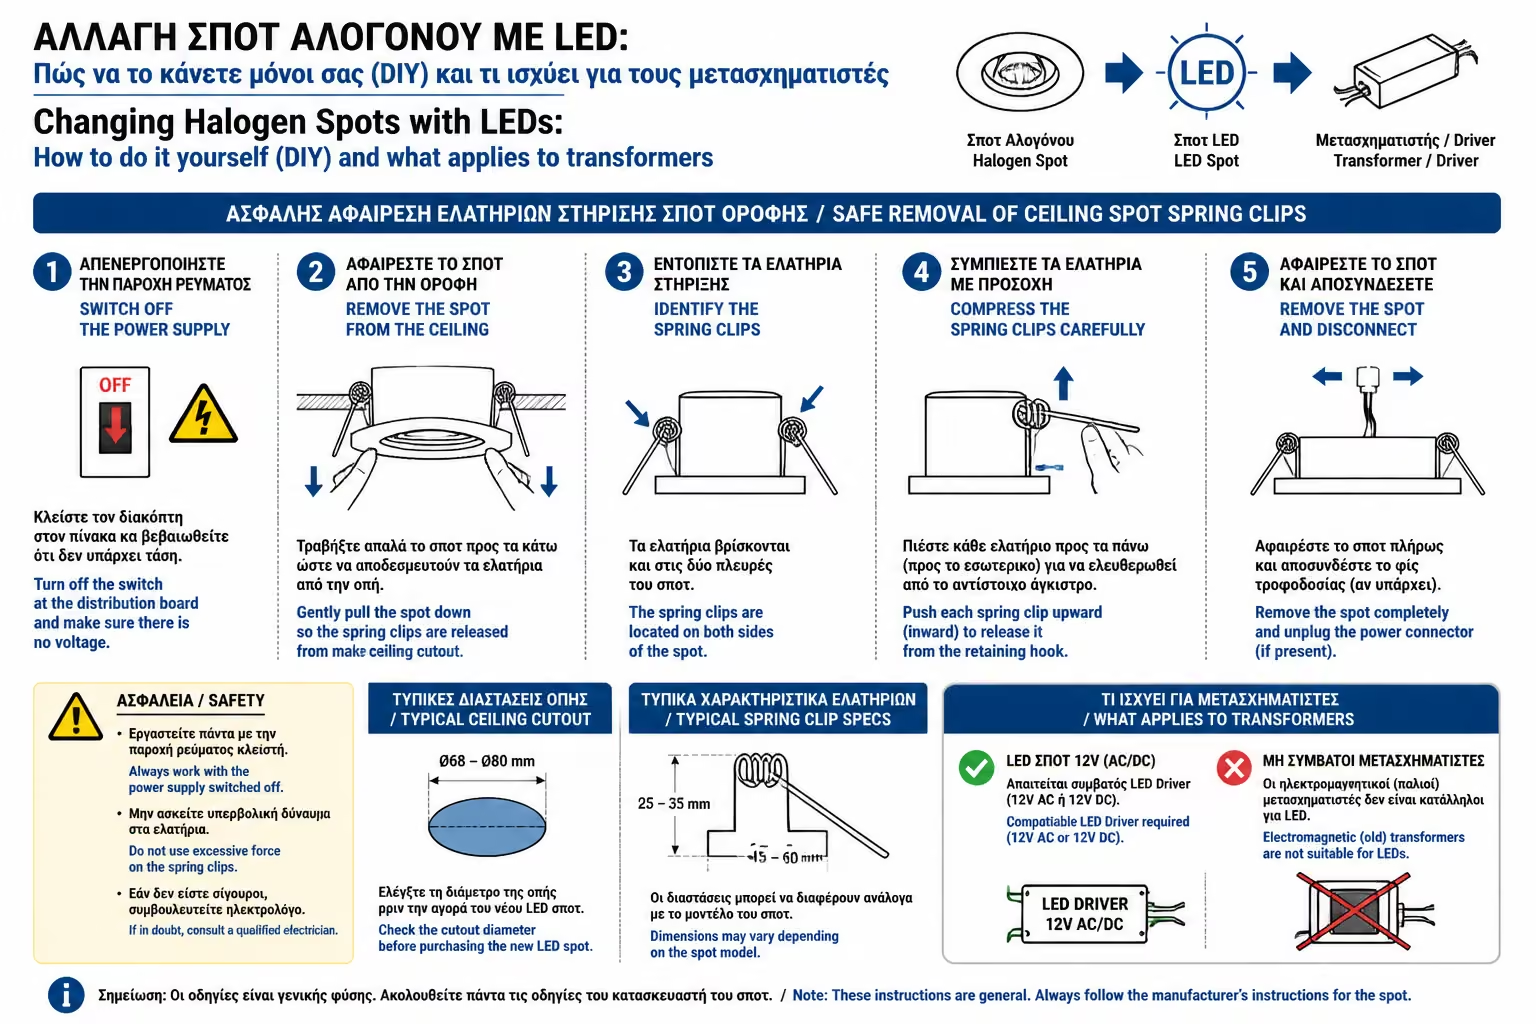
If your home was remodeled or built before 2015, chances are the drywall in your living room or bathroom is filled with the classic, recessed halogen downlights.
These lamps were once the ultimate symbol of luxury, but today they are an energy "black hole". A typical halogen spot consumes 50 Watts and converts 90% of that energy into pure heat (it literally scalds to the touch), wearing out cables and increasing your bill. The corresponding LED lamp consumes only 5 Watts (90% saving), does not heat up at all and produces exactly the same light.
Replacing them is one of the most profitable Do-It-Yourself (DIY) jobs you can do. As engineers, let's see step by step how to change safely and solve the big "puzzle" with the old transformers.
Before you go to the store, you need to take out an old lamp to see what "clamp" (dui) it has. There are two main types of houses:
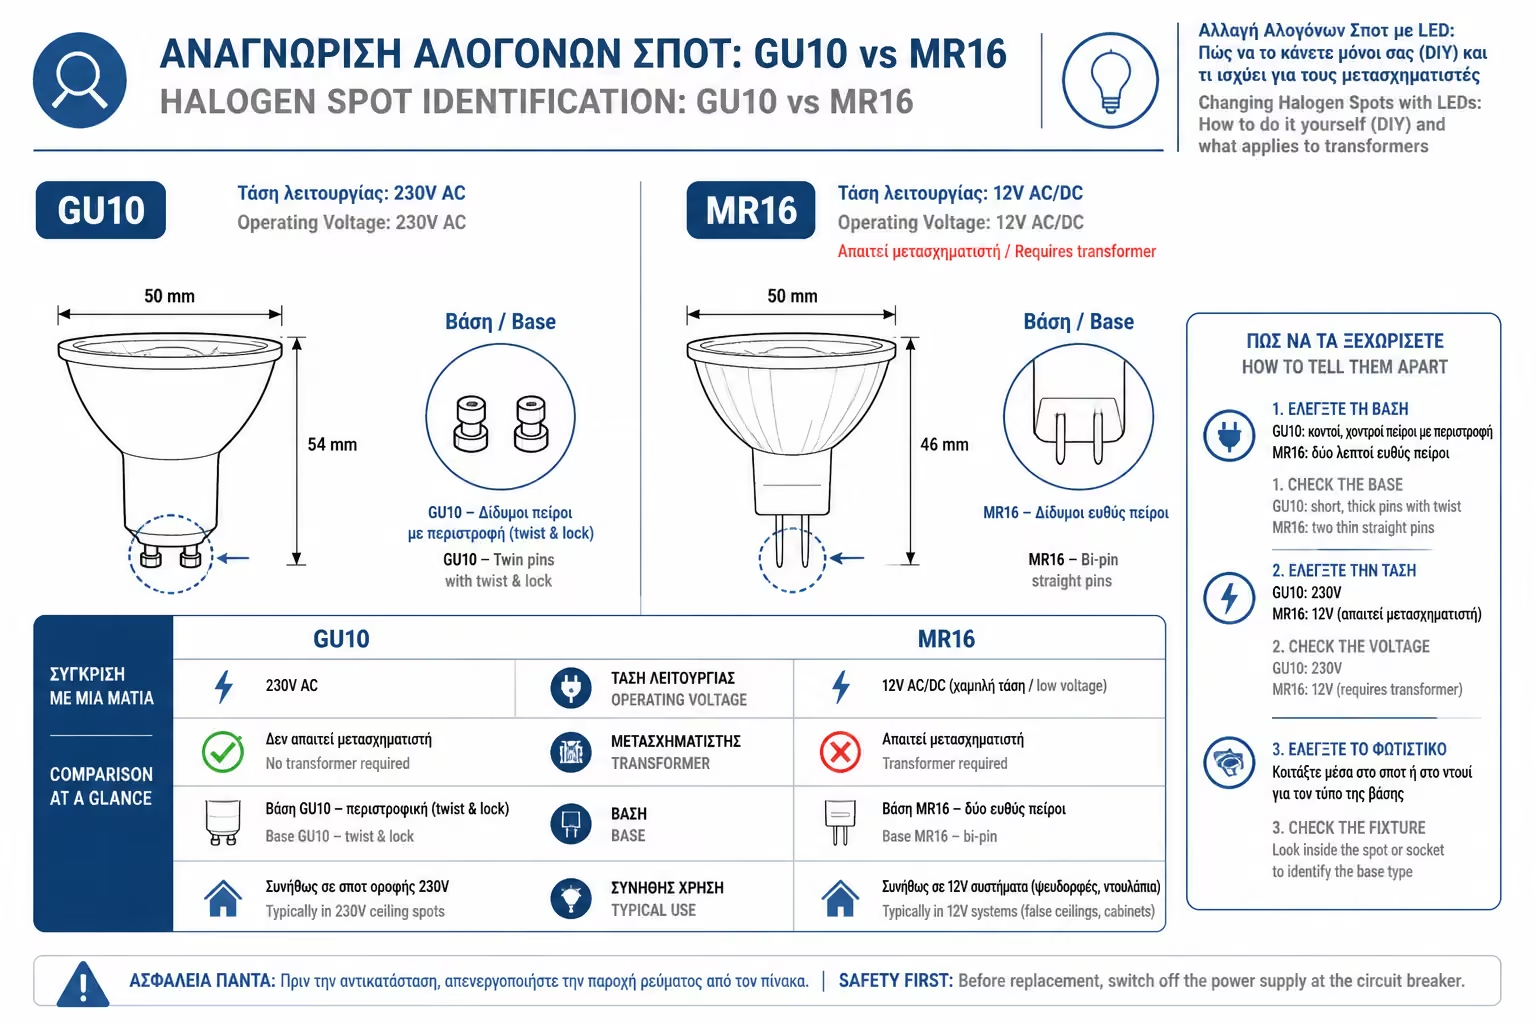
The base of the lamp has two thick, flat pins (like small mushrooms). Snaps on with a slight twist (like the old starters on fluorescent lamps). This is the easy case.
The base has two thin, sharp "spikes". It snaps into place by simply pushing it into the slot. Because it works with 12 Volts, there is a transformer hidden inside the plasterboard. This is the "wicked" case.
SAFETY RULE: Before touching anything, remove the light switch and ideally the corresponding fuse from the panel. Wait 10 minutes if the halogens were on because they will burn your fingers.
If you find that you have the thick "legs" (GU10), you are in luck. The process is literally Plug & Play.
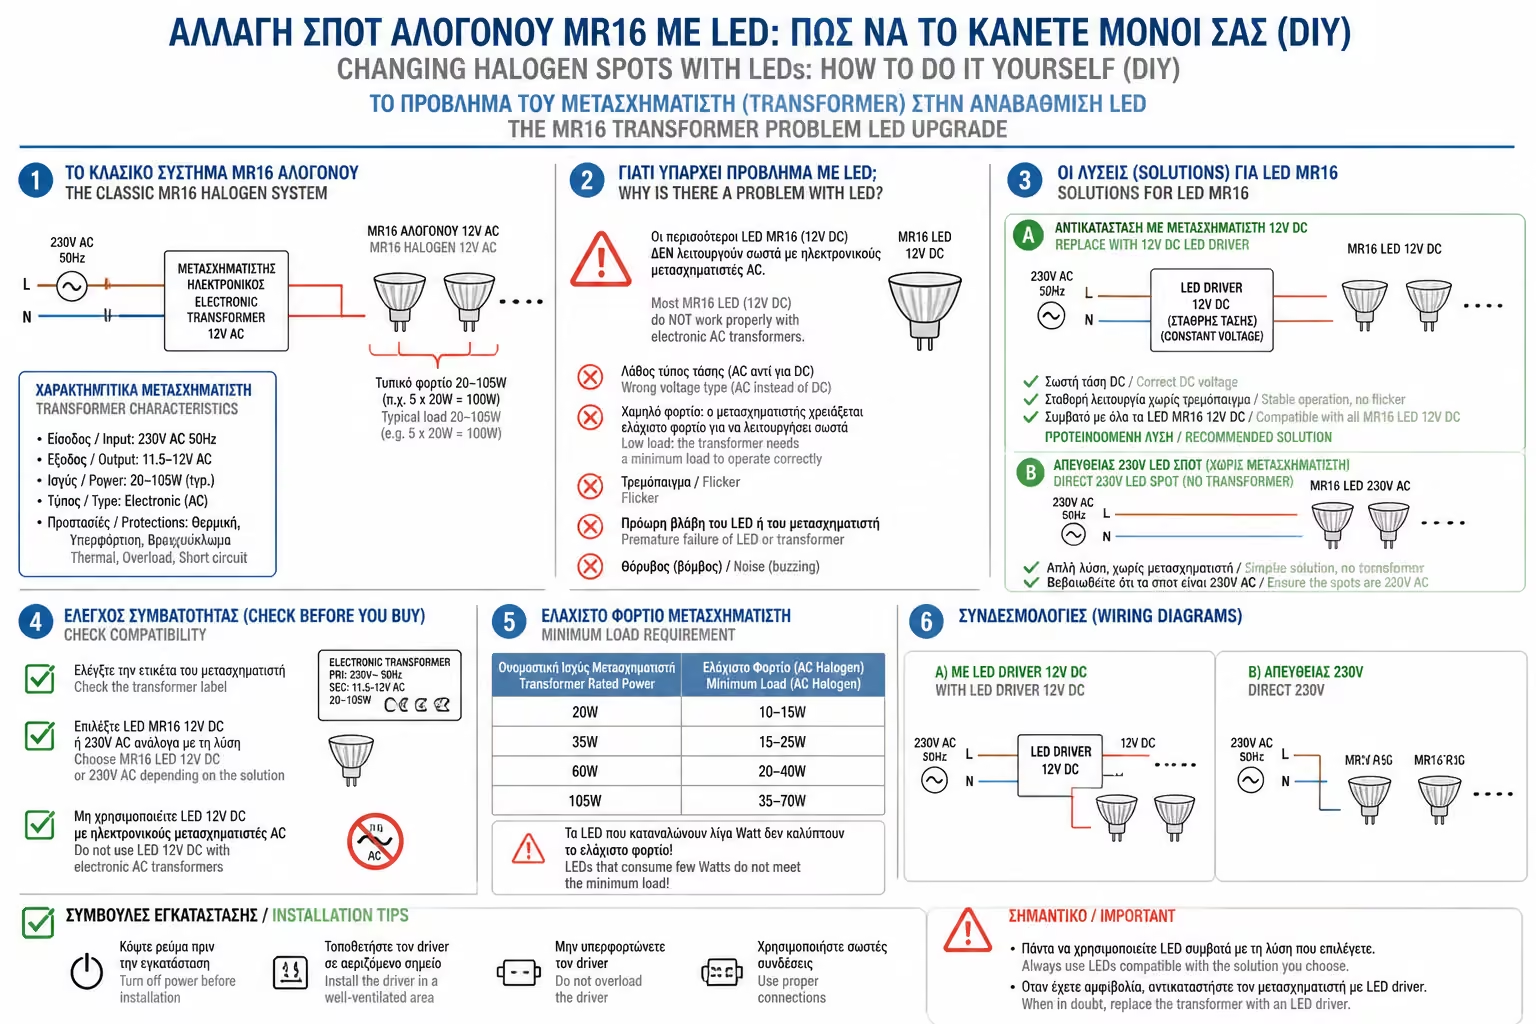
If you have the lamps with the thin studs (12V), things get complicated. You can of course go buy MR16 (12V) LED bulbs and just bolt them to the old dolly. But in 8 out of 10 cases, as soon as you hit the switch, the new LEDs will start to flicker like a disco or won't light up at all.
What's wrong? The old plasterboard transformer! The old electronic halogen transformers require a "Minimum Load" to start working. They usually say "20W - 60W" on them. As long as the old bulb was burning 50W, everything was fine. But your new LED bulb only burns 5W! The transformer does not even understand that there is a lamp connected to it, it gets confused and malfunctions (Flickering).
(Note: The following step involves bare wires, so if your hands don't "grab" them, call a licensed electrician).
Thus, you are saved forever from burning transformers, and your system becomes completely reliable.
You can change the transformer with a new one, special for LED (LED Driver). But the most correct, permanent and "clean" solution applied by all professionals during the renovation, is the complete removal of the transformer.
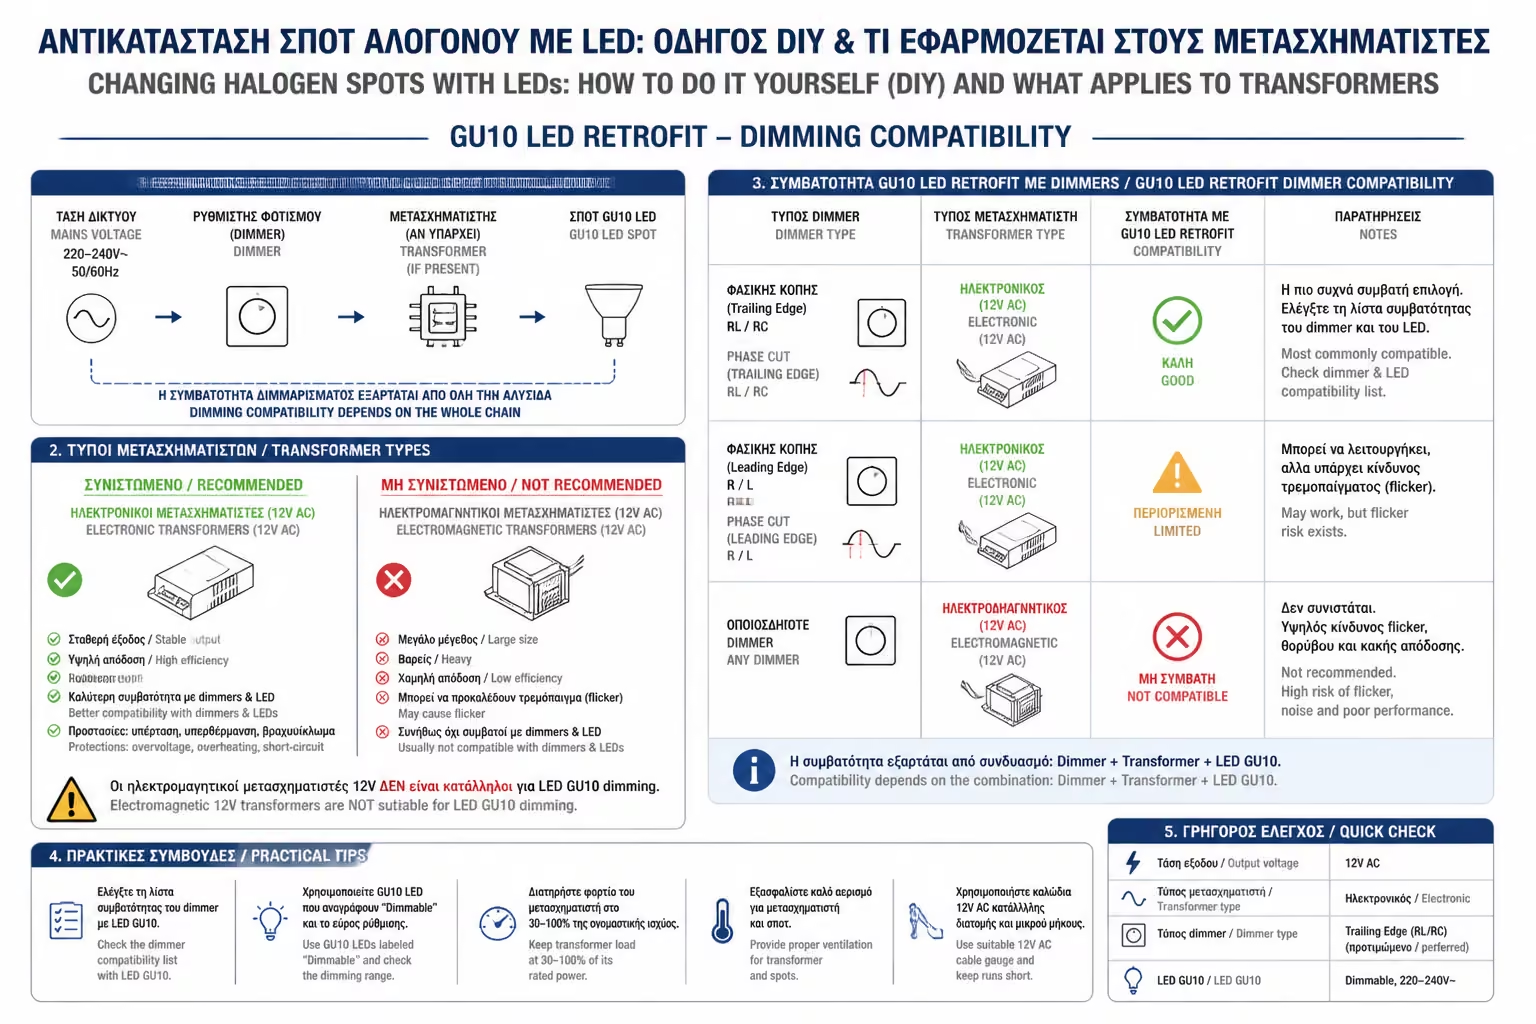
Last but critical rule: All old halogen bulbs were inherently "Dimmable". You could dim them with the rotary switch (dimmer) on the wall.
Not all LED bulbs are Dimmable! Their board has a special circuit.
Switching from halogen to LED is an investment that pays for itself in less than a year through the electricity bill. Identify your dui, respect the safety rules, remove the old transformers (where possible) and give a cool, modern breath to your living room.
Next Step: We solved the ceiling replacement issue. But what about "pass-through" spaces, where we don't necessarily want bright ceiling lighting? Continue to our guide: Stair & Corridor Lighting: Ideas for recessed wall spots and automation with motion detectors.
Return to category.
Go to categoryReturn to the central guide.
Go to guide