
Kitchen Lighting: How to properly light the worktop without shadows (LED Strips & Spots)

The kitchen has long ceased to be just the place where we cook. In modern homes, it is the core of social life, the place where we drink our coffee, where the children read and where we welcome our guests. However, from an electrical study point of view, the kitchen is above all a laboratory.

The biggest and most annoying mistake we encounter every day as engineers are brand new, expensive kitchens where the owners struggle to cut vegetables... in the dark.

Why is this happening? Because the lighting design was based on the wrong logic. Let's analyze the "Shadow Syndrome" and see how the right Task Lighting with LED strips or spots solves the problem once and for all.

1. The Fallacy of Central Lighting (The "Shadow Syndrome")

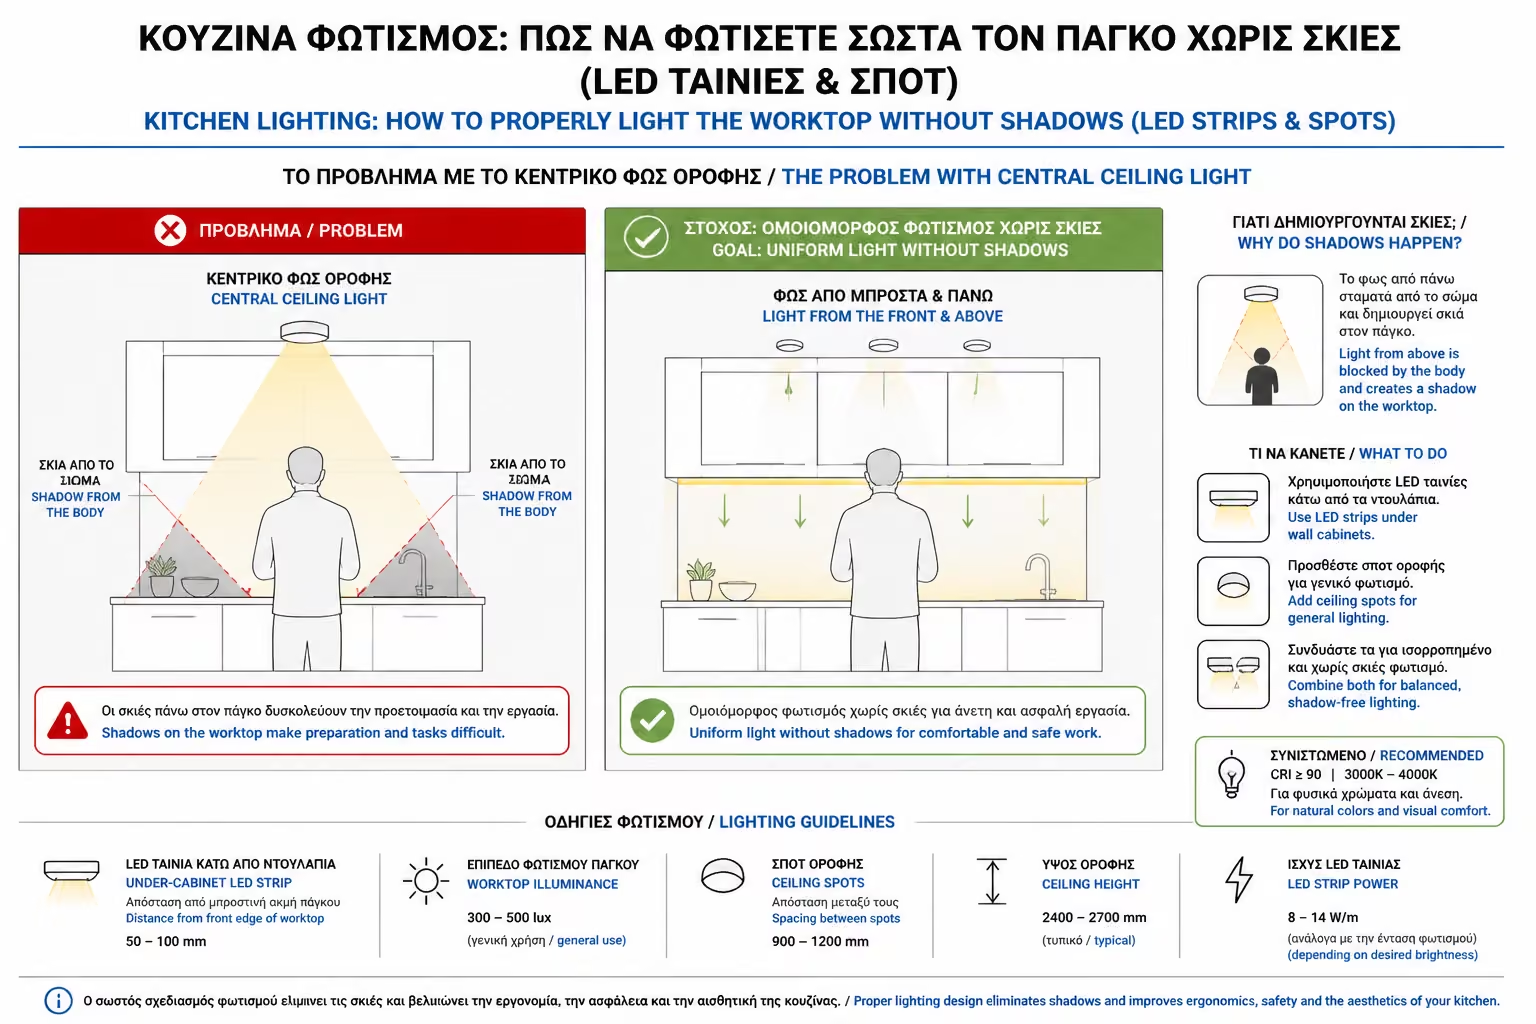
In older builds (but unfortunately in many modern ones as well), the contractor simply left a central power supply in the middle of the kitchen ceiling.

Let's see what happens in practice: The workbench is located around the perimeter, attached to the walls. When you go to the counter to cook, you turn your back to the center of the room. Your body gets right between the central ceiling light and the counter, creating a huge, dark shadow right where you're holding the knife! The central light illuminates the floor perfectly, but leaves the counter in dim light.

The solution is clear: Countertop lighting should come in front of and above you, not behind you.

Illustration for 1. The Fallacy of Central Lighting (The "Shadow Syndrome")

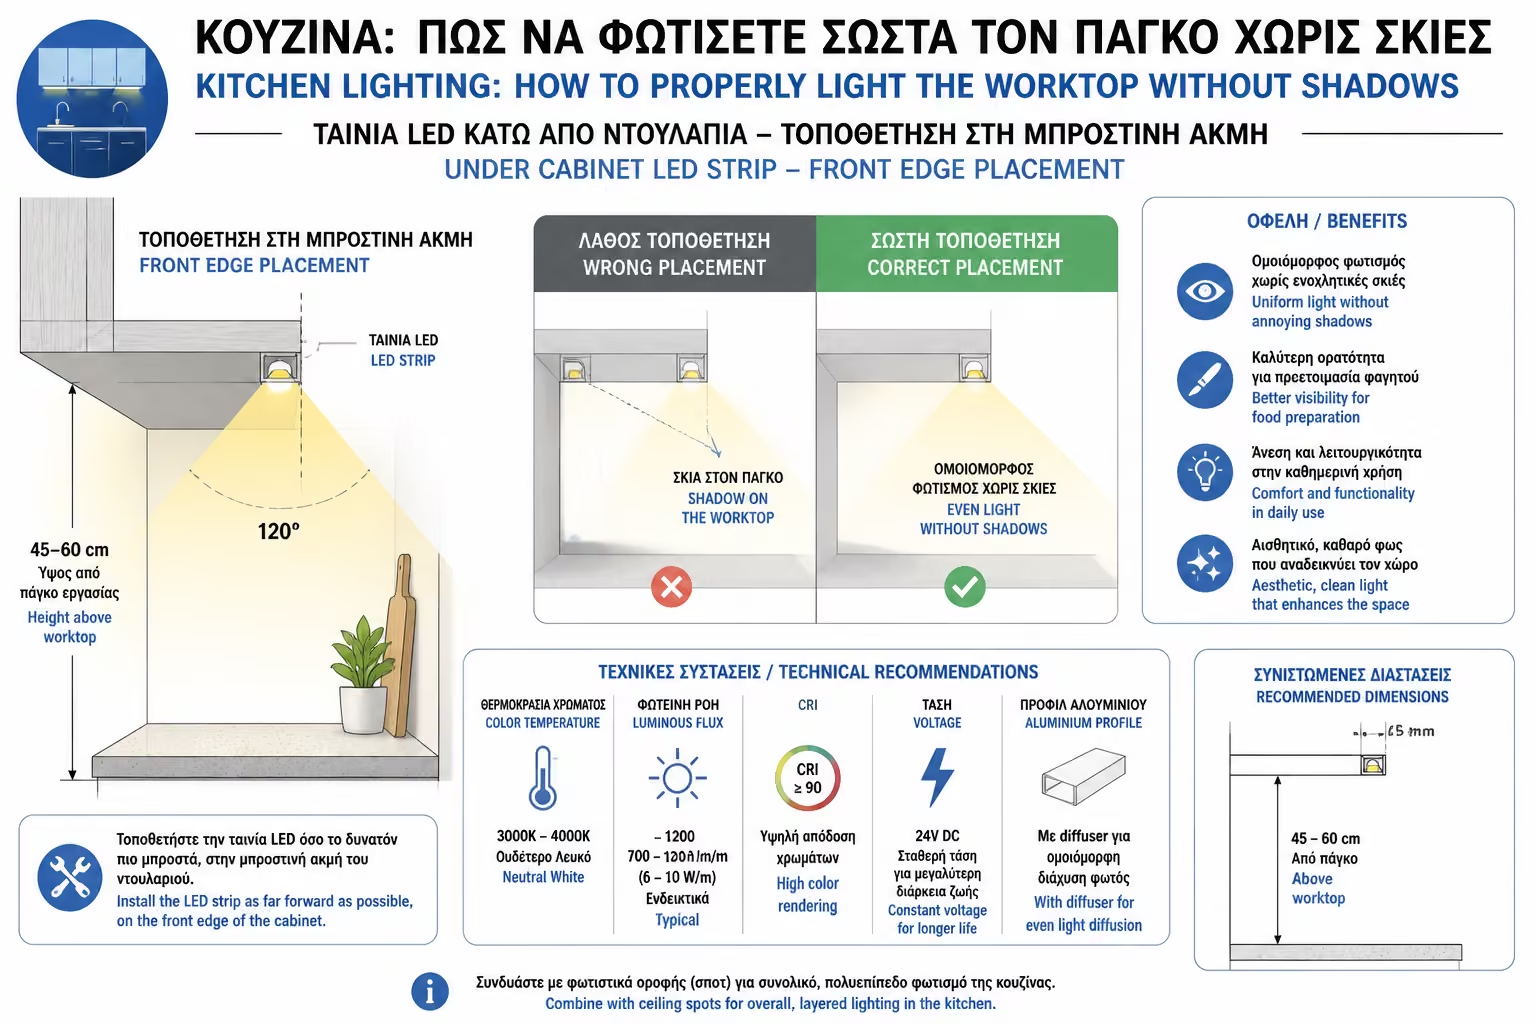
2. The Solution: LED strips under the upper cabinets

Illustration for 2. The Solution: LED strips under the upper cabinets

If your kitchen has a series of "upper cabinets" (hanging), you have the ideal infrastructure. Installing linear lighting (LED Strip) on the bottom of these cabinets is the ultimate solution. But how is it positioned correctly?

Engineer's Tip: If there is no fascia/cuttle on the cabinet, use an Aluminum Corner Profile (45 degrees) placed in the corner between the cabinet and the wall, so that it "throws" the light diagonally towards the center of the counter and not vertically down.

A. The Wrong Position (Stuck on the wall)

Many electricians or carpenters hide the LED strip all the way back, right where the cabinet meets the wall tiles (the "back" of the kitchen). The result:* The light "hits" the tiles hard creating a sheen and illuminates the back half of the counter, leaving the front (where you work) dark.
B. The Right Position (On the Front Lip)

The LED strip inside its aluminum profile must be placed on the front, outer lip of the cabinet (behind the small "bezel" / lowering of the door, so that the aluminum is not visible). The result:* The light falls right in the center of the counter, perfectly illuminating your hands and the work surface. Also, if you're sitting at the kitchen table, the light is hidden behind the bezel and doesn't "blind" you (doesn't cause glare).

3. What if I don't have upper cabinets? (Islands and free walls)

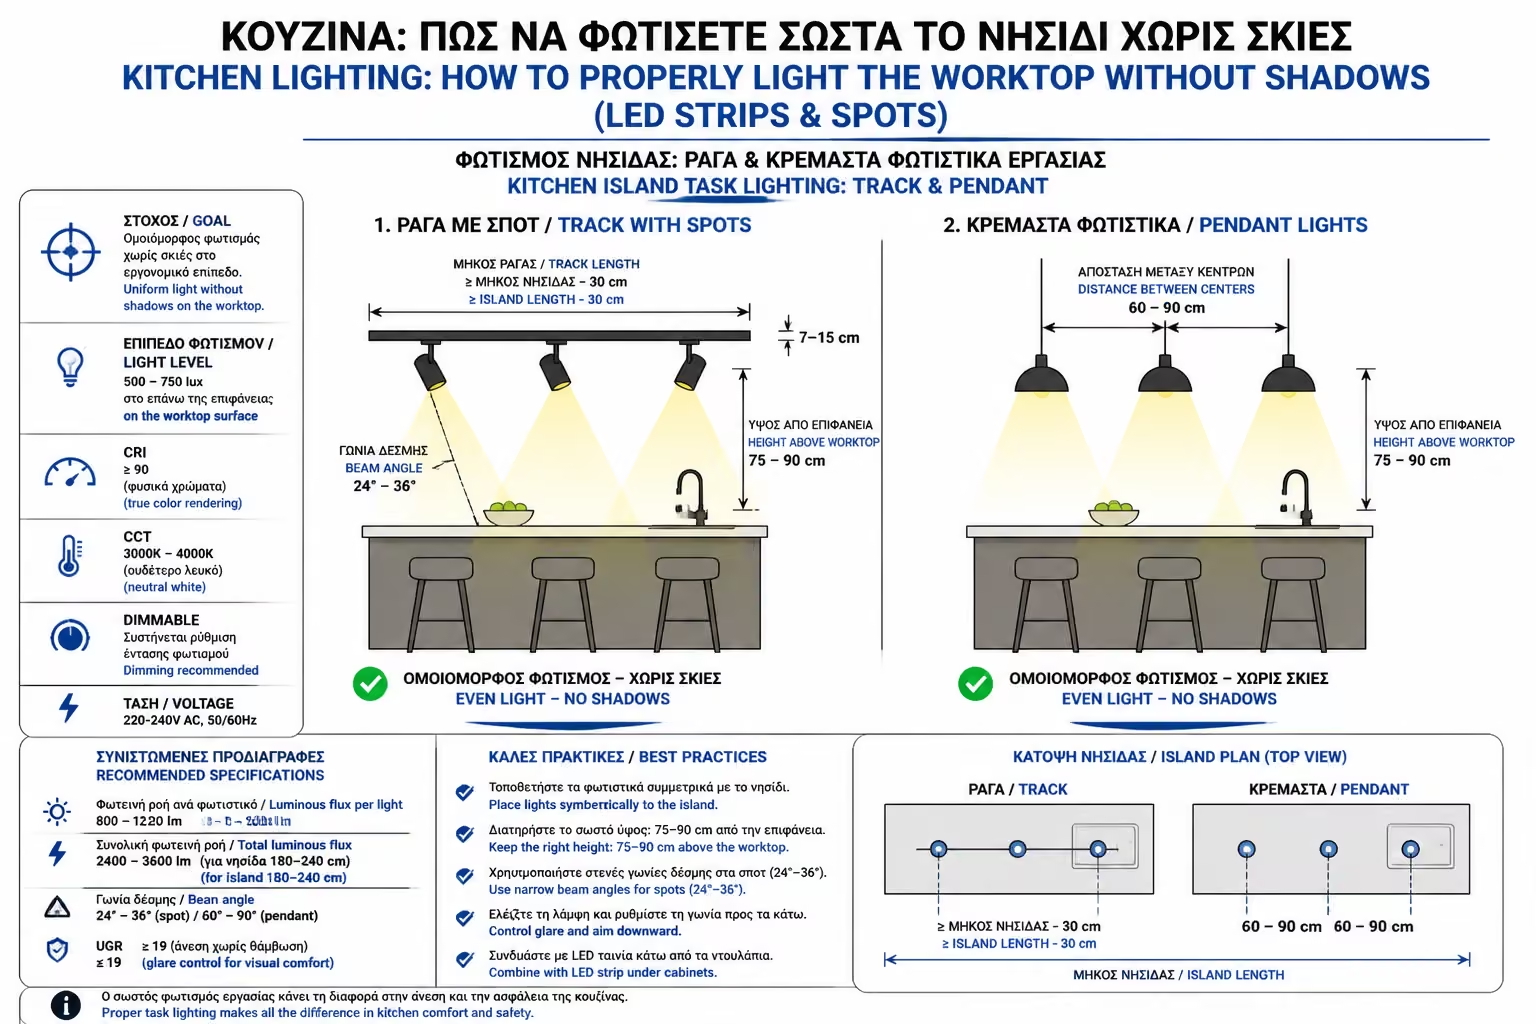
The modern minimalist trend often eliminates the upper cabinets, leaving the counter free or creating large islands (Islands) in the middle of the space. Here the LED strip has nowhere to hide. Ceiling Spots (Recessed or External) provide the solution.

Illustration for 3. What if I don't have upper cabinets? (Islands and free walls)

The Rule of Vertical Placement

Spots should go into the ceiling, just above the center of the counter or island. Not behind the man who cooks!

The Choice of Beam (Beam Angle)

Don't get spots that "turn on" the light everywhere (eg 120 degrees). They will fill the space with diffused light and you will lose the intensity. Choose a spot with a directional (narrow) beam, usually 36° to 45°. Thus, the light will be "centered" like a theatrical spotlight exclusively on the desktop, giving an incredibly architectural and functional effect.

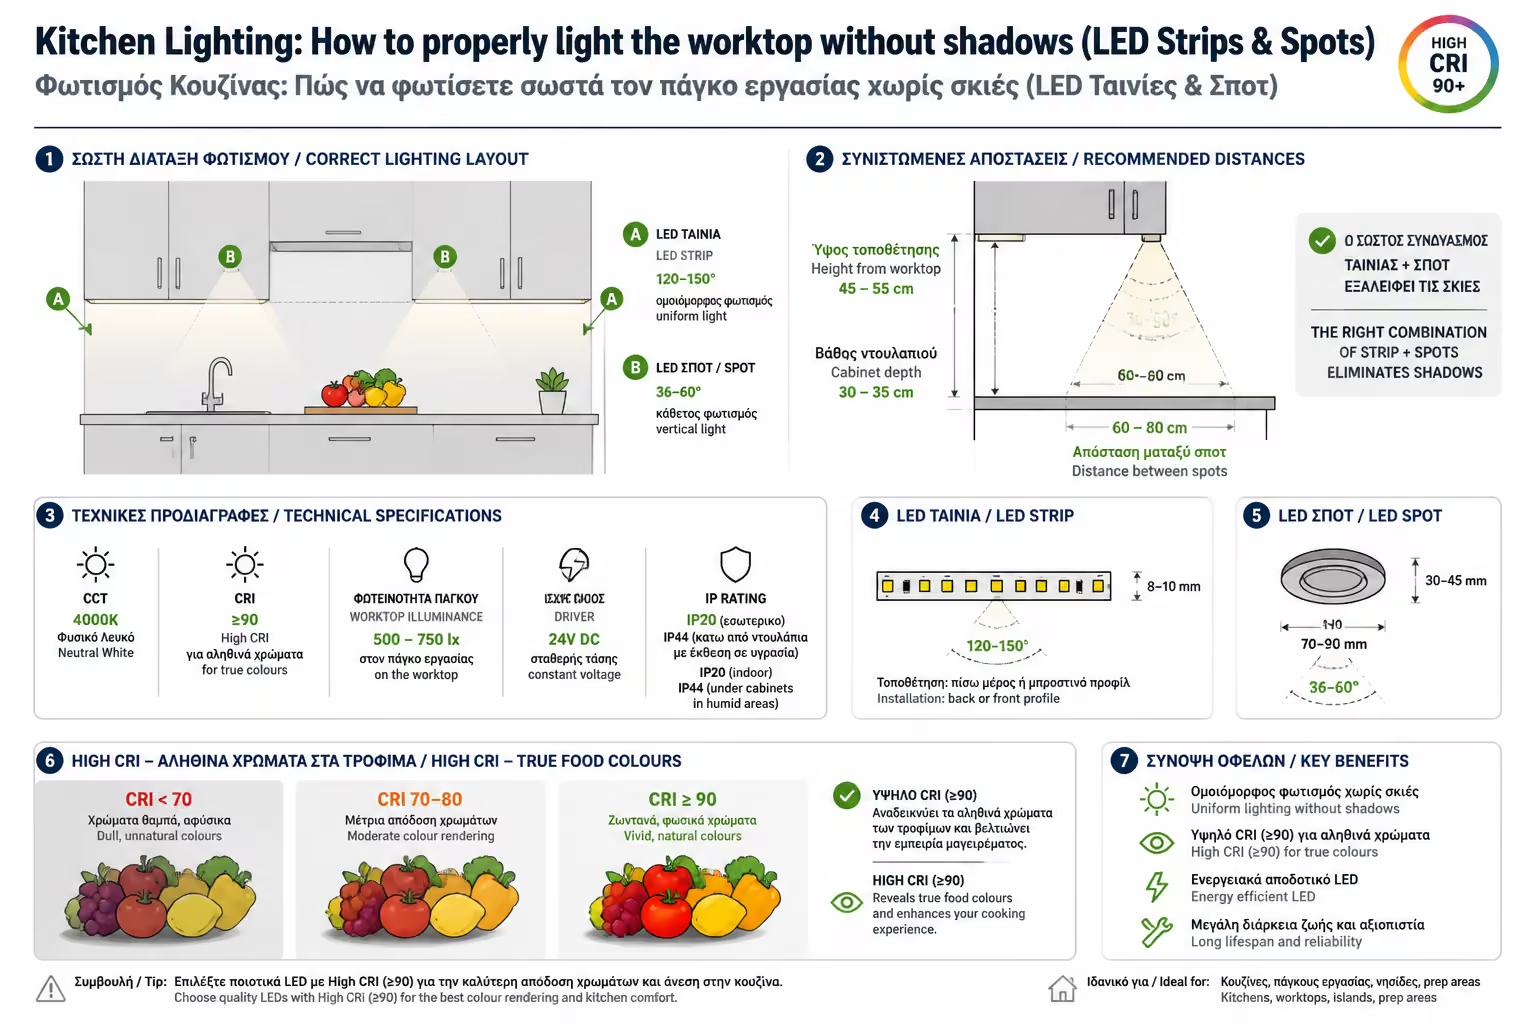
4. The detail that elevates the Kitchen: The CRI Index

Illustration for 4. The detail that elevates the Kitchen: The CRI Index

In the previous article we agreed that for the kitchen we need Natural White light (4000K) for cleanliness and alertness. But there is one more technical characteristic that is of vital importance for the kitchen: The Color Rendering Index (CRI - Color Rendering Index).

This index tells us how "true" the colors look under artificial light, with 100 being excellent (which is sunlight).

  • If you put in a cheap LED strip with a CRI < 80, red tomatoes will look faded, fresh meat will look brown and stale, and the colors of your wooden cabinets will look "dead".
  • For the kitchen counter, require LED Strips and Spots with CRI > 90 (or ideally CRI > 95). The difference in price is minimal, but the difference in how your food and kitchen ingredients look is staggering.

Summarizing

Perfect kitchen lighting doesn't need exaggeration, it needs targeting. Keep the center light or chandelier for general lighting and ambiance, but be sure to bathe the worktop in strong, directional light (4000K & High CRI), free of shadows. Cooking will turn from a chore into a pleasure.

Next Step: We solved the topic of the workshop (Kitchen). We now go to the area with the most stringent security requirements in the whole house. Water and electricity have never been good friends. Continue to our guide: Bathroom Lighting & IP Ratings: What fixtures are allowed above the shower and mirror (Zones 0, 1, 2).

Related Articles

Preview