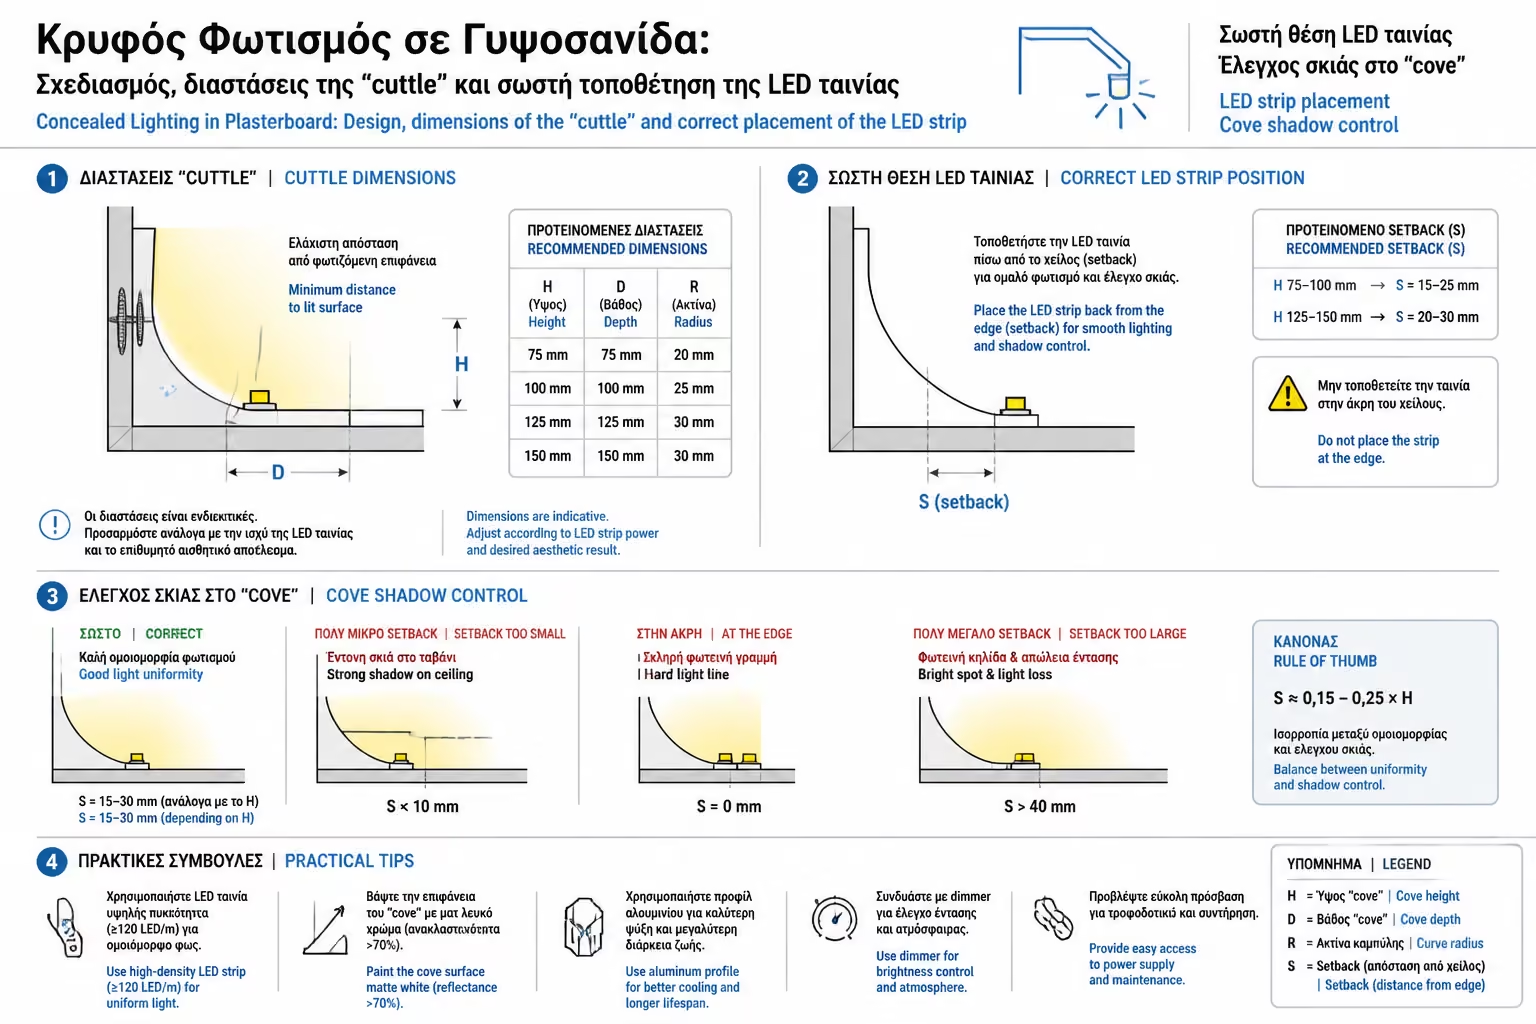
Knife height (H)
It should be at least 5 to 7 cm. If it is lower, the lighting will be too "harsh" and the film will be seen from a distance. If it is higher, it will prevent the light from reaching the ceiling.
Recessed lighting is the most powerful tool in a decorator's quiver. It has the ability to transform a "cold" space into a warm, luxurious retreat, give depth to rooms and make the ceiling appear to "float".
However, as engineers, we see the same mistake all too often: Owners who have spent thousands of euros on drywall and expensive LED strips, only to see a result full of shadows, "spots" of light, or - the worst - the LED strip itself showing through the construction.
Perfect hidden lighting is not a matter of luck, but of geometry. Let's see the ideal dimensions and technical secrets for a professional result.
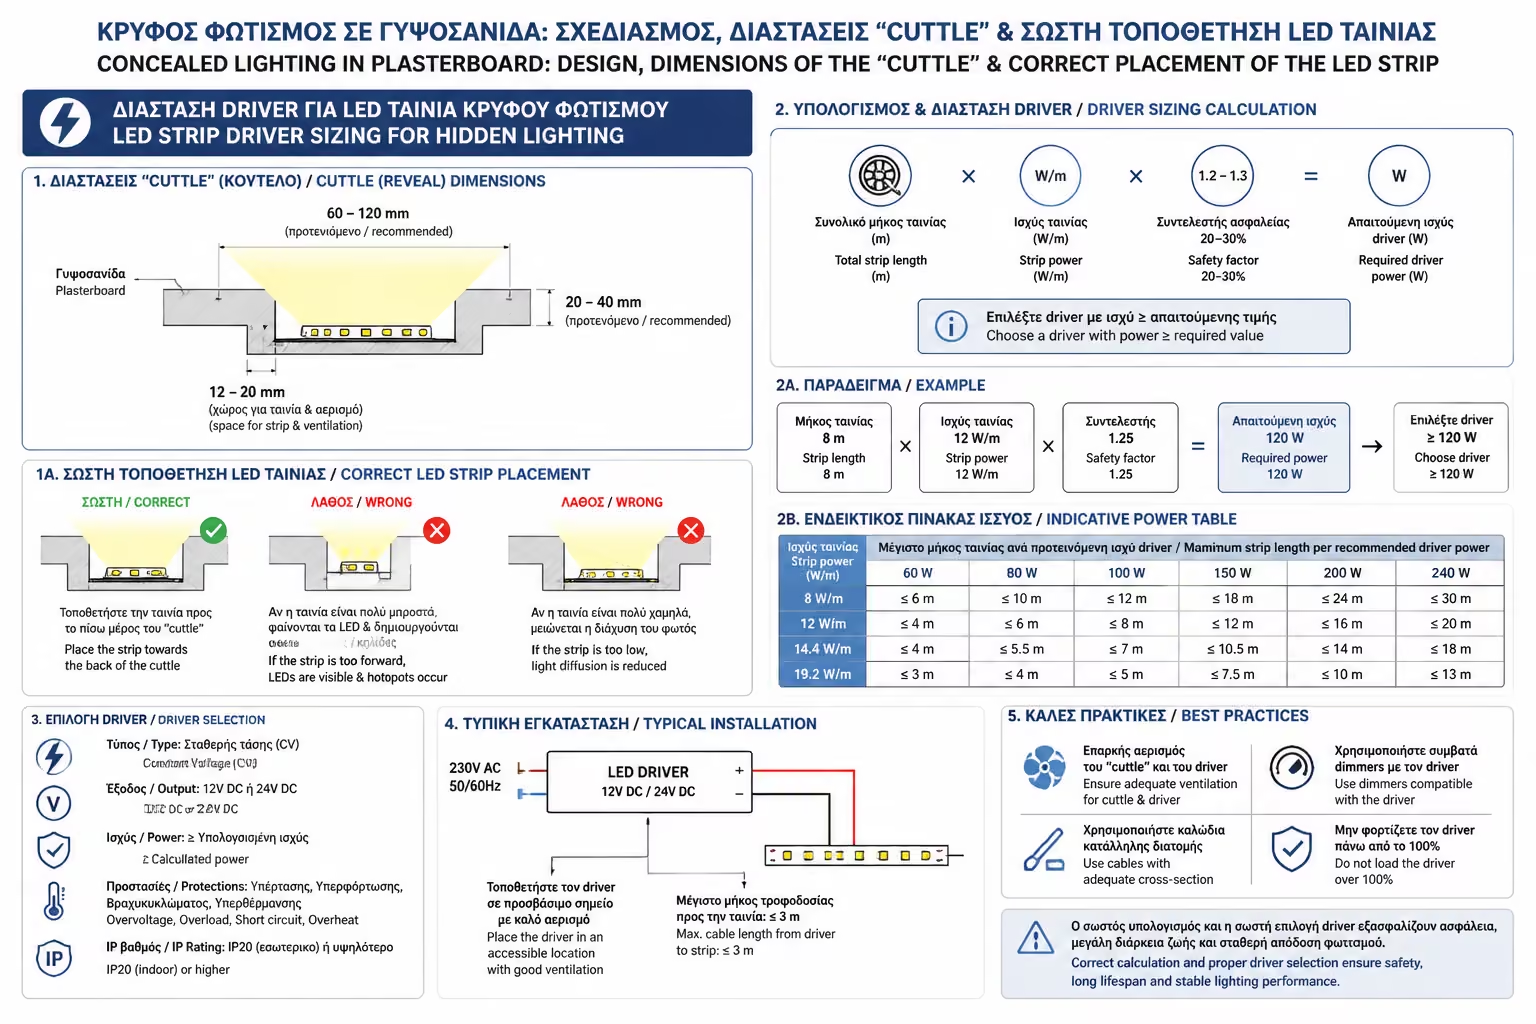
To have hidden lighting, we need to create a recess in the plasterboard. On the construction site, the two critical points are the "kutelo" (the vertical part that hides the tape) and the "patura" (the horizontal shelf where the tape sits).
The Ideal Dimensions:
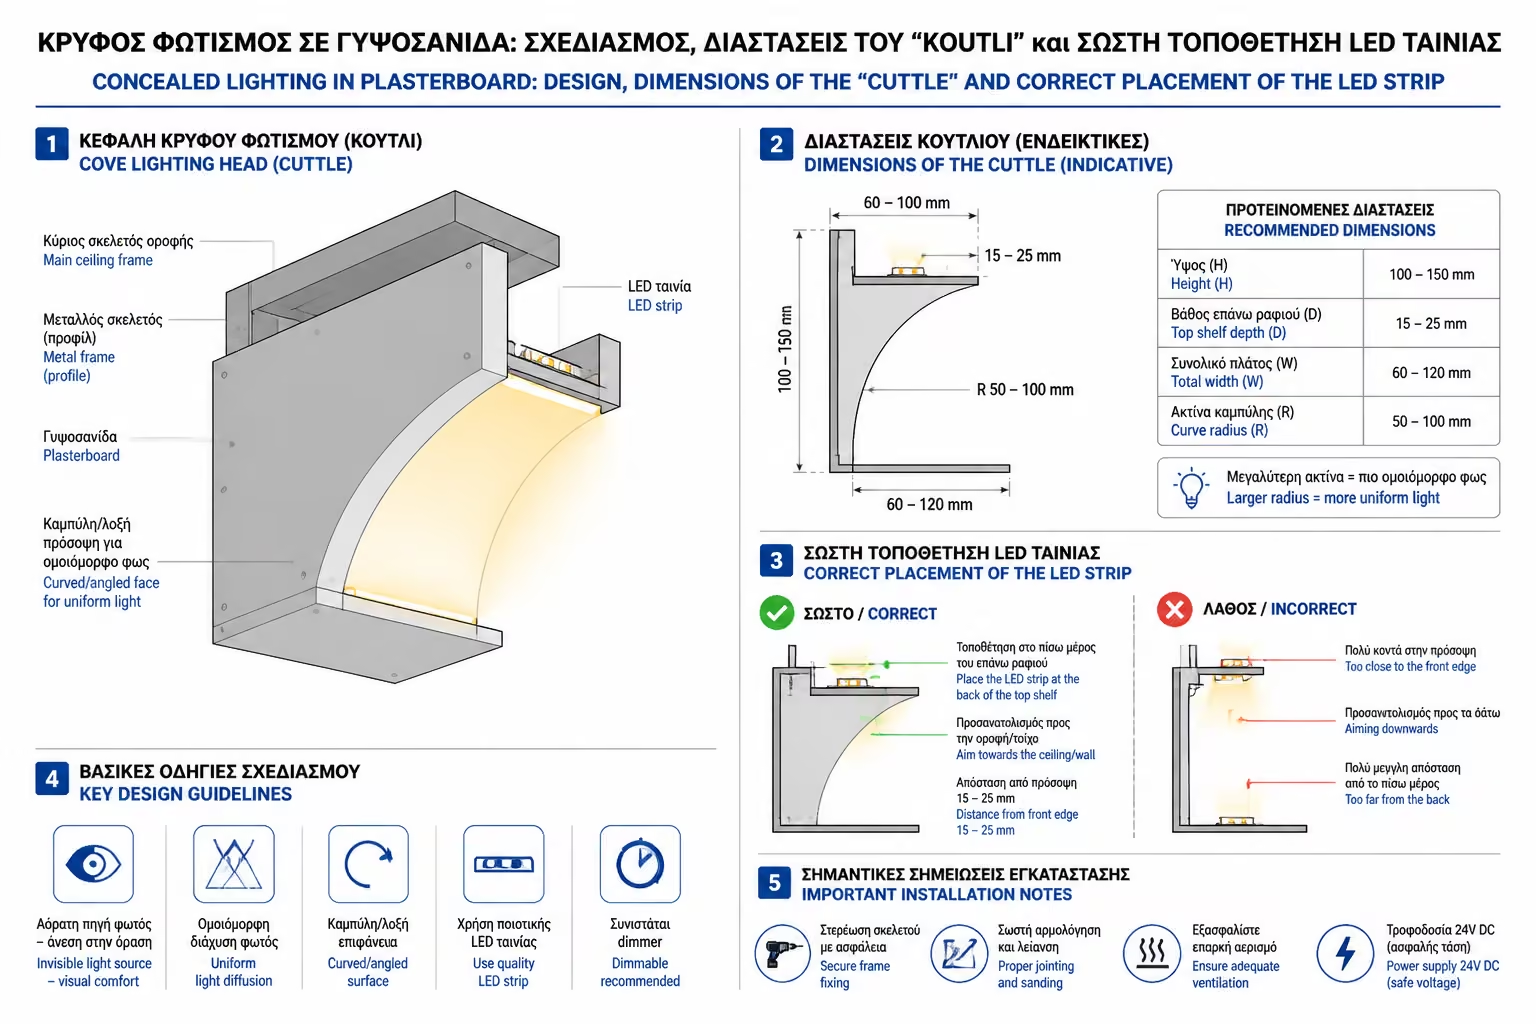
It should be at least 5 to 7 cm. If it is lower, the lighting will be too "harsh" and the film will be seen from a distance. If it is higher, it will prevent the light from reaching the ceiling.
The gap between the top of the box and the ceiling should be 10 to 15 cm. This gap allows the light to "breathe" and spread evenly towards the center of the room.
Usually 8 to 10 cm is enough to fit the tape and its aluminum profile.
This is where 90% of failure or success lies. Many place the LED strip in the depth of the recess, glued to the wall. Error!
Never stick the LED strip directly onto the drywall.
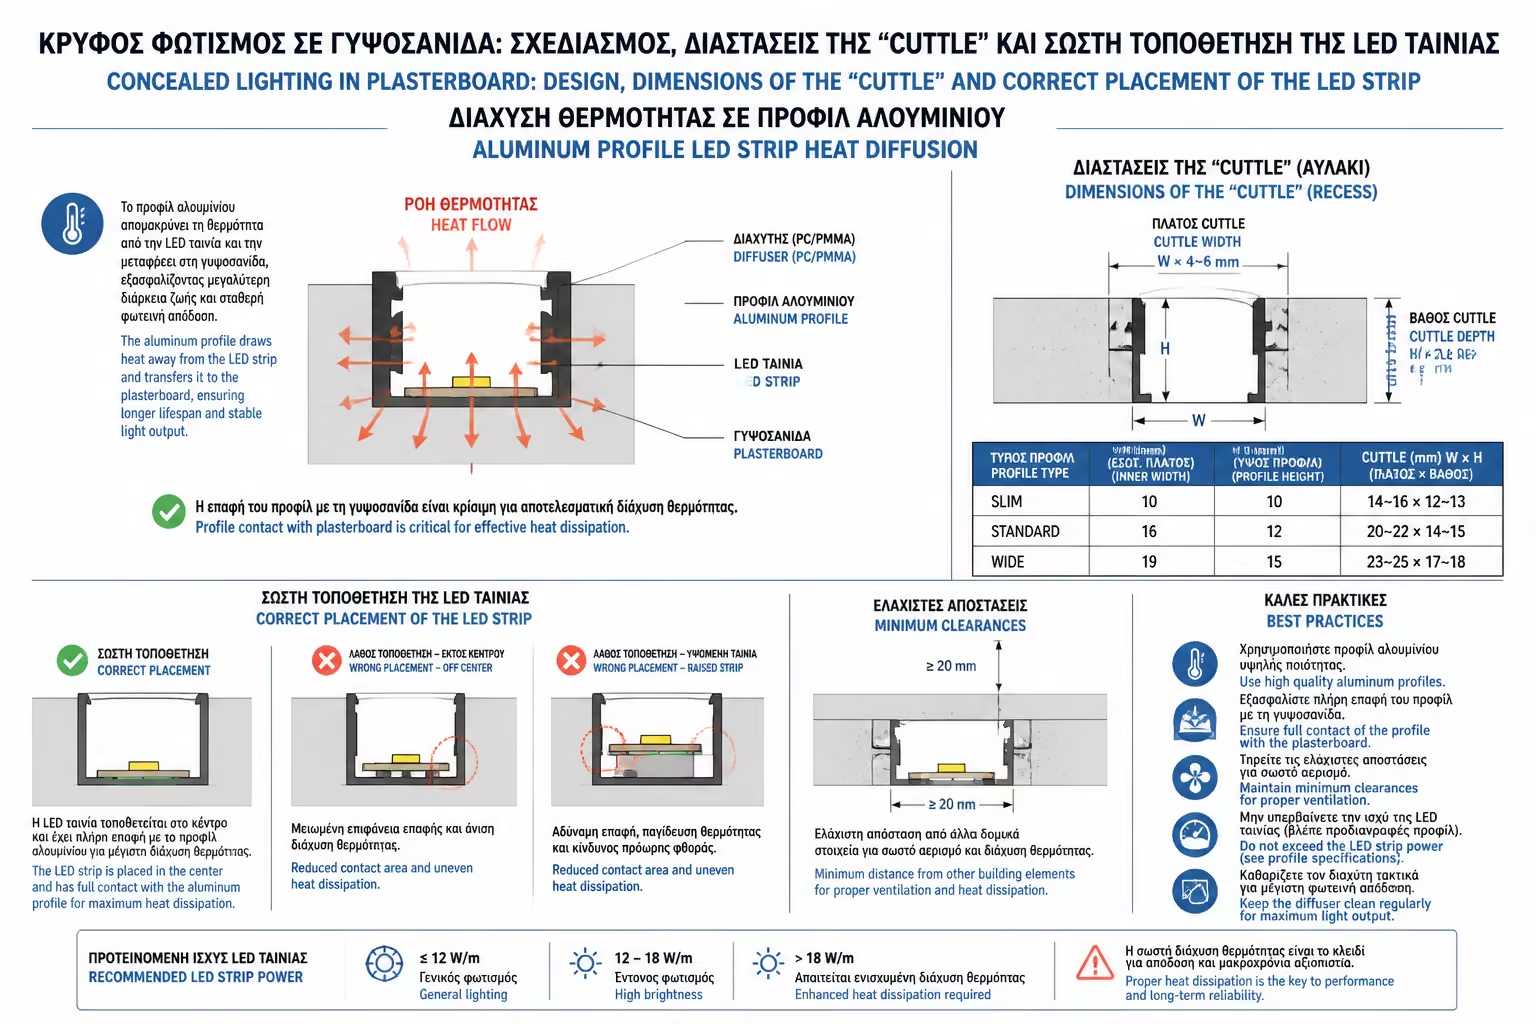
For recessed lighting, we are not interested in Watts, but in Lumens per meter (lm/m).
LED density: Choose strips with at least 120 LEDs per meter or the modern COB LED strips that have no gaps between the lights. So the light will appear as a single, continuous laser beam rather than a broken line.
600 - 900 lm/m (Enough for atmosphere).
1,200 - 1,800 lm/m.
As we have seen with the magnetic rails, the transformer is the component that breaks down most often.
Do not let the electrician drop the transformer into the drywall and then close it. It must be placed where you can access it (eg behind a ventilation grill or in a cabinet), otherwise in a failure you will have to tear down the structure.
The right recessed lighting is a balance between the hidden and the obvious. With the kutelo in the right dimensions, the tape placed towards the outside and the use of aluminum profiles, you will ensure a result that will make your house look more expensive, larger and more comfortable.
Next Step: Design is one leg. The other is the "psychology" of light. How do you know if the light should be yellowish or white? Continue to our guide: Color Temperature (Kelvin): How to choose between Warm (2700K), Natural (4000K) and Cool (6000K) light per room.
Return to category.
Go to categoryReturn to the central guide.
Go to guide