Basic, Functional & Atmospheric Lighting (Layered Lighting): The
3-layer rule for a perfect living room
Have you ever wondered why when you enter the lobby of an expensive
hotel or a well-designed restaurant, you immediately feel a sense of
warmth, depth and luxury? The secret is not hidden (only) in the
expensive furniture, but in the architecture of the light.
The most common mistake we make in our homes is that we try to light
everything with a single source: a large, powerful chandelier in the
middle of the living room. The result? The space looks "flat",
shadowless, uninteresting – more like a doctor's office waiting room
than a relaxation area.
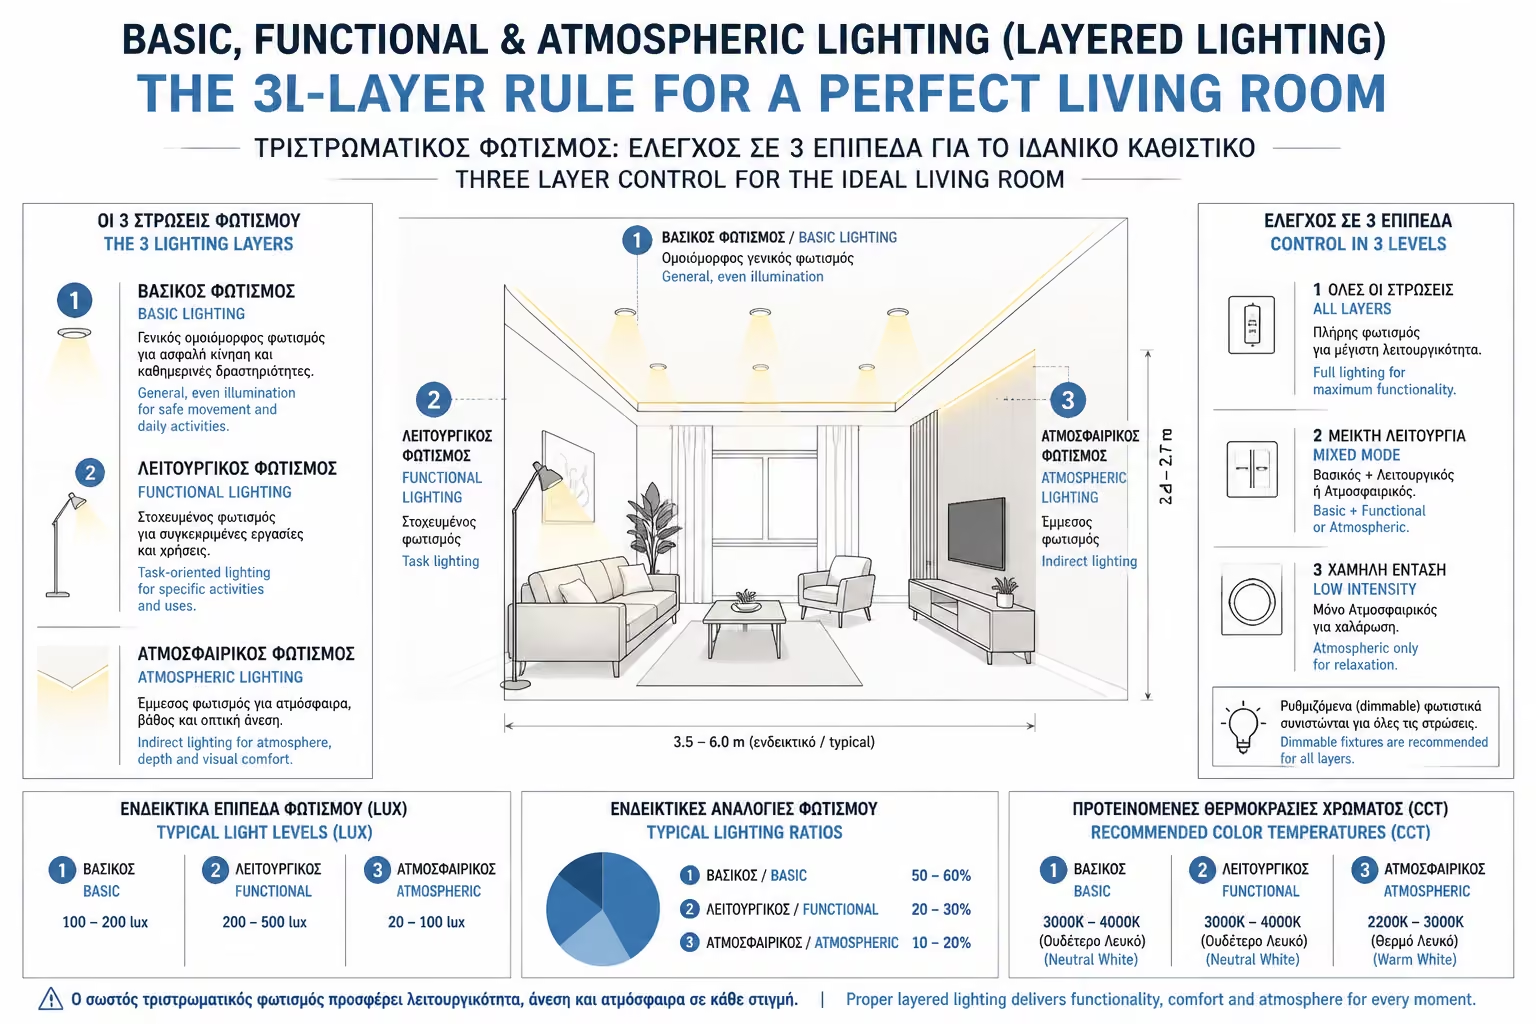
Professional lighting designers never use just one source. They use the
Rule of 3 Levels (Layered Lighting). As engineers, let's see how to
apply this "hierarchy" of light in your own living room,
combining different fixtures to create the ultimate scene.
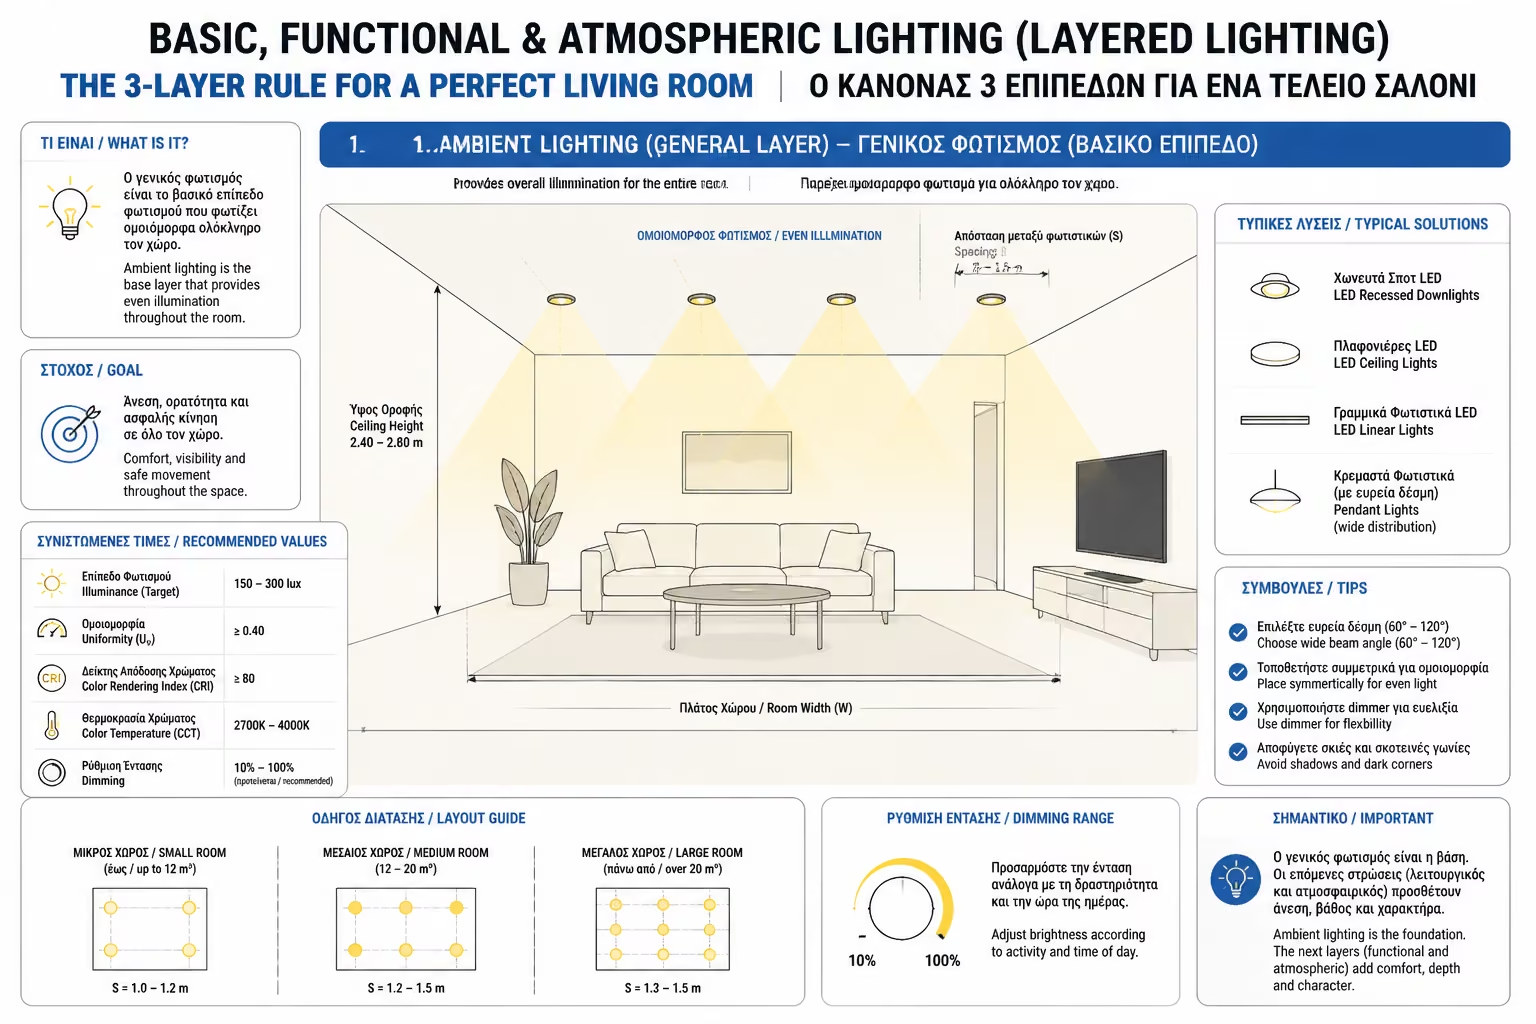
Level 1: Basic or General Lighting (Ambient Lighting)
This is your "canvas". The first level is the lighting that
allows you to enter the room, walk safely, clear the space and see
everything clearly. It doesn't have to be spectacular, it just has to
be adequate.
The Purpose: To bathe the space with a uniform, soft light,
dispelling absolute darkness.
How it is achieved: * Central ceiling lights (ceiling lamps or
chandeliers).
Recessed spots (Downlights) scattered on the plasterboard with a
large beam opening (e.g. 120°).
Concealed ceiling lighting (as we saw in a previous chapter), which
is reflected on the ceiling and diffuses sweetly throughout the
room.
The Secret: Basic lighting should never blind you. It must be
connected to Dimmer, so you can lower its volume in the evening when
you want to watch a movie.
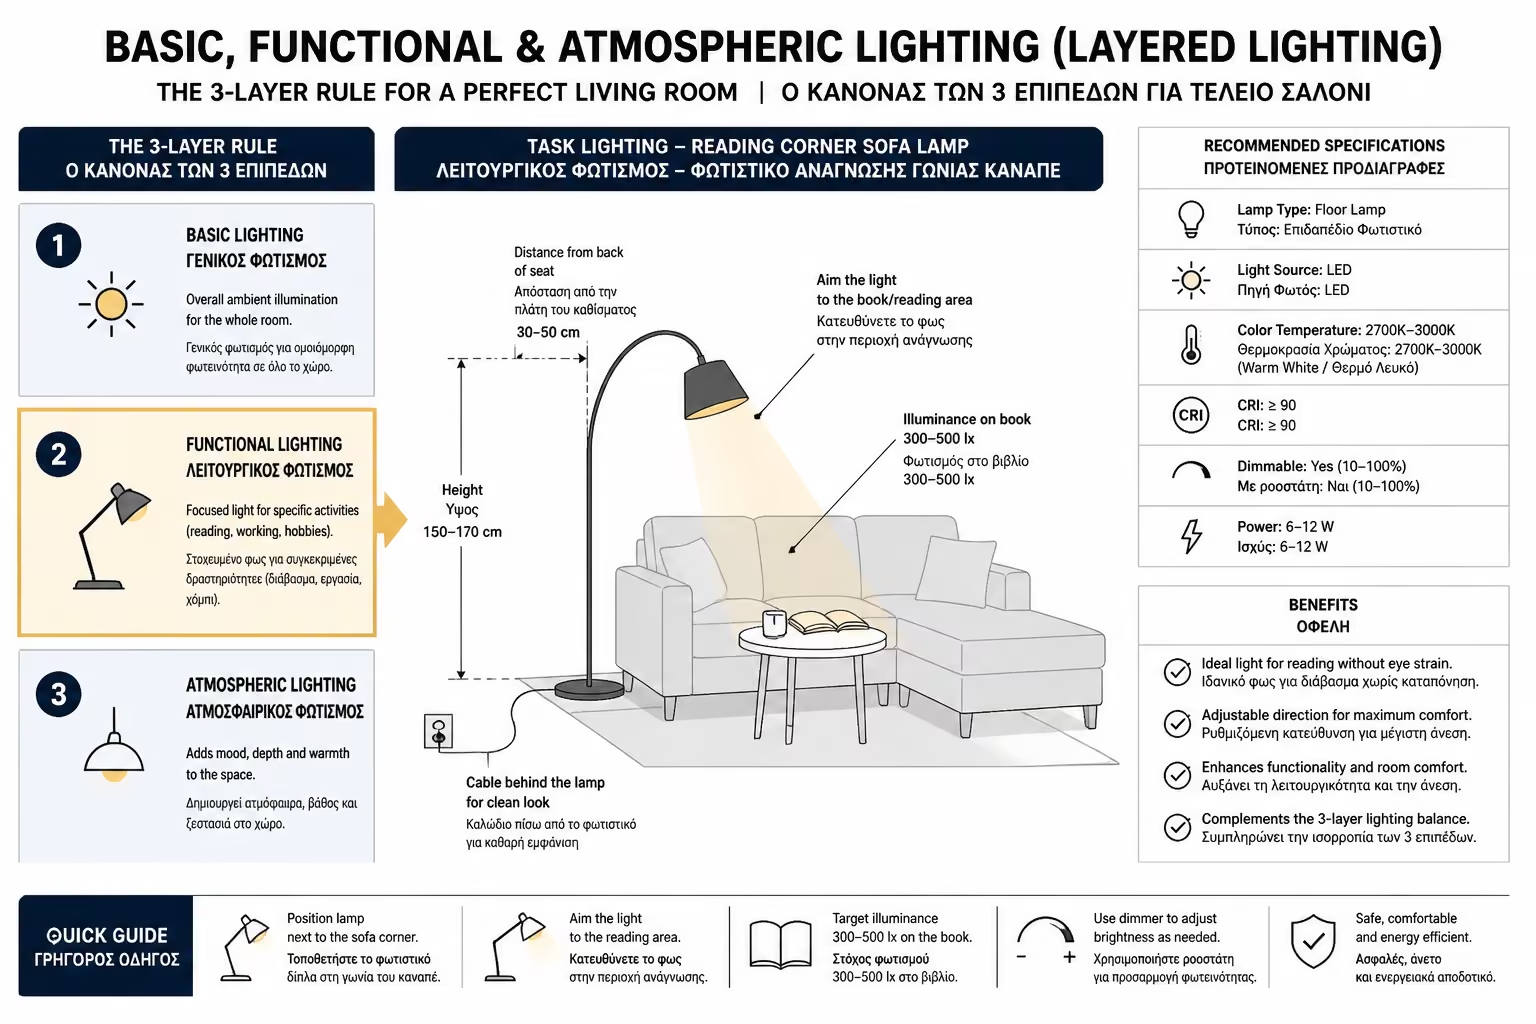
Level 2: Task Lighting
After we have made the "canvas", we go to the specific
activities. Functional lighting is the "work" light. It is
targeted, intense and limited to only where you need it, without
disturbing the rest.
The Purpose: To illuminate a specific surface to read a book, play
board games or sew, without tiring your eyes.
How it is achieved: * A floor lamp (floor lamp) with a
"split" arm, placed next to or behind the reading chair.
A portable (table lamp) on a side table.
A hanging lamp (pendant) that goes down low, right above the dining
table.
The Secret: Functional light must be free of shadows. If you write
with your right hand, the reading light should come from your left.
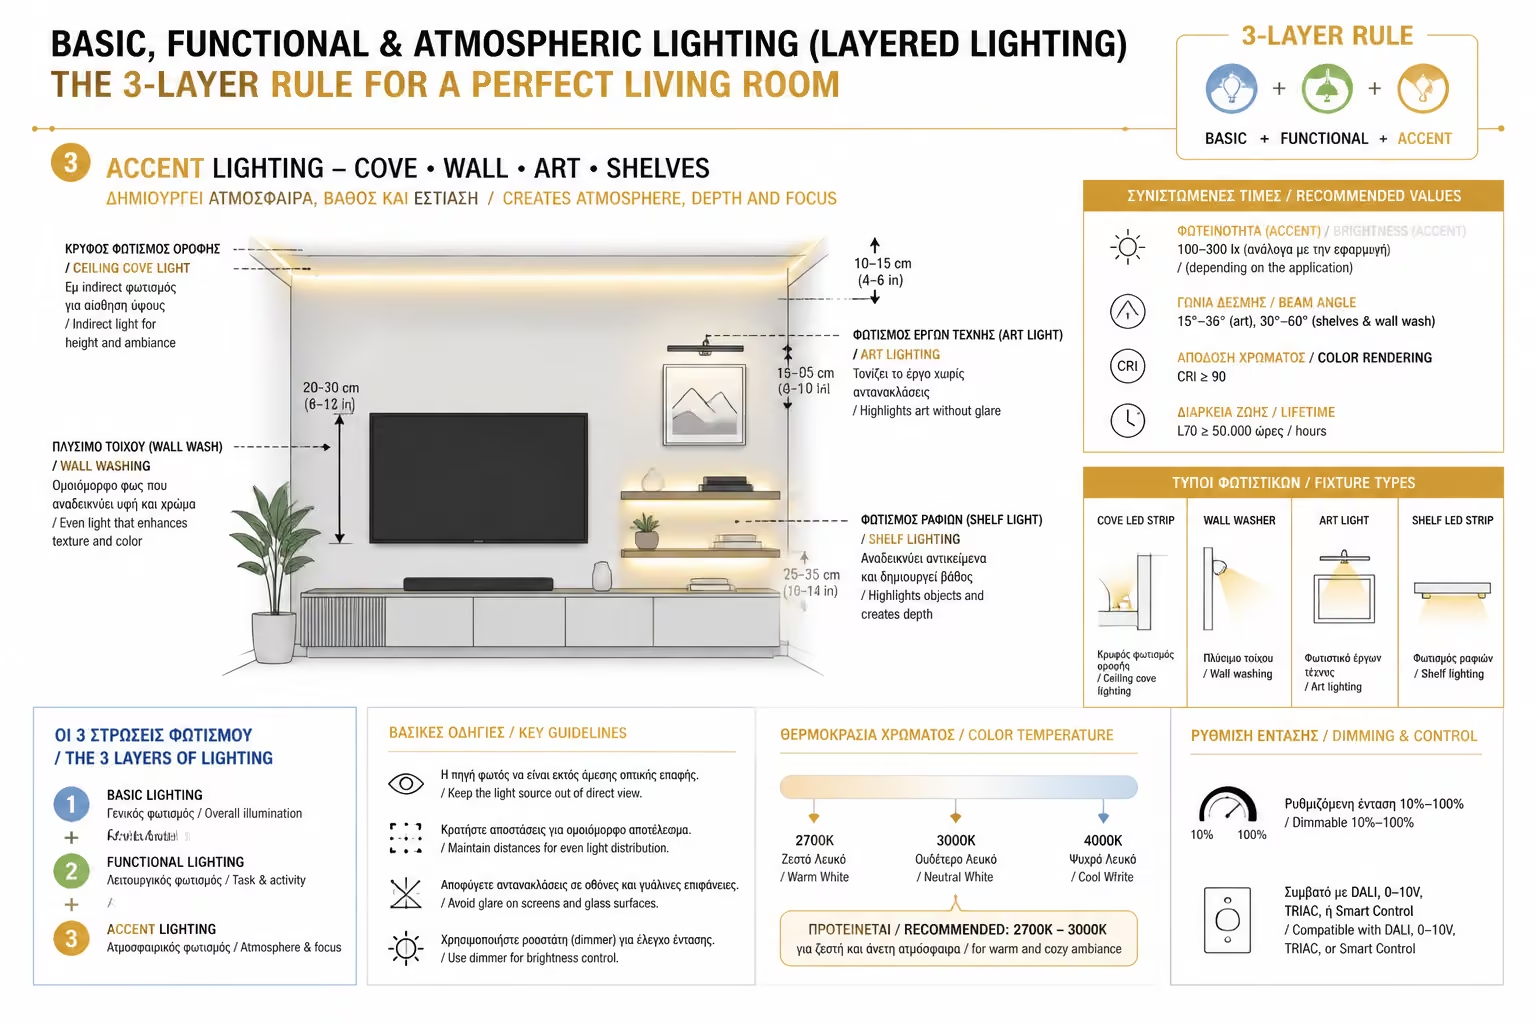
This is where all the magic lies! It is the "direction" of
the space. Ambient lighting has no practical use. Its purpose is
exclusively to impress, to give depth to the room (3D feeling) and to
highlight architecture or art.
The Purpose: To draw the eye to specific points (focal points) of
the living room. In general, the accent lighting should be 3 times
brighter than the basic (ambient) lighting at the point it is aimed
at, to create the necessary contrast.
How it is achieved: * Ceiling "spots" with a very narrow
beam (eg 15° - 24°) that "hit" directly on a painting.
Wall sconces that cast light up and down (Up/Down lighters) to
highlight the texture of a stone wall or wallpaper.
LED strips hidden behind the TV (bias lighting) or under the shelves
of a library.
Floor spots that illuminate a large indoor plant (casting dramatic
leaf shadows on the ceiling).
How to combine all 3 (Use Scenarios)
The advantage of Layered Lighting is flexibility. Depending on the
time and mood, you play with the switches like a conductor:
Scenario "Cleaning / Reception of Guests": Everything
lights up. The basic lighting (Level 1) is at 100%, the spotlights
on the tables (Level 3) add luxury, and the dining room (Level 2) is
ready to eat. The space is bright and full of energy.
"Chill Evening / Movie" scenario: The central lighting
(Level 1) turns off completely. Only the hidden LED strip behind the
TV lights up and a small spotlight that illuminates the plant in the
corner (Level 3). The space acquires a mysterious, cinematic
atmosphere without reflections on the screen.
"Reading" scenario: Turn on the main lighting (Level 1)
dimmed to 30% with the dimmer (just enough so that the room is not
black) and turn on 100% only the floor lamp next to your armchair
(Level 2).
Summarizing
To create an "expensive" effect, you don't necessarily need to
buy expensive lamps from Italian houses. You need to put them in the
right places. Combine general lighting for visibility, floor/portable
work lights and spotlights to highlight the beautiful elements of your
home. The "marriage" of these 3 levels is the ultimate
signature of a professionally designed space.
Next Step: Do you have old recessed halogen spots that "burn"
non-stop electricity and put out unbearable heat, but you hesitate to
call an electrician? Continue to our practical (DIY) guide: Changing
Halogen Spots to LEDs: How to do it yourself (DIY) and what applies to
transformers.