Renovation & Cohabitation: How to Survive at Home When the Only
Bathroom Is a Yapi
Let's be honest: renovating a home's only bathroom while still living in
it is one of the biggest tests on a family's nerves, patience and
relationships. The dust, noise and lack of privacy is the easy part. The
hard part is meeting basic biological needs for 7 to 10 days.
Unless you can stay at a relative's house or book a room,
"surviving" the construction site requires strategic planning.
Here are the most tested and practical solutions to get out of this
adventure unscathed.
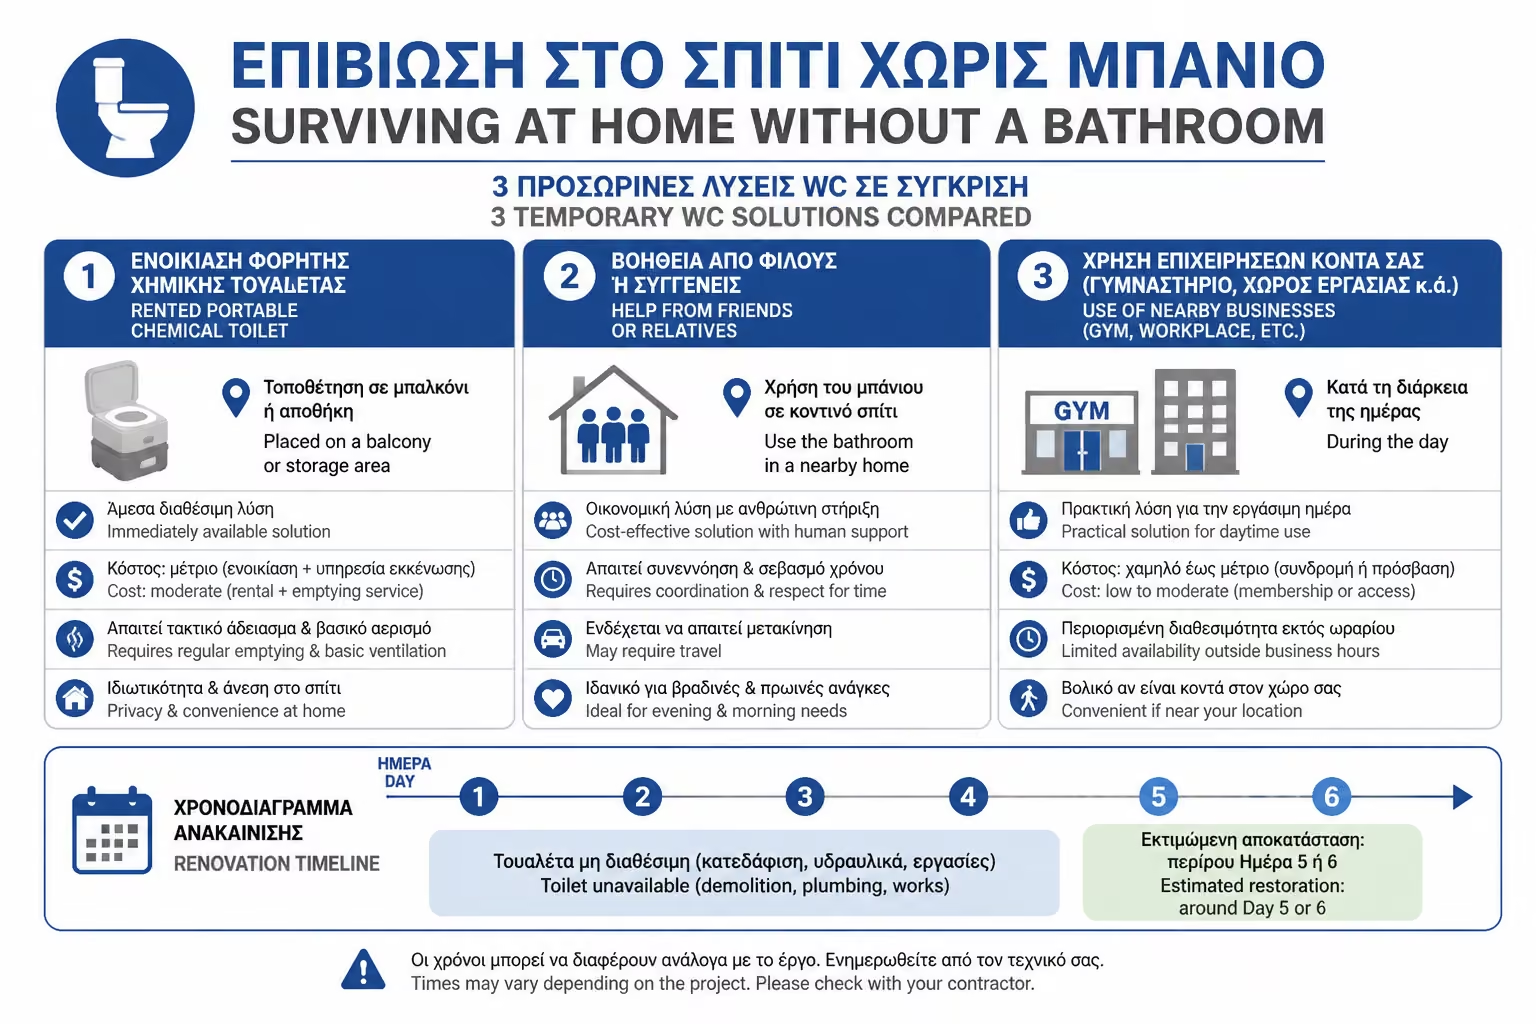
1. The Big Problem: What do we do with WC?
From Day 1 (stripping) to at least Day 5-6 (waterproofing/tiling), the
bathroom basin will not be present or attached.
The Chemical Toilet Solution (The most autonomous)
It may seem extreme, but many companies rent out portable chemical
toilets (like those from events or campsites) for home use during
renovations. It can be placed on the balcony or in a warehouse. It's
clean, doesn't smell because of the special liquids and saves you a
lot of stress.
The "Allies" Solution (Friends & Neighbors)
Enlist the people close to you. Let them know in advance that you
will need to visit them during "peak hours".
Local Businesses
Coffee shops, gyms, or your workplace can act as temporary solutions
during the day.
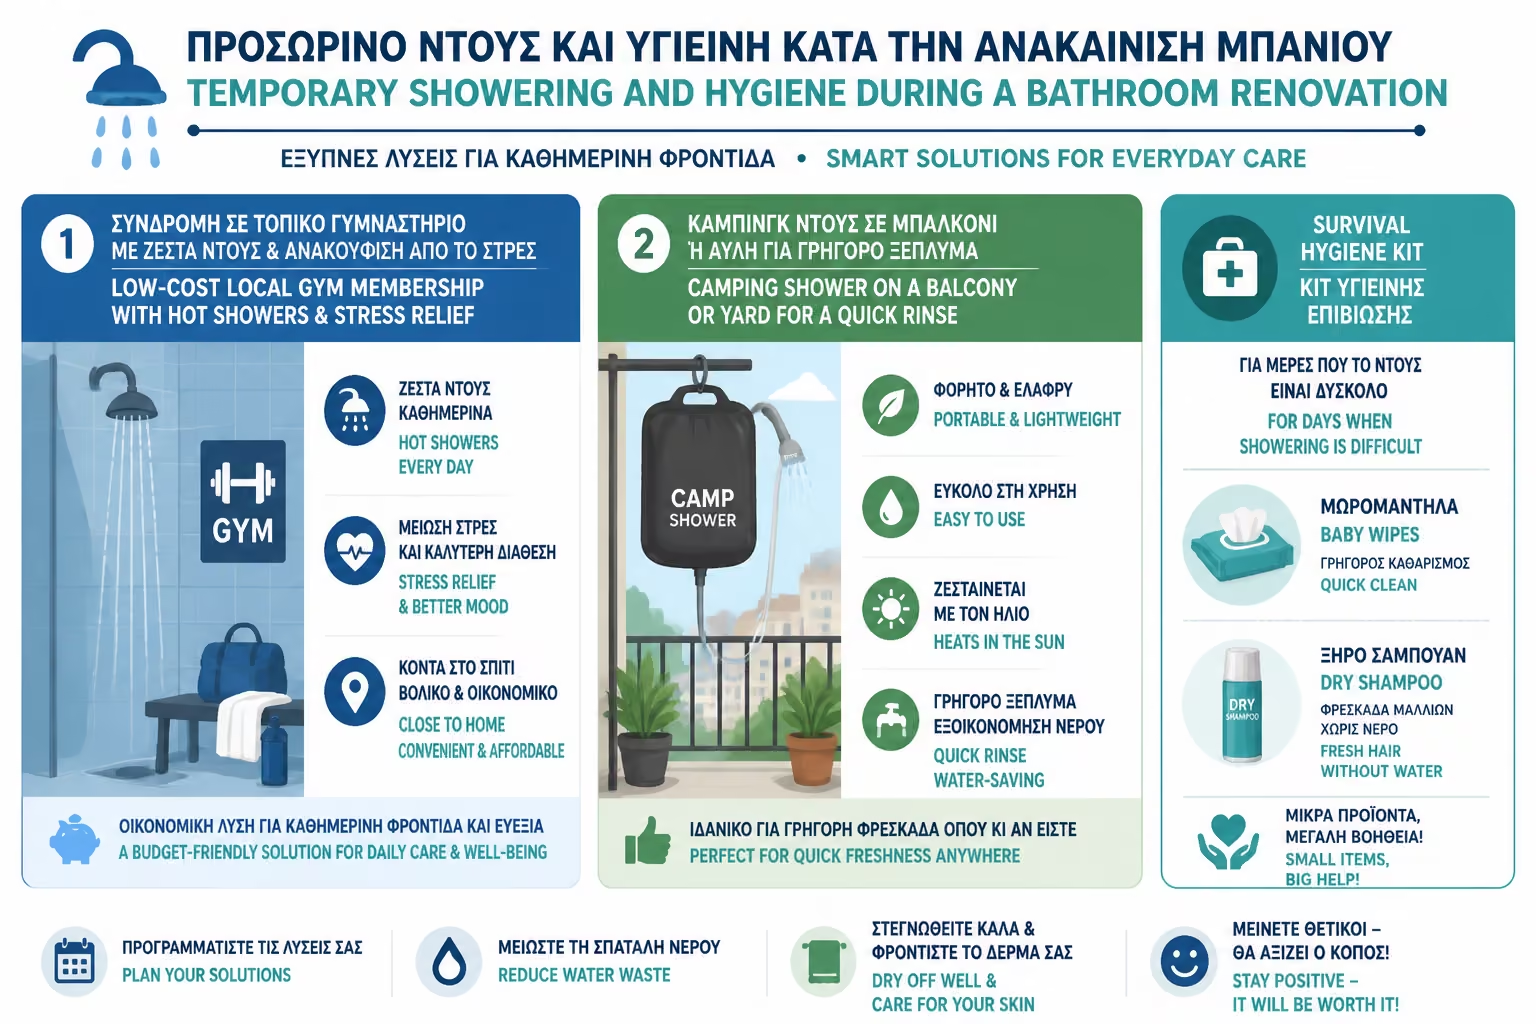
2. The Shower Problem: Where will we wash?
If the renovation takes place in summer, the need for a shower is
imperative. If it is done in winter, hot water is necessary.
Gym membership
Perhaps the best investment for renovation days. With an affordable
monthly membership to a nearby gym, you have daily access to clean
showers with plenty of hot water, while also relieving the stress of
the day.
The Portable Camping Shower
If you have a large balcony with a siphon or a yard, a portable
camping shower (hanging the tank up and heated by the sun) can save
you, at least for a quick rinse.
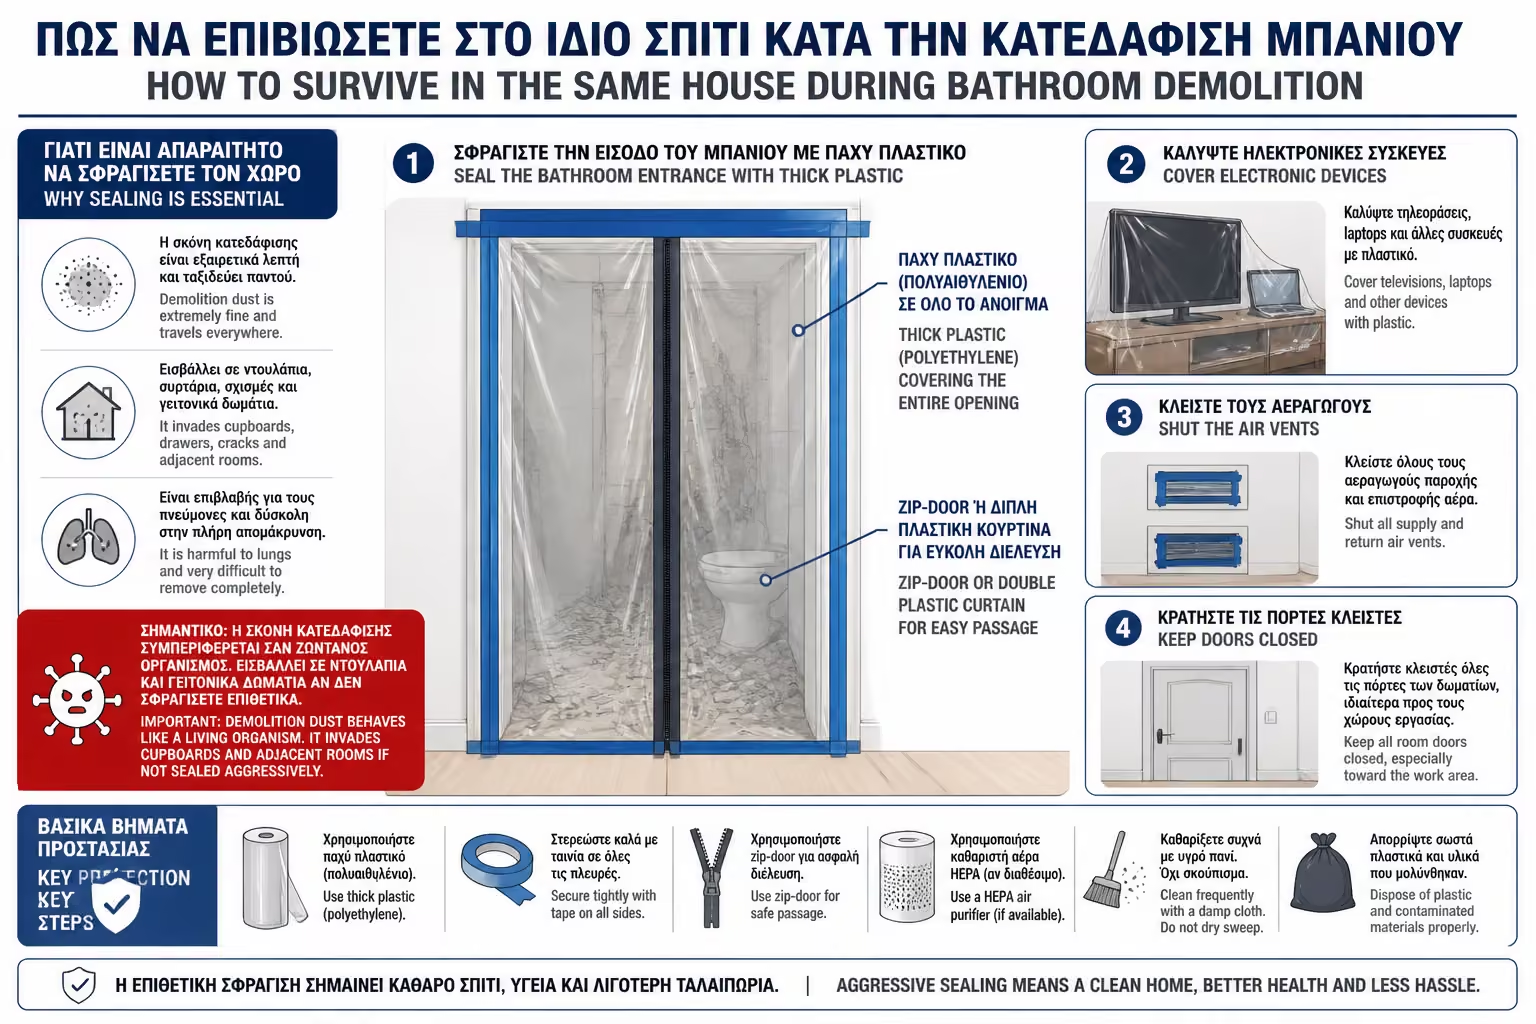
3. Dust Management & Protection of the Rest of the House
Dust from demolition and plaster scrubbing is like a “living
organism”; it gets under doors and into closets.
Nylon Sealing
Before the first compressor arrives, seal the bathroom door from the
outside with thick construction nylon and duct tape. Create a
"zip door" or double curtain out of nylon.
Air Duct Closure
If the house has central air conditioning or a ventilation system,
close the vents to prevent dust from being carried to other rooms
through the pipes.
Electrical Devices
Cover the TV, laptops and delicate living room furniture with sheets
or nylons.
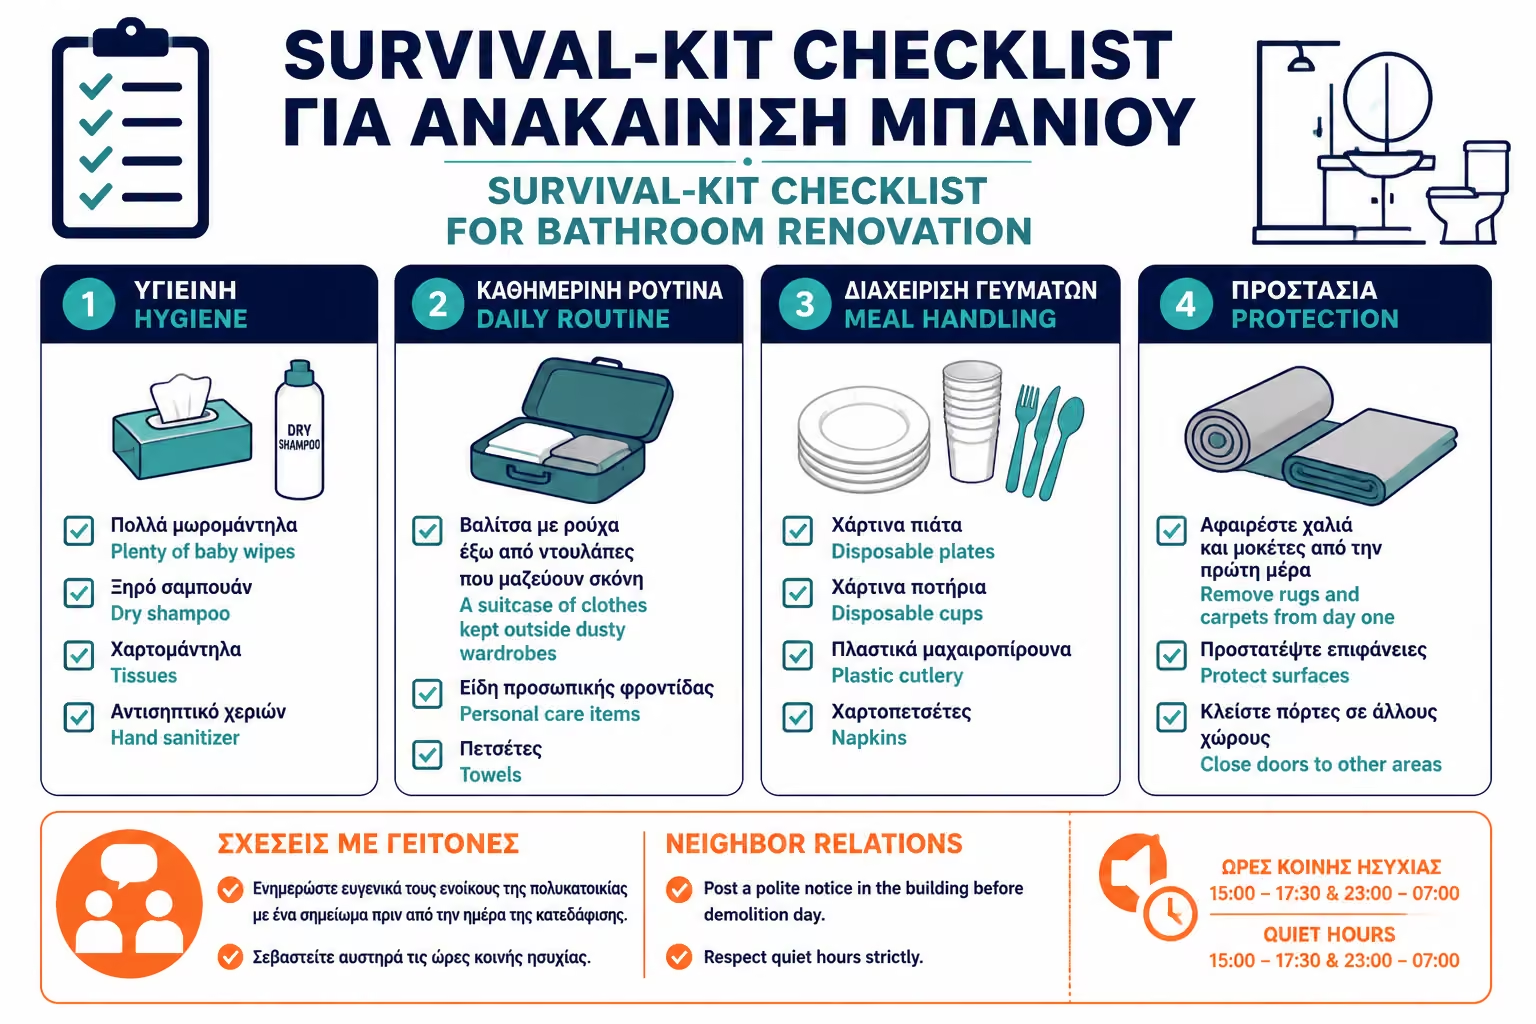
📊 Survival Plan: What to have ready (Survival Kit)
Category
What you need to buy/prepare
Usefulness
Hygiene
Baby wipes (many) & Dry Shampoo
For the days when showering is impossible.
Everyday life
A suitcase with clothes for 5 days out of the closet
So that you don't open and close wardrobes in the dust.
Focus
Disposable plastic/paper plates and cups
Washing dishes in the kitchen sink becomes difficult when the
bathroom is closed.
Protection
Carpets and rugs are collected from day 1
The dust from the craftsmen's shoes would ruin them.
💡 The Engineer's Advice
"One detail that many people forget is Neighbor Relations. The
bathroom demolition (Day 1) produces a terrible, structural noise that
carries throughout the apartment building. Two days before starting,
stick a polite notice at the entrance of the apartment building,
apologizing for the inconvenience and clearly stating the calendar days
of heavy work. Also, ask the contractor to strictly adhere to communal
quiet hours. An angry neighbor who calls the police for a disturbance
can stop the project and blow your schedule from day one."
🏁 Guide Completion: The Renovation Journey Has Reached Its End!
Through these 9 detailed stages, we covered the full path of a properly
planned bathroom renovation.
1. Protection & Organization
The protection and organization of the space.
2. Plumbing Rough-Ins
The plumbing installation and service points.
3. Pipework
The selection and installation of the piping.
4. Slopes & Drain
The critical floor slopes and the correct drain.
5. Waterproofing
The invisible but life-saving waterproofing layer.
6. Tiling
The careful and precise installation of the tiles.
7. Ceiling
The protection and painting of the ceiling.
8. Sanitary Ware
The ergonomic installation of the sanitary fixtures.
9. Finishing & Living Through It
The final connections, the realistic timeline, and the practical
secrets of coexisting with the renovation.
Bathroom renovation is a demanding project, but with the right
knowledge, proper planning, and attention to the critical details, the
result is not just a beautiful room, but a hygienic and relaxing space
you can enjoy reliably for the next 25 to 30 years.