No Plaster Use
Budget or rush crews use plaster of paris to "pinch" and close pipes quickly because the plaster dries in minutes. However, plaster is like a sponge: it absorbs the humidity of the bathroom, swells, rots and destroys the plaster.
After completing the plumbing and electrical installations, the bathroom looks like a "bombed landscape". The walls are full of deep grooves (excavations) and the old plasters have been removed.
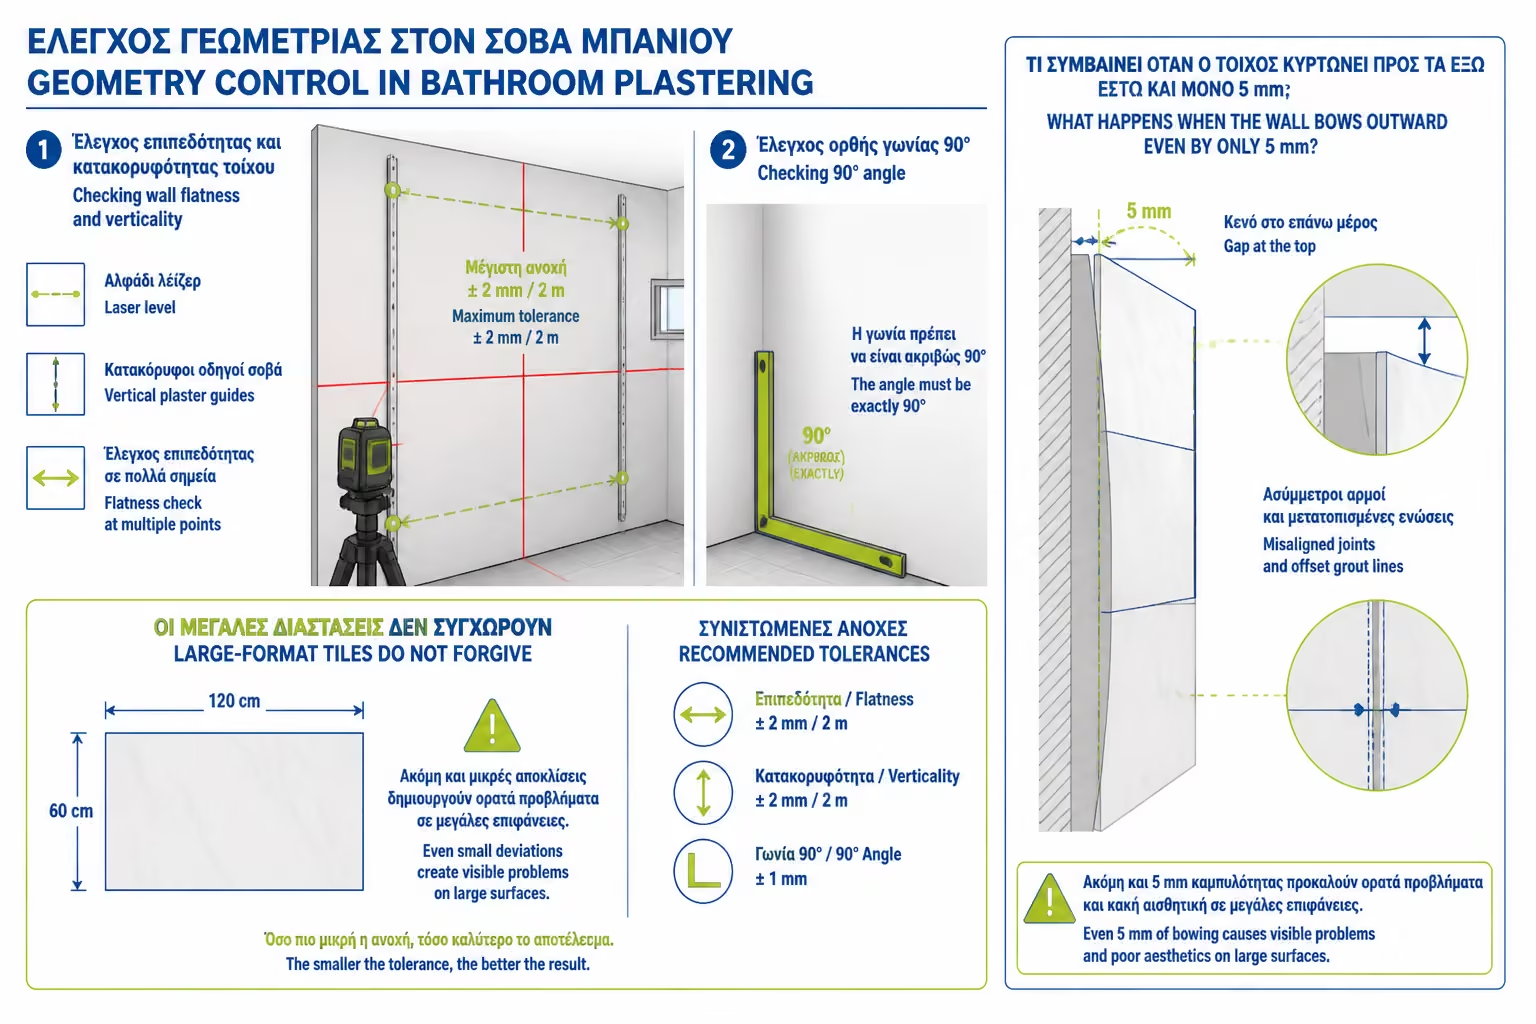
Phase 3 is the geometry reset stage. Many homeowners underestimate plastering, considering it a simple "preparation" to be covered by tiles. This is a huge mistake. If the plasterer does not deliver perfectly vertical walls and exactly 90 degree angles, the slab that follows will be at a dead end.
Let's see how wall wounds are closed properly and why "levelling" is the only way to not waste your money.
The channels where the new piping and cable coils nest must be completely filled and stabilized.
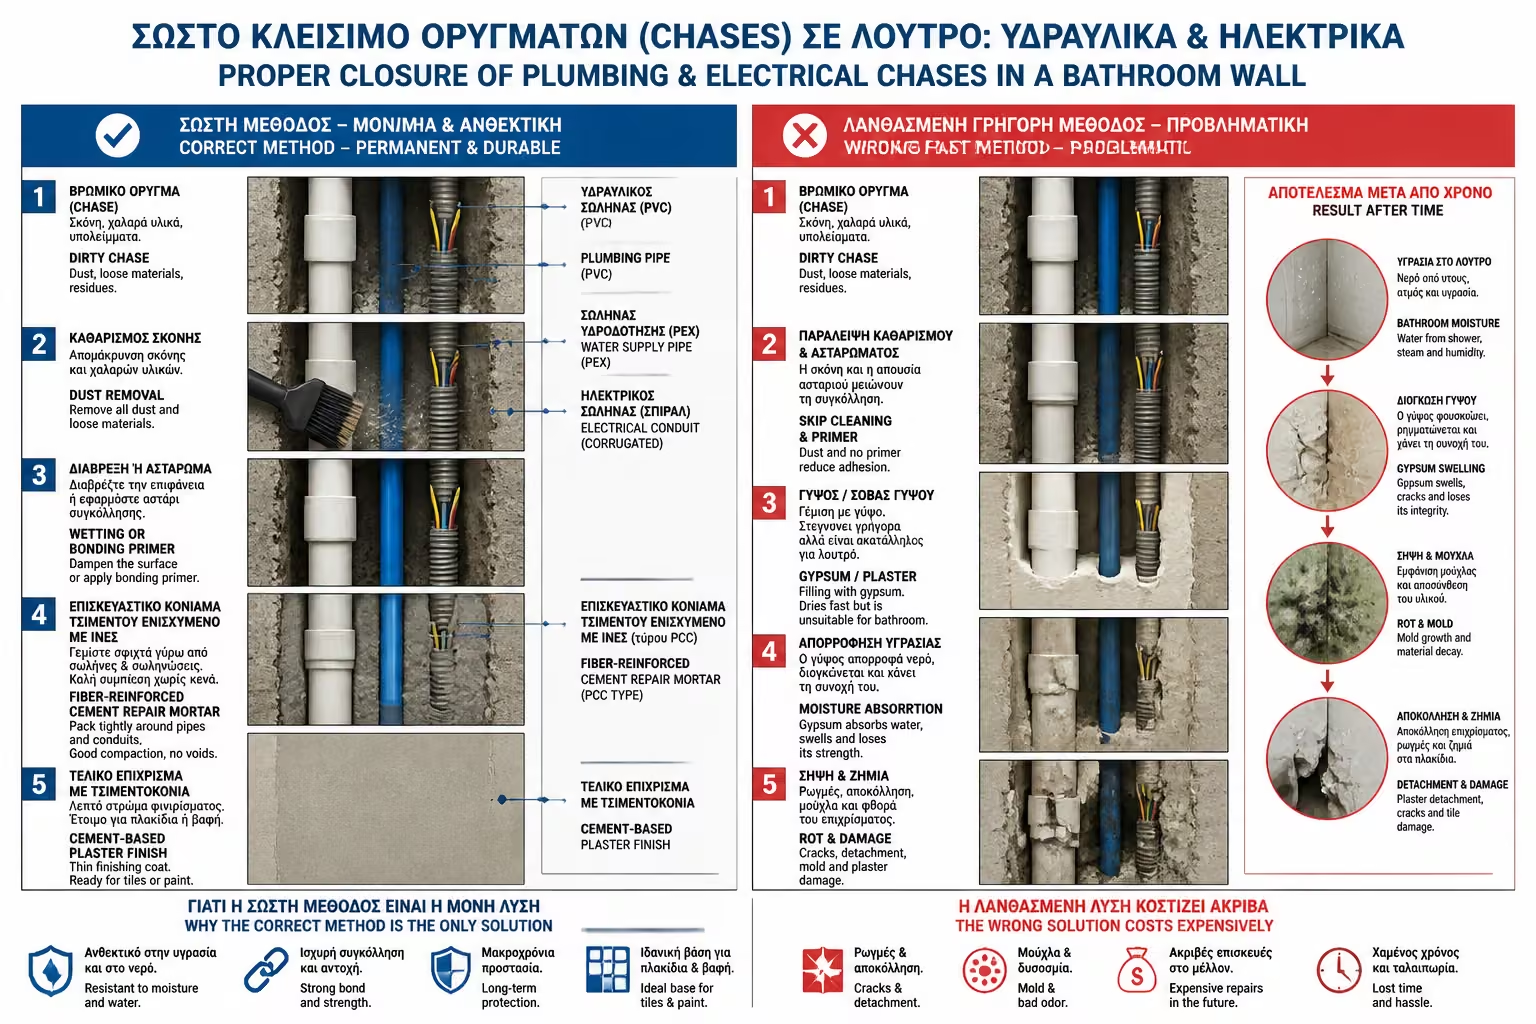
Budget or rush crews use plaster of paris to "pinch" and close pipes quickly because the plaster dries in minutes. However, plaster is like a sponge: it absorbs the humidity of the bathroom, swells, rots and destroys the plaster.
Excavations must be thoroughly cleaned of dust, moistened with water (or a special adhesion primer) and filled with fiber-reinforced high-strength repair cement mortars. These materials do not shrink and offer superior static stability around the pipes.
Modern tiles (especially the large ones, e.g. 60x120 cm) do not forgive even a millimeter of deviation. For them to be placed correctly, the wall must be a "sword".
The plaster must be applied using guides (metal plastering arms) placed with a laser level. If the wall "goes" out even half a point, the tiles on top will create gaps.
The corners where two walls meet must be perfectly right. If the corners are "open" or "closed", then when the tile reaches the corner, it will be forced to cut the tile diagonally. This creates a very ugly visual image, especially at the point of the shower or where the sink furniture steps.
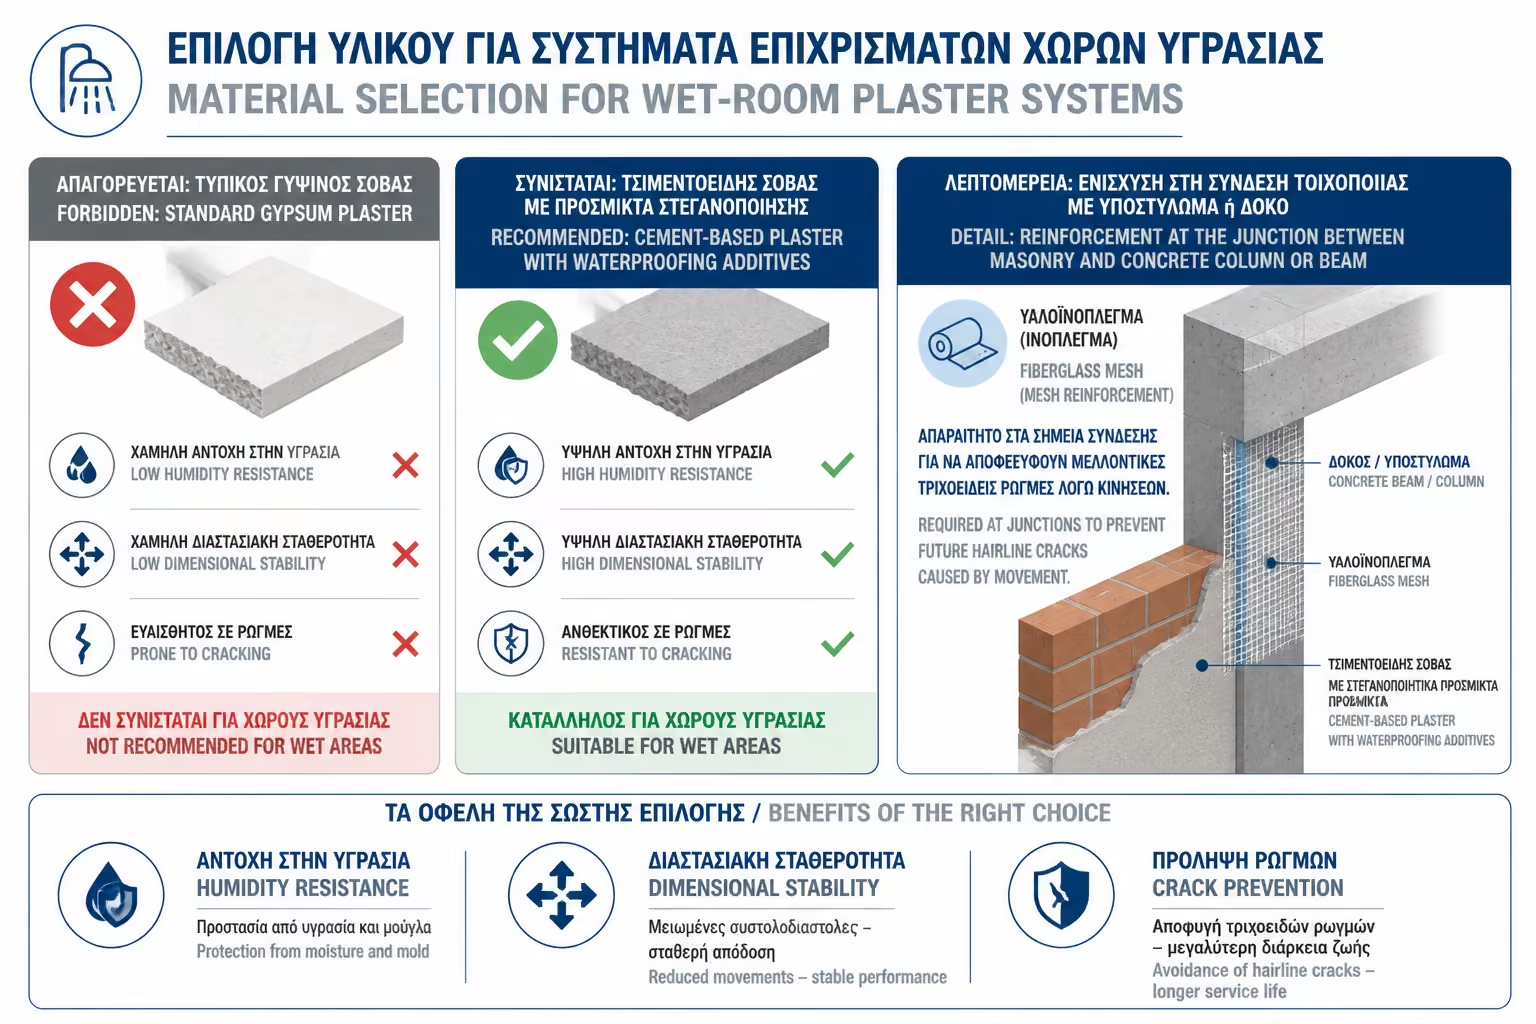
In the bathroom, the use of simple plasters is prohibited. The permanent presence of water vapor requires cement-based materials.
Cementitious plaster (one or two coats) is used with the addition of sealing compounds, which exhibits excellent resistance to moisture and does not disintegrate if it comes into contact with water. Also, at the joints of the bricks with concrete elements (columns/beams) plastering mesh must be placed to prevent the creation of future cracks (capillaries) from the contractions and expansions of the building.
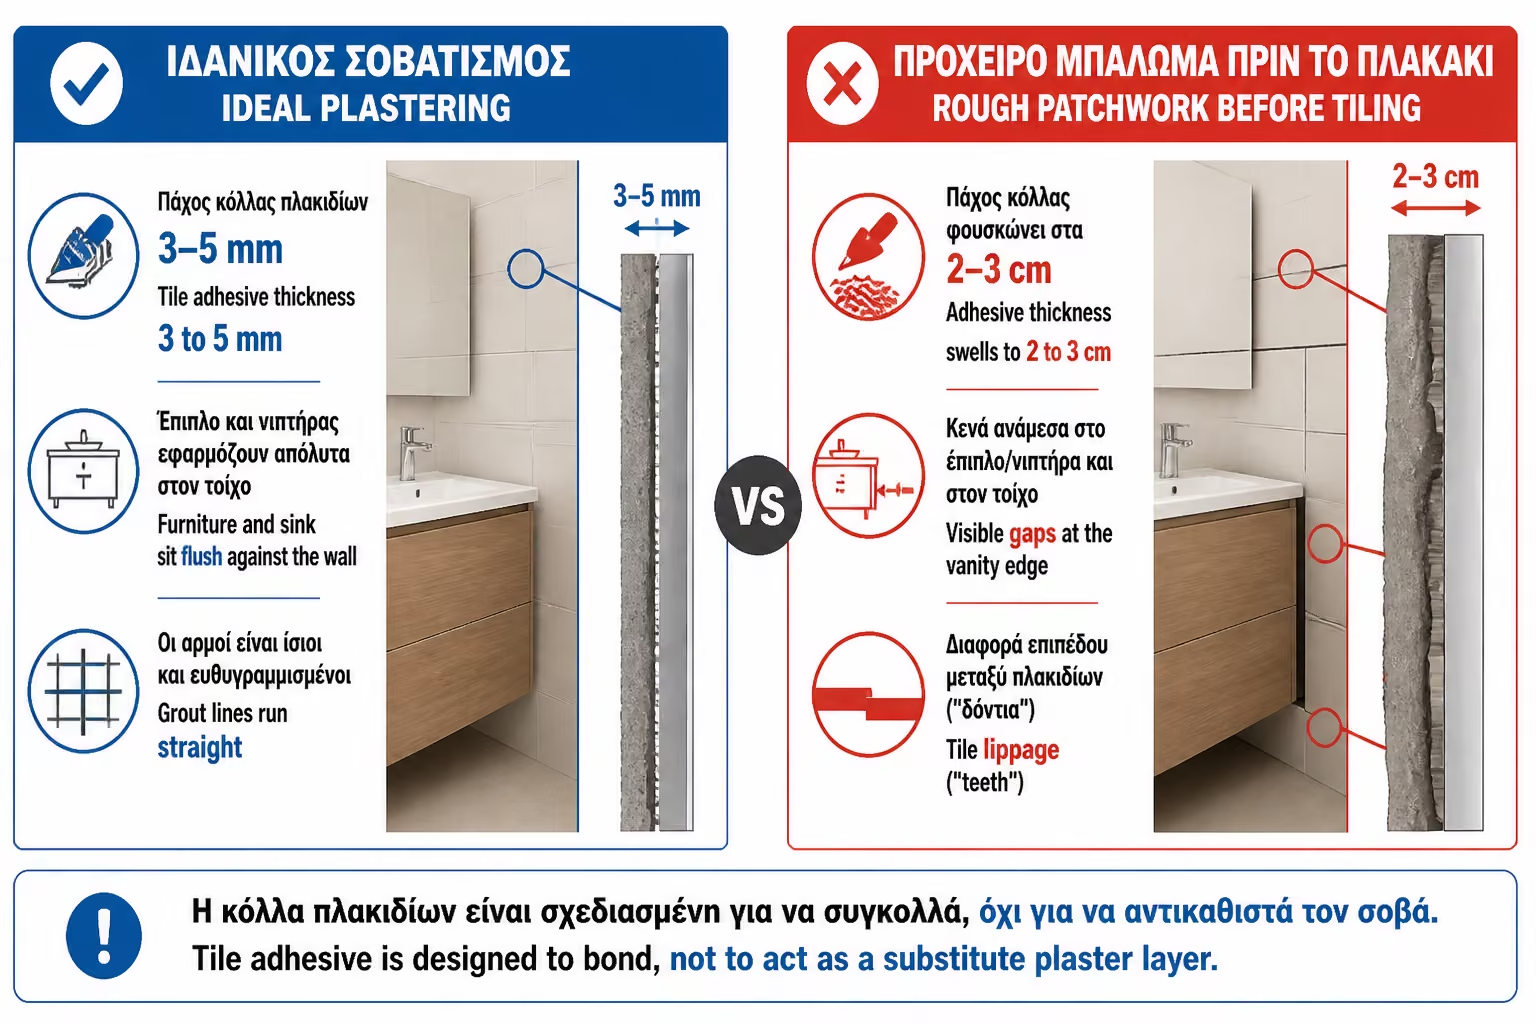
| Technical Specification | Ideal Plastering 📐 | Rough / Crooked Plastering ❌ |
|---|---|---|
| Tile Adhesive Thickness | Firm and thin (3–5 mm). Economy in material. | Large (up to 2-3 cm) to "straighten" the wall. Risk of detachment. |
| Furniture application | The piece of furniture and the sink are flush against the wall without any gaps. | Unsightly miter gaps are created in the corner of the bench. |
| Joint Alignment | Tile joints "run" evenly across the entire height. | The joints open or narrow, creating "teeth". |
> "There's a bad habit in the market where some people say, 'Come on, baby, the tile and the adhesive will straighten it out.' Never accept that. Tile adhesive is designed to stick, not to fill gaps and make the plasterer. > If the thickness of the adhesive exceeds the manufacturer's recommended millimeters (usually over 8-10mm), the adhesive when dry it will "pull" the tile inside. This will cause your bathroom to be filled with 'teeth' (unevennesses on the surface), even if you have bought the most expensive tiles on the market. Correct plastering is the only guarantee for a flat wall."
Our masonry is now perfectly aligned and ready.
In the next article we move on to the floor: Phase 4 - Floor Cement (Processes). We will analyze how the new substrate is created and how the gradients are calculated so that the water is magically guided to the siphon without ever pooling.
Return to category.
Go to categoryReturn to the central guide.
Go to guide