Covering the Piping
It covers and protects the routes of drains and water pipes that pass through the floor.
After plastering the walls, the interest is transferred exclusively to the floor. Phase 4 involves the creation of the new substrate, commonly the 'fill' or floor screed.
If the walls require absolute verticality, the bathroom floor requires the exact opposite: a controlled and studied slope. The bathroom is a place that receives large amounts of water. The cement mortar is what will determine whether the water after a shower will be led "magically" and directly to the drain or if it will stagnate in the corners, creating foci of mold, stench and future leaks.
Let's see how the right subfloor is made and how the wrinkles are calculated.
Cement mortar is a strong mixture of sand (usually sand or river sand), cement and water. It is laid on the concrete slab (after it has been cleaned of the debris from the excavation) and serves three main purposes:
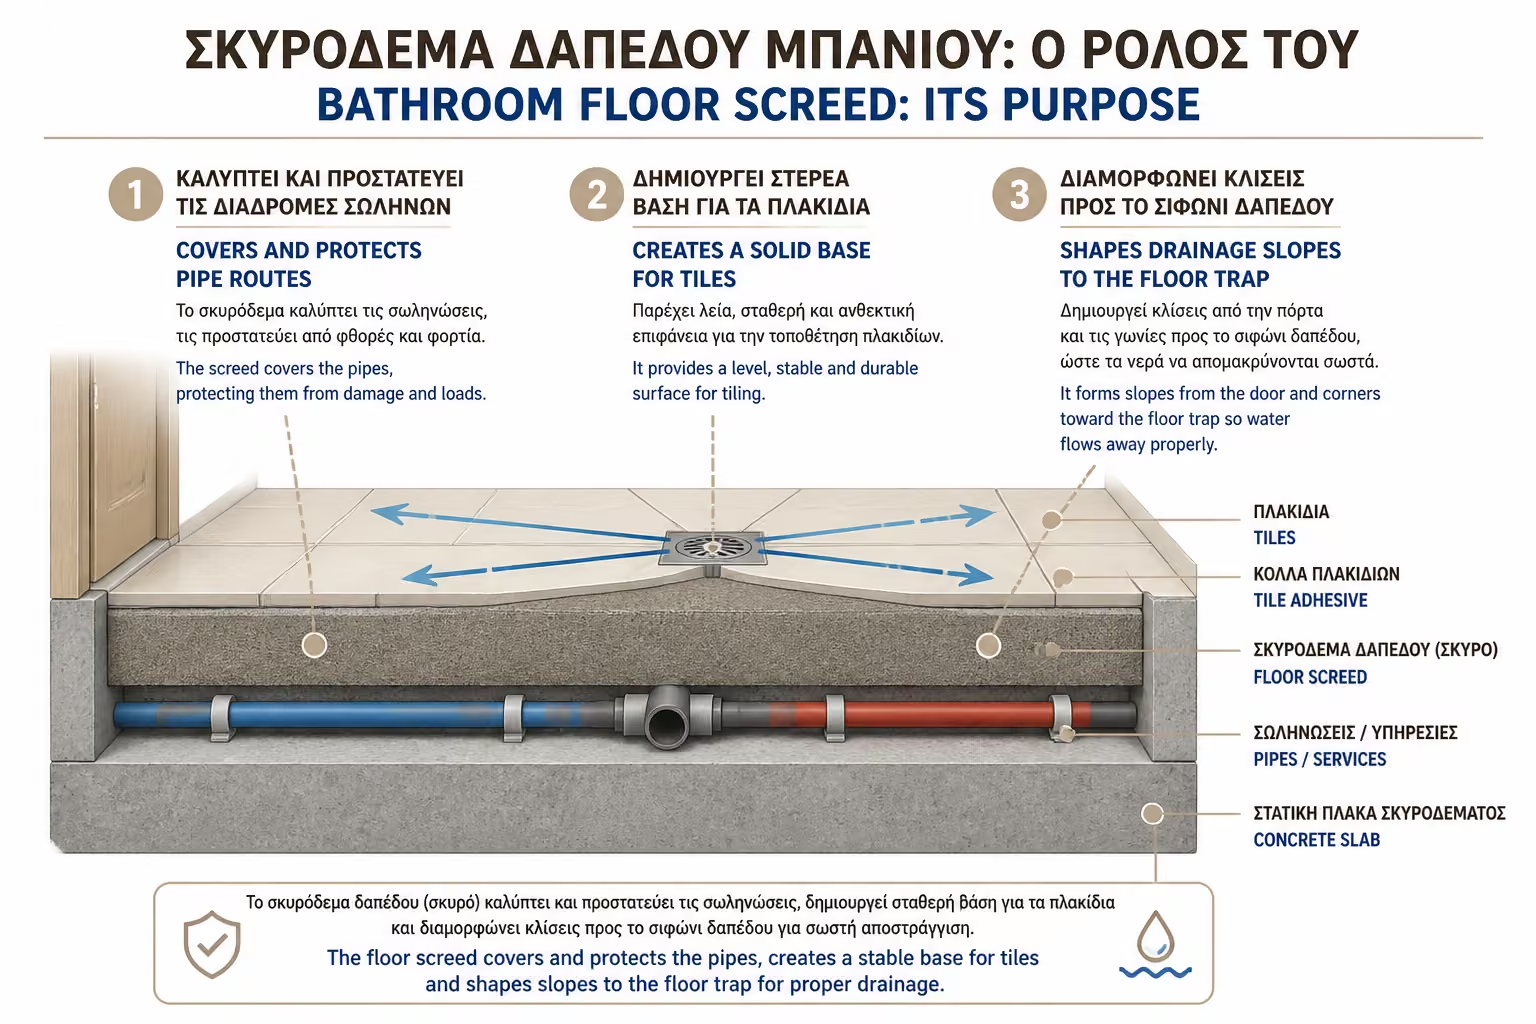
It covers and protects the routes of drains and water pipes that pass through the floor.
It offers a firm, solid and flat surface to which the tiles can then be glued.
It creates the necessary slopes from the front door and the corners of the bathroom to the central siphon.
Sights are not made with the eye. They obey strict construction rules:
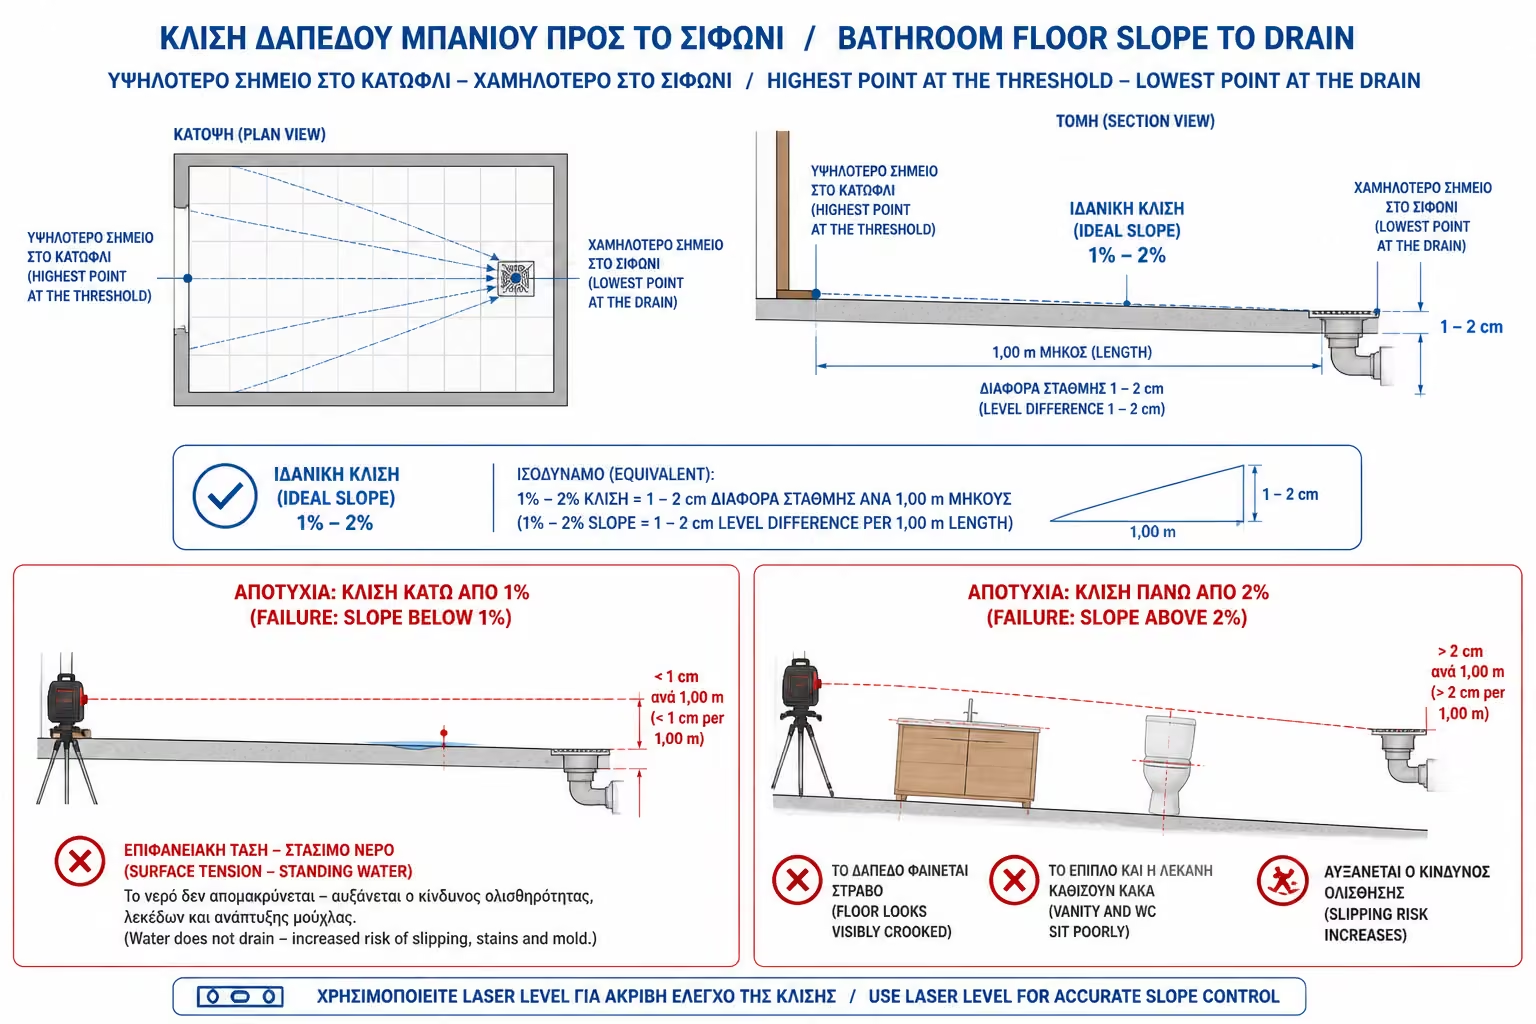
The technician installs guides using a laser rangefinder, starting from the highest point (the bathroom door threshold) and ending at the lowest point (the faucet).
For a typical bathroom, the ideal slope is between 1% and 2%. This practically translates into 1 to 2 centimeters of height difference for every 1 meter of length.
If the slope is less than 1%, the water due to surface tension will stagnate. If it is more than 2%, the floor will look obviously crooked, the furniture and the basin will not step firmly, and there will be a risk of slipping (sliding) for the user.
The way the cement mortar will be laid depends directly on the type of drainage you have chosen for your shower:
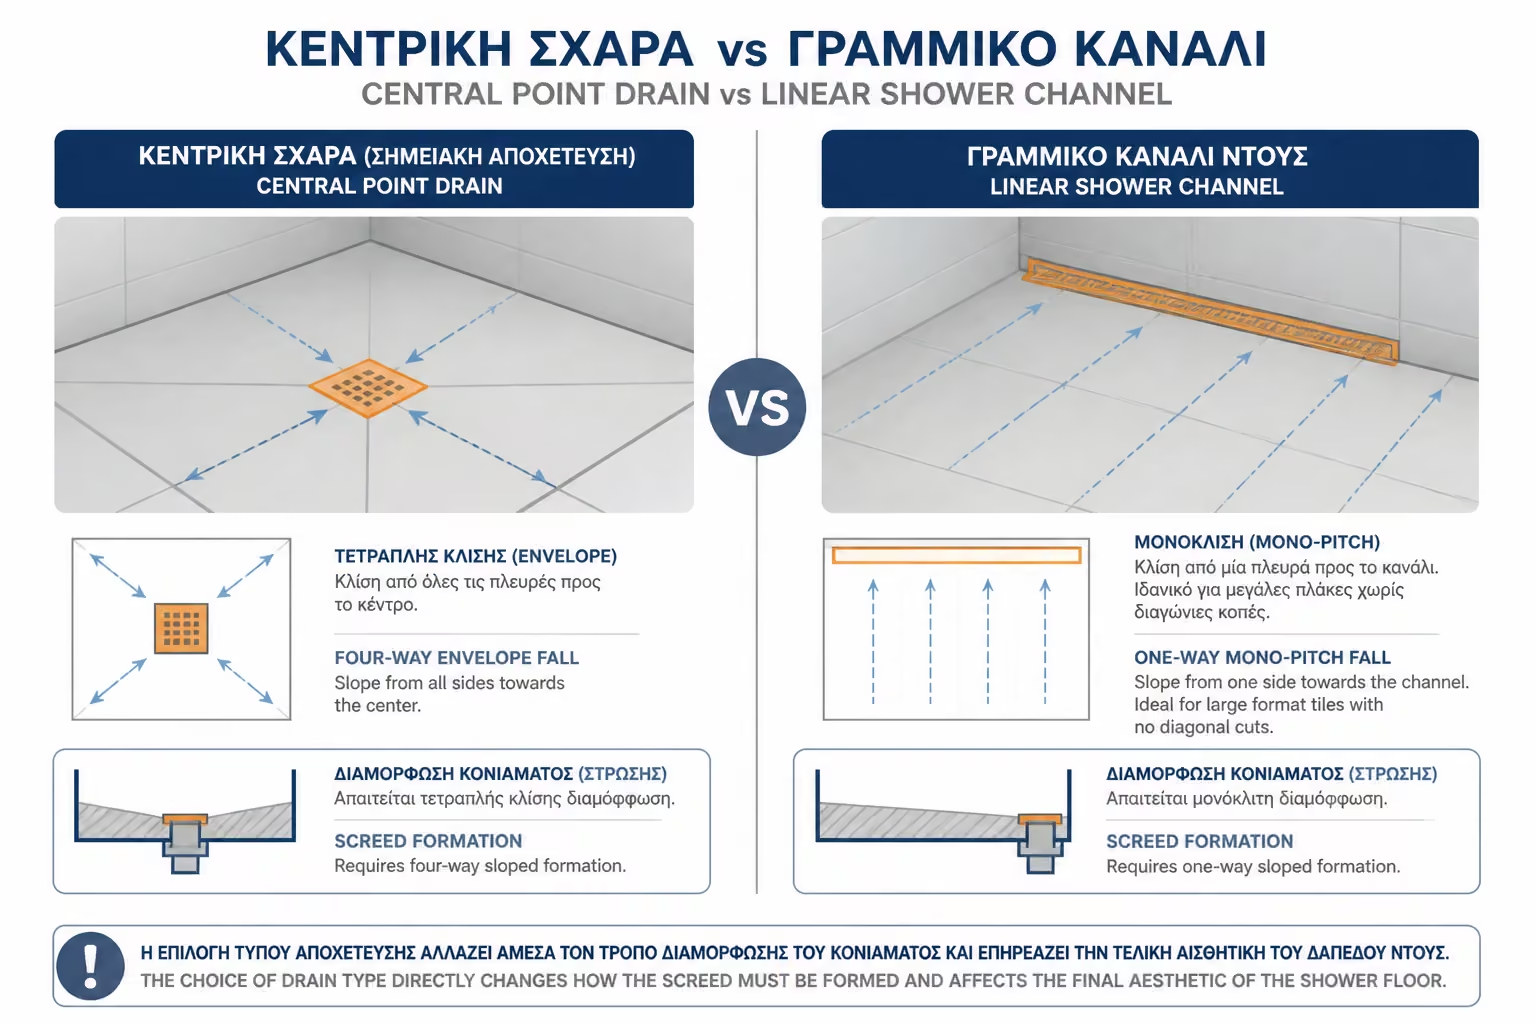
It requires the so-called "vessels" or "folder". The cement mortar should slope from all 4 sides towards the center. This means that the tiler will need to cut the floor tiles diagonally (triangular cuts) to follow the slopes, which affects the aesthetic effect if the tiles are large.
It is the most modern and minimalist solution. The channel is usually placed "face" to a wall. Here the cement mortar needs a monoclinic flow, i.e. a slope in one direction only. This allows for large tiles to be installed without cutting into the floor at all.
A simple cement mortar can easily crack (crack) when drying, especially if its thickness is thin in some places above the pipes. For this reason, modern technology requires:
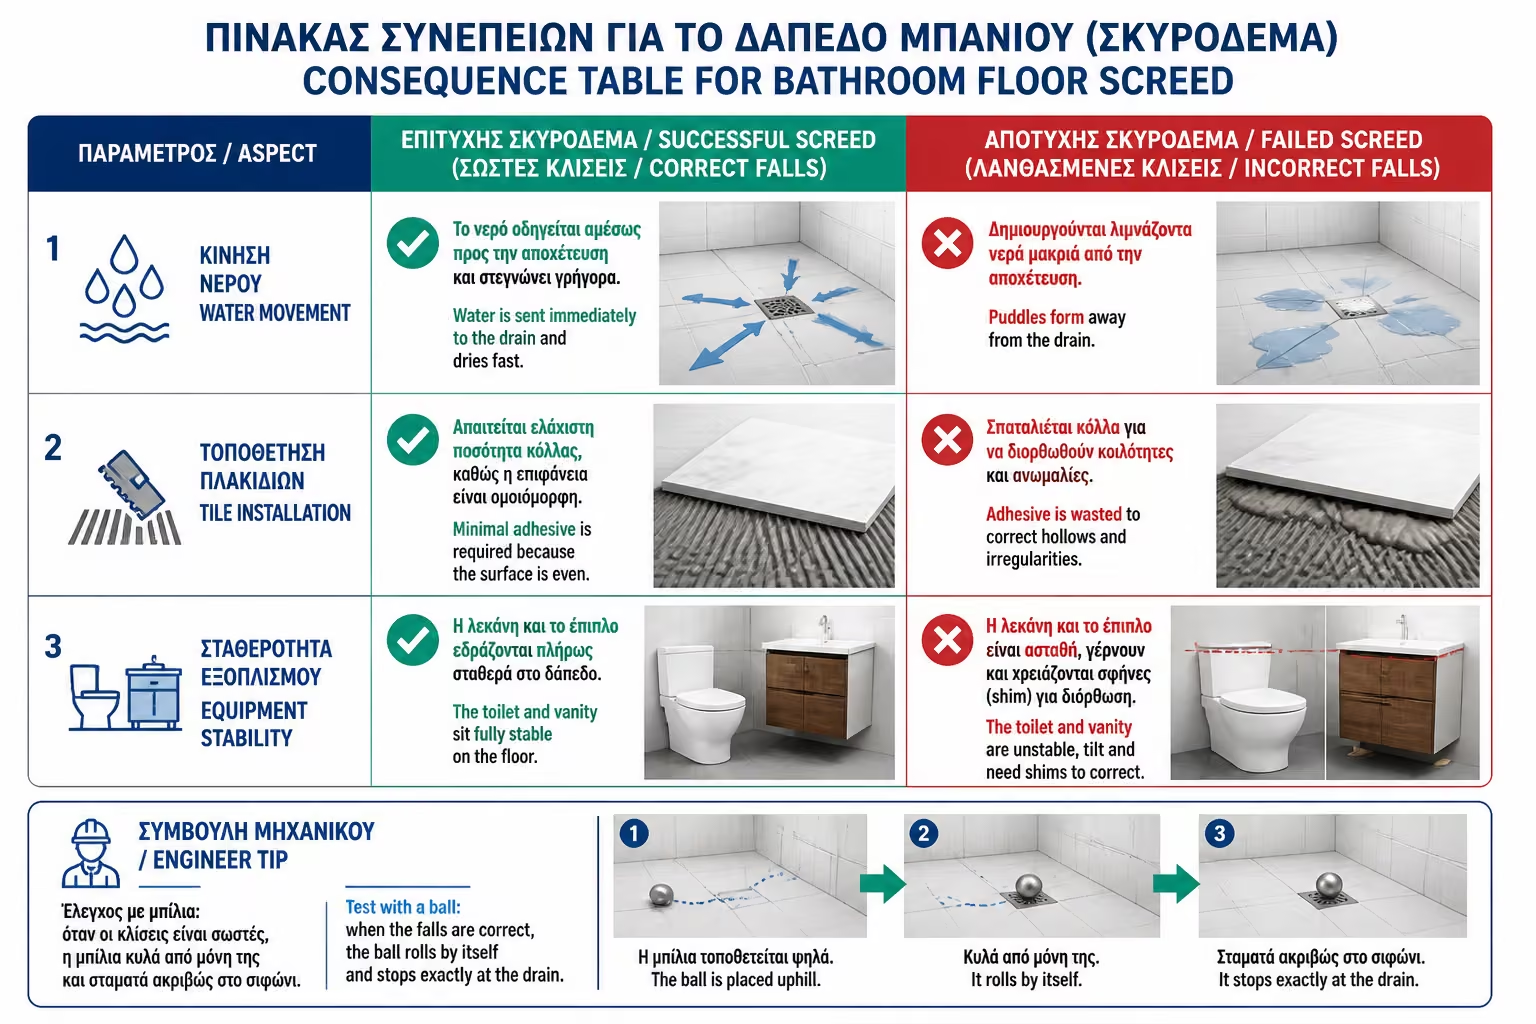
| Feature | Successful Cement Mortar 📐 | Failed Cementing ❌ |
|---|---|---|
| Water Movement | The water flows immediately into the siphon. The floor dries quickly. | The waters form "pools" away from the siphon. |
| Placing Tiles | Minimal use of glue, perfectly flat application. | Big waste of glue to fix potholes. |
| Equipment Stability | The basin and the furniture are 100% stable. | Furniture leans or needs "wedges" to straighten. |
If the cement mortar has been placed correctly, the ball should roll on its own and stop right on the siphon. If it stops mid-way or runs off into the wall, the grout has the wrong flow and needs to be corrected immediately before the space is sealed."
Our floor now has the correct slopes and is ready to receive its armor.
In the next article we move on to one of the most critical sub-pillars of renovation: Phase 5 - Waterproofing (Preparation). We will see how we create an impermeable, elastic membrane under the tiles to make sure that moisture never gets through to the walls and neighbors.
Return to category.
Go to categoryReturn to the central guide.
Go to guide