Phase 8 - Sanitary & Furniture Installation: Assembling the Space
Now that the ceiling is painted and the dust from the scuffs has been
removed, it's time for the main "protagonists" to enter the
bathroom. In Phase 8, the space ceases to resemble yapi and takes on its
final form and usability.
The installation of furniture and sanitary ware requires surgical
precision and, above all, absolute protection of the new tiles.
Carelessness in drilling or a heavy tool falling on the floor can cause
irreparable damage.
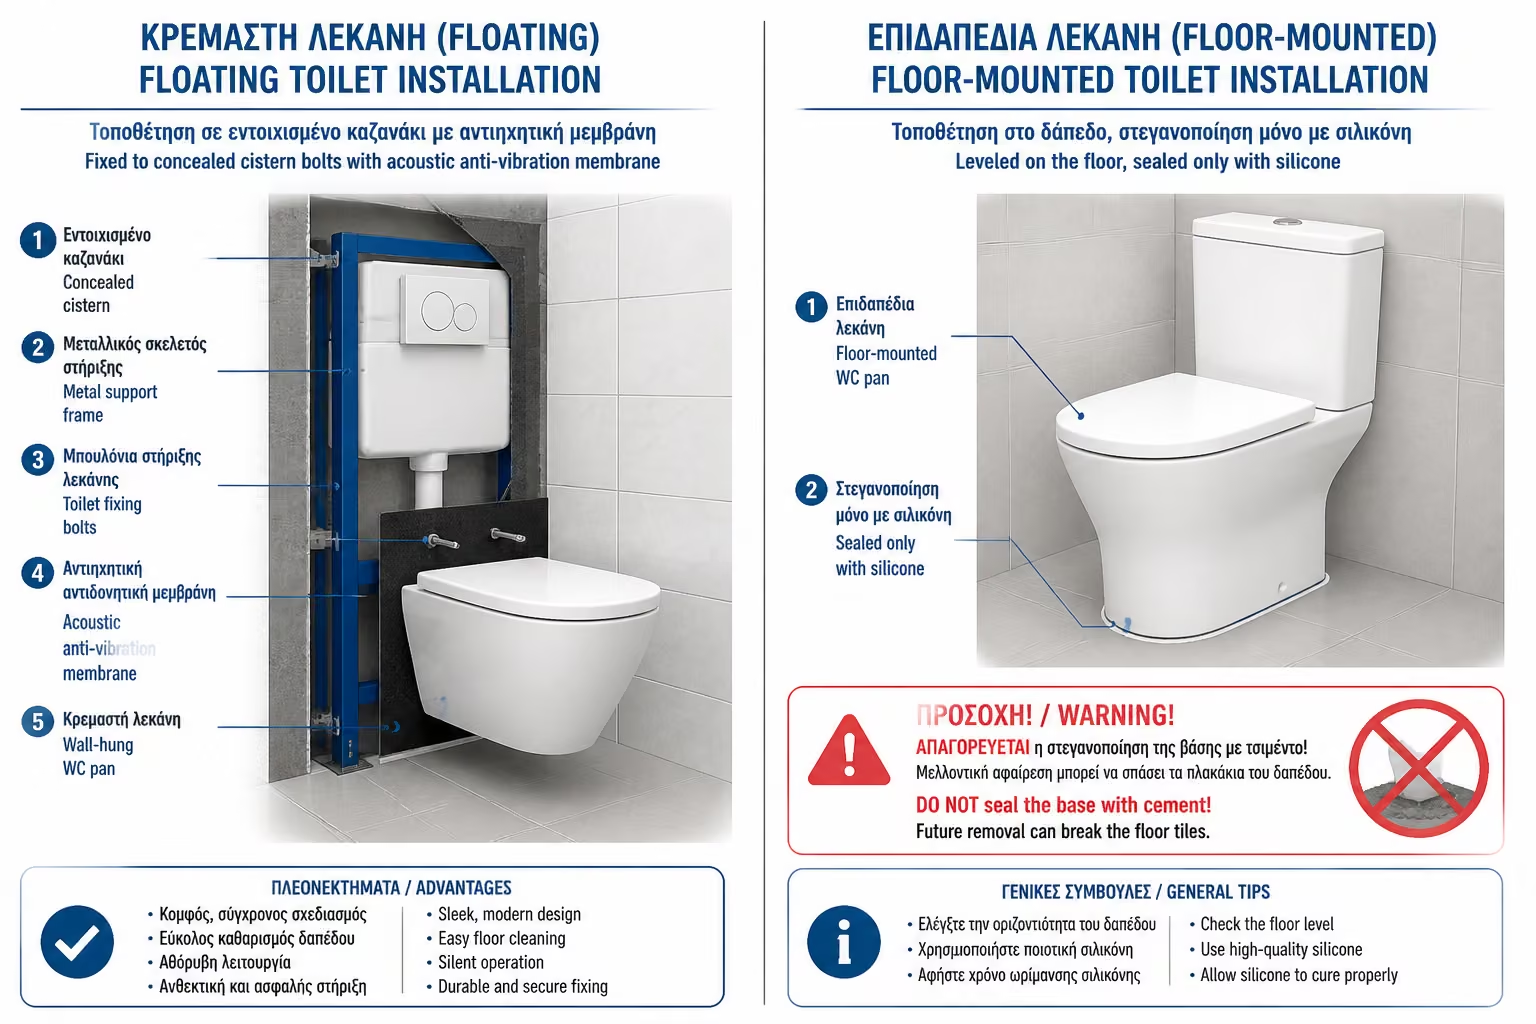
1. Placing the Basin (Hanging or Floor)
The basin is the first element to be installed, as it determines the
movement distances in the space.
If you have a Hanging Basin
The plumber attaches it to the bolts of the built-in cistern which
was hidden behind the plasterboard in Phase 2. Here it is mandatory
to use sound insulation / anti-vibration membrane between the
cistern and the tile. If it is omitted, the pressure when sitting
will be transferred directly to the tile, with a great risk of
cracking it.
If you have a Floor Basin
The basin is leveled to the floor and screwed. Attention: Its base
is sealed with the floor exclusively with silicone, never with white
cement. The cement will set and, if the basin needs to be unscrewed
for a blockage in the future, it will drift and break the floor
tiles.
2. Bathroom Furniture & Washbasin: Correct Heights and Support
Bathroom furniture is subject to daily stress, so its support on the
wall must be stable, especially if it is wall-hung.
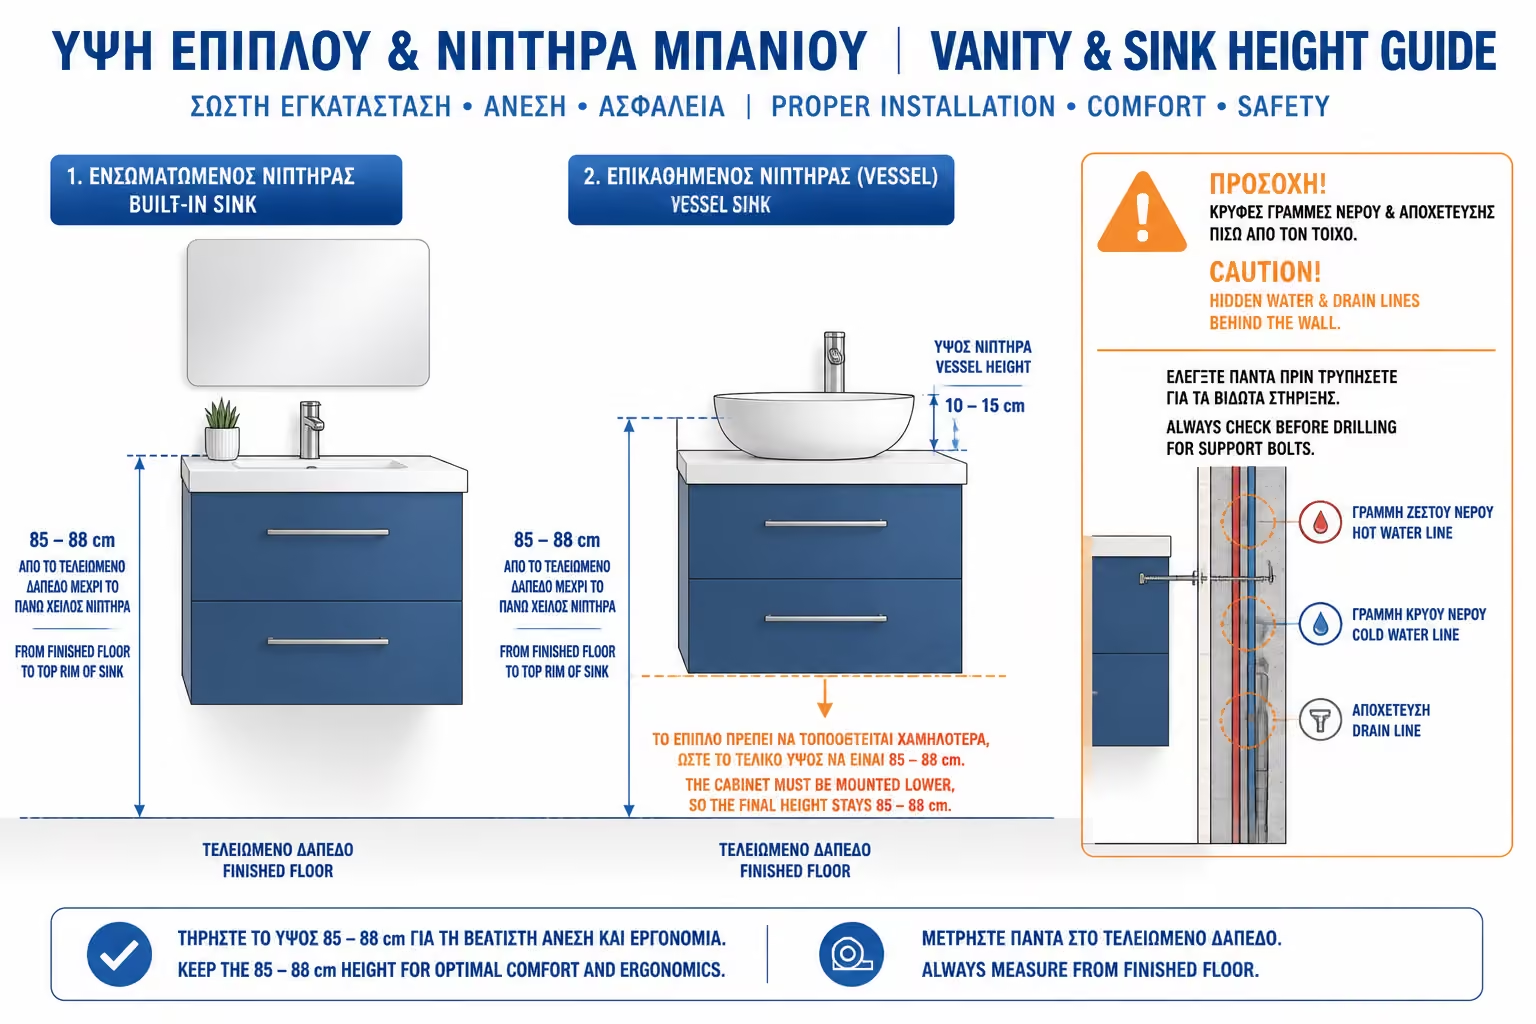
The Golden Height
The standard height for the top lip of the sink (where our hands
rest) is 85 to 88 cm from the finished floor. If you have a table
washbasin (bowl type), the piece of furniture must be placed lower,
so that together with the height of the bowl, the final result does
not exceed 88 cm.
The Waiting Trap
Before the wall is drilled, it is double-checked that the support
screws do not coincide with the internal water and drainage pipes
that pass directly behind.
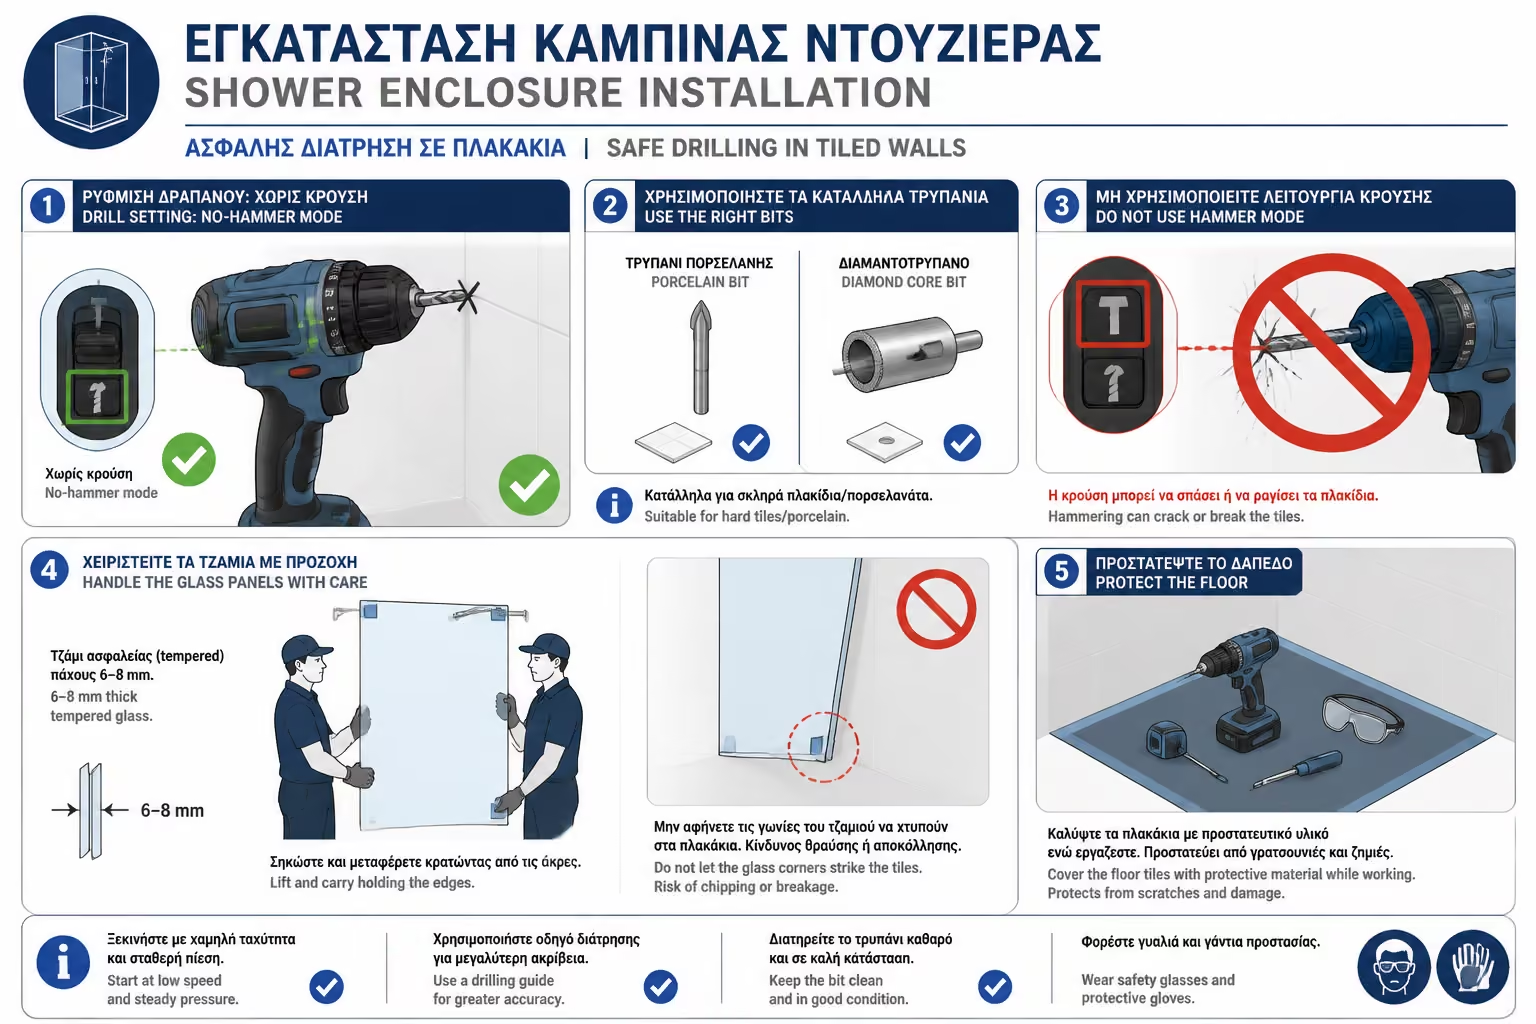
3. The Glass Shower Cabin: Safety and Durability
The cabin is the element that will keep the humidity limited.
Punch without Impact
To fix the metal profiles of the cabin, the craftsman has to drill
holes in the wall tiles. This is done exclusively with special
porcelain drills or diamond drills, with the electric drill set
without impact. If an impact (compressor) is used, the tile will
break immediately.
Safety Glass (Tempered)
Crystals of at least 6mm to 8mm thickness are used. During
installation, the corners of the crystals should not hit the tile
with force, as tempered glass is sensitive to shocks at its edges.
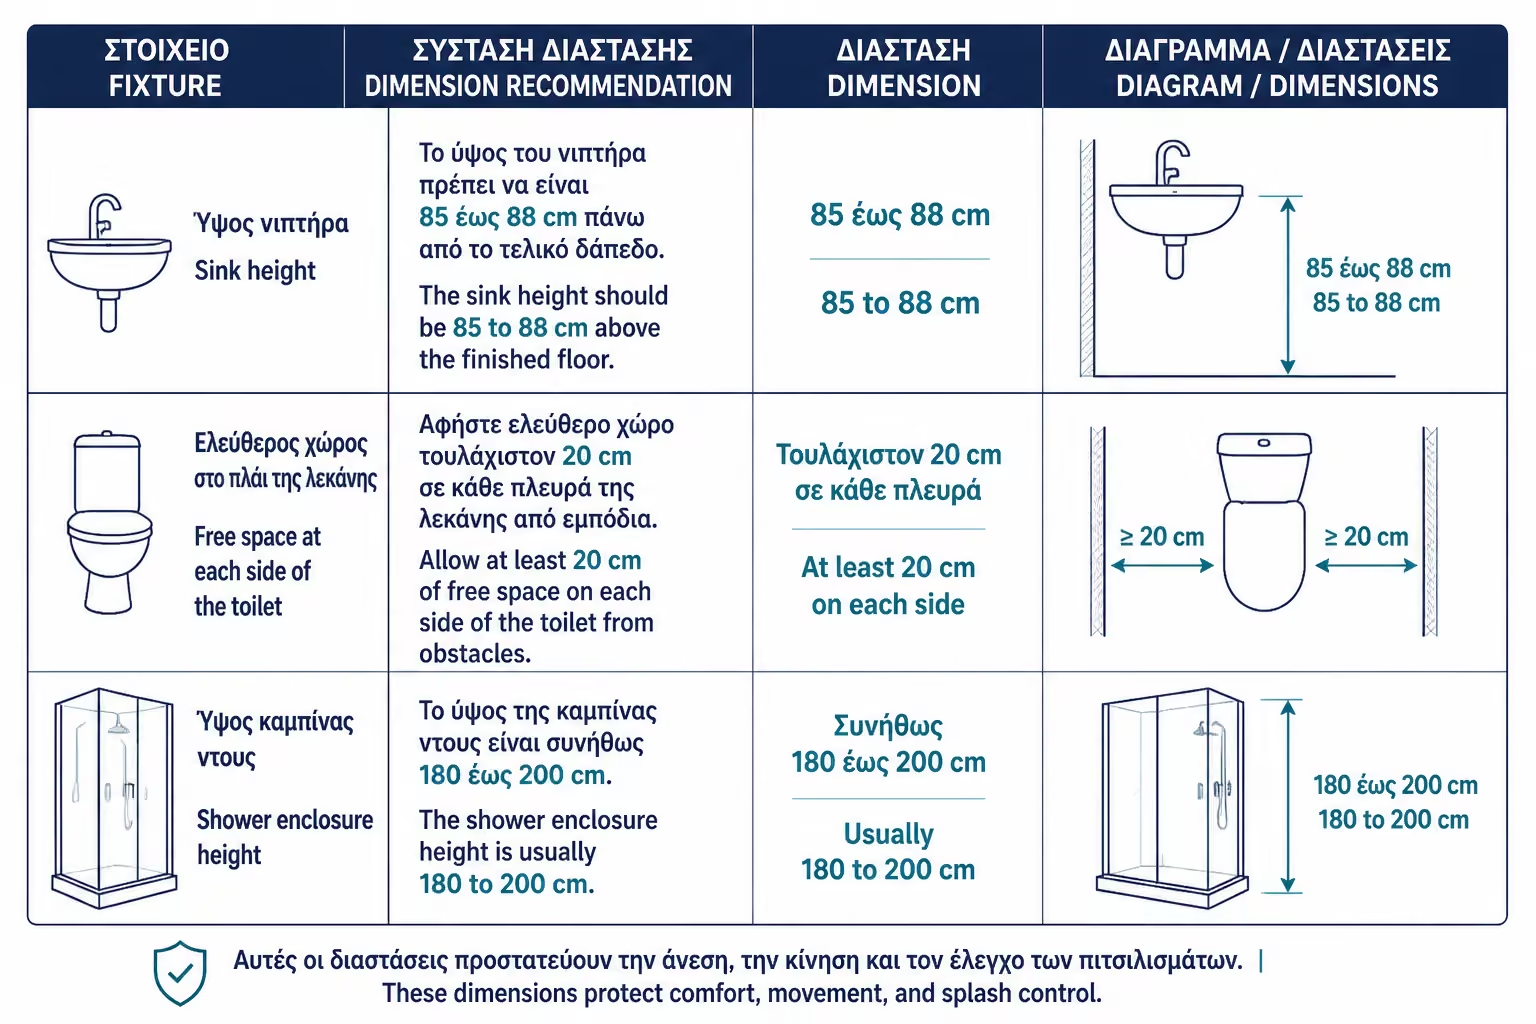
📊 Table of Ideal Distances & Heights
Item of Equipment
Correct Measurement
Why does it matter?
Washbasin height
85 – 88 cm from the floor
Easy to wash without straining the waist.
Free space to the right/left of the pelvis
At least 20 cm from any obstacle
So that the user does not feel cramped.
Cabin height
Usually 180 – 200 cm
Prevents shower splashes from escaping.
💡 The Engineer's Advice
"When the cabinet and basin are installed, ask the crew not to
throw away their protective boxes. After the furniture is screwed down,
the craftsmen should cover it again with the cardboard and nylon
packaging. There is one more phase of work (the final connections and
accessories) and you don't want any tools to accidentally fall into the
brand new sink or onto the basin lid creating permanent marks."