Having finished laying the tiles, the bathroom is now
"dressed" to the height you have chosen. But before anything
resembling a piece of furniture, basin or sink enters the space, the
gaze and work must be directed exclusively upwards: to the ceiling (or
plasterboard) of the bathroom.
The choice to paint the ceiling at this exact point in time is not
accidental. It is a purely strategic move to protect your new equipment
and ensure the maximum possible resistance of the space to moisture.
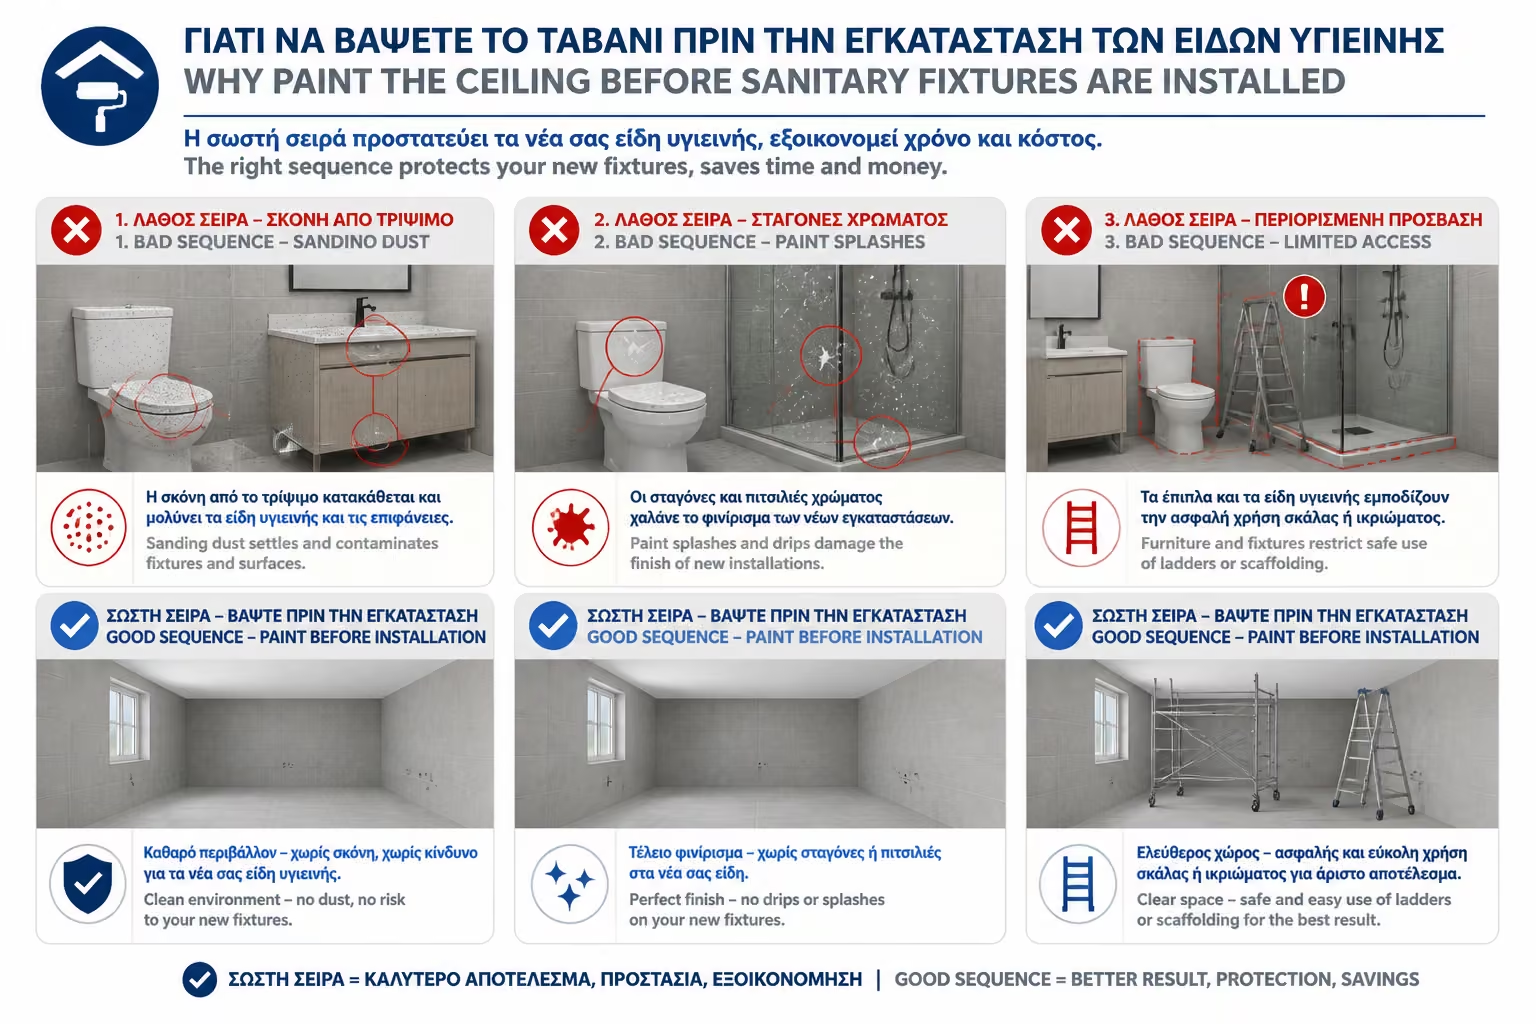
1. Why is the Ceiling Painted BEFORE the Sanitary Ware goes in?
Many DIYers leave painting for last, thinking of it as an "easy
finishing job". This is a big management mistake for three main
reasons:
The "Storm" of Dust
To make the ceiling smooth, the painter must putty and, above all,
sand it with a manual or electric sander (giraffe). This process
produces an incredibly fine, penetrating powder. If your new basin,
cabinet and batteries are already installed, this dust will sit
everywhere, get into the mechanisms and silicones, making cleaning a
nightmare.
The Danger of Splashes
No matter how careful the painter is, the roller always
"tears" or throws tiny drops. It's much easier to clean a
drop of plastic paint off a bare tile than trying to scrape it off a
brand new glass cabinet or wooden vanity.
Freedom of Movement
With no basins or furniture obstructing the floor, the handyman can
set up their scaffolding or ladder safely, move quickly and paint
seamlessly without fear of breaking or scratching anything.
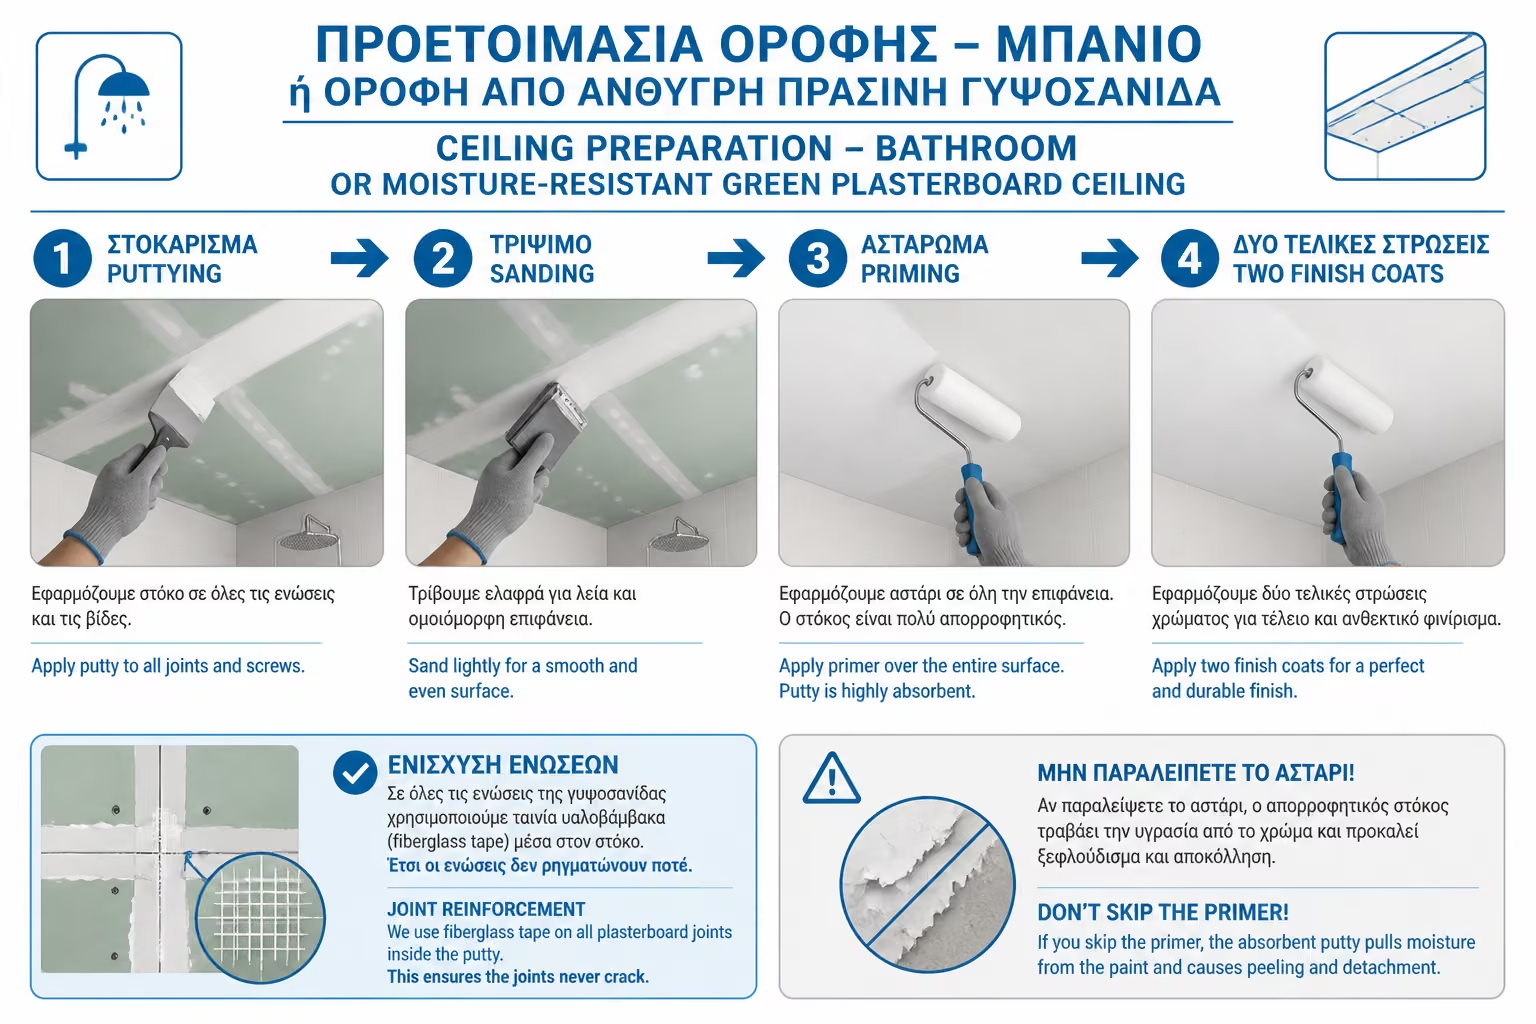
2. The Process: Stocking & Grinding
The bathroom ceiling suffers all the time from the water vapors of the
hot water.
Preparation
If the ceiling is concrete, it is scraped well to remove any loose
parts. If it is made of gypsum board (which must be anhydrous -
green in color), the joints of the sheets are covered with a special
self-adhesive glass tape (kraft) so that they never crack.
Stocking
Acrylic putty putty is applied (usually two coats) to completely
level the surface.
Primer
This is the step that people in a hurry often "forget".
The putty is highly absorbent. If painted without a primer, the
paint will peel within a few months. Micronized acrylic primer or
solvent primer is used, which "locks" the putty and
creates the perfect adhesion bridge for the paint.
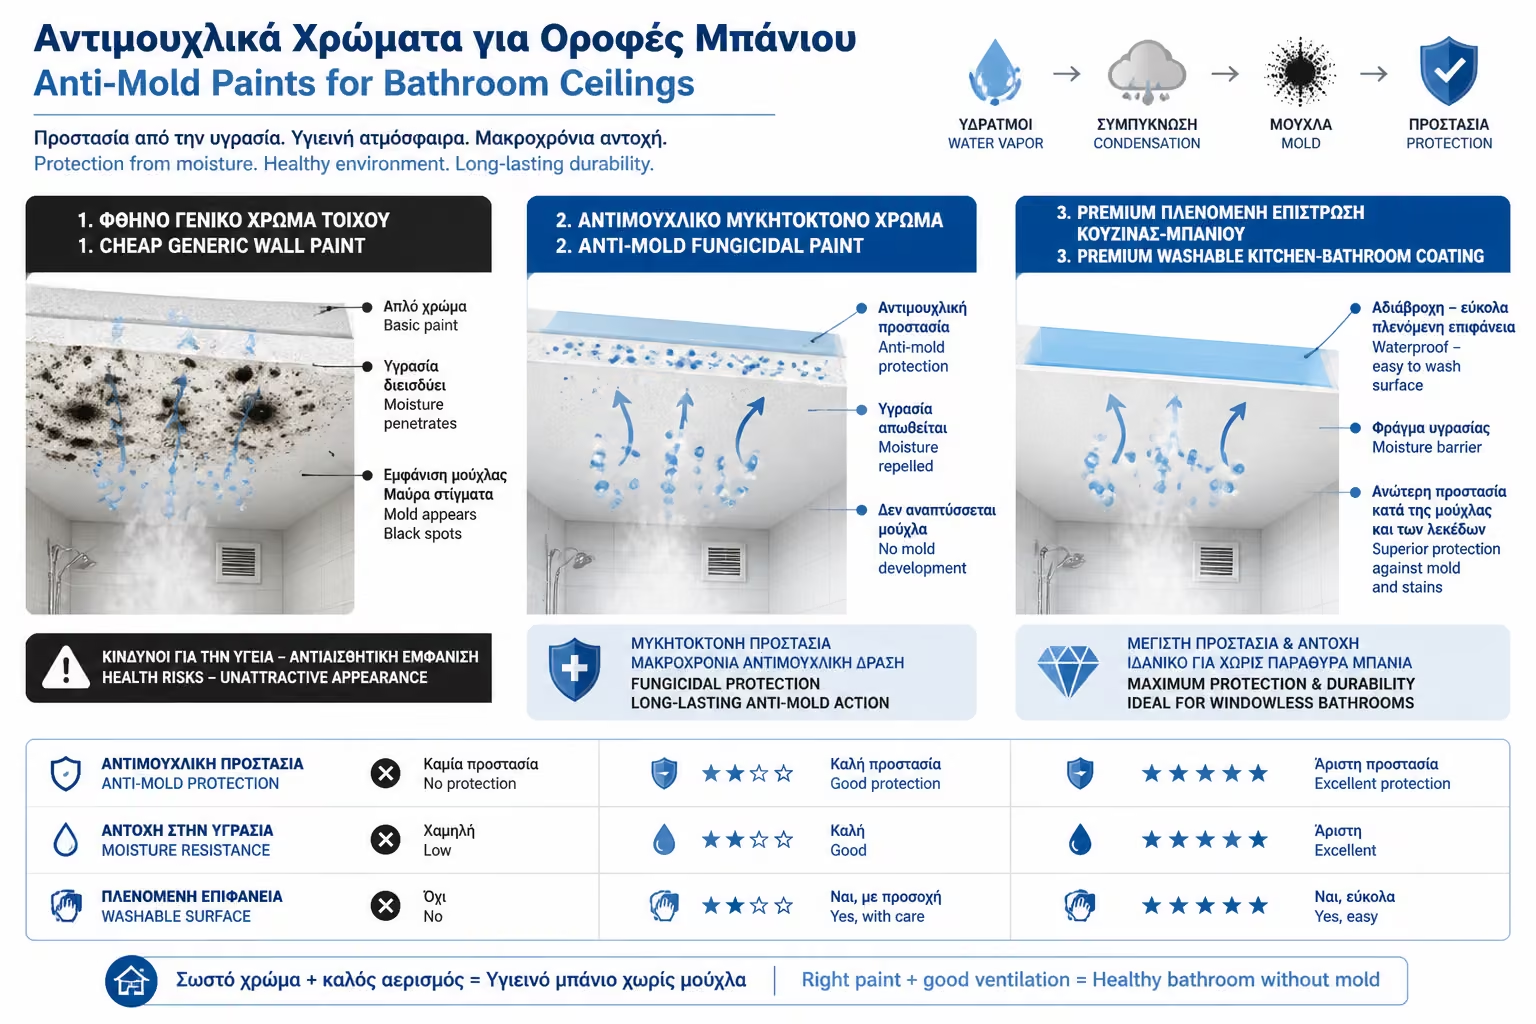
3. Color Selection: The Battle Against Mold
In the bathroom, the use of simple, cheap plastic colors is
prohibited. You need special "weapons" for areas with high
water vapor concentration:
Antifungal / Fungicidal Paints
These are special acrylic or plastic paints, enriched with strong
fungicidal additives. They effectively prevent the growth of black
spots (mold) created by trapped water vapors, especially in the
corners of the ceiling.
Polyurethane or Epoxy paints (for extreme situations)
If your bathroom has no window at all (but only ventilation), it is
worth investing in a premium satin or matte paint specifically for
"kitchen bathrooms", which creates a washable film that
withstands even frequent scrubbing with a sponge.
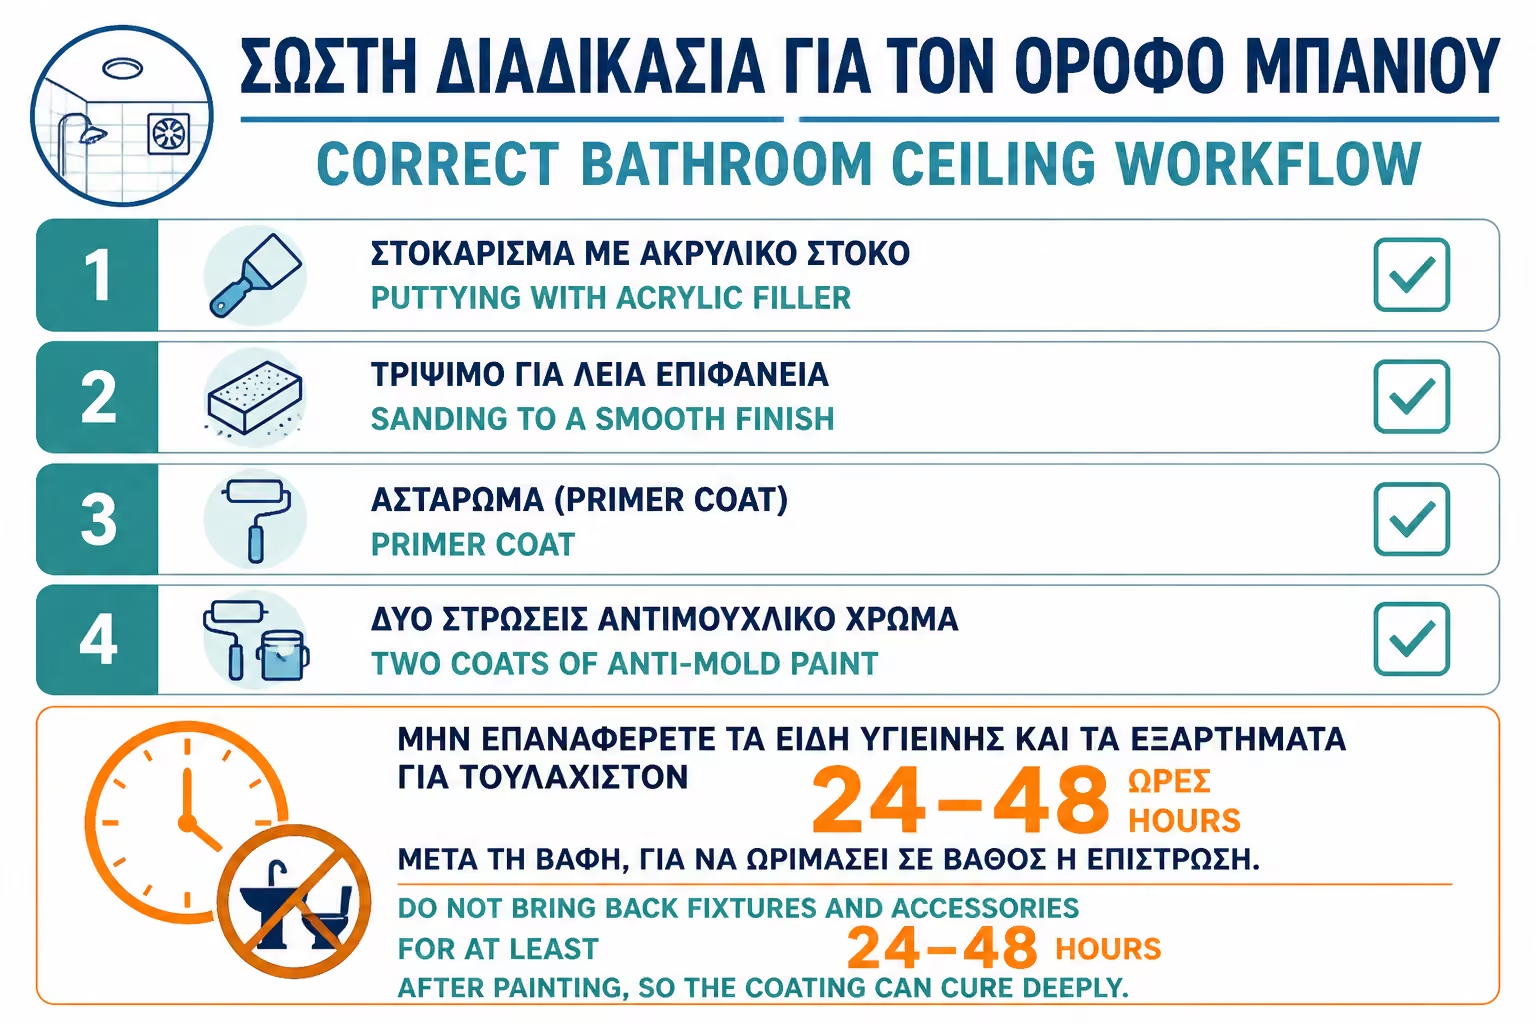
📊 Checklist: The Correct Row on the Ceiling
Step
Work
Material
Why is it necessary?
1
Spatula
Acrylic Putty
Eliminates imperfections and joints.
2
Rubbing
Sandpaper / Machine
Creates a perfectly smooth surface.
3
Primer
Micronized Primer
It stabilizes the putty so that the paint does not peel.
4
Painting (2 hands)
Anti-mould Paint
Protects against water vapor and mold.
💡 The Engineer's Advice
"When the painter finishes painting the ceiling, don't rush to
bring in the plumber the same day. The mold-resistant paint needs at
least 24 to 48 hours to 'cure' (deep dry and the fungicide chemicals to
fully activate). Once that time has passed, the ceiling is now a
ready-made, hard shield. Then, and only then, is the space ready to
welcome the hygiene products without any risk."