The Craftsman Technique
The right technician wraps the battery nuts with electrical tape or a soft cloth before tightening with a wrench so as not to leave permanent, unsightly marks on the metal.
If the previous phase was about the volume of furniture and sanitary ware, Phase 9 is about functionality, safety and aesthetic perfection. It is the stage where the scattered waits of cables and pipes turn into running water, light and ergonomics.
At this stage, the plumber and electrician make their final pass. Here, everything is judged down to the millimeter details, while the most critical material for the longevity of the bathroom is used: mold-resistant silicone.
Modern batteries (especially the trendy matte black ones, copper ones or built-in ones) have sensitive coatings that are easily scratched when tightening.
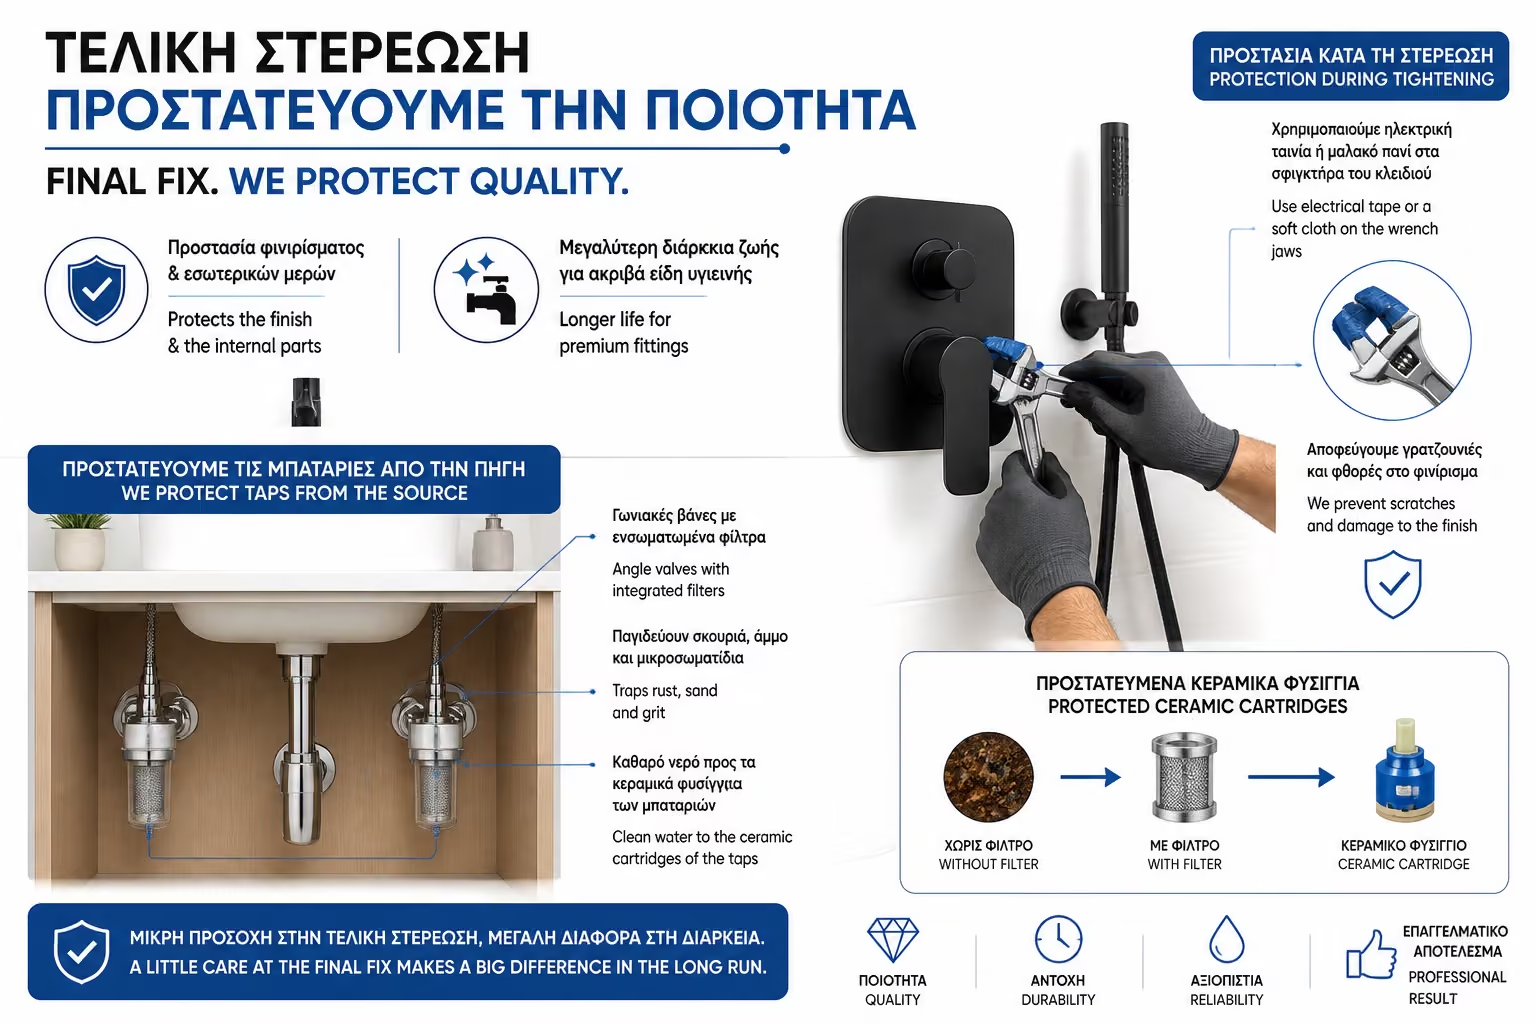
The right technician wraps the battery nuts with electrical tape or a soft cloth before tightening with a wrench so as not to leave permanent, unsightly marks on the metal.
Under the furniture, water supplies must be connected to switches that have a built-in filter. These retain mains grit and rust, protecting the ceramic mechanisms of your expensive batteries from premature wear.
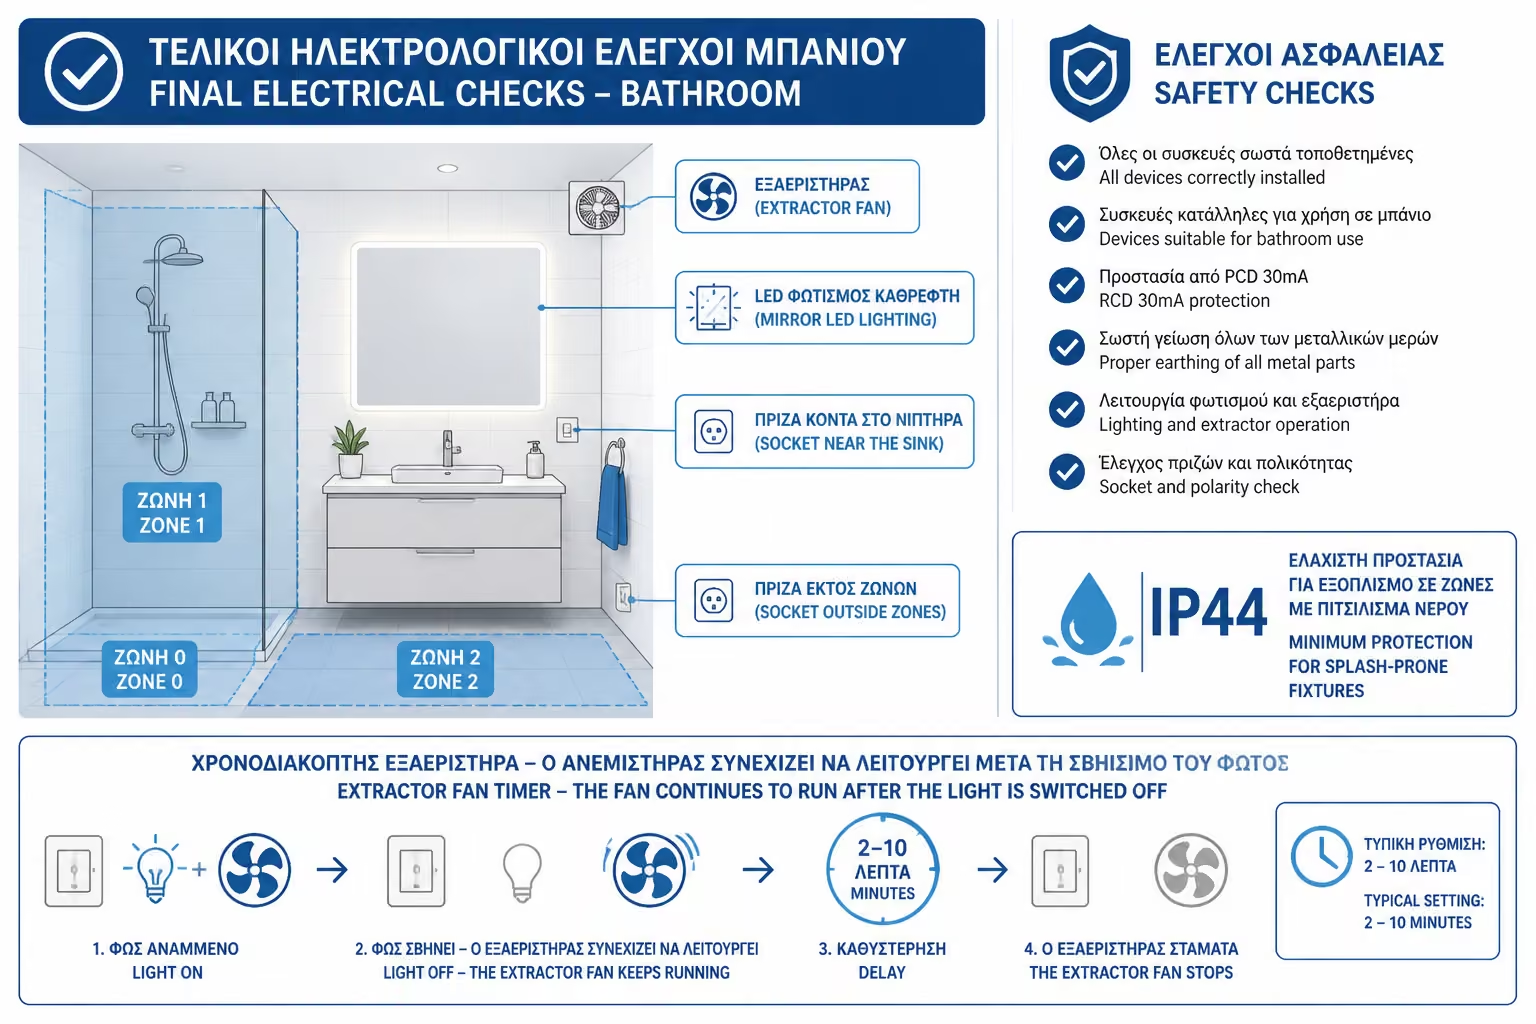
Water and current are mortal enemies. In the bathroom, safety rules are strict.
All sockets and lamps placed near water sources (sink, shower) must have a minimum protection index of IP44. This means that they withstand splashes and intense humidity.
The mirror LED lighting and the electric vent (if there is no window) are connected, which should have a timer so that it continues to run for a few minutes after the light goes out, removing water vapor.
Paper cases, towel racks, soap dishes and the central mirror take their place.
As in the cabin, the drilling of the accessories on the tiles is done without impact and with special glasses or porcelain drills.
The ideal position for toilet paper is about 65-70cm from the floor and 20cm in front of the rim of the bowl for easy access.
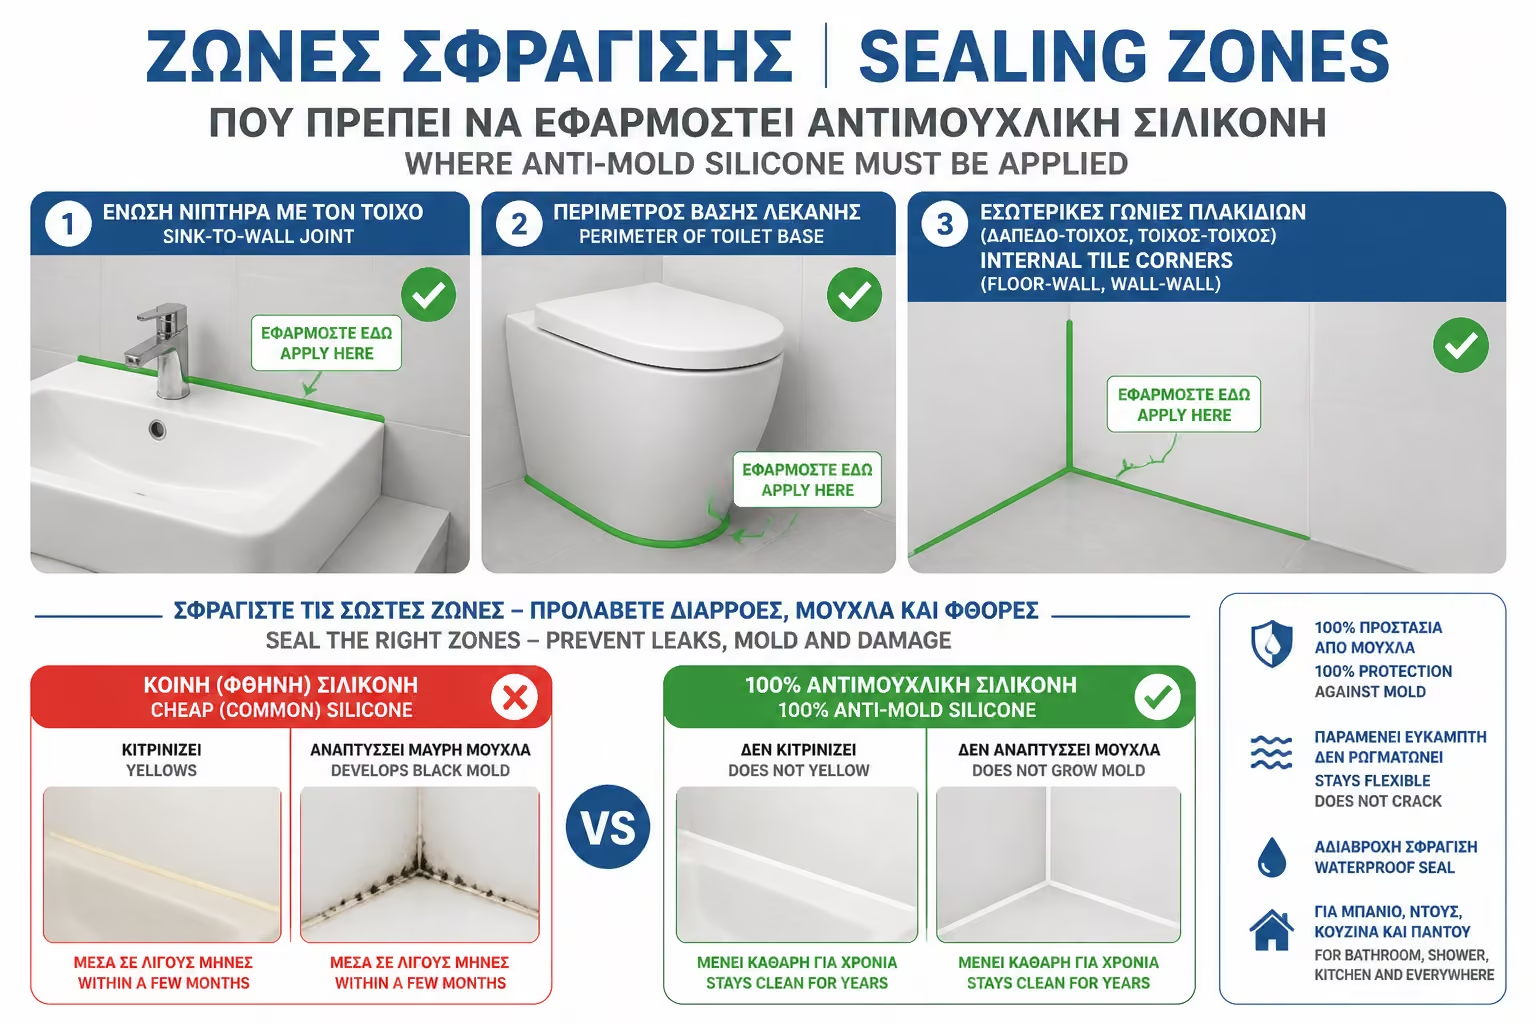
Silicone is not just a decorative material; it is the rubber seal of the bathroom. Caution: Common, cheap silicone will yellow and fill with black mold spots within six months.
Only 100% pure, fungicidal (anti-mould) silicone is used, which is applied:
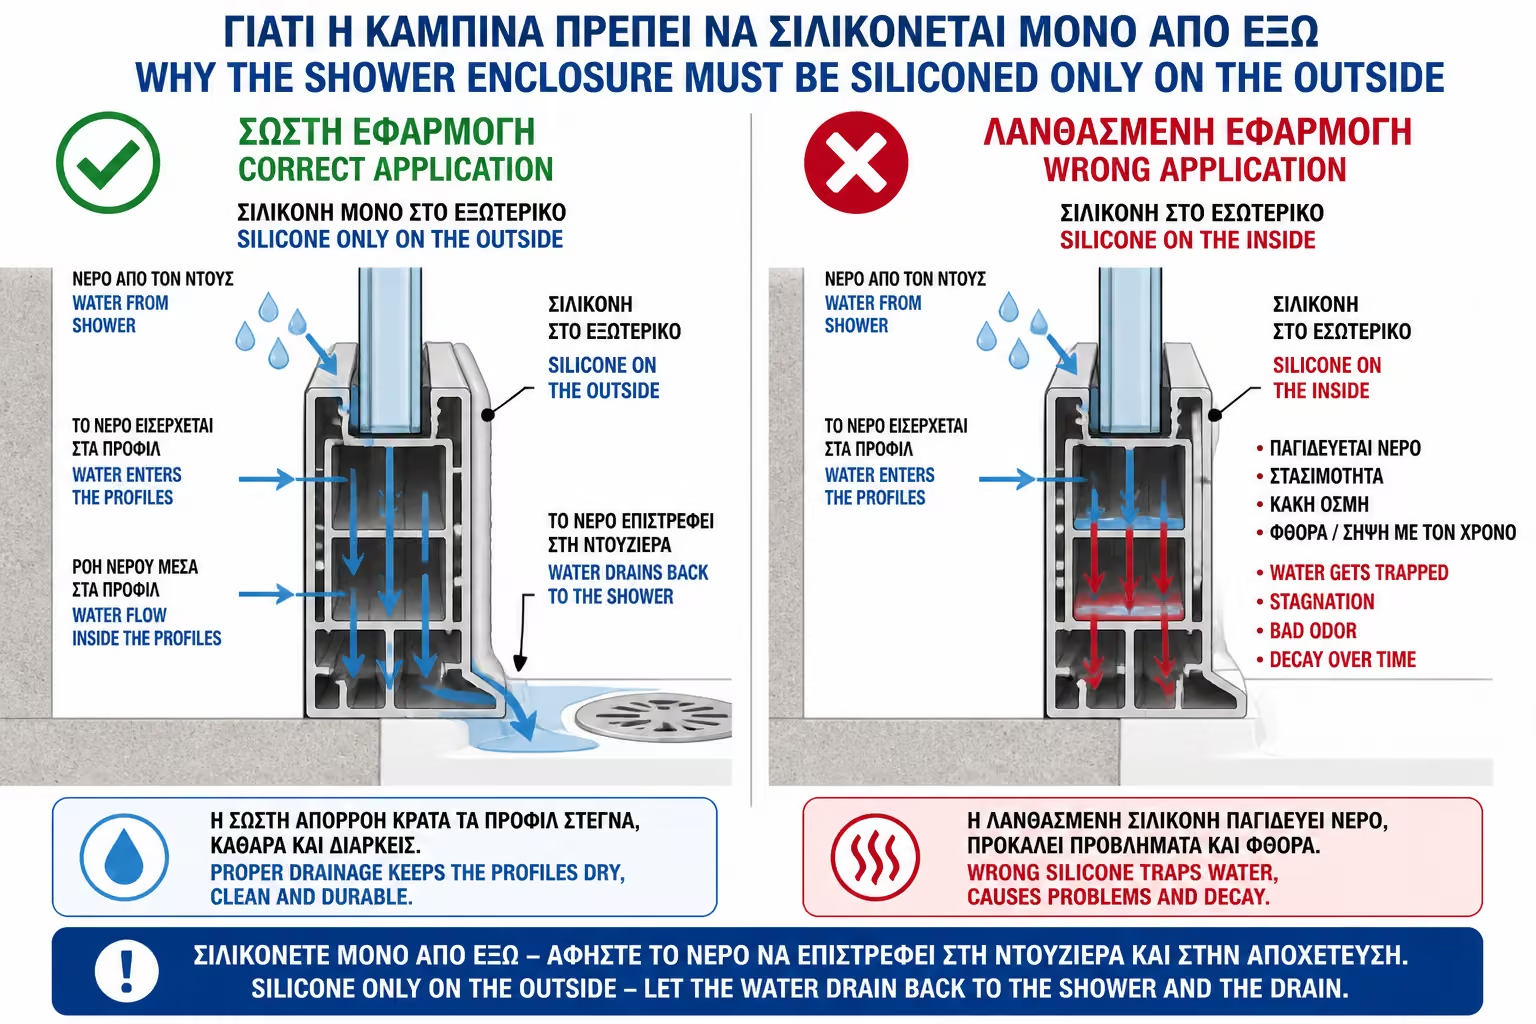
> The Secret of the Cabin: The glass cabin is STRICTLY siliconed ONLY on its outside. If silicone is inserted from the inside, the water trapped in the aluminum profiles cannot escape, stagnates, rots the material and creates a bad smell. Silicone on the outside means that water slides off the inside and goes back down the drain.
| Feature | Common Trade Silicone ❌ | Fungicide (Anti-mold) Silicone 🛡️ |
|---|---|---|
| Moisture resistance | Small. It peels off easily. | Excellent. It maintains its elasticity. |
| Appearance of Mold | It tans quickly from water vapor. | Contains additives that inhibit fungi. |
| Aesthetics in Time | Its color turns yellow and changes. | It remains crystalline, white or colored. |
"Once the plumber has finished all the connections, do what's called a Crash Test. Before packing up his tools, run all the batteries in the hot water for 5 minutes at full pressure. Take a dry piece of toilet paper and run it under the faucets, behind the basin, and around the corner switches. If the paper stays completely dry, the job is perfect. If you see even a hint of moisture darkening the paper, there is microleakage (tear) and the connection must be retightened on site."
The connections are complete, the silicones are laid and your bathroom is now fully functional!
Let's see how this all translates into time shall we? Here is the Detailed Work Schedule: How many days does each stage actually take in a realistic 7-10 day plan?
Return to category.
Go to categoryReturn to the central guide.
Go to guide