

Bathroom DIY, Maintenance & Styling
Return to category.
Go to categoryJoints are one of the first signs that reveal the true age and use of a bathroom. The tiles may be clean, polished and in good condition, but if the joints are blackened, yellowed or filled with gray "smoke", the whole area looks dirty. This is especially the case around the shower, at the base of the tub, behind the basin, near the floor drain and in low spots where water remains.
The problem is that the joint does not behave like the tile. Tile is usually a more closed, hard and easily cleaned surface. Grout, on the other hand, is more porous. Holds soaps, salts, dust, cleaning residues, moisture and, in poor ventilation conditions, mold. That's why you can sand the tiles and they look clean, but the lines between them remain dull and dark.
Whitening joints is not just a cosmetic job. When done correctly, it helps remove surface dirt, reduce mold, see if the grout is still healthy, and better protect the surface. When done wrong, however, it can wear down the joint, make it more porous, wash away its material, or create the illusion that a problem has been solved that actually needs caulking or replacement.
The best-known "home" solutions are baking soda, oxygen and the special joint brush. These can help a lot, especially on joints that have surface dirt or mild blackening. But it is not a panacea. If the joint is cracked, missing, chipped or has black mold deep in the material, cleaning may improve the appearance but not restore its technical condition.
In this guide we'll see how to tell dirt from mold, when it's worth trying bleach, how to use baking soda and oxygen, what role a brush plays, what chemicals to avoid or use with caution, and when the right way is not cleaning but re-caulking.
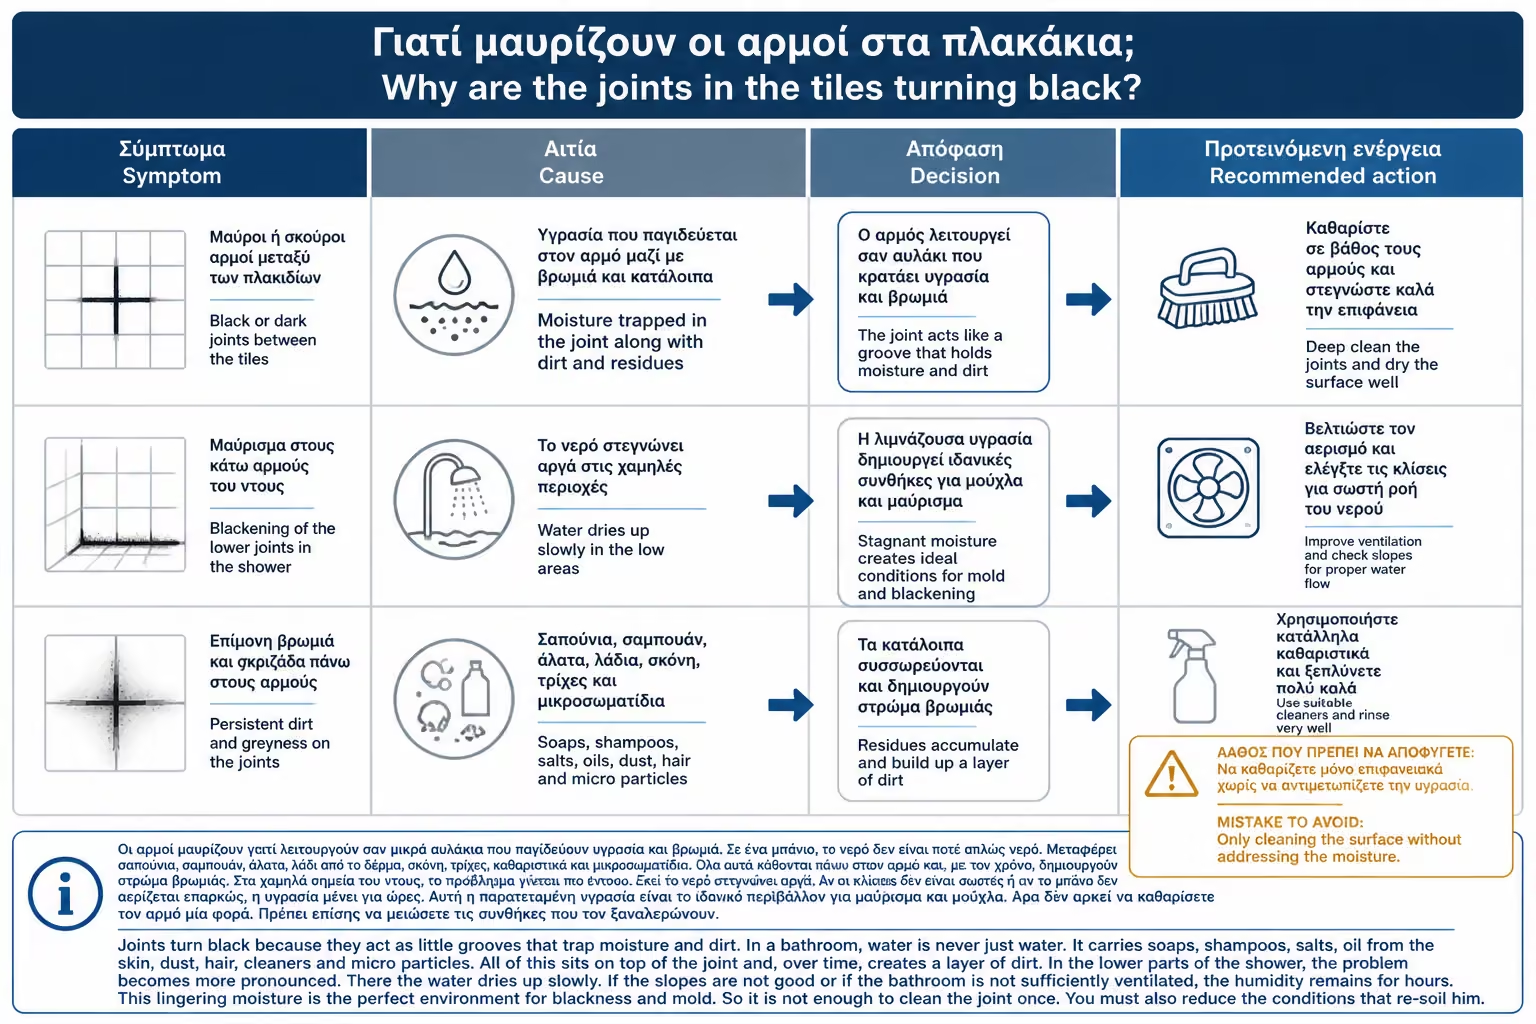
Joints turn black because they act as little grooves that trap moisture and dirt. In a bathroom, water is never just water. It carries soaps, shampoos, salts, oil from the skin, dust, hair, cleaners and micro particles. All of this sits on top of the joint and, over time, creates a layer of dirt.
In the lower parts of the shower, the problem becomes more pronounced. There the water dries up slowly. If the slopes are not good or if the bathroom is not sufficiently ventilated, the humidity remains for hours. This lingering moisture is the perfect environment for blackness and mold. So it is not enough to clean the joint once. You must also reduce the conditions that re-soil him.
There is also the "tobacco" of daily use. It's not literally smoke, but a gray-black layer of soaps, dust, salts and organic debris. This is often removed by good mechanical cleaning. Conversely, black mold that has set deep into the joint is more difficult and can return if the moisture is not addressed.
A practical example is the joint behind the basin or around the floor drain. It may not take a direct shower, but it collects moisture, dust and cleaning agents. If it is mopped often but not dried well, the joint gradually darkens and looks like the entire floor has aged.
Before you start whitening, you need to understand what you are trying to remove. Simple dirt is usually gray or brown in color and gradually comes off with scrubbing. Salts appear whiter, duller or harder and are often combined with soaps. Mold appears as black or dark spots, usually in places that stay wet.
The distinction is important because each problem requires a different approach. Dirt needs decontamination and brushing. Salts need mild acid action, with attention to ingredients. Mold needs cleaning, disinfection and above all humidity control. If you clean the mold but the spot remains constantly wet, it will return.
There are also cases where the joint is not dirty, but worn. If it has lost its surface, become rough or crumbled, then it looks darker because it holds dirt deeper. No matter how much you scrub it, it won't be as good as new. Local scraping and re-stucco may be needed.
A simple check is to test clean a small spot. If color lightens with gentle cleaning and brushing, there is hope for overall whitening. If it stays black, smells musty, or the grout comes out as powder, the problem is deeper.
Bleaching is worthwhile when the grout is technically sound but soiled. That is, when there is no material missing, there are no cracks, it does not crumble and the tiles around it are stable. In this case, proper cleaning can largely restore the original color, or at least bring it much closer to the original image.
It is also worth it when you want to refresh the image of the bathroom without doing any work. Clean joints greatly change the feel of the space. A bathroom with old but clean tiles can look dignified and well-kept. Conversely, a bathroom with expensive surfaces but black joints looks neglected.
It is not worth insisting on cleaning only when the joints are broken, open, missing in places or deeply moldy. In such cases, bleaching may improve the image for a while, but it does not restore the material. If the grout is lost, it must be refilled. If it is brittle, the worn part must be removed.
A common mistake is to use strong bleaches on damaged joints. The result may look whiter temporarily, but the joint becomes even more vulnerable. The correct order is first status check and then clean option.
Baking soda and hydrogen peroxide are often used together to clean joints. The baking soda acts as a mild abrasive and helps to "lift" the dirt. Oxygen has a mild oxidizing effect and can help with blemishes and dark spots. Together they create a paste that sits on the joint and is worked on with a brush.
But they must be used sensibly. We do not make too wet a mixture that runs everywhere, nor do we rub too hard. Baking soda, although mild, is still an abrasive material. If constantly rubbed on delicate tiles, glossy surfaces or natural stone, it can create dullness or micro wear.
Oxygen must be used with care and not combined with other chemical cleaners. We do not mix it with bleach, ammonia or strong cleaners. Also, we always test on a small spot whether the tiles are delicate, colored, matt with a special texture or natural stone.
Wear gloves and ventilate the bathroom. We may be talking about milder solutions compared to strong chemicals, but that doesn't mean we're working carelessly. Proper cleaning requires safety, especially in a small bathroom without a window.
The special joint brush is narrow, harder than a regular sponge and designed to work inside the joint line. This is important, because the joint is lower than the tile and often does not clean well with a flat cloth. The cloth goes over the tile, but does not go into the depth of the joint.
The brush should be hard enough to pick up dirt, but not so aggressive that it digs into the joint. Avoid metal brushes. They can injure the grout, scratch tiles or leave metal marks. For household cleaning, a good nylon joint brush is usually the safest choice.
Brushing time matters. Work across the joint, not sloppy over the entire surface. At joint intersections, insist a little longer because more dirt collects there. Do not press so hard that you pull material out of the joint. If you see grains of grout coming off, the joint is worn or you are rubbing too much.
A practical example: on a bathroom floor with gray joints, mopping hardly changes anything. The same area with soda-oxygen paste and a narrow brush can be noticeably opened up, because the action is inside the joint line and not just over the tiles.
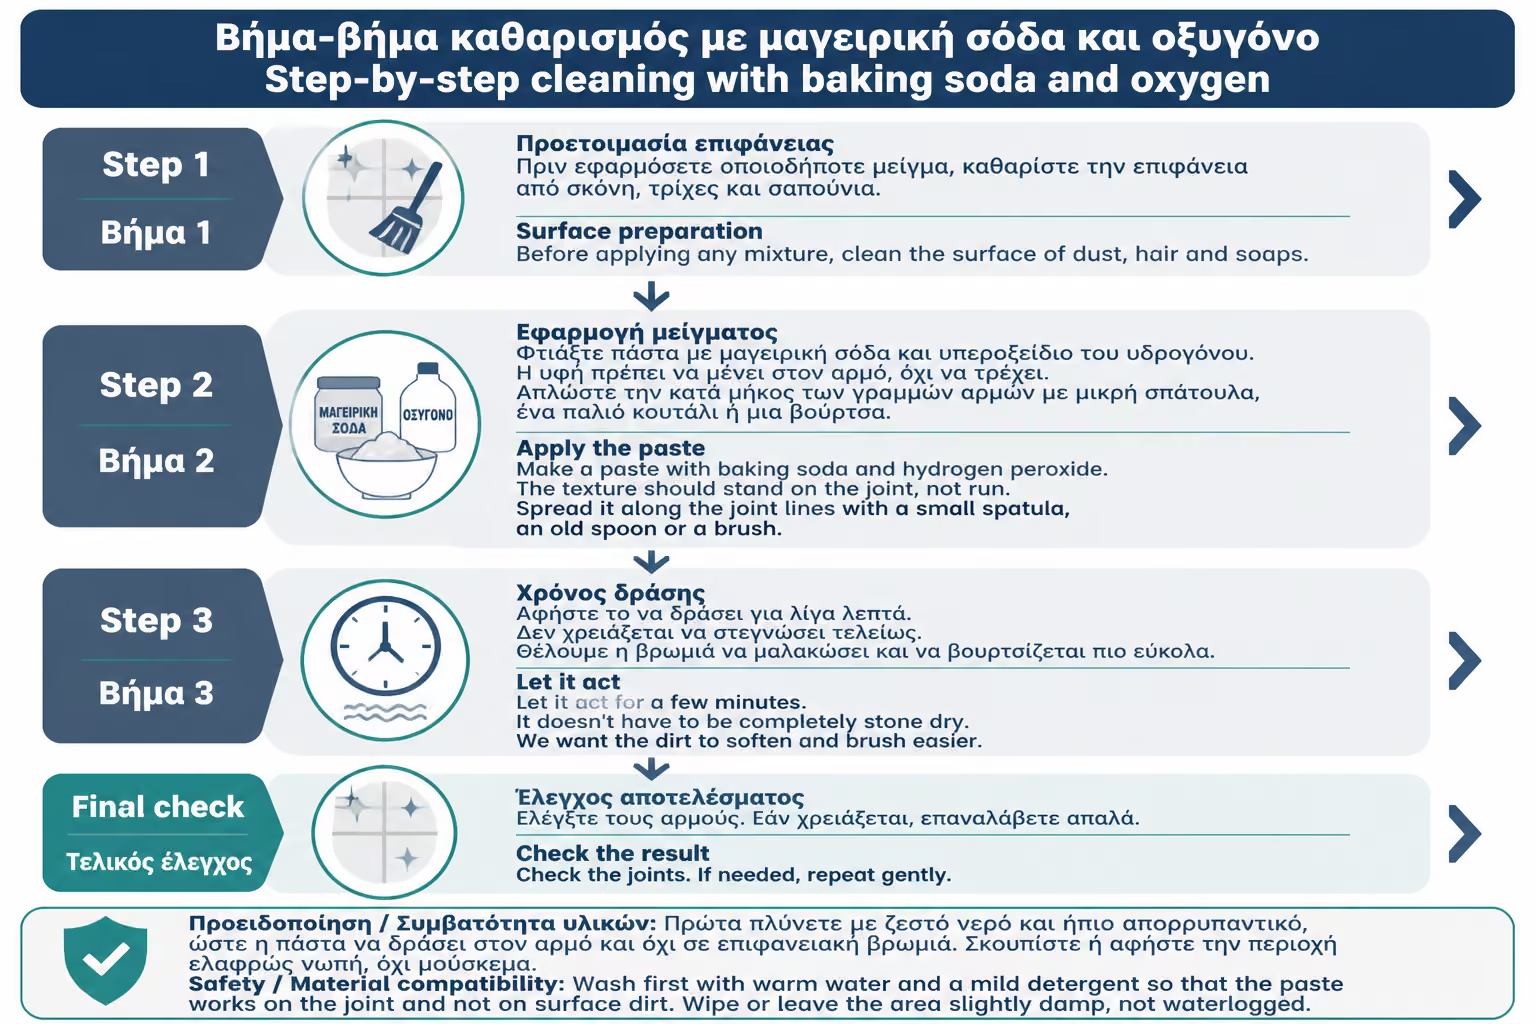
Before applying any mixture, clean the surface of dust, hair and soaps. Wash first with warm water and a mild detergent so that the paste works on the joint and not on surface dirt. Wipe or leave the area slightly damp, not waterlogged.
Make a paste with baking soda and hydrogen peroxide. The texture should stand on the joint, not run. Spread it along the joint lines with a small spatula, an old spoon or a brush. Let it act for a few minutes. It doesn't have to be completely stone dry. We want the dirt to soften and brush easier.
Then work the brush along the joints. Start with moderate pressure. If you see dirt rising, keep going. If nothing changes, you can repeat a second pass instead of scrubbing hard. In stubborn areas, leave the paste on a little longer, but do not overdo it.
At the end, rinse very well. Baking soda leaves a residue if not removed. Wipe with clean water and a sponge several times until the dusty feeling is gone. Dry as much as possible, especially on walls and low areas. If moisture remains, the cleaned joint can quickly become dirty again.
In some cases, oxygen can be used without soda, mainly for places where we want a gentler application without an abrasive action. This can be useful on more sensitive surfaces, although it always needs testing. It is applied to the joint, left to act and then lightly rubbed with a brush or cloth.
Its action is most evident on organic tans and mild stains. It will not always remove hard scale or old deep dirt. If the dirt is mainly a greasy film from soaps, a mild detergent may be needed first for decontamination.
Oxygen should not be considered innocent because it is also used in domestic applications. It may affect paints or sensitive materials. If the joints are colored, test first. You don't want to create uneven fades.
After use, rinse thoroughly and ventilate the bathroom. The cleanliness of the joint is judged not only by whether the paint has come off, but also by whether there is any residue left that will attract new dirt.
There are special joint cleaners on the market, in spray, gel or liquid form. Some are designed for mold, some for scale, some for general grime. They can be very effective, especially when natural solutions are not enough. But they want attention to use and a good understanding of the problem.
If the product is for mold, it may contain chlorides or other active ingredients. It can whiten blackheads quickly, but should not be mixed with acids, vinegar, citric acid or other cleaners. If the product is for salts, it may be acidic and not suitable for marble or natural stones.
Read the label, test on a small spot and do not arbitrarily increase the action time. Just because the joint is very dirty doesn't mean you have to leave the product on for hours. It can wear away the grout or affect the tiles.
Special cleaners are useful when used in a targeted manner. You don't need to spray the entire bathroom every week with a strong product. For maintenance, gentle cleaning is best. For difficult areas, special product with care.
Bleach whitens quickly and is therefore often used on black joints. It can instantly improve the image, especially on surface mold. But it is not always the best solution for frequent use. It can discolour, corrode certain materials, affect silicones and create strong fumes in a small bathroom.
The biggest mistake is mixing bleach with other products. Do not mix with vinegar, citric acid, oxygen, ammonia or other cleaners. Combinations may create hazardous gases. If you have used another product, rinse thoroughly and wait before using bleach.
Bleach can also "hide" the problem. Whitens the surface, but if there is permanent moisture, poor ventilation or damaged silicone, the blackness returns. So the owner enters a cycle of heavy bleaching without addressing the cause.
If used, it must be done with ventilation, gloves, proper dilution where provided and good rinsing. Not an everyday product for sensitive joints. It is a tool that needs attention.
Not all joints are cleaned in the same way, because not everyone has the same tiles around them. If the tiles are ceramic or porcelain, they usually hold up quite well to gentle methods. However, if there is marble, travertine, natural stone, cement tile, pressed cement mortar or a special matte finish, much more care is needed.
Acidic products such as vinegar or citric acid can dull natural stones. Abrasives can scratch delicate surfaces. Baking soda, although mild, can act as an abrasive when scrubbed vigorously. Oxygen can affect certain paints or surfaces. That's why testing in a small, inconspicuous spot is essential.
In natural stone, special neutral cleaners are often needed and not "homemade" solutions with acids. If you don't know what material you have, don't start with aggressive cleaning. Damage from the wrong product can be more difficult and expensive than cleaning the joints.
A practical example: white marble with grayed joints. The owner puts vinegar for the salts and rubs. The joints may open a little, but the marble around them is dull. The result is worse than before. On such surfaces, a special approach is needed.
Mold usually appears in places that stay damp and are not ventilated. In the joints it looks like black spots or lines that do not go away easily with simple cleaning. It is often accompanied by blackened silicones, a musty smell and reappears a few days after cleaning.
If the blackness is mostly in the corners of the shower or at the tile/tub/shower connection, it may not be a grout issue but a silicone issue. Mold on silicones often seeps into the material. Then cleaning temporarily opens it up, but doesn't make it go away. The correct solution may be a silicone replacement.
If the mold is in the joints between tiles, cleaning can help, but moisture must also be addressed. That is, ventilation, better drying after the shower, checking if water pools and avoiding permanent humidity. Otherwise, the mold returns.
In extensive mold, especially if there is also moisture in the wall, bleaching is not enough. Needs investigation. There may be leakage, poor sealing, condensation or insufficient ventilation.
The shower is the most difficult area, because it receives water every day. Start with a good rinse to remove soaps. Then apply the paste or cleaner to the joints and work with a brush. Emphasize the low points, near the siphon and the areas where the water stays longer.
After cleaning, a good rinse is essential. Residues of soda, oxygen or cleaner must not remain in the joints. Rinse with plenty of water and sponge. Then dry as much as you can or allow the shower to be well ventilated.
If the joints in the shower are opening, cracking or missing, do not limit yourself to cleaning. Local plastering or wider repair is needed there. The clean but open joint is still open. Water doesn't care if the spot looks white; it will pass through the gap.
In showers with a glass cabin, be careful not to let joint cleaners sit on rubbers, profiles and silicones. Work in a targeted manner and rinse well.
Floor joints collect different dirt than walls. In addition to water and soaps, they collect dust, hair, residue from shoes, cleaners and mops. That's why they turn gray more easily. The mop often does not clean them deeply, because it goes over the lines and can spread the dirt.
For a deeper cleanse, work in sections. Do not spread paste all over the floor and then try to clean it. Start with a zone, apply, brush, rinse and continue. This way you can better control the result and do not leave any residue to dry.
On floors, washing needs attention. If baking soda or cleaner is left in the joints, it can leave a dullness or attract new dust. Rinse several times with clean water and then dry as much as possible. If the floor stays wet for a while, the joints get dirty again faster.
If the floor joints have a very large color difference after cleaning, some may be worn and some may not. In old bathrooms, the solution can be a general refreshing of joints, not just bleaching.
There are joint pens or special paints available on the market that can be applied to the existing joint and make it look white or uniform again. They can provide a quick aesthetic improvement, especially on walls or lightly used areas. But it is not always a technical repair.
If the joint is clean, dry and firm but just discolored, a good re-staining product can help. But if there is mold, dampness, brittleness or an open joint, the paint just covers the problem. It can peel, blacken underneath or create a false sense of cleanliness.
Before using such products, the joint must be thoroughly cleaned. We do not paint over soaps, salts or mold. Also, they must be suitable for wet areas if used in a bathroom or shower. Not all products are of equal strength.
Joint pens have a place in aesthetic renewal, not as a substitute for stucco. If grout is missing, first fill the gap. Then, if necessary, we deal with color.
After whitening, prevention is easier than repeating a deep clean every few weeks. In the shower, wash soaps off the walls and floor after use. If there is a glass cabin, the squeegee helps not only the glass but also to reduce the water that ends up low in the joints.
Ventilation is critical. Leave the shower door open, run a fan or open a window. The faster the bathroom dries, the less black the joints. Moisture is the main factor that causes dirt to stick and mold to return.
Avoid leaving water on the floor after mopping. Many cleansers leave a film if not rinsed off properly. This film traps dust and makes the joints gray. Use the right amount of detergent, not more "so it cleans better".
In areas with very hard water, regular gentle descaling helps keep joints from becoming rough and dull. If you let the scale build up, then more aggressive cleaning is needed.
There are joint protection or sealing products that reduce water and dirt absorption. They can help in some cases, especially on porous joints, floors or areas that get dirty quickly. However, they are not always necessary and do not replace the correct grout.
Sealing only makes sense on a clean and dry joint. If applied over dirt or moisture, it can trap the problem. Also, it must be a product suitable for the type of grout and the tile. Some sealers can leave a sheen or stain on sensitive tiles.
In showers, protection can help, but should not create false security. Joint sealing does not replace waterproofing under tiles, nor does it fix open or broken joints. It is a superficial measure of maintenance.
If you are thinking of sealing on a large surface or on special tiles, it is worth testing on a small spot. The end result should be clean and even, not stained or shiny in random places.
There is a point where cleaning no longer makes sense. If the joint is deeply sunken, split open, chipped, clawed out, or has deep mold that won't go away, new grout is needed. This means removing the worn grout and filling with new, suitable material.
The new stucco can be local or general. If the problem is small and limited, local repair can be done. If the joints are worn all over the floor or all over the shower, a wider renewal is needed. Cleaning a damaged joint over and over again is like polishing a crack.
Pay attention to the corners too. If the blackness or crack is in a wall-to-floor corner or around a tub/shower, silicone may be needed rather than grout. Using the wrong hardware leads to repeated bursting.
A good rule of thumb: if the joint is full but dirty, clean it. If it is empty, flimsy or broken, it is repaired. These are two different tasks.
Joint whitening mistakes usually come from overdoing it. More product, more power, more action time. But joints are material that can wear out. They want cleaning, not abuse.
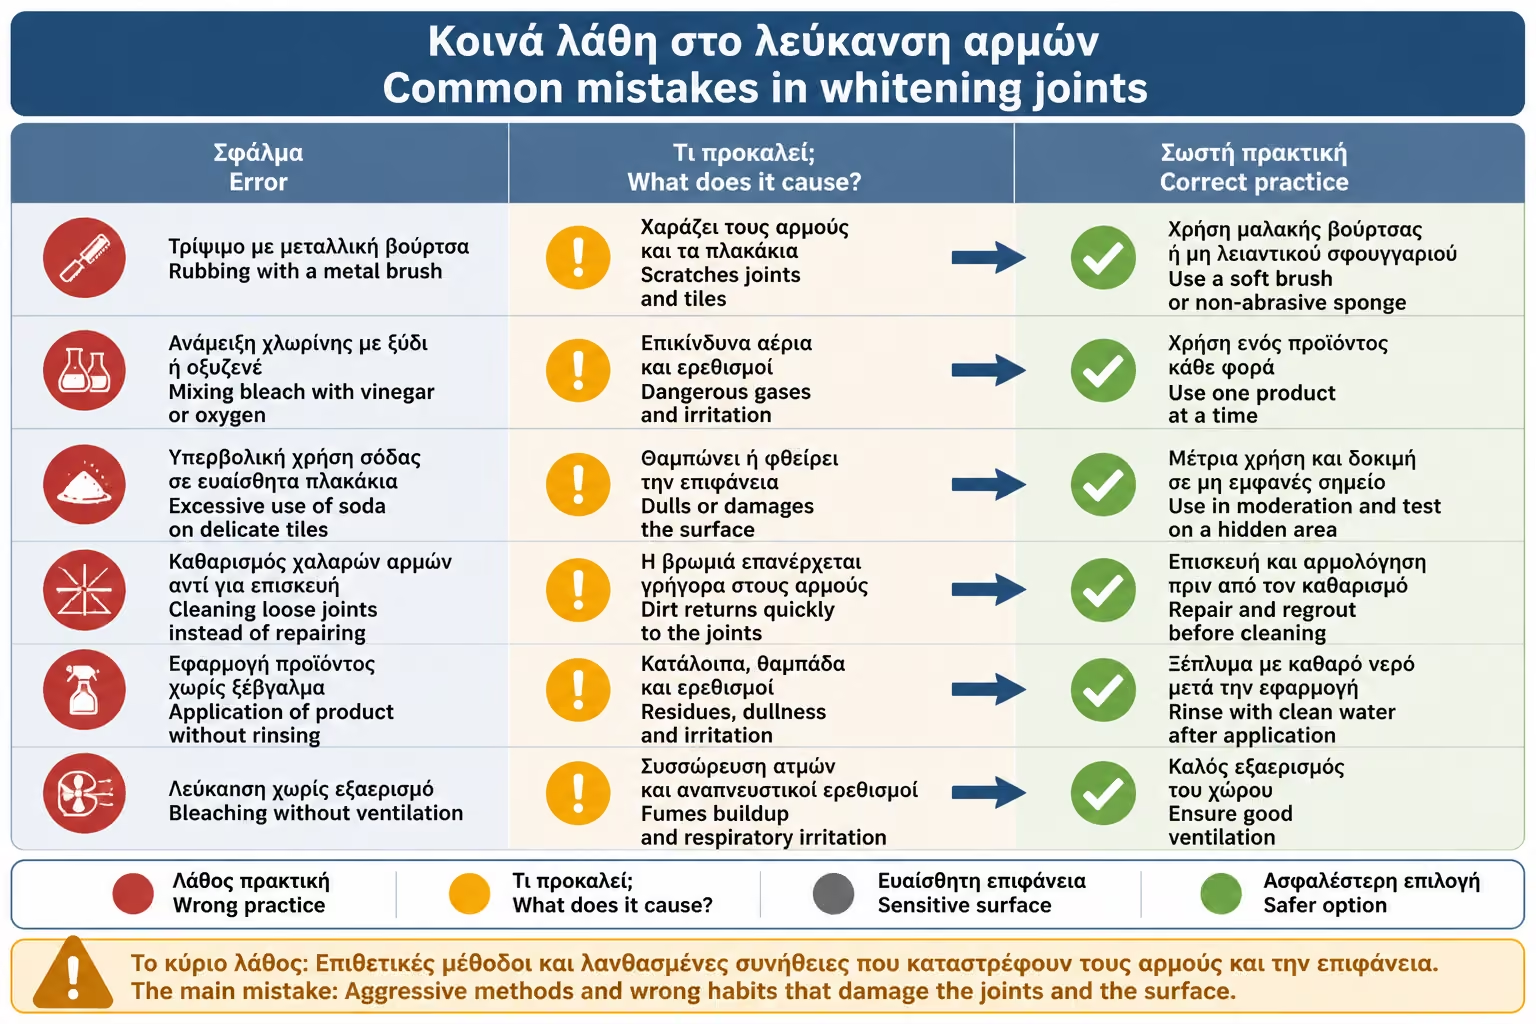
| Error | What does it cause? | Correct practice |
|---|---|---|
| Rubbing with a metal brush | Grout wear and scratches | Nylon joint brush |
| Mixing bleach with vinegar or oxygen | Hazardous fumes | One product at a time |
| Excessive use of soda on delicate tiles | Fading or minor wear | Test and gentle rubbing |
| Cleaning loose joints instead of repairing | The problem returns | Local or general plastering |
| Application of product without rinsing | Debris and new dirt | Rinse and dry well |
| Bleaching without ventilation | Dampness and re-emergence of mould | Drying and ventilation |
| Use of acids on natural stone | Dullness and chemical deterioration | Special neutral products |
| Painting joints on mold | Temporary coverage | Clean or repair before painting |
A typical example is the owner who cleans the shower joints every week with a strong product, but never ventilates the bathroom. The joints temporarily open, but the blackness returns. The problem isn't that the cleaner wasn't strong enough. It is that the moisture remains.
Bleaching and joint cleaning is an economical job when done DIY. The basic materials are cheap and sufficient for several applications. Costs increase when special products, sealants, joint paints or professional cleaning are needed.
| Material / Labor | Indicative cost picture 2026 |
|---|---|
| Baking soda | around €1–3 |
| Household oxygen | around €1–4 |
| Special joint brush | around €3–10 |
| Mild bathroom cleaner | around €3–8 |
| Special joint / mold cleaner | around €5–15 |
| Pen or joint paint | around €5–20 |
| Joint sealant | around €8–25 |
| DIY complete joint cleaning kit | around €10–35 |
| Professional cleaning of small bathroom joints | around €60–€150+, depending on condition |
| Local or general replastering of joints | case by case |
The prices are indicative and depend on the area, the quality of the products, the size of the bathroom, the condition of the joints, whether VAT is included and whether we are talking about a simple cleaning or a technical repair. A low DIY solution makes sense when the joints are just dirty. But if it needs scraping and new stucco, the work changes category.
A professional is needed when the joints are extensively blackened, when there is deep mold, when the grout is loose, when pieces are missing, when the tiles sound hollow, or when there is moisture in the wall or floor. In these cases, the cleaning is only superficial.
A professional is also needed for sensitive materials: natural stone, marble, pressed cement mortar, cement tiles or special tiles with a matte/embossed texture. Improper cleaning can leave permanent marks. If you do not know the material, a small spot test is necessary, but on expensive surfaces it is better to seek technical advice.
If the blackness returns very quickly after cleaning, the problem may be ventilation, standing water, leakage or poor sealing. There is no need for a stronger cleaner. It needs a diagnosis.
The right technician will check to see if the joints are cleaned, if local grouting is needed, if the silicones need to be changed, and if there is any evidence of moisture behind the tiles. It is this distinction that protects the owner from repetitive, sketchy solutions.
| Inquiry | Yes / No |
|---|---|
| Are the joints full and firm, without gaps or spalling? | Yes / No |
| Has it been checked if the blackness is surface dirt or mold? | Yes / No |
| Are the tiles around the joint suitable for the cleaning method? | Yes / No |
| Has the product been tested on a small spot before being applied everywhere? | Yes / No |
| Will a nylon joint brush be used and not a metal one? | Yes / No |
| Will not mix bleach with hydrogen peroxide, vinegar or other cleaners? | Yes / No |
| Will the joints be thoroughly rinsed after cleaning? | Yes / No |
| Will the area dry thoroughly after work? | Yes / No |
| Is there adequate ventilation in the bathroom to prevent mold from returning? | Yes / No |
| If grout is missing, will it be grouted instead of just whitewashed? | Yes / No |
| If the blackness returns quickly, will the cause of moisture be checked? | Yes / No |
If the answer is “No” to the points about joint stability, tile material, or avoiding mixing cleaners, don't start yet. Bleaching should be done safely and only when the joint is suitable for cleaning.
If you want to restore the color of the joints, do not start with the strongest chemical. Start by checking: is the joint strong or missing? Is it dirt or mold? Will the tile withstand the method you will use? Baking soda, baking soda and a proper joint brush can make a big difference to healthy joints. But if the grout is cracked, chipped, or the blackness comes right back, no more bleaching is needed; repair and moisture control is needed.
Bleaching and joint cleaning can dramatically change the look of a bathroom. The clean lines between the tiles make the space look brighter, healthier and more cared for. With baking soda, hydrogen peroxide and a special brush, you can go a long way in dealing with surface blackness, gray grime and dullness from daily use.
The key is not to confuse cleaning with repair. A healthy but soiled joint is cleaned. A broken, gaping or loose joint needs grouting. A blackened silicone in the corner may need replacing, not brushing. And a blackness that immediately returns indicates that moisture remains.
The right approach is gentle, methodical and safe: first test, then suitable cleaner, correct brush, good rinsing, drying and airing. Thus the joints are cleaned without wearing out and the bathroom is kept in better condition for longer.
Return to category.
Go to categoryReturn to the central guide.
Go to guide