
Bathroom Fixtures & Water Equipment
Return to category.
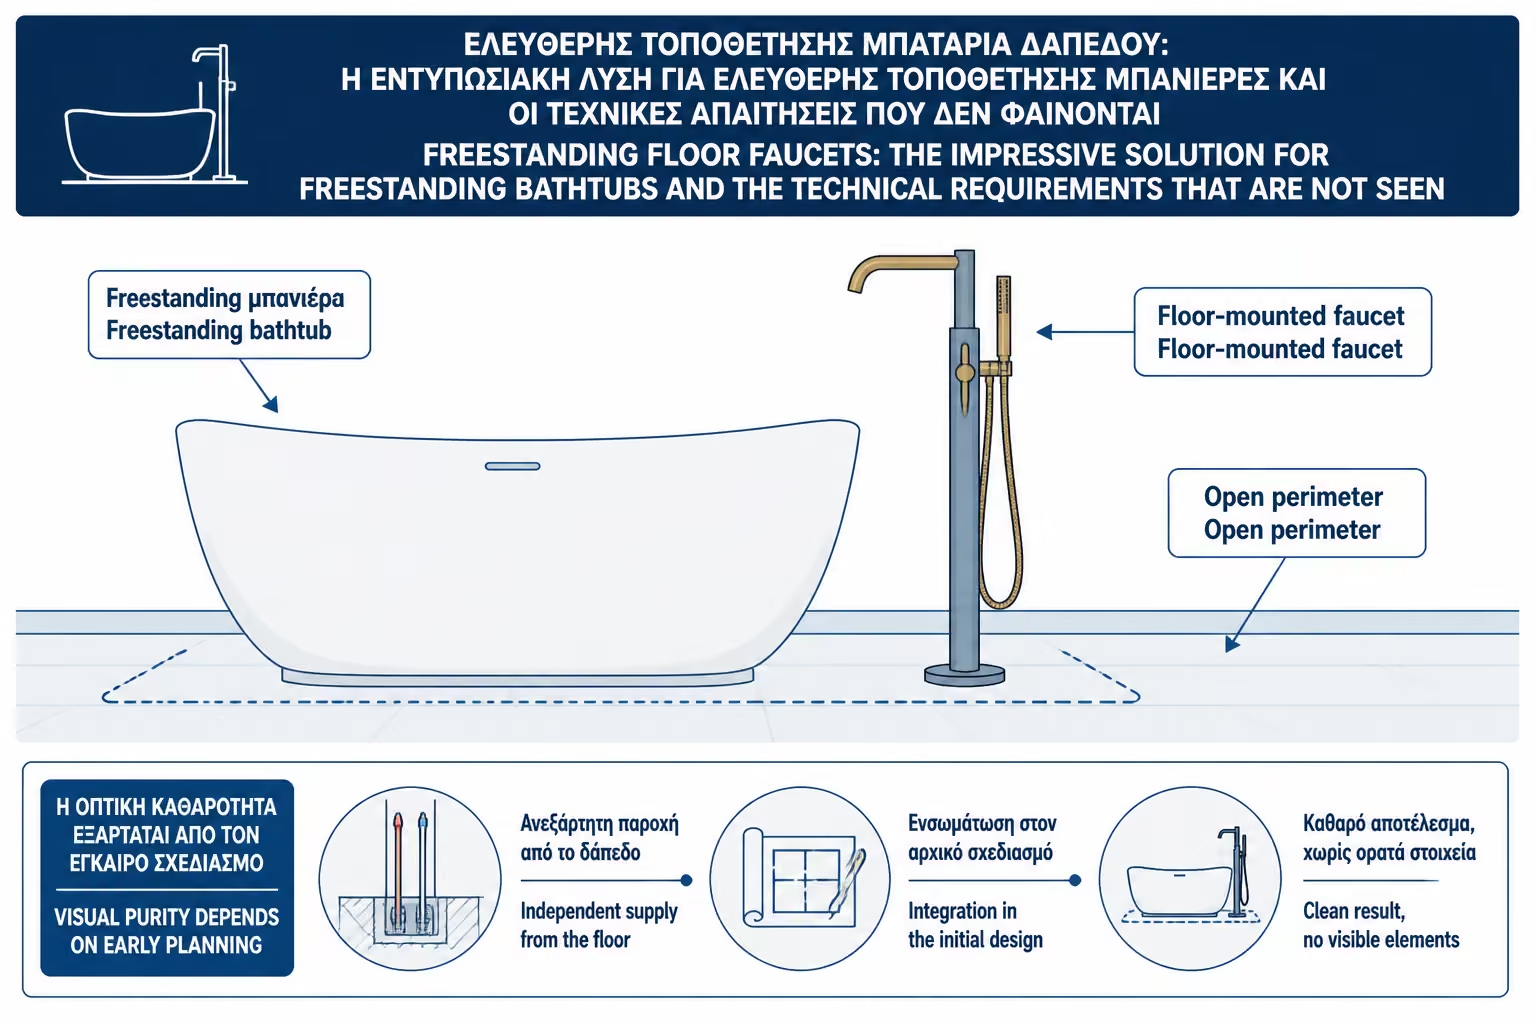
Go to categoryThe freestanding bathtub is one of the strongest elements in a master bathroom. It does not necessarily rest against a wall, it does not "hide" inside a built apron and it is not treated as a simple hygiene item. It stands in the space as a central object. That is why the tap that accompanies it must have the same logic. When the tub is free standing, away from a wall or without a deck for a faucet, a floor faucet is often the most natural and impressive choice.
The free-standing battery, or floor-mounted tub filler, comes out of the floor and stands next to the tub. It usually has a tall body, a filling spout and often a built-in hand shower. Aesthetically, the result is excellent: the bathtub remains clean, the wall is free and the whole takes on the image of a hotel or spa bathroom. In matte black, brushed nickel, gold or chrome, the tap becomes an almost sculptural element.
But the floor tap is one of the solutions that does not forgive improvisation. It is not bought at the end, after the tub is in. It is not placed "where convenient". It needs hydraulic waits from the floor, proper anchorage, stable substrate, rough-in kit, pressure control and correct position in relation to the tub lip. In many installations, the base and waits must go in before the floor is closed and before tiling or finishing is completed.
The most critical point is support. A floor tap is tall. If not properly anchored, it may wobble when the lever is opened or the phone is used. Some installation instructions note that wooden sub-floors may require additional reinforcement due to the height and weight of the tap, otherwise the tap may flex slightly during use. In other rough-in systems, the base is placed on a structural foundation or concrete floor at a certain height in relation to the finished floor.
The second critical parameter is supply. The freestanding bathtub has a large volume. If the tap has low flow, it will take too long to charge. Technical instructions for floor-mount tub filler rough-in kit state that the tempering valve must be able to handle a flow of 6 GPM or more, which is about 22.7 liters/minute, so that there is sufficient flow to the mouth of the tub. Other guidelines give indicative pressure ranges such as 20–70 psi or 20–60 psi depending on the product. ([rejuvenation.com](https://www.rejuvenation.com/netstorage/images/pdfs/instructions/D-Street-Floor-Mount-Tub-Install-Instructions-and-Spec.pdf?utm_source=chatgpt.com), [crosswaterlondon.com](https://www.crosswaterlondon.com/installation-instruction-download/144045?utm_source=chatgpt.com))
In this guide we will see when a floor mixer is needed, how to choose the right one for a freestanding bathtub, what should be done in the plumbing waits, how it is supported, what is the correct position in relation to the bathtub, what flow is needed and what mistakes can lead to a broken floor or an unstable installation.
The floor faucet is a bathtub faucet that is not fixed to the wall, nor to the bathtub, nor to a counter. It is fixed to the floor and connected to hot and cold water supplies coming from below. The visible body is high so that the spout goes over the rim of the tub and pours the water into the basin.
It usually consists of two parts. The first is the internal or rough-in part, i.e. the base, plate or kit that is anchored to the floor and connected to the utilities. The second is the trim or final visible part, i.e. the tap body, the lever, the spout and the phone, if present. In many branded systems, the rough-in must be installed before the floor is finished, and the finishing body is put in after the finished surface.
The main difference from a wall-mounted bathtub faucet is that the floor faucet does not have the wall as a point of support. All stability depends on its base on the floor. That is why the installation is more demanding. The tap is like a tall lever: the taller, the greater the torque when someone uses it. If the base is not solid, the body will wobble.
This option is almost always associated with freestanding bathtubs. If the bathtub has ready holes or a deck for a tap, it can accept a deck-mounted solution. If it is located near a wall, it can accept a wall-mounted solution. But if it is free in the space, without a nearby wall and without a deck, the floor tap is the natural solution.
The freestanding bathtub is designed to be seen from all sides. If we accompany it with a wall-mounted mixer, it must be located close to a wall. If we accompany it with a deck-mounted battery, the bathtub must have a suitable surface or holes. Many modern freestanding bathtubs do not have such a provision, precisely because they want a clean, monolithic image. There, the floor battery leaves the bathtub "untouched".
Aesthetically, the floor battery acts as a companion sculpture. It is usually placed on the side or at one end of the bathtub and creates a relationship with its shape. In an oval bathtub, a slim cylindrical faucet gives elegance. In a more classic clawfoot tub, a more decorative floor mixer may suit better. In a modern bathroom, a black or brushed finish can tie in with a shower, mirror and accessories.
The practical advantage is the freedom of placement. The bathtub can be placed near a window, in the center of the room or at an angle, without depending on a supply wall. However, this only applies if the facilities have been properly laid out on the floor. Freedom of design presupposes technical precision.
If the tub is too close to a wall, perhaps a wall-mounted faucet makes more sense. If it has a deck or special holes, maybe a deck-mounted solution is simpler. The floor tap is mainly worth when the bathtub is actually placed freely and the tap becomes part of the composition.
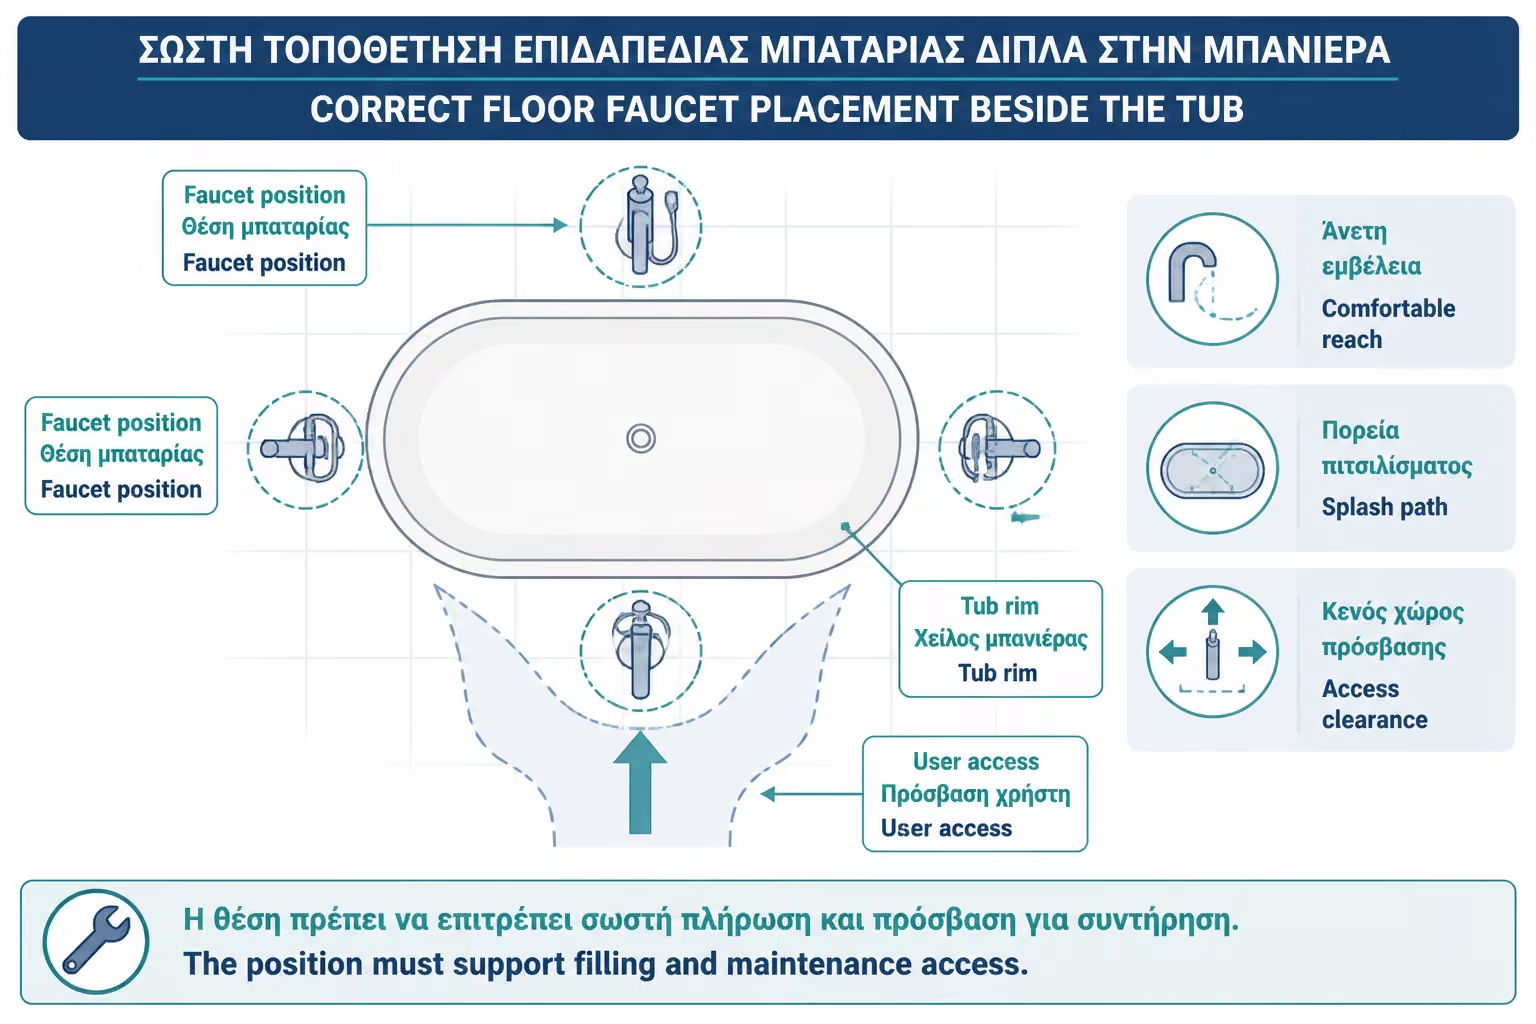
The location of the floor tap must be decided before the floor is closed. It's not just a matter of aesthetics. The spout should fall into the tub, not on the rim and not too far out. The lever must be accessible to the user. The hand shower, if present, should be usable without overstretching the hose and without dripping outside the tub.
Usually the tap is placed on the side of the tub or near one end. If it goes in the center of the long side, it can be very convenient to use, but there must be room around it. If it goes in the end, it fills the tub more subtly and is often less of a nuisance. The correct position depends on the shape of the tub, spout, door opening, traffic and where the user sits.
Freestanding tub faucets selection guides state that the height of the tub should be measured so that the spout goes over the rim, and that a faucet that is too tall can look out of proportion and cause splashing. For wall or freestanding faucets, as a practical guideline, a short distance of about 3–5 inches above the rim is suggested for a quieter flow and less splash.
The location must be marked on the floor with actual dimensions. Roughly place the tub or mark its outline with masking tape. Note where the tap will come out, where the spout will fall, and how the user will move around it. If the tap blocks the passage or is too close to the edge of the tub, use will be inconvenient.
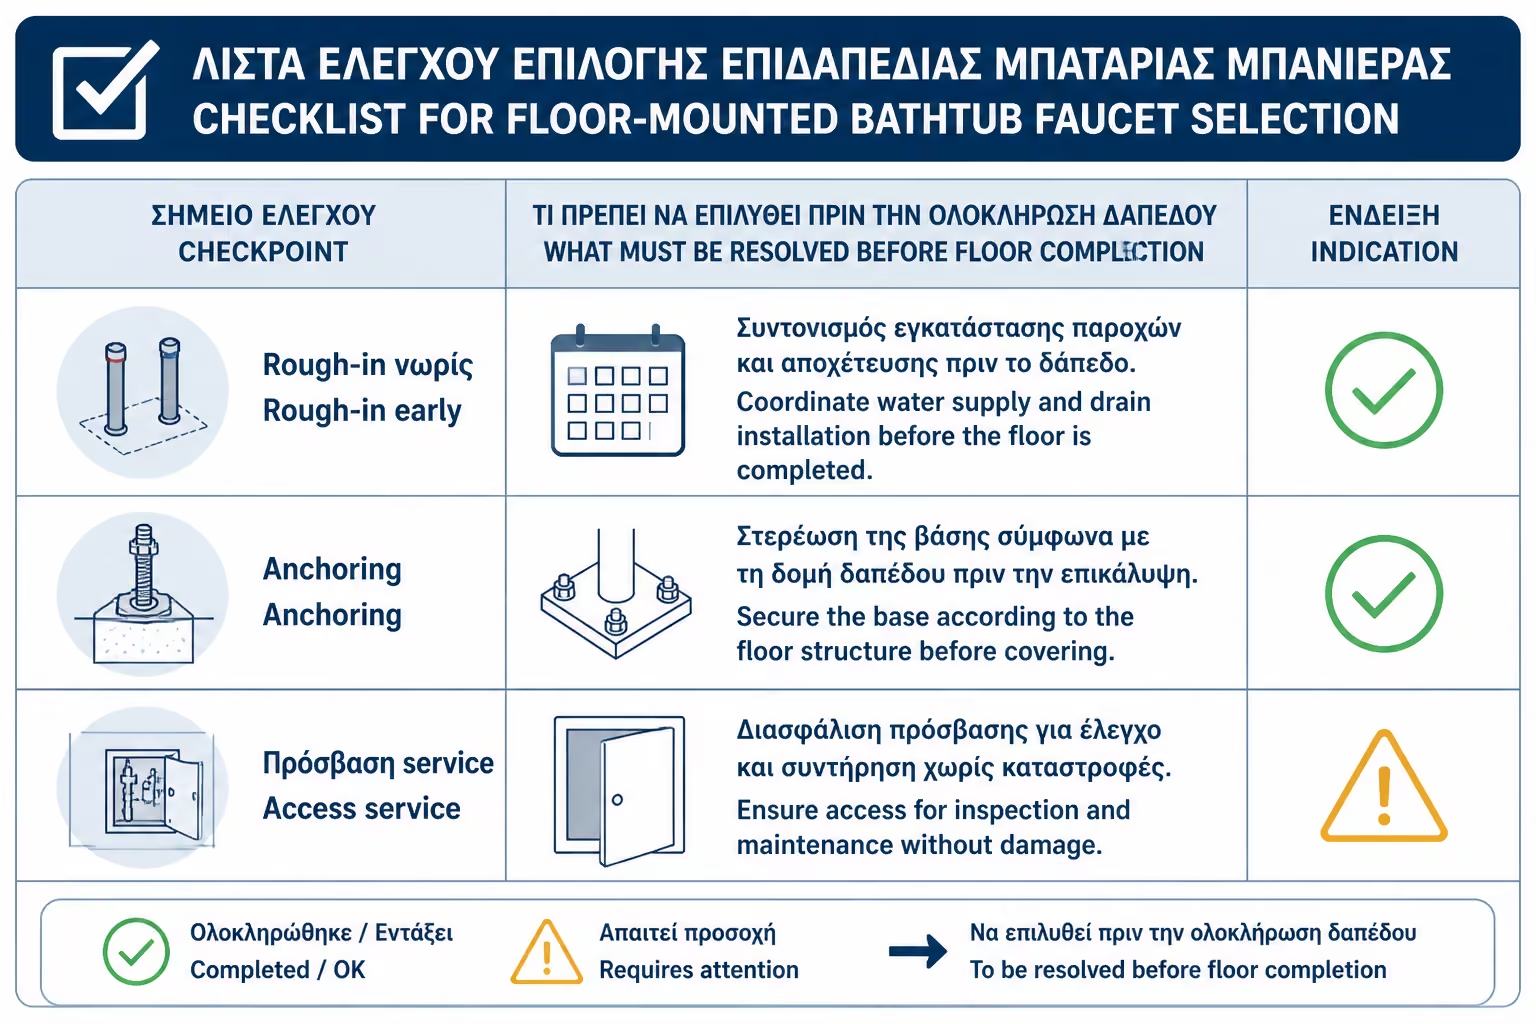
The floor-mounted tap needs hot and cold supplies from the floor. This means that the pipes must be in the exact spot before the structure is closed. In a complete renovation, this is done at the plumbing stage. In a finished bathroom, adding a floor faucet may require breaking up the floor, moving pipework, and re-tiling.
Waits should not be placed "around". Each battery has a specific rough-in, lead distance, base, depth and connection method. Some installation instructions for floor-mounted tub fillers warn that the inlet supply spread is not adjustable and that if the rough-in is not done according to the dimensions of the product, the filler will not apply properly.
This means you must have the tap or at least the rough-in kit selected before the final work is done. It is not enough to tell the plumber "a floor battery will fit here". Technical drawing, product code and installation instructions are required.
If you change the tap afterwards, the new model may not match the existing standbys. In wall mounted taps there is often a greater tolerance. In floor taps, the tolerances are smaller and the base is concrete.
The rough-in kit is the hidden or semi-hidden part of the tap that is placed on the floor. It includes a mounting base, supply connections and often protective or test caps for the construction phase. It is the equivalent of the "substructure" on which the visible body of the tap will later be placed.
On many branded products, the rough-in kit is purchased separately from the finished body. This confuses many owners. They see a price for the trim or the tap, but they haven't calculated the rough-in. Without it, the installation cannot be done properly. Some guidelines describe that the rough-in must be installed, leveled, connected to the utilities and to the correct height in relation to the finished floor.
Rough-in has another important function: it helps test before the final battery goes in. Supplies can be checked for leaks, protected during tiling and wait until the finish is laid. This is much safer than crude pipes that come out of the floor and then "fit" to the body.
In floor taps, rough-in is not a detail. It is the base of the installation. If this goes in wrong, the whole battery will be wrong.
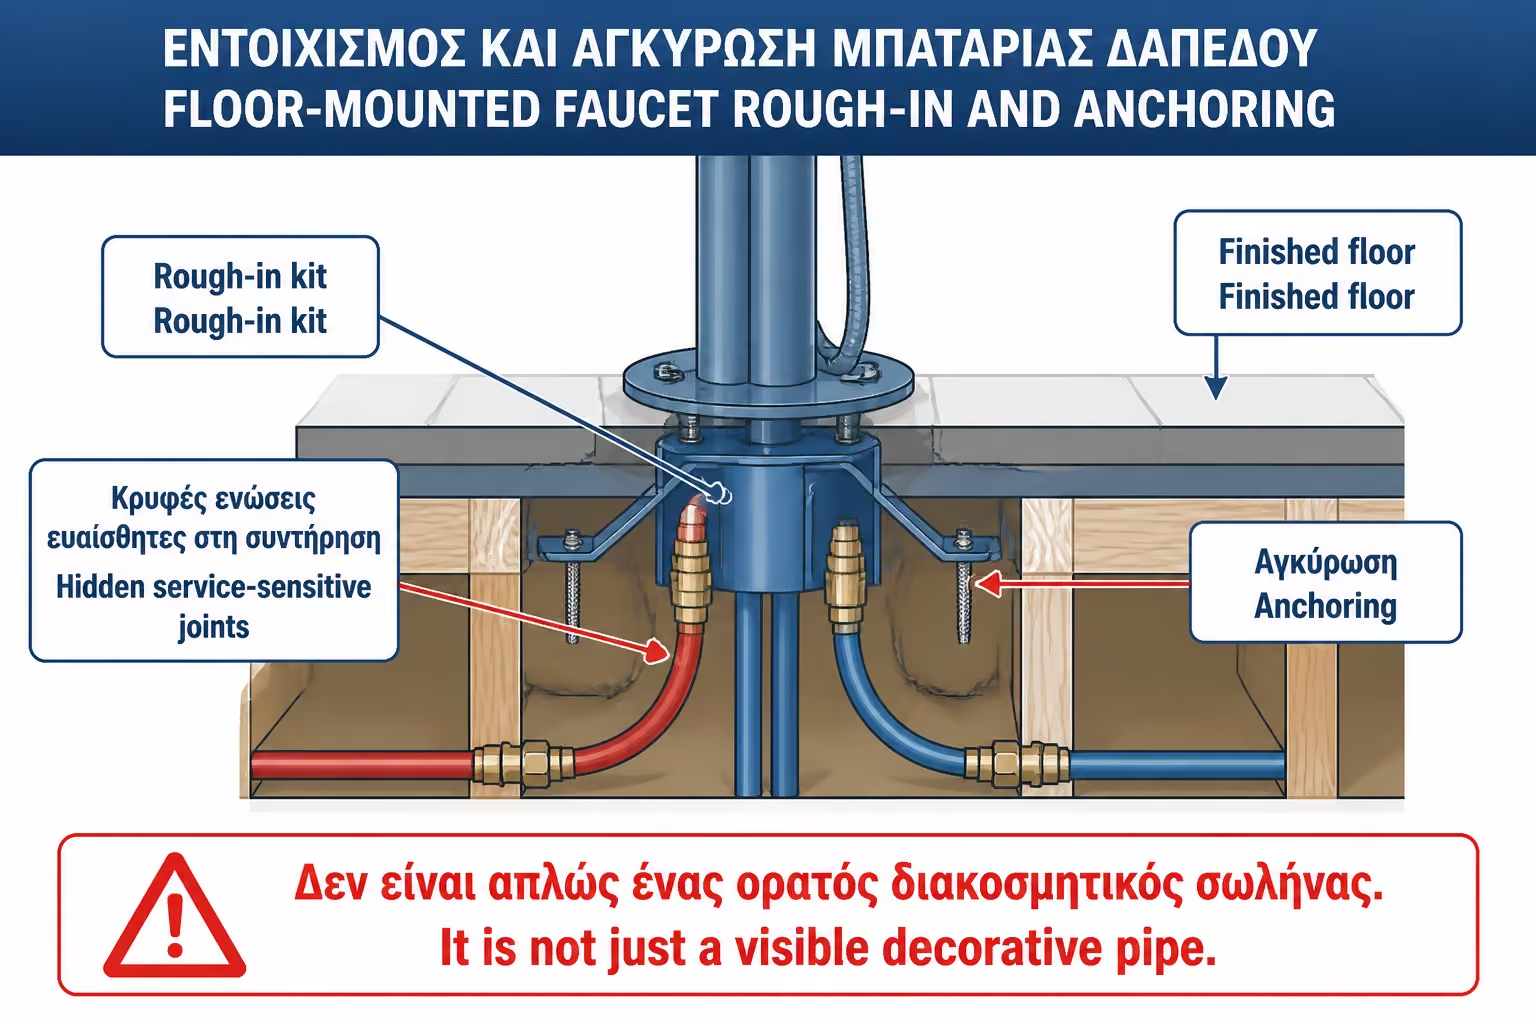
The floor tap must be anchored to a stable base. The tile itself is not a structural element. If the tap is only screwed onto tile or a weak substrate, over time it can move, loosen the screws, break the joint or strain the hydraulic connections.
In a wooden sub-floor, it is often necessary to reinforce it with wooden beams or cross support under the base. Installation instructions state that due to the height and weight of the tap, additional wooden reinforcements may be required, because without them the tap may bend slightly during use. In other instructions, the base is attached to a cross support brace with screws before the floor is finished.
On a concrete floor, anchoring is done differently. Appropriate plugs, holes and an accurate level in relation to the finished floor are needed. The rough-in must be level and stable. If it is placed wrong, the final body will look crooked, which in a tall tap is very obvious.
The support must be designed before the tiles are laid. If after finishing the floor you find that the base has nowhere to grip firmly, the solutions are limited and often sketchy.
The floor tap must be installed in relation to the finished floor, not the concrete or old substrate. The finished floor includes cement mortar, glue, tile or other top coating. If the rough-in is set too low or too high relative to the final level, the final body may not fit properly or the base rosette may not press properly.
Rough-in instructions for floor mount tub filler state that the top surface of the rough-in kit must be flush or about 1/4" higher than the finished floor, and that it must be level. Other manufacturers have their own tolerances, so there is no general rule for all products But there is a general principle: the final floor must be known before the base is locked.
This creates a need for coordination between the plumber, tiler, supervisor and owner. The plumber needs to know how thick the final layer will be. The board must know that there is a rough-in that must not be covered or moved. The owner must have decided on the product.
If the floor is changed afterwards, for example if a thicker tile or a different adhesive is put in, the base can be affected. In such solutions, decisions must be locked in early.
The bathtub faucet is not a sink faucet. It must fill a large volume of water in a reasonable amount of time. A freestanding bathtub can have a capacity of 180, 220 or even 300 liters, depending on the model. If the tap is running low, charging will be slow and annoying. Also, the water may lose temperature while you wait.
That's why bathtub faucets usually have a higher output than sink faucets. Floor-mount rough-in technical instructions state that for adequate flow at the tub spout, the tempering valve must be able to handle at least 6 GPM, which is about 22.7 l/min. Other rough-in instructions show peak flows much higher at a given pressure, but these are product and condition dependent.
Before choosing a faucet, look at its flow in l/min or GPM and compare it to the capacity of the tub. If the bathtub is 220 liters and the tap gives 12 l/min, in theory it takes more than 18 minutes to fill completely, not counting losses and mixing. If it gives 22 l/min, the time is roughly halved.
Flow depends on pressure, piping, filters, thermostatic valves and hot supply. Don't just rely on the pretty mouth. The bathtub faucet must fill the bathtub.
Most floor drains have minimum and maximum pressure specifications. For example, floor-mounted bath/shower mixer instructions state a minimum pressure of 20 psi and a maximum of 60 psi, while other instructions suggest 20–70 psi and installation of a pressure-reducing valve if the pressure exceeds a certain limit. ([crosswaterlondon.com](https://www.crosswaterlondon.com/installation-instruction-download/144045?utm_source=chatgpt.com), [rejuvenation.com](https://www.rejuvenation.com/netstorage/images/pdfs/instructions/D-Street-Floor-Mount-Tub-Install-Instructions-and-Spec.pdf?utm_source=chatgpt.com))
In practice, pressure is not enough. An adequate supply of hot water is also needed. The freestanding bathtub needs many liters of hot water. If you have a small electric water heater, it may not be enough to fully fill to a comfortable temperature. If you have a boiler or heater, it needs to be able to support the flow the tap is asking for. If there is solar, temperature and possible thermostatic mixing should be considered for safety.
If the hot and cold have large pressure differences, mixing can be difficult. Some guidelines state that hot and cold pressures should not differ by more than a certain limit, such as 30 psi. This is important for stable operation.
Before investing in a freestanding bathtub and floor mixer, ask for a supply and hot water check. It's frustrating to have a great bathtub that fills slowly or never fills properly with hot water.
Many floor faucets have a built-in hand shower. It is very useful for rinsing the bathtub, bathing, cleaning and other practical tasks. But it must be designed correctly. The hose should not be pulled too far, the hand shower should rest in a non-drip position, and the user should be able to reach it comfortably from inside the tub.
If the tap is inserted too far from the bathtub, the phone may be inconvenient. If it gets too close, it may disturb the entry/exit. If the IUD falls to the floor or rests on the tub, it can look messy and wear out. The position of the phone stand should be seen in actual use, not just in a photo.
The hand shower also increases the need for a solid base. When someone pulls on the hose, a lateral force is applied to the tap. If the base is not solid, the body may wobble. This is yet another reason why anchoring to the floor is critical.
In a freestanding bathtub, the phone is almost essential for practicality. A bathtub without a phone may look cleaner, but it is more difficult to clean and use.
The supplies of a floor battery are under or in the floor. If there is a leak, access may be difficult. That is why the installation must be checked before the floor is closed and correct fittings used, not makeshift extensions.
Some installation instructions state that supply lines should be pulled above the floor surface to allow for leak testing when needed. Other systems are based on a rough-in kit that allows testing and connection according to a specific procedure.
The important thing is not to bury connections in inaccessible places without testing. All connections must be pressure tested before the floor is closed or before final installation is completed. Piping must be flushed of shavings and debris before the tap is connected so they do not clog filters or mechanisms.
If the bathroom is on a floor, a leak in the floor can affect the space below. The floor tap is beautiful, but because it "steps" at a critical point, hydraulic quality should not become a field of economy.
The floor around the freestanding bathtub can receive water. It's not a shower, but there are always drips, overflows, cleaning, hand showers and steam. The holes around the floor tap must be properly sealed so that water does not find its way to the substrate.
The base of the tap is usually covered with a rosette or decorative base. This does not mean that there can be a rough hole underneath. Floor waterproofing should incorporate the waits, especially if the floor has a waterproofing layer. In wooden sub-floors, protection against water is even more important.
Also, the floor must be level at the point of the base. If the base steps on an uneven tile, in a strong current, or in a spot with a gap underneath, it may not stand properly. If there are large slabs, the cut around the base must be done cleanly. An expensive floor tap with a bad tile cut immediately looks sketchy.
Waterproofing is not just a shower thing. Any floor perforation in a wet area is a potential point of water entry.
The floor mixer is worth it when the bathtub is truly freestanding, when there is enough space around it, when a complete renovation is done and when the aesthetic value of the space justifies the investment. It is also worth it when the bathtub does not have a tap deck and is not close enough to a wall for a wall-mounted solution.
Not always worth it in a small bathroom. If the bathtub fits very close to a wall, a wall-mounted faucet can be simpler and more economical. If the bathtub has a deck or holes, a deck-mounted solution may be more practical. If you don't want to open floor, the floor tap can be a very expensive conversion.
It's also not worth it if the floor can't properly support the base or if there's no way for supplies to pass through safely. In flats, especially with existing slabs and limited floor height, pipework should be carefully considered by a plumber and engineer/technician where appropriate.
The floor tap is a highly aesthetic and demanding solution. When the space supports her, she is impressive. When it is forced or casually entered, it becomes a source of trouble.
Before settling on a floor battery, it's worth considering the alternatives. The wall-mounted tap is a good solution if the bathtub is close to a wall. It is simpler to support, the supplies come from the wall and service is often easier. But it needs the right height and projection so that the water falls into the bathtub.
The deck-mounted battery goes on the rim or deck of the tub, if the model allows it. It is practical and stable, but does not fit all freestanding bathtubs. Many modern oval or thin acrylic bathtubs do not have enough surface area for faucet holes.
There are also built-in wall-mounted bathtub faucets, where the body is hidden in the wall and only the spout and handle are visible. These give a clear picture and can be great if the tub is close to a wall. But they want a prediction before the walls are closed.
The floor tap is the most aesthetically free, but not always the most practical. The right choice depends on the location of the bathtub, the infrastructure and the budget.
Floor taps are usually more expensive than simple wall or deck-mounted taps. The cost includes the product itself, possible rough-in kit, finishing, telephone, plumbing, floor reinforcement and possible tiling or sub-floor interventions.
| Category | Indicative cost of Greece 2026 | What to watch out for |
|---|---|---|
| Economical floor battery | 250–600€ | Attention to stability, finish, spare parts |
| Branded floor battery | 600–1,500€+ | Better mechanism, support, finish |
| Premium / design / PVD finish | 1,200–3,000€+ | High aesthetics, requires perfect installation |
| Rough-in kit / floor installation base | 100–400€+ | Not always included in the price |
| Hydraulic floor waits | Wide variation | It depends on pipe runs and floor |
| Floor reinforcement / anchoring | Wide variation | Especially on wooden or weak substrates |
| Fix after tiling | Much more expensive | Often requires floor breaking |
Prices are indicative and are affected by VAT, brand, finish, available spare parts, country of origin, if a phone is included, if rough-in is required, and the condition of the floor. Don't just compare the price of the tap. Compare the complete package: product, rough-in, waits, support, sealing and fitting.
In this category, the economy in installation is the wrong point of saving. An expensive battery that wobbles or drips from the floor is a much bigger problem than a more expensive proper installation.
The first mistake is the decision after the floor is finished. Unless waits are anticipated, conversion is difficult and expensive.
The second mistake is buying a tap without a rough-in kit or without checking if it is included. Many systems need a separate base.
The third mistake is relying only on the tile. The tap must grip a solid substrate or a proper base, not just the finished surface.
The fourth mistake is the wrong position. If the spout does not fall properly into the tub or the lever is not accessible, use becomes inconvenient.
The fifth mistake is underestimating the flow. A large bathtub needs several liters per minute. If the tap or supply is weak, charging will be annoyingly slow.
The sixth mistake is not pressure testing before closing the floor. Connections should be tested while they are still accessible.
| Inquiry | Yes / No |
|---|---|
| Is the tub really freestanding and not better served by a wall or deck-mounted faucet? | Yes / No |
| Is the bathtub selected before the tap position is determined? | Yes / No |
| Do you have a technical drawing of the tap and rough-in kit? | Yes / No |
| Can hot/cold supplies come to the exact spot on the floor? | Yes / No |
| Can the floor firmly support the tap base? | Yes / No |
| Is reinforcement provided on a wooden or weak substrate? | Yes / No |
| Has the final floor height been calculated with glue and tile? | Yes / No |
| Does the spout go over the rim of the tub properly? | Yes / No |
| Is the tap flow enough for the capacity of the tub? | Yes / No |
| Can the water heater or boiler provide enough hot water? | Yes / No |
| Does the hand shower, if there is one, reach and store practically? | Yes / No |
| Has the floor been pressure tested before being closed? | Yes / No |
If you can't answer "yes" to most of them, it's not time to proceed with the installation. The floor tap is a solution that needs to be technically locked before it becomes beautiful.
If you have to keep only one thing, keep this: the floor mixer is not an accessory added to the end of the freestanding bathtub. It is hydraulic infrastructure that must be designed from scratch. He wants accurate floor waits, rough-in kit, solid anchoring, correct finished floor height, flow control and pressure testing before construction closes. If done correctly, it is one of the most impressive solutions in a master bathroom. If done sloppily, it may wobble, drip, or require breaking tiles.
Freestanding floor faucets are the most impressive and natural choice for many freestanding bathtubs. They give absolute freedom in the position of the bathtub, keep the walls clean and create a highly aesthetic image. In a properly designed master bathroom, they can become the element that completes the composition.
The technical side, however, is demanding. Supplies must be routed through the floor at the correct point, the base must be anchored to a stable substrate, the rough-in kit must be placed at the correct level, and connections must be tested before the structure is closed. The final floor, thickness of the tiles, location of the tub and height of the spout must be known early on.
Equally important is flow. A freestanding bathtub has a large volume and needs a tap that fills it in a reasonable time. Pressure, hot water supply and the ability of the water heater or boiler to support the use must be checked. A beautiful tap with low flow can prove to be a daily disappointment.
The floor tap is worth it when the space, budget and technical preparation support it. If the bathtub is close to a wall or if there is no possibility of proper waiting on the floor, a wall or deck-mounted solution may make more sense. The right choice is not the one that looks the most impressive in the photo, but the one that can be installed correctly and work stably for years.
Return to category.
Go to categoryReturn to the central guide.
Go to guide