
Bathroom Fixtures & Water Equipment
Return to category.
Go to categoryThe correct heights in the bathroom are among the decisions that are not obvious in the final result, but they determine whether the space will function properly every day. A built-in shower faucet installed too low, a rain head that almost rests on someone's head, a hand shower that is out of reach, or water outlets that end up right behind a vanity drawer can spoil an otherwise good renovation.
The hard part is that the heights have to be decided early. When the wall is open, everything is easy to see. Once drywall, waterproofing, adhesives, tiles and furniture go in, fixes get expensive. A 5–10 cm mistake in a shower can go unnoticed at rough-in stage, but become an annoyance for years. A mistake in the plumbing outlets can mean cut drawers, exposed hoses or a faucet that does not fit.
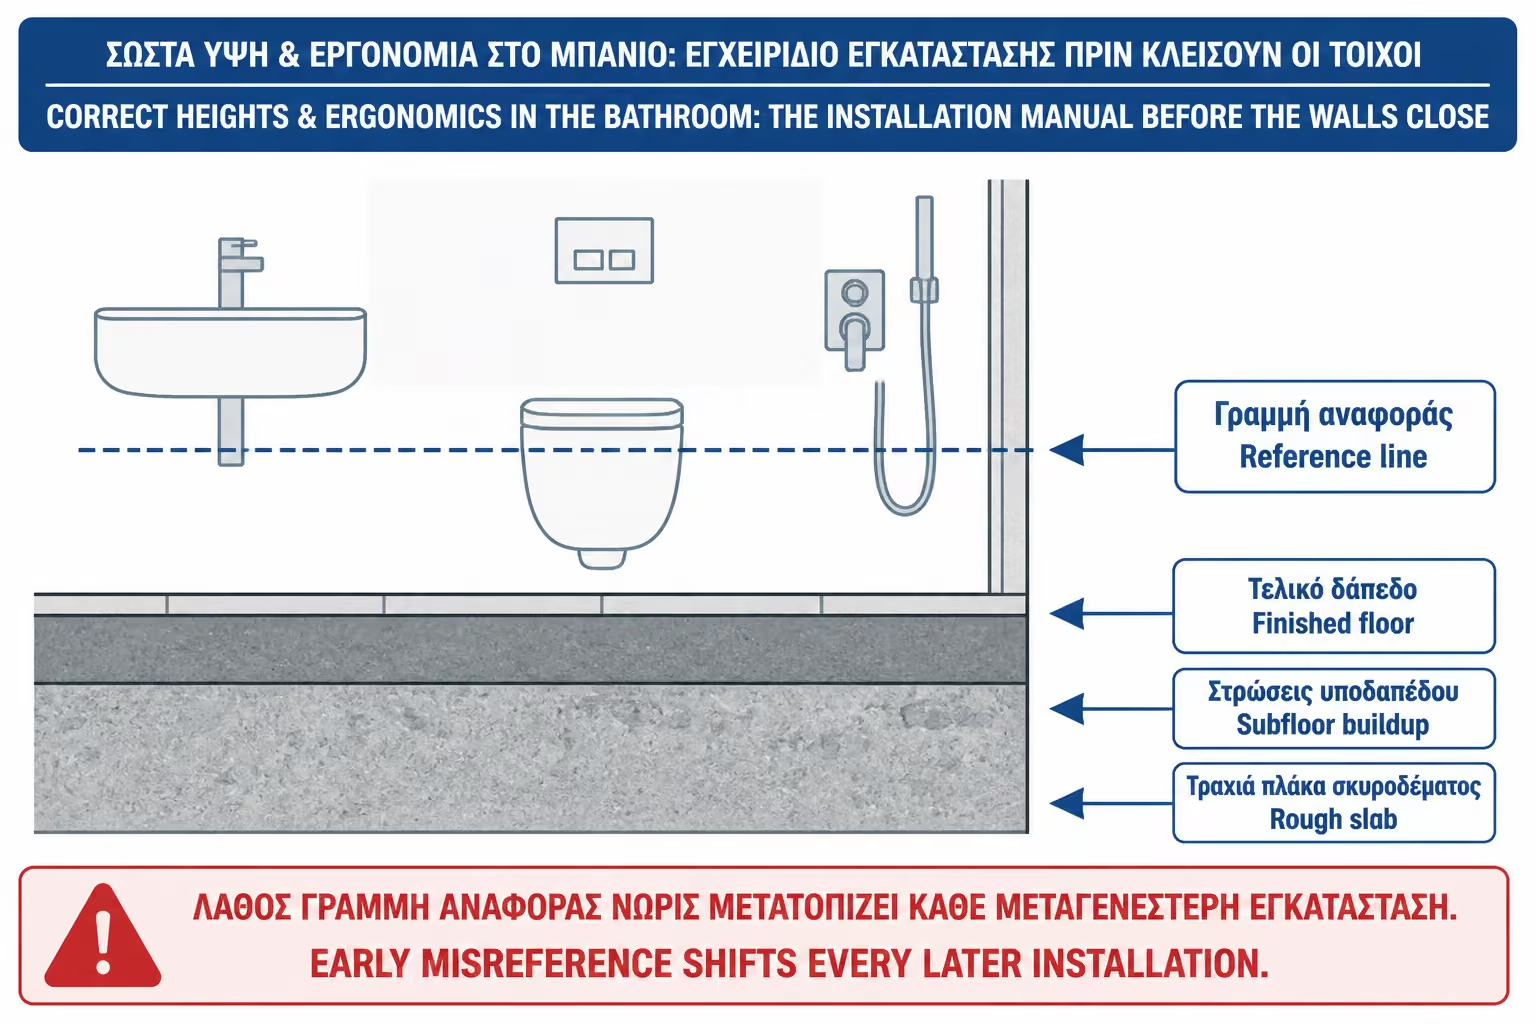
We also need to clarify something basic: heights are measured from the finished floor. Not from the slab, not from the old cement mortar, not from the unpaved floor. Finished floor means the level that the user will eventually walk on, together with adhesive, tile or other coating. If the plumber marks from the "current" floor and then raises the final level 2-4 cm, all heights will come out lower.
There are indicative standards, but not one absolute number for everyone. hansgrohe states that for an overhead or rain shower there should be at least 20–30 cm of clear space between the shower head and the user's head. Geberit gives a general rule of about 85–90 cm from the floor for the top edge of a washbasin, with adjustment according to the user's needs. These are useful starting points, but in practice the technician must also factor in user height, faucet model, sink type, vanity, shower head and finishes.
In this manual we will look at practical installation heights for inset shower mixer, rain head, hand shower, hand shower bracket, basin waits, basin drain and wall mounted basin mixers. The figures are indicative for residences and must always be checked with the technical drawings of the products.
Before we talk about heights, a reference level must be agreed. In each bathroom, all waits should be measured from the finished floor. If the floor is not yet finished, the technician needs to know how much the level will rise with grout, sealant, adhesive and tile.
This is especially critical in renovations. The old floor can be removed, new slopes can be made, a linear siphon can be inserted, the level can be raised or cement mortar can be pressed. If the heights are marked before the final level is locked, everything can go wrong. The same goes for the shower. If there is a built-in shower with slopes, the point where the user steps may differ from the floor of the rest of the bathroom.
The "finished floor" should be marked on the wall with a clean line. Ideally, the plumber, tiler and contractor agree on this line before the waits are over. In a serious renovation, this line is more important than any verbal instruction.
If in doubt, we leave a little leeway through adjustable fittings where possible. But in built-in faucets, ceiling heads and washstands, the tolerances are not infinite. Prevention is better than "we'll bring it up later".
The table below is a practical starting guide for a typical residence. It does not replace the technical drawings of the products, but helps everyone speak the same language on the construction site.
| Installation point | Indicative height from finished floor | Observation |
|---|---|---|
| Built-in shower faucet center | 100–115 cm. | Often 105–110 cm for walk-in showers |
| Thermostat/shower control | 100–120 cm. | Reach comfortably without getting the user wet |
| Wall-mounted rain head | 210–220 cm. | Or 20–30 cm above the tallest user |
| Roof rain head | Depending on the ceiling, ideally a clear margin of 20–30 cm from the head | Beware of low false ceilings |
| Fixed hand-shower holder | 110–130 cm. | A sitting/standing user can reach |
| Hand-shower rail | Lower base approx. 90–110 cm, upper base 160–180 cm. | Allows adjustment for different heights |
| Water outlet for hand shower | 60–80 cm or 100–120 cm depending on the system | Don't make the spiral an awkward curve |
| Washbasin top edge | 85–90 cm. | Sessile often terminal edge around 90 cm. |
| Hot/cold sink facilities | 55–60 cm. | Depending on furniture and drawers |
| Washbasin drain on the wall | 45–55 cm. | Usually below the water outlets |
| Built-in basin faucet | Mouth approximately 15–20 cm above the sink rim | Judged by projection and trough, not just height |
These numbers are practical bands, not law. If the user is too tall, the shower head rises. If the bathroom is for children or the elderly, the controls should be more easily accessible. If the sink is counter-top, its final edge must come out correctly, not just the height of the furniture.
For a standard shower, the center of the built-in faucet or control is usually placed about 100–115 cm from the finished floor. A very practical point for a modern walk-in shower is 105–110 cm. At this height, the user can turn on the water without bending down and without being too close to the flow.
In international rough-in guides, shower valve height is often given as approximately 38–48 inches, i.e. approximately 96–122 cm from the finished floor, with adjustment depending on shower type and users. This confirms that the practical zone of 100–115 cm is reasonable for residences, but not absolute.
If the control is thermostatic with a separate diverter, there must be room for the user to operate both buttons comfortably. If there is a large tile, it is good to align the tap aesthetically with joints or the center of the tile, but without sacrificing ergonomics. The tap should not protrude so low that it hits the body, nor so high as to make it difficult for children or shorter users.
In a shower that is also used by children, 100–105 cm is often more friendly. In a master bathroom for tall adults, 110–115 cm may be more comfortable. In any case, the center of the tap is marked before sealing and before tiling.
Height is not the only issue. The horizontal position is equally important. In a walk-in shower, the faucet is often placed near the entrance so that the user can turn on the water without stepping under the cold stream. This is very practical. If the tap is directly under the head, the user often gets wet before setting the temperature.
In a small closed enclosure, the tap is usually placed in the wall opposite or to the side of the entrance, in the center of the shower. The user must be able to reach it without opening the door in the wrong direction and without bending down. If there is a fixed crystal, it should be checked if the hand reaches comfortably.
In a shower with a bench, the position can be changed. The seated user must reach the phone and perhaps the remote. Standard heights are not enough there. An ergonomic study is needed.
The best practice is to design the shower in plan and elevation. Where does the user stand? Where does the water fall? Where does the door open? Where is the soap dish or alcove? The tap must serve this use.
The wall-mounted rain head or fixed shower head is usually placed about 210–220 cm from the finished floor. In lower bathrooms it can stay close to 205–210 cm, while for tall users it can go up to 220–230 cm, if space allows.
The basic ergonomic principle is to have clear headroom. hansgrohe states that the ideal overhead/rain shower installation depends on body height and that there should be at least 20–30 cm between the head tray and the user's head. If the tallest user is 190cm, a 210cm head gives just 20cm before factoring in head thickness and flow angle. So in such a house maybe you need a 220 cm or ceiling solution.
A practical installation guide also states that the fixed head often goes in about 200–210cm from the floor and that for taller users it can go up to 220cm, keeping about 20cm above the head. This shows that 210–220 cm is a good zone, but not an immutable one.
The head should not be inserted so high that the flow loses intensity or disperses, nor so low as to disturb the head. In a rain shower with a large head, the height must be combined with the pressure and dimension. A large head set too low can feel heavy and uncomfortable.
The roof head gives a cleaner rain feel, but has less flexibility. If the ceiling is low, you cannot raise it. If the false ceiling lowers the space, the clear height can become limiting. Before deciding on a ceiling head, the final clear height from the floor of the shower to the lower surface of the head should be checked.
The same principle applies: we want about 20–30cm of clear headroom above the tallest user. If the tallest user is 185 cm and the head ends at 210 cm, the result is comfortable. If it's 195cm and the head ends up being 205cm, it's a bad choice.
In ceiling heads, cleanliness must also be considered. If the head is too high, it is difficult to clean. If it's too low, it's annoying. In large rain showers, a proper water supply is needed and often a concealed mixer tap/diverter provided before the roof is closed.
In low bathrooms, a wall-mounted head with a long arm may be more practical than a ceiling-mounted one. In high master bathrooms, the ceiling can give a much better experience.
The hand shower should be easily accessible. If it is mounted on a simple fixed holder, a practical height is about 110–130 cm from the finished floor. This lets the user reach it without lifting the arm too much and without bending over. If the hand shower is used for children, pets or cleaning, a lower point may be more practical.
If an adjustable shower rail is installed, the lower fixing point can be placed at about 90–110 cm and the upper one at about 160–180 cm, depending on the length of the rail and the users. That way the hand shower can be lowered for children or seated use and raised for normal showering.
Practical guide states that the hand shower is often fixed about 120–150 cm from the floor so that it is easy to grasp without excessive hand movement. This is fine for fixed height use, but the bar gives better flexibility for a family.
The water outlet for the hand shower, i.e. the wall outlet, must be placed so that the hose does not kink, hang awkwardly or hit the floor. If it is too low, the hose may drag. If it is too high, it creates an awkward curve. It is often placed around 60–80 cm when the hand shower is used with a rail, or around 100–120 cm when combined with a specific support system. Here we follow the manufacturer's system.
In a family bathroom, the hand shower is not an afterthought. It is used for children, shower cleaning, bathing without getting the whole body wet, the elderly and daily practical uses. That's why the barbell is often better than the fixed support.
If the hand shower goes too high, children can't reach it. If it goes too low, adults find it uncomfortable. If there is only a rain shower without a hand shower, the bathroom may look nice but be impractical. Ergonomics requires both experience and practicality.
For elderly users or people with reduced mobility, the hand shower should also be reachable from a seated position if there is a shower seat. Then the support height must be studied specifically, not chosen from standard numbers. In such cases, an additional grab bar, seat and lower control may be required.
The location of the hand shower must be checked in the actual space. Stand in the shower, reach out and see whether you can really use it. Don't decide only from a drawing.
For the sink, the most important height is not the waits. It is the finished top edge of the sink. For classic or built-in washbasins, the practical zone is approximately 85–90 cm from the finished floor. As a general rule, Geberit gives the upper edge of the washbasin 85–90 cm from the floor, with adaptation for children, the elderly or special needs.
With countertop basins, this mistake is very common. The vanity is placed at a classic height and then a 12–15 cm basin is added on top. The result is a final rim height of 95–100 cm, which is too high for many users. For a countertop installation, the height of furniture + counter + basin must be calculated so that the final rim usually ends up around 88–92 cm, depending on the users.
Geberit also states that the upper edge for classic/vanity basins is usually around 85 cm, while for lay-on washbasins it can be slightly higher, around 90 cm. This is very practical for free-standing washbasins: we don't just raise the bowl onto a standard piece of furniture, but lower the piece of furniture if needed.
If users are tall, 90–92 cm may be comfortable. If there are children, elderly or lower users, 85–88 cm may be needed. Comfort is judged on hand and face washing, not just appearance.
For a typical vanity unit, the hot and cold supplies usually exit about 55–60 cm from the finished floor. The drain usually comes out lower, around 45–55 cm. These heights allow a spiral and siphon to be connected behind the furniture, without being too visible and without cutting too much into the drawers.
But there are many pitfalls here. If the furniture has a drawer, the waits must come out in the gap left by the manufacturer. Many pieces of furniture have a special notch for a siphon. If the drain comes out lower or higher than this notch, cuts may be needed. If the supplies come out too wide, they may be visible when the drawer is opened. If they come out too close to the center, they may collide with the siphon.
For hanging furniture, it is even more important to hide the waits. The ideal solution is to have a technical drawing of the furniture before the supplies come out. If there isn't, we use safe zones, but leave room. In custom furniture, the carpenter and the plumber must agree.
For a washbasin without furniture, with a decorative siphon, the heights and distances must be more aesthetically pleasing. Nothing is hidden there. The supplies must be symmetrical and the siphon straight, because everything can be seen.
The hot and cold supplies for a sink are usually placed about 10–15 cm apart, to the right and left of the axis of the sink or faucet. The hot usually enters on the left and the cold on the right, as we look at the wall. The sewer enters the central axis.
In furniture with a drawer, the fittings should not be located exactly where the back of the drawer passes. If there are manufacturer's instructions, they are followed. If not, it is good that they come out as close as possible to the central area of the siphon, but with enough room for switches and spirals.
If the tap is deck-mounted on the counter, the water supplies behind the vanity connect to the tap hoses. If the tap is wall-mounted, things change: the supplies and the concealed body enter the wall at a certain height, and the spout outlet must align with the sink.
There are no "blind" numbers for all furniture. The right thing is to have a washbasin, furniture and faucet design before the waits come out.
The built-in sink faucet is one of the most demanding in terms of height. It is not enough to say that it comes in at 100 or 110 cm. The correct height depends on the finished top edge of the washbasin, the depth of the trough and the projection of the spout.
In practice, the spout should protrude about 15–20 cm above the rim of the sink, but this is indicative. If the sink is shallow, it may need a lower height to prevent splashing. If it is deep or overlying, more margin may be needed. The water should fall near the valve or the center of the trough, not on the back wall and not near the front lip.
If the finished basin edge is at 90cm, the spout can often be around 105–110cm from the finished floor. However, if the sink is very high, low, shallow or has a special trough, the number changes. The tap mounting body must be installed based on the technical drawings, not a general rule.
Architectural Digest points to poor forecasting for wall-mounted faucets as a common mistake in bathroom renovations, because the position of the spout in relation to the sink must be carefully determined before the finish surfaces are inserted. That's exactly the point: after tiling, correction is difficult.
If the tap goes on the counter, the heights of the wall outlets do not directly determine the height of the flow. The height is given by the tap itself and the position of the hole in the counter. But ergonomics remain critical.
For low taps in inset or undermount sinks, the spout should leave enough room for the hands and pour the water into the trough. For tall faucets in free-standing basins, the spout should go over the rim without being too high. If the drop is large and the trough shallow, it will splash.
In such cases, the final height of the sink and faucet must be checked with a plan. We measure: finished floor, furniture height, countertop thickness, sink height, spout height, spout projection. The water must fall in the right place.
Wall waits for spirals can remain in the zone of 55–60 cm, but it must be ensured that they do not collide with drawers. If the piece of furniture has two drawers, the siphon and switches must fit into the special notch. Otherwise, drawers will be cut after the fact.
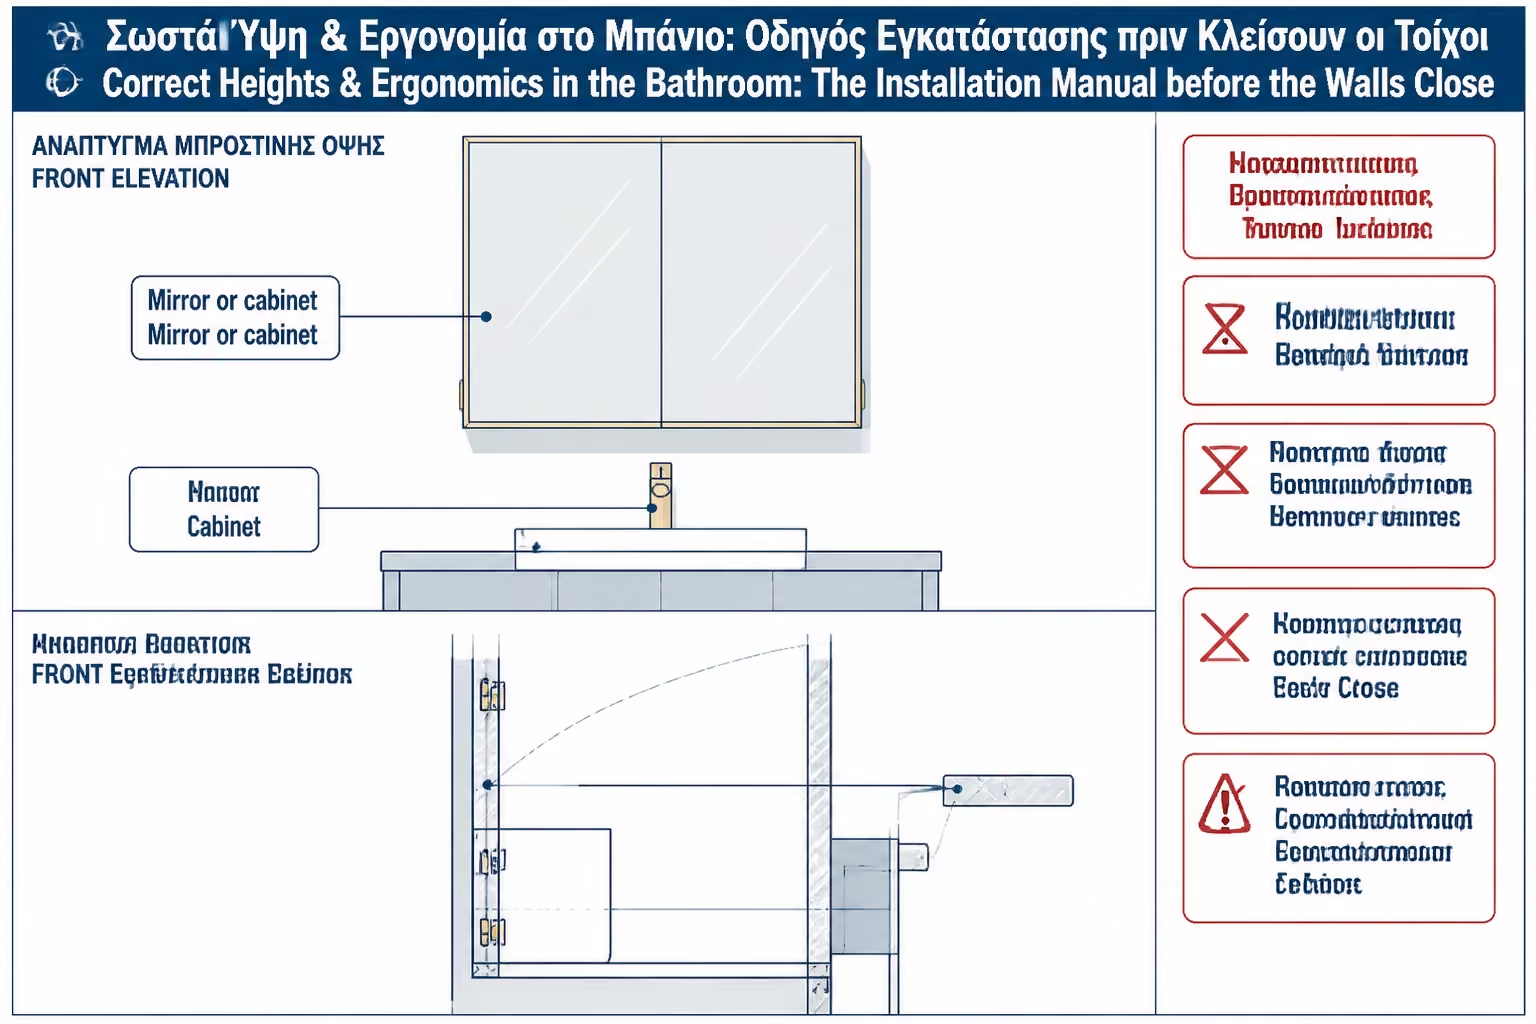
Although the subject is the plumbing rough-in, washbasin ergonomics is also tied to the mirror. A mirror or mirror cabinet installed too low can visually or practically clash with a tall faucet. A mirror cabinet with a depth of 12–17 cm can also become annoying if the faucet or sink is too close.
Usually, the lower edge of the mirror is placed about 110–120 cm from the floor, but this depends on the height of the washbasin and the users. If there is a mirror cabinet, it needs more clearance than a plain mirror so that the doors can open and splashing water does not hit the underside. If there is a built-in basin faucet, the rosette and spout must be designed together with the mirror.
This is a common mistake: the water outlets are decided first, then a large mirror cabinet is installed and suddenly the space looks cramped. The faucet, the sink and the mirror are one composition. They must be designed together.
In small WCs, where everything is compressed, the tap, the mirror and the lighting supply must be coordinated early.
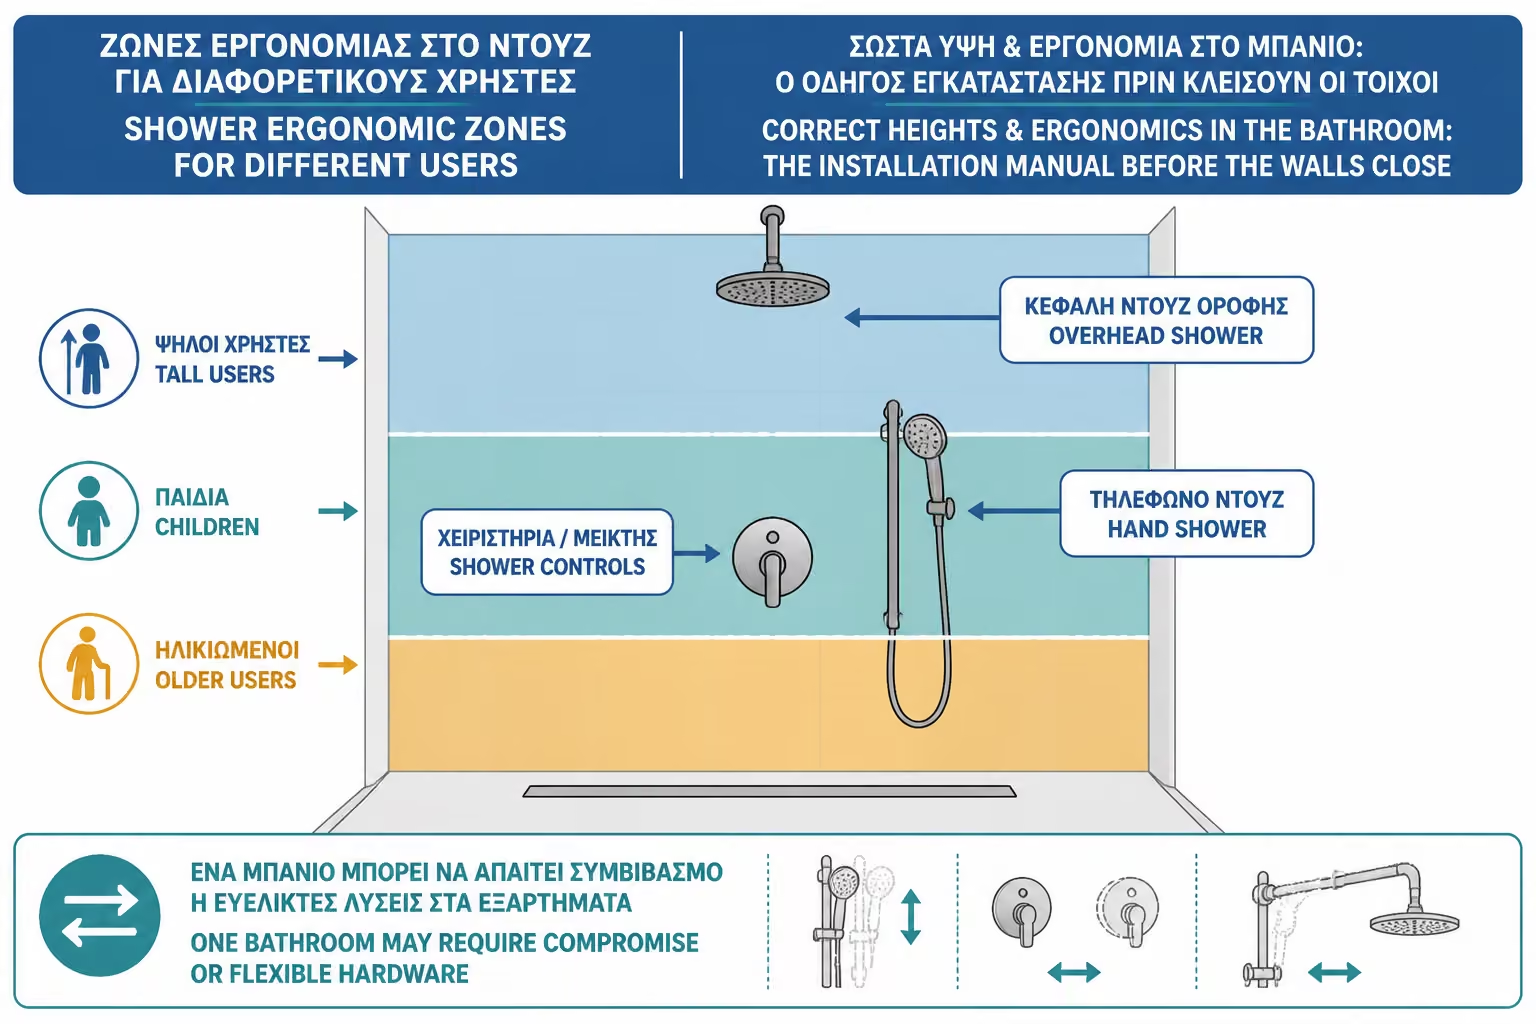
Standard heights are a starting point, not a one-size-fits-all rule. If the main users are tall, the washbasin can be raised to 90–92 cm, the shower head to 220–230 cm and the control slightly higher. If there are children, you may need a lower shower head or bar. If there are elderly people, the controls should be easily accessible, with clear movement and without bending over.
For accessibility, general housing rules are not enough. Special dimensions, clearances, handles, sitting, non-slip floors and different heights are needed. There, special instructions must be followed and a study done by a professional.
In families with a large difference in user height, the adjustable shower rail is a very good solution. The rain head can be positioned for the tallest user, while the hand shower remains adjustable for everyone. The washbasin is usually chosen as a compromise around 88–90 cm.
Ergonomics is not a "right number". It is proper use by the real people who will live in the bathroom.
In modern bathrooms with large tiles, plumbing outlets should not accidentally land on joints, cuts or awkward spots. The shower mixer, head, hand-shower holder and built-in basin mixer must be coordinated with the tile pattern. But aesthetics should not undermine ergonomics.
Ideally, before the facilities are passed, the wall is faced with tiles. Where do the joints fall? Where will the center of the tap go? Will a tile be cut in half? Will it be drilled too close to the edge? Will the rosette come out on a joint? All this affects the final result.
If the choice is between perfect joint alignment and functional height, function comes first. But usually with a little planning both can be achieved. Especially on large plates, a small shift of 2–3 cm can change the image a lot.
The plumber cannot guess the slab cut-outs or the final tile layout. The tiler cannot correct wrongly placed plumbing outlets. Coordination must be done before the walls are closed.
The first mistake is measuring from the wrong floor. If you don't measure from the finished floor, all the heights will be wrong.
The second mistake is the shower head too low. In a rain shower, this is particularly annoying because the user feels that the head "sits" on him.
The third mistake is the shower faucet too deep or too far out on the wall. This is mainly about the depth of the installation, not just the height, but it is equally critical.
The fourth mistake is waiting for a sink behind drawers. Then furniture gets cut, storage gets messed up and it looks like a sloppy job.
The fifth mistake is the countertop sink too high. The furniture must be lowered so that the finished edge is ergonomic.
The sixth mistake is the built-in sink faucet without projection control. The height can be "right", but the water falls wrong and splashes.
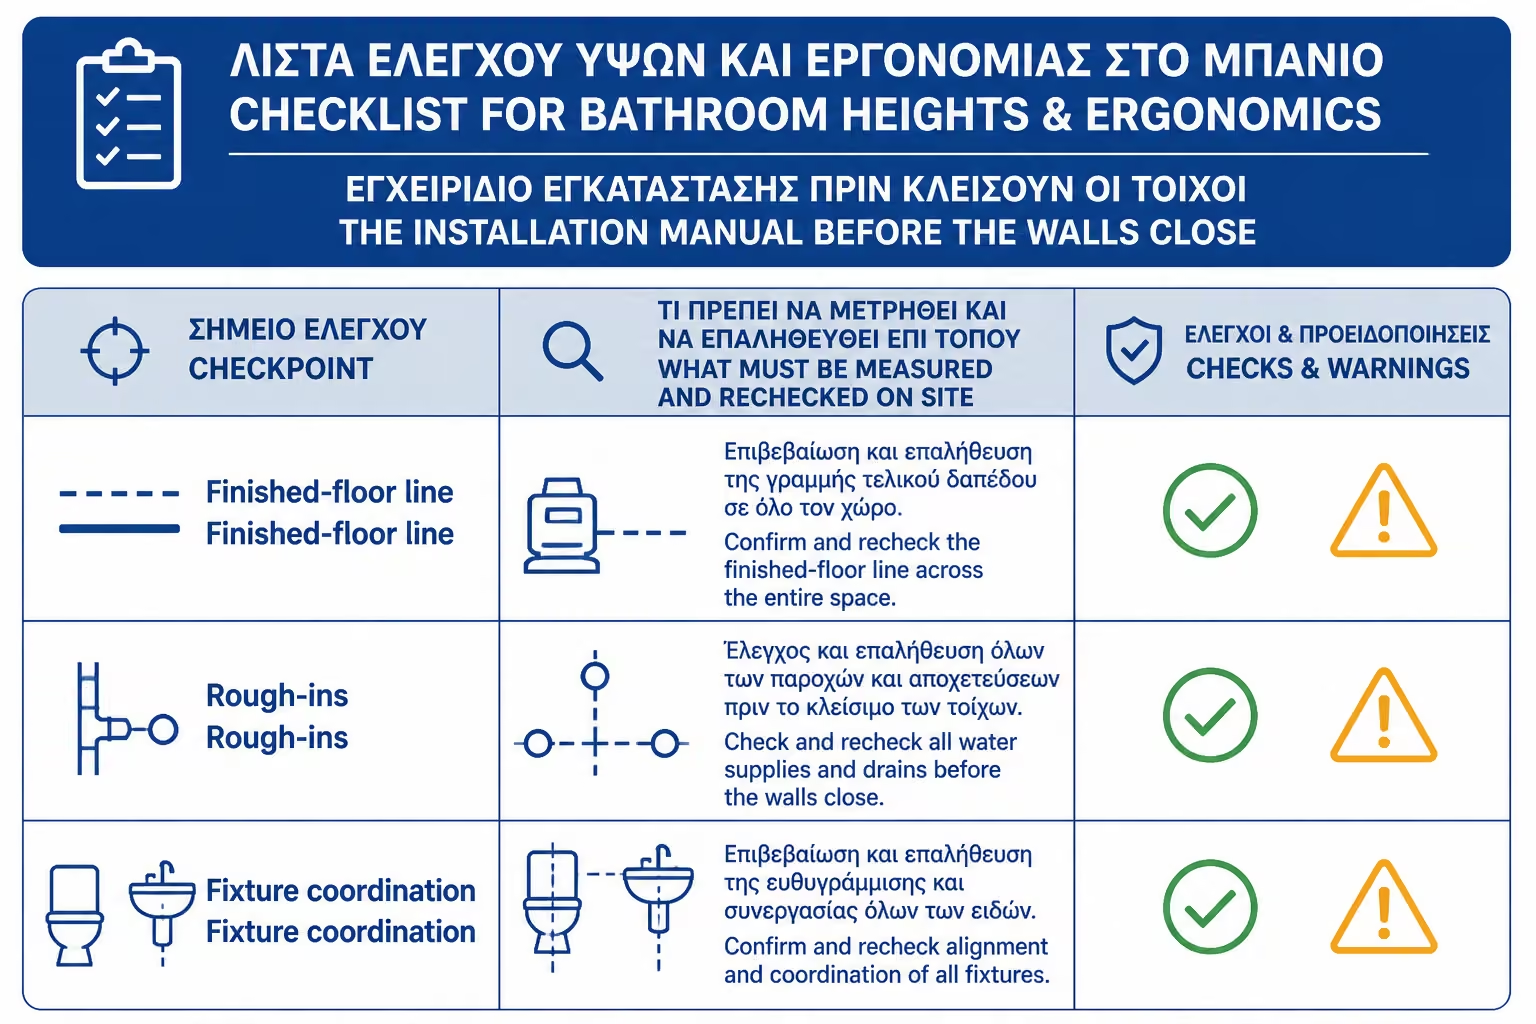
| Inquiry | Yes / No |
|---|---|
| Is the finished floor level clearly marked? | Yes / No |
| Have glue, tile, waterproofing and slopes been calculated? | Yes / No |
| Is the built-in shower faucet model selected? | Yes / No |
| Is the shower faucet center in an ergonomic zone of 100–115 cm? | Yes / No |
| Does the rain head have 20–30 cm clearance above the tallest user? | Yes / No |
| Is the hand shower within easy reach of all users? | Yes / No |
| Is there an adjustable shower rail if the bathroom is for family use? | Yes / No |
| Does the top edge of the sink come out about 85–90cm or as much as suits the users? | Yes / No |
| Do the sink fittings not clash with furniture drawers? | Yes / No |
| Does the sink drain fit into the furniture slot correctly? | Yes / No |
| Has the built-in basin faucet been projection and trough tested? | Yes / No |
| Is there a plan view with tiles, joints and fittings? | Yes / No |
If you can't answer "yes" to most of them, it's not time to close the walls. Heights are one of the few things that are difficult to correct afterwards.
If you have to keep only one thing, keep this: don't ask the plumber to "set the standards". Ask for everything to be marked from the finished floor and based on the actual products. Center of shower mixer approx 105–110cm, rain head usually 210–220cm or 20–30cm above the tallest user, top edge of basin approx 85–90cm, basin taps approx 55–60cm and drain 45–55cm These are a starting point. The final height is decided by the user, the product and the furniture — not the habit of the workshop.
Correct installation heights are the hidden ergonomics of the bathroom. When they are right, no one notices them. When it's wrong, they annoy every day. The shower faucet should open comfortably, the head should not be low, the telephone should be within easy reach, the washbasin should not be too childish or too high, and the waits should not collide with furniture and drawers.
For a typical home, a good base is: built-in shower mixer at 100–115 cm, often 105–110 cm, rain head at 210–220 cm or with a 20–30 cm margin above the tallest user, hand shower in an accessible zone 110–130 cm or on an adjustable bar, top edge of basin at 85–90 cm, facilities wash basin at 55–60 cm and drain at 45–55 cm. All from the finished floor.
But the numbers don't work by themselves. They must be checked against the technical drawings of the faucet, washbasin, furniture, shower head and tiles. Especially in countertop washbasins and built-in faucets, the relationship between height and projection is more important than a general number.
The best tool is rehearsal. Mark on the wall, stand in the space, see where the hand falls, where the water will come out, where the drawer will open and where the tallest user will stand. If this process is done before the walls are sealed, the bathroom will function properly for years. If omitted, errors will remain under the tiles.
Return to category.
Go to categoryReturn to the central guide.
Go to guide