The solution
On the market there are short Patch Cords with a length of 15cm, 25cm and 50cm.
You have set up your Rack. At the top is the Patch Panel (where the house cables permanently end up) and just below that is the Switch. All that remains is to connect them together to give internet.
This is where most amateur installations break down aesthetically and functionally. You open the Rack door and you see a "cascade" of colorful, tangled cables (known in the field as Spaghetti Wiring). When trying to figure out which wire goes where, it's impossible. Even worse, that bulk of cables blocks airflow, baking your gear.
Cable Management is not just about beauty. It is a key requirement for network reliability, cooling and maintenance. Let's take a look at the 4 rules System Admins follow to create Racks that look like works of art.
The biggest mistake that creates "chaos" is using the wrong cables. When the space between the Patch Panel and the Switch is only 5 cm, it is absurd to use a 1 meter Patch Cord! The excess copper must be hidden somewhere, creating loops and boogies.
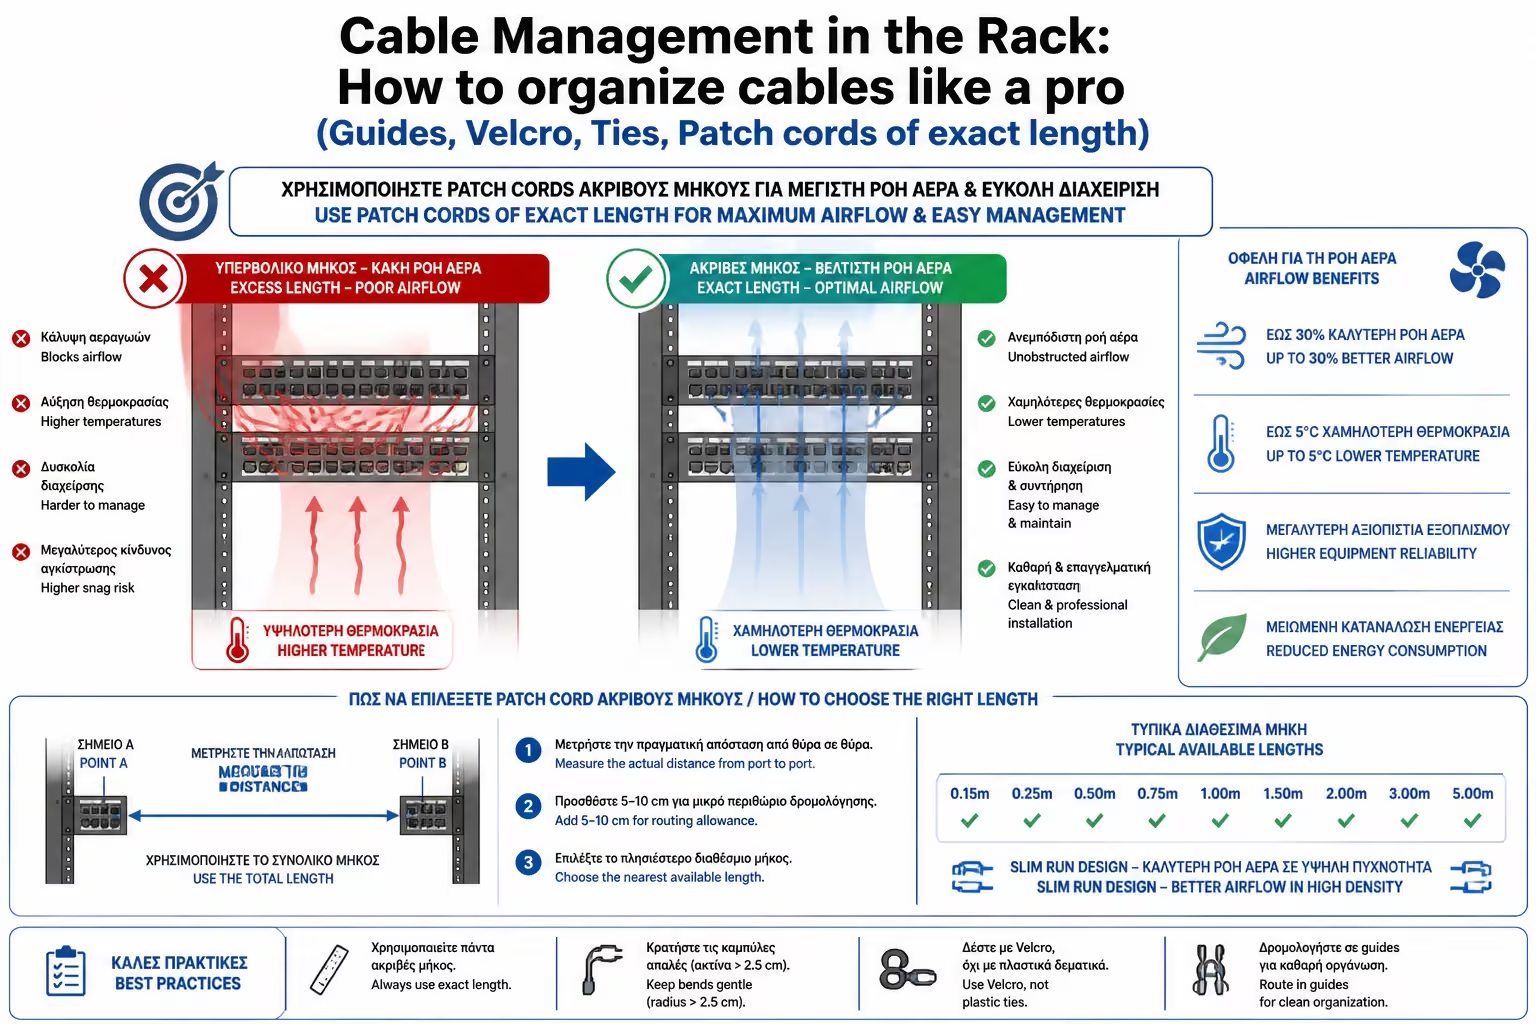
On the market there are short Patch Cords with a length of 15cm, 25cm and 50cm.
To save even more space, look for "Slim" Patch Cords (eg 28AWG or 30AWG diameter). They are impressively thinner and extremely flexible, allowing perfect airflow while maintaining speed certification (Gigabit/10G).
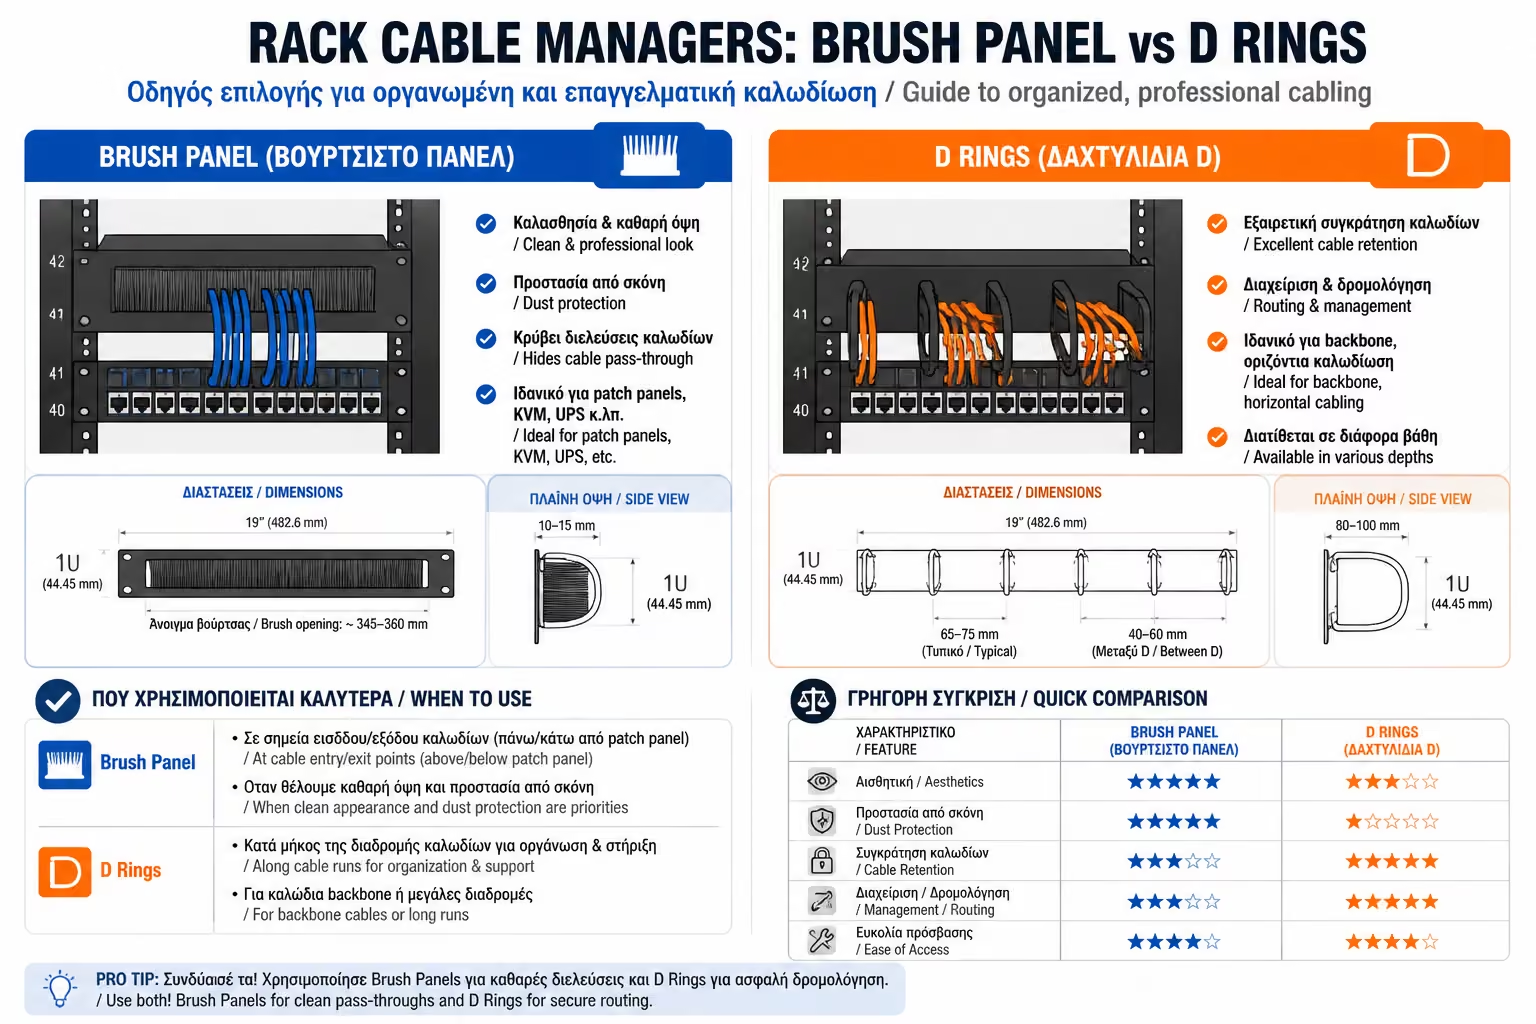
If you have long distances inside the Rack (eg from the Switch to the Router located on the bottom shelf), the cables should not hang freely in the air. They must be routed horizontally and vertically. For this purpose, we use 1U or 2U Cable Managers, which are screwed to the Rack just like the machines.
There are two popular types:
They have a dense brush along them. The cables pass through the bristles and are "hidden" at the back of the Rack. They keep dust out and offer an incredibly clean facade.
They have plastic "fingers" or metal rings. You collect all the wires in a bundle, pass them through the grommets and snap the metal cap on top.
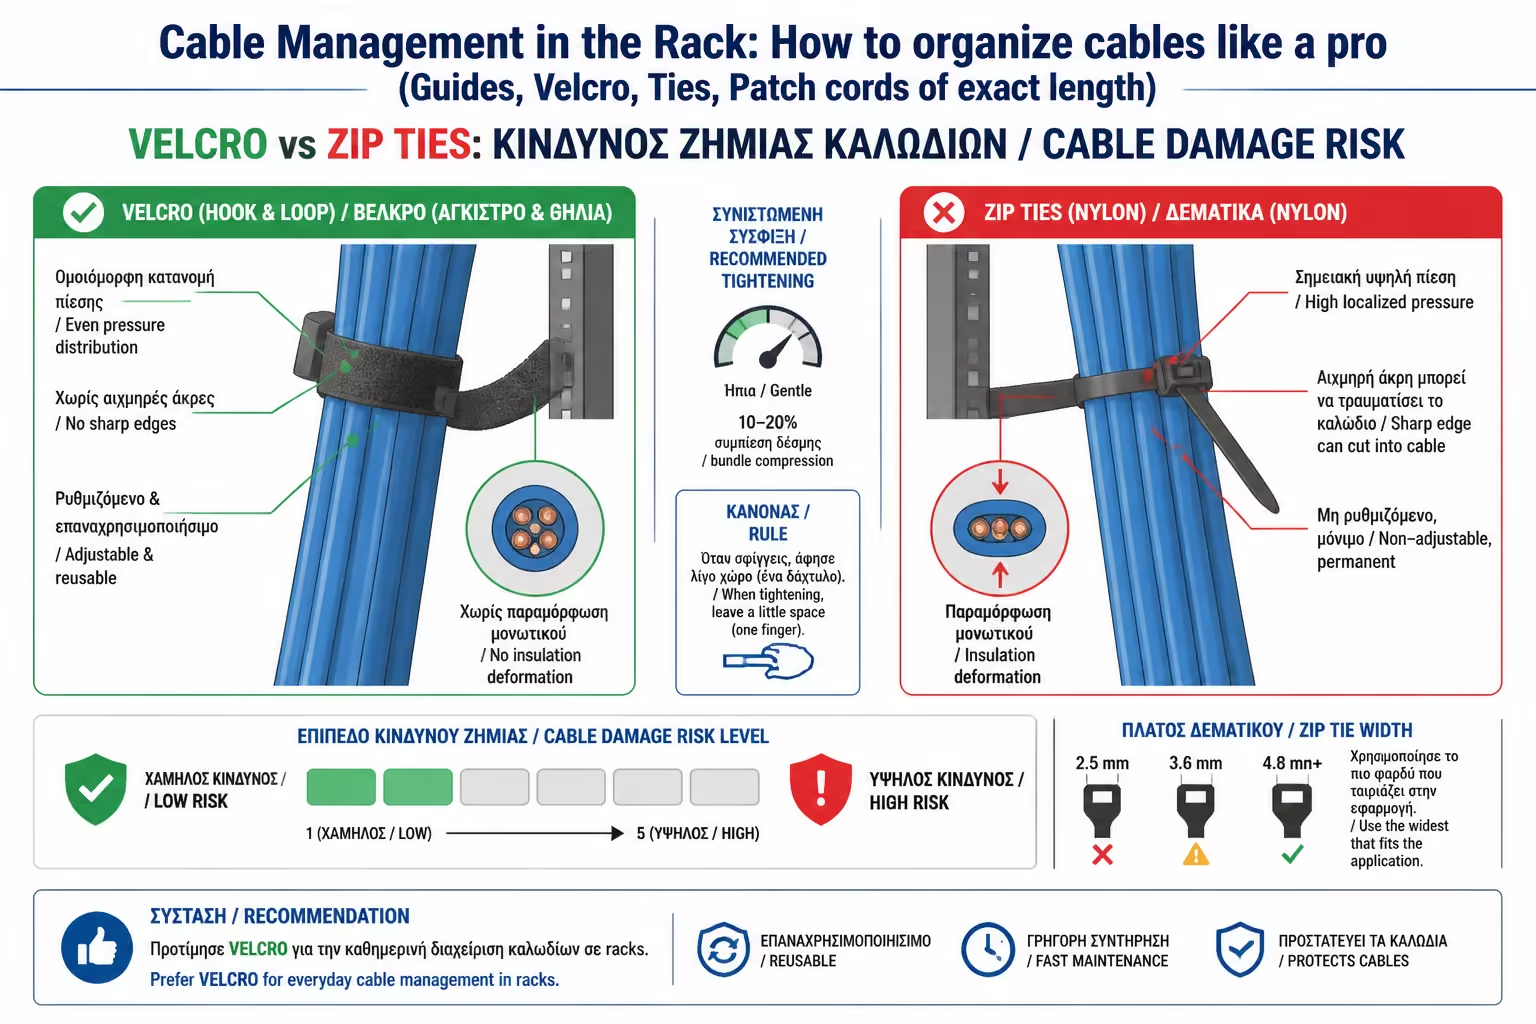
When it comes time to tie a bundle of cables together (both at the back of the Patch Panel and at the front), electricians usually pull out the classic plastic zip ties (Zip-ties).
On data networks, plastic bundles are strictly prohibited.
The Professional Road: Velcro Tapes (Scratch) Use only double-sided Velcro rolls (cut to desired length).
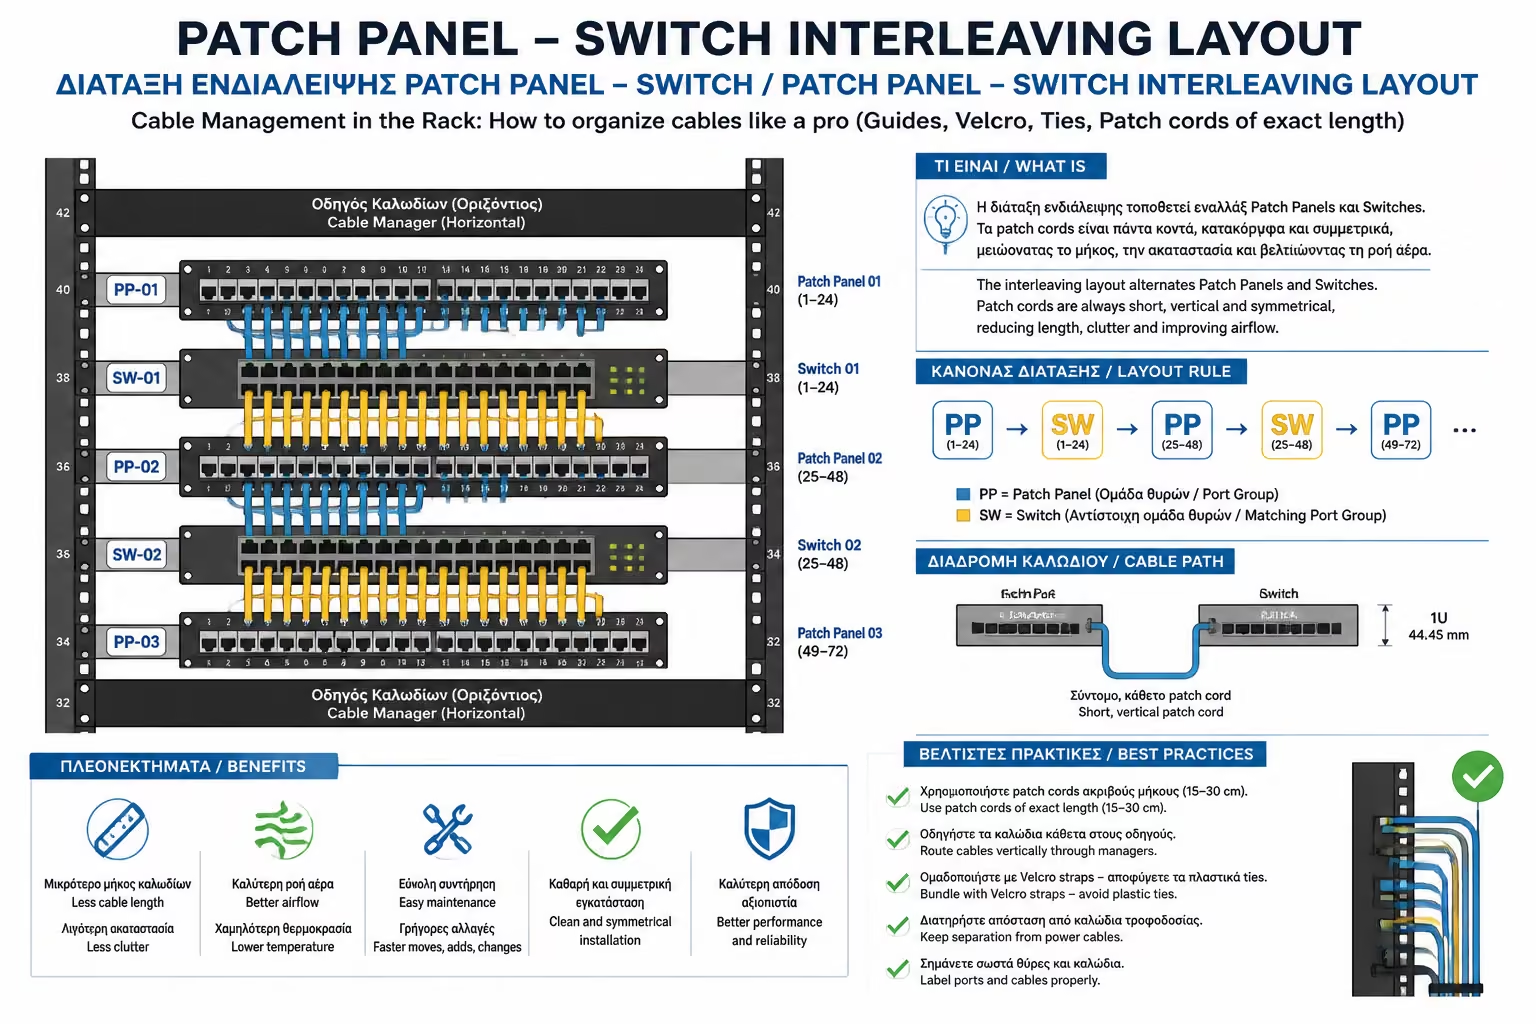
The best cable management... is the lack of need for cables. How you place the machines in the Rack determines the chaos.
The Wrong (Sandwich): Put 3 Patch Panels one under the other on top, and 3 Switches on the bottom. This forces you to run 72 long cables from top to bottom, creating a huge, unsightly bulk in the middle of the cabin. The Right (Interleaving): Place the equipment alternately! (Patch Panel -> Switch -> Patch Panel -> Switch). With this arrangement, the Switch's top row of ports is only 5cm from the Patch Panel above it. You can use 15cm Patch Cords, connecting the machines directly, without even needing Cable Managers. The result is a flat "wall" of short cables that hide absolutely nothing!
A properly organized Rack is not a luxury, it is a proof of respect for your investment. By ditching the plastic cords, using quality Velcro, choosing Patch Cords to the exact length needed and bolting the gear down in a smart arrangement, you ensure that your net will breathe properly and any future damage (or addition) will be resolved in minutes, instead of hours of frustration.
Next Step: All these cables end up in the Switch. This is the "boss" of the network. However, there are €20 switches and €1,000 switches. Which one do you need?
We continue in the buying guide for the "heart" of the Rack: Network Switches (Unmanaged vs. Managed vs. PoE): How to calculate the total PoE Budget to power all your cameras and APs.
Return to category.
Go to categoryReturn to the central guide.
Go to guide