The Cable
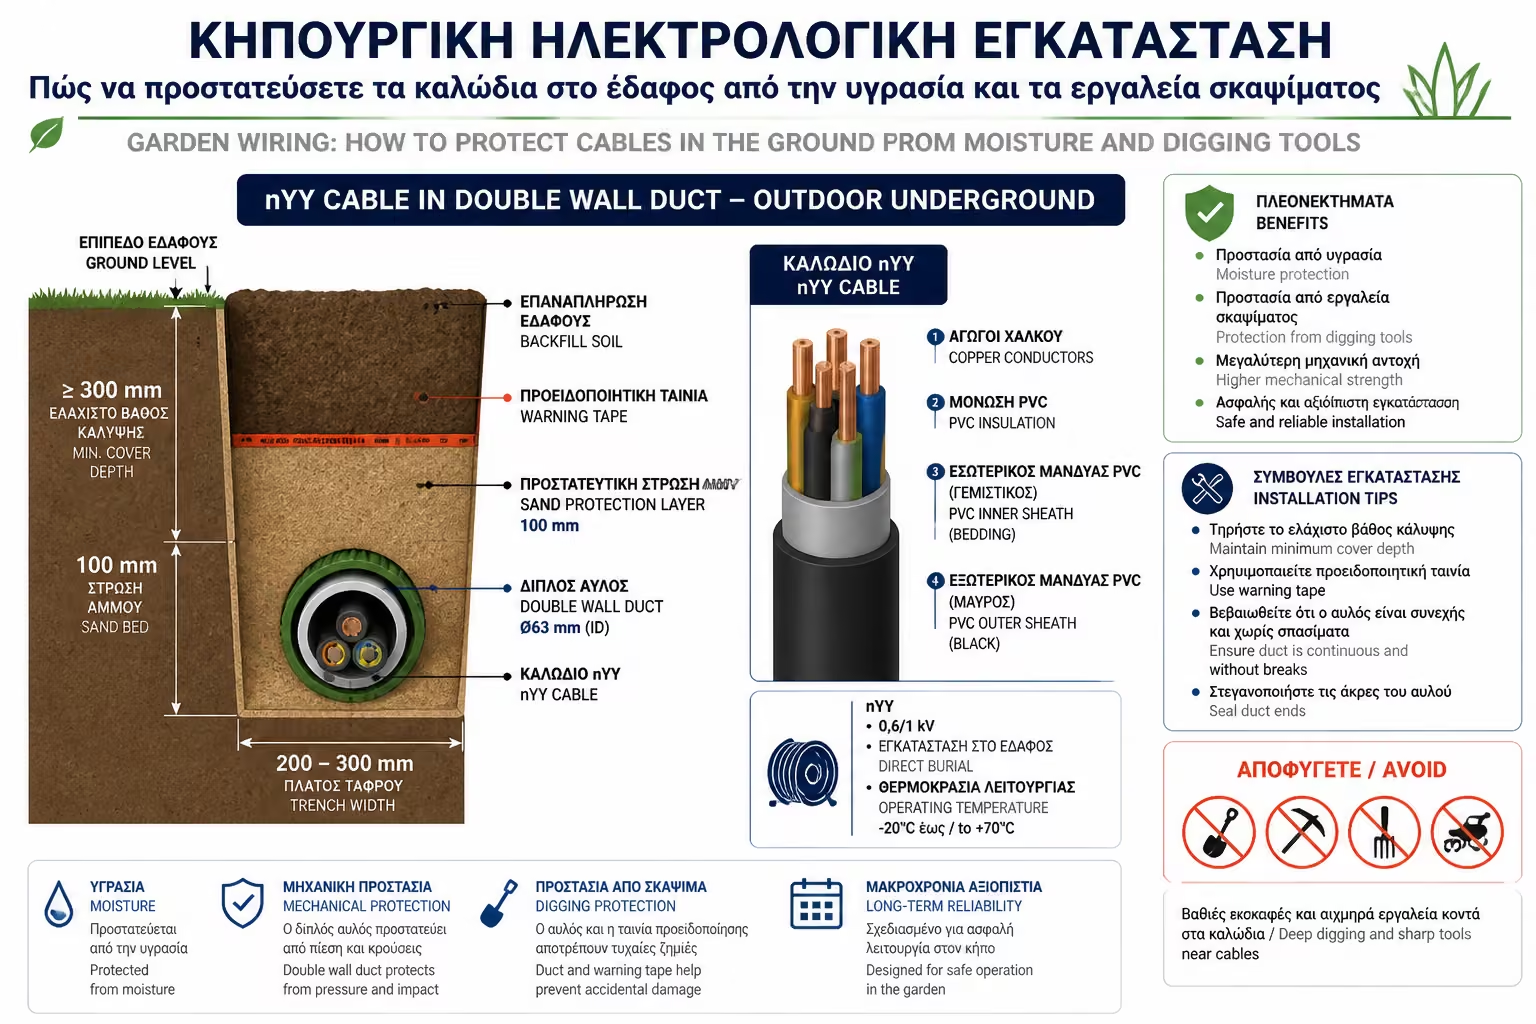
A black outdoor cable (type NYY) is required, which has reinforced moisture resistant insulation.
You have chosen the most impressive IP65 waterproof lights for your garden. You have bought the best spotlights and the most stylish sconces. But all this is useless if the current does not reach there safely.
The garden is the most hostile environment for an electrical installation. There, the enemy is not only water. It's the rodents that love to chew on plastic cables, it's the tree roots that over the years acquire terrifying strength and crush everything in their path, and above all... it's the gardener's hoe!
Digging a 10cm trench, dropping a gray cable in and covering it with soil is a recipe for future disaster. As engineers, let's see how we "bury" the cables in the garden according to regulations, so that they do not "drop" the general of the house and no one is ever in danger.
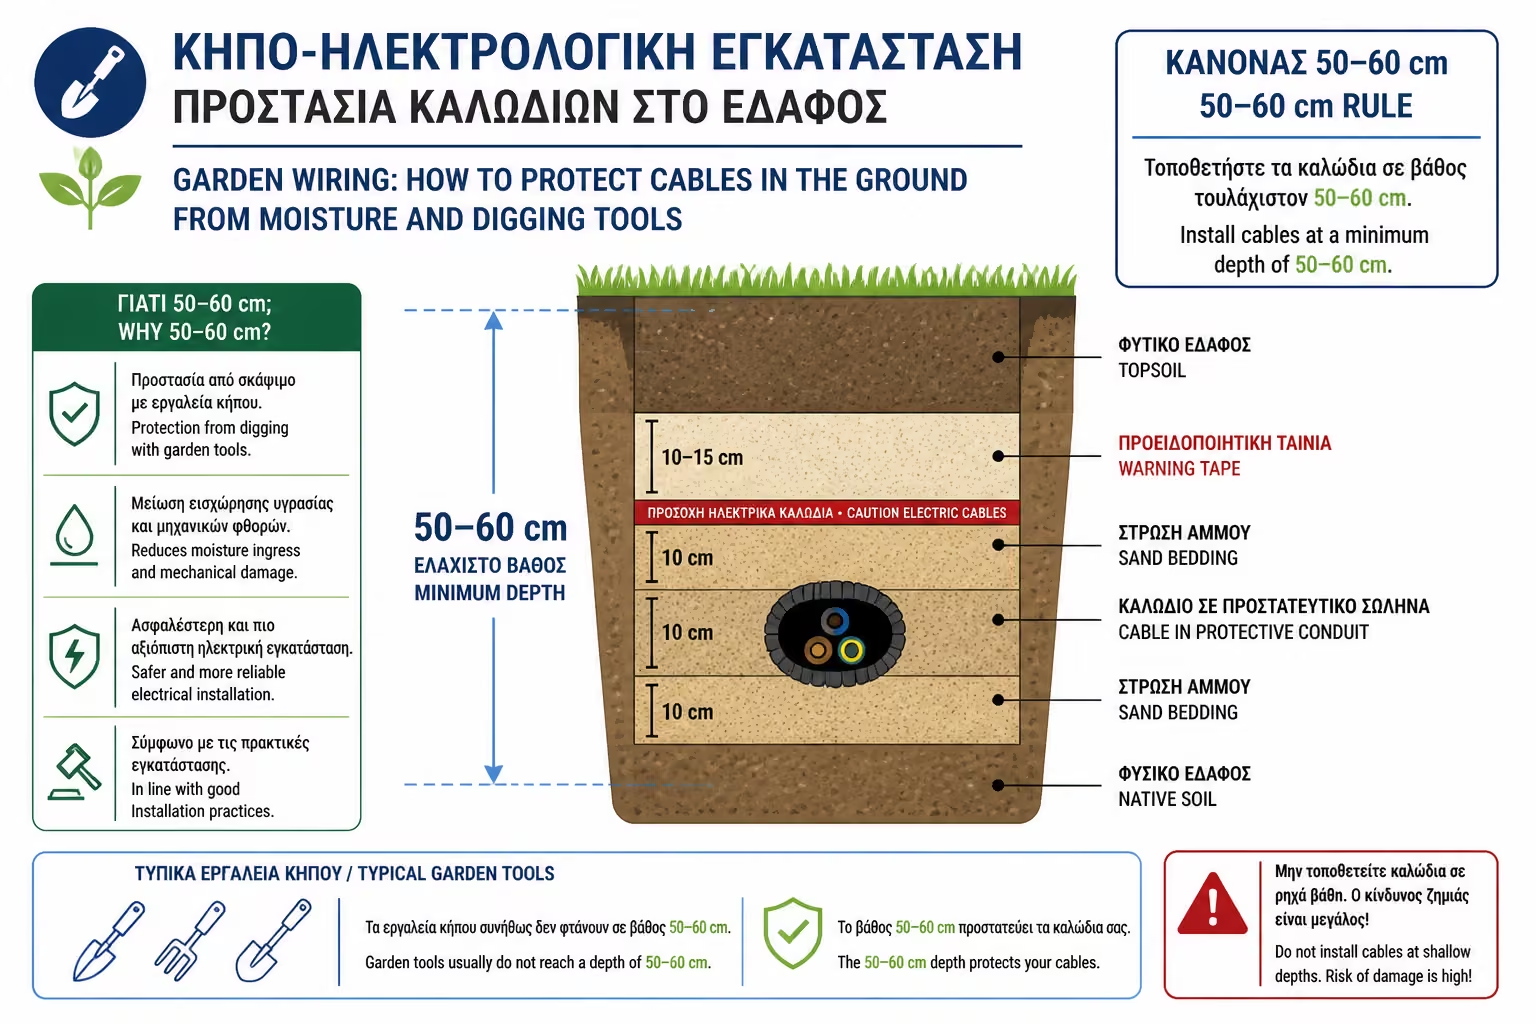
The first and most important step is excavation. Cables should never lie on the surface.
Not just any cable for the garden. Classic indoor gray cable (NYM type) will corrode quickly in soil.
A black outdoor cable (type NYY) is required, which has reinforced moisture resistant insulation.
The cable never rests bare on the ground. It must be passed through a double wall structured tube (they are usually red/orange or black with ridges). These tubes are hard on the outside (to withstand shock and pressure) and smooth on the inside (to allow the cable to slide easily).
The pipe is not simply thrown into the ditch on top of the stones. Soil pressure will cause the pointed stones to puncture the plastic over time.
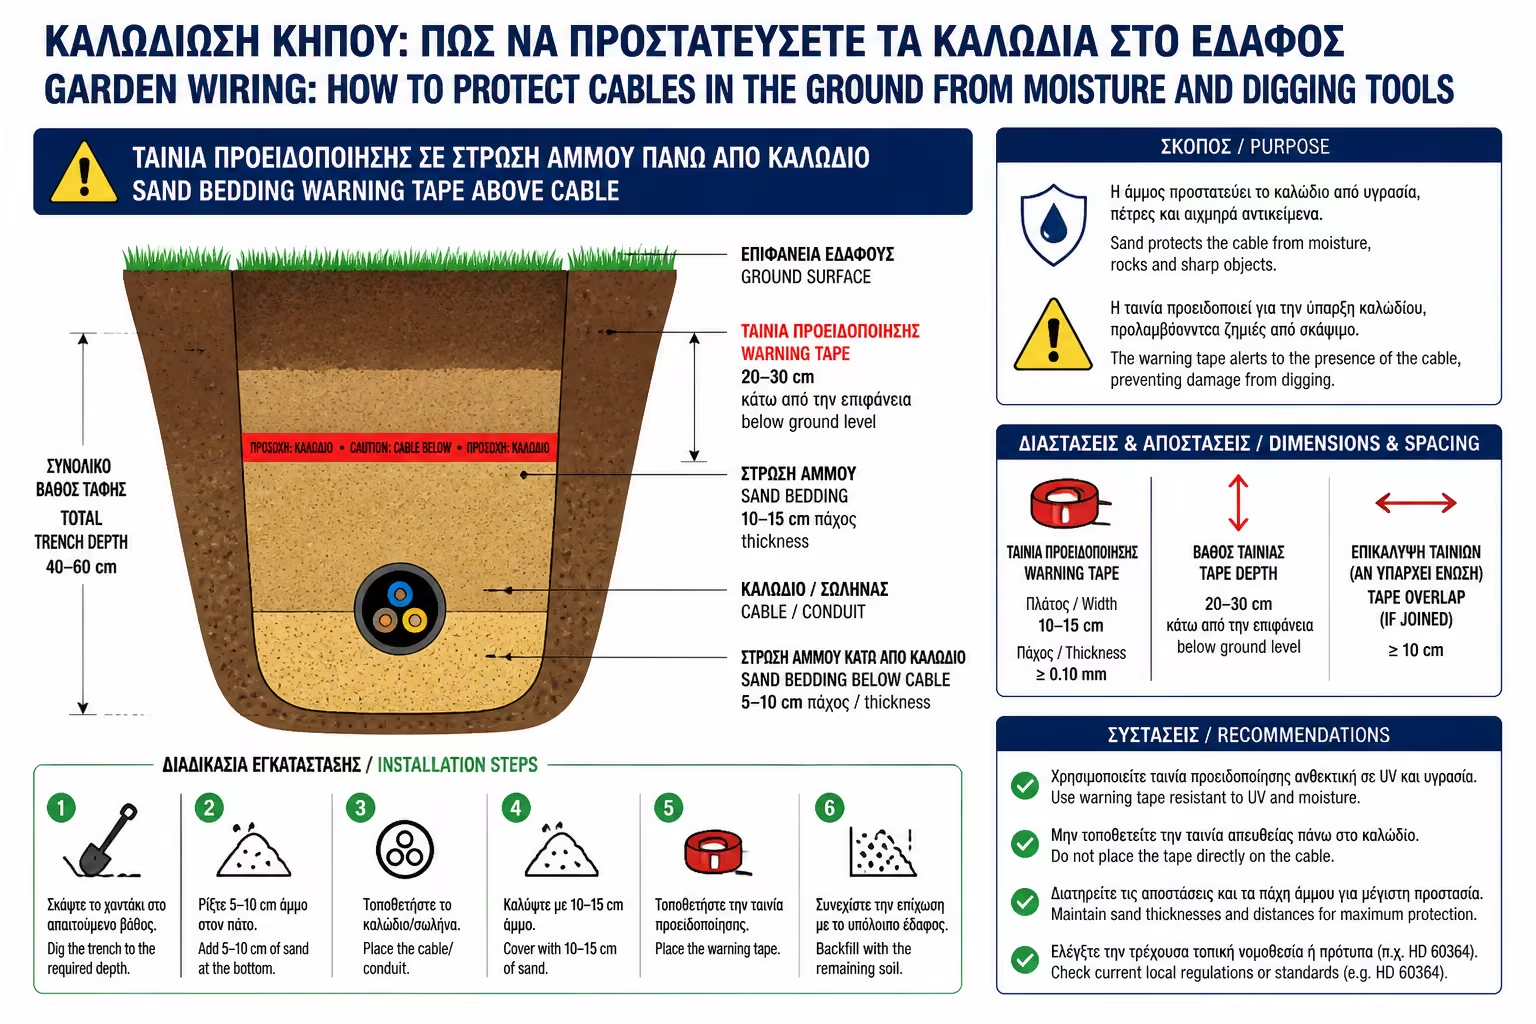
This is the step that almost all hobbyists skip, but it saves lives! After covering the pipe with sand, pour about 20 cm of plain soil on top. At this point, you spread a plastic, colored Warning Grid (or Tape) (usually yellow or red, that says "CAUTION ELECTRICAL WIRE") across the trench.
How it works: Imagine that in 10 years you sell the house. The new owner decides to plant a large tree and puts a digging machine (hoe) in front. As it digs the soil, the machine will first "pull" the red plastic strip (located at a depth of 30 cm). The operator will see it, realize that there is current underneath, and stop, BEFORE cutting the cable that is deeper!
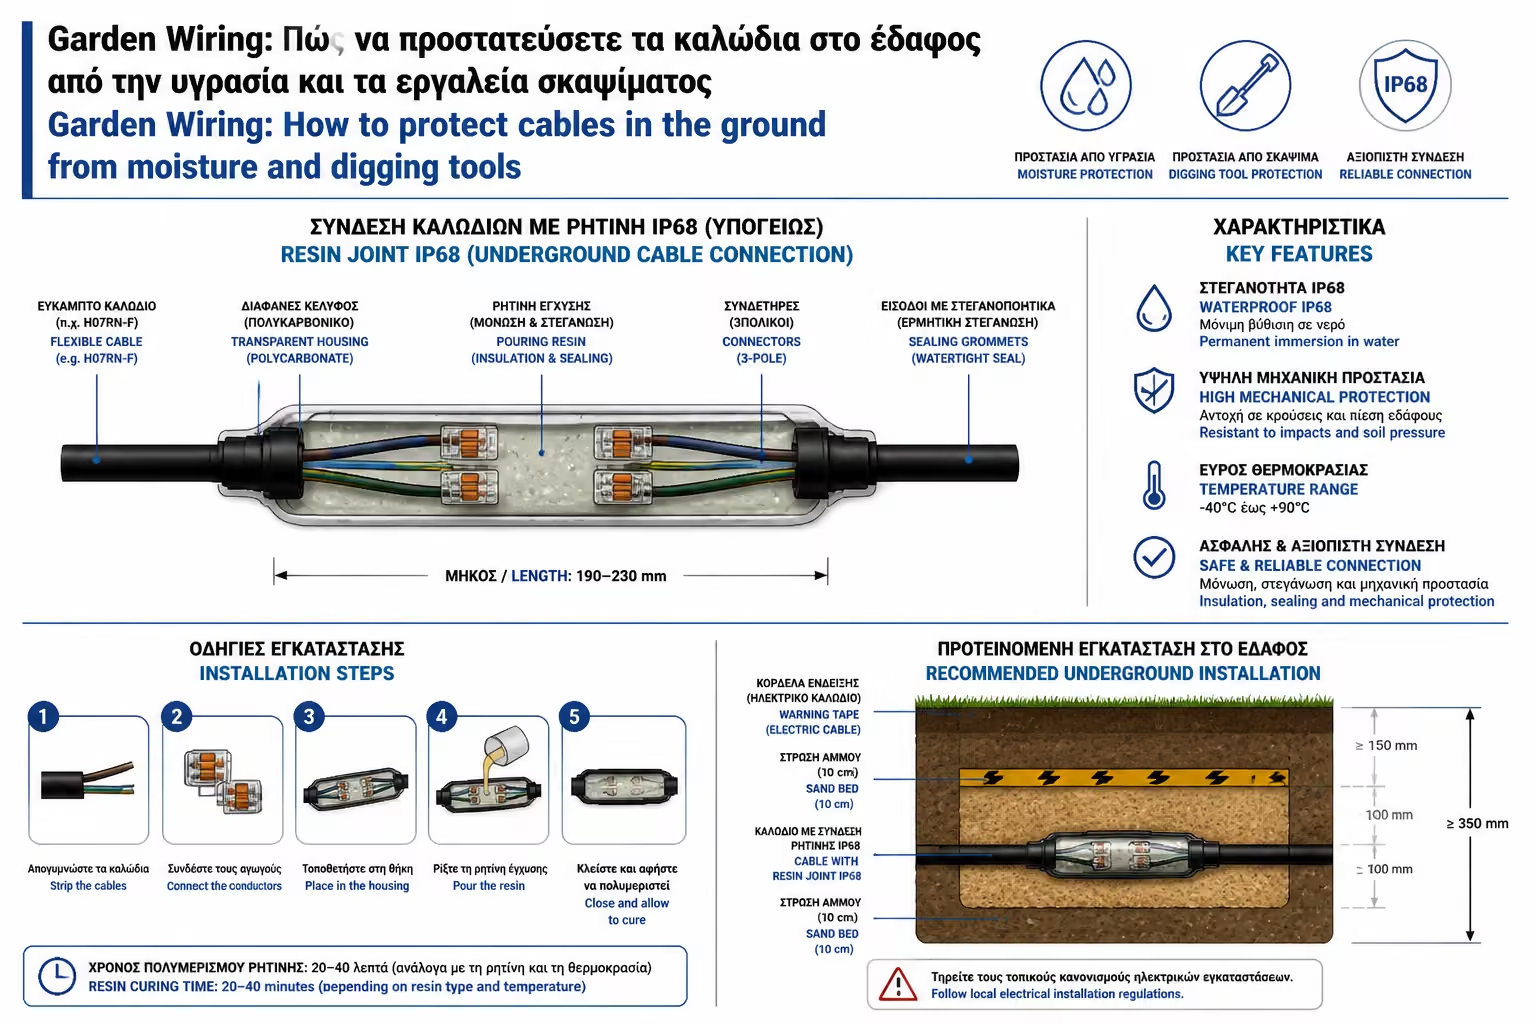
The rule says: It is forbidden to make connections (splices) of cables under the ground! * The cables must be in one piece from the panel to the lamp. If you have to join or branch them, the joint must be above ground, in a watertight junction box (IP65) bolted to a wall or hidden behind a bush.
If you accidentally cut a cable with a shovel, or if the branch has to be buried in the ground, the classic insulating tape or heat shrink spaghetti will last... a week. There the use of Resin Joint is required. It is a special plastic casing inside which you make your connection with terminals. Next, pour a liquid resin mixture (like a two-part glue) into the housing. This resin solidifies in minutes, becomes hard as rock and "hugs" the cables, making the joint 100% waterproof (IP68), ready to be re-buried in wet soil.
When building your garden, do the wiring once and properly, before the lawn is laid and the plants are planted. Invest in double pipes, dig to the right depth and don't skimp on the warning tape. The cost of proper infrastructure is negligible compared to the cost of having to dig up and destroy a complete, beautiful garden because a cable got wet.
Next Step: Reading all of the above (digging, pipes, hazards), you might be thinking, "Should I just get some solar lights and stick them in the lawn and mess around?" We answer this very dilemma: Solar Garden Lights vs. Wired (230V): When the convenience of solar is worth it and when a cable is required.
Return to category.
Go to categoryReturn to the central guide.
Go to guide