Nylon for home routes
Good flexibility for short runs and tight residential bends.
Pulling cables through conduit looks easy when an experienced electrician does it. In practice, a few mistakes in fish tape choice, cable tying or handling are enough to jam the cable halfway and turn a small task into a frustrating mess.
The correct method depends far more on technique than on brute force. With the right tool, sequence and a few professional habits, even a capable DIYer can achieve a clean result.
Success depends less on brute force and more on method. The better you prepare the route, the fish tape and the cable tie-on, the less likely the insulation is to jam or get damaged along the way.
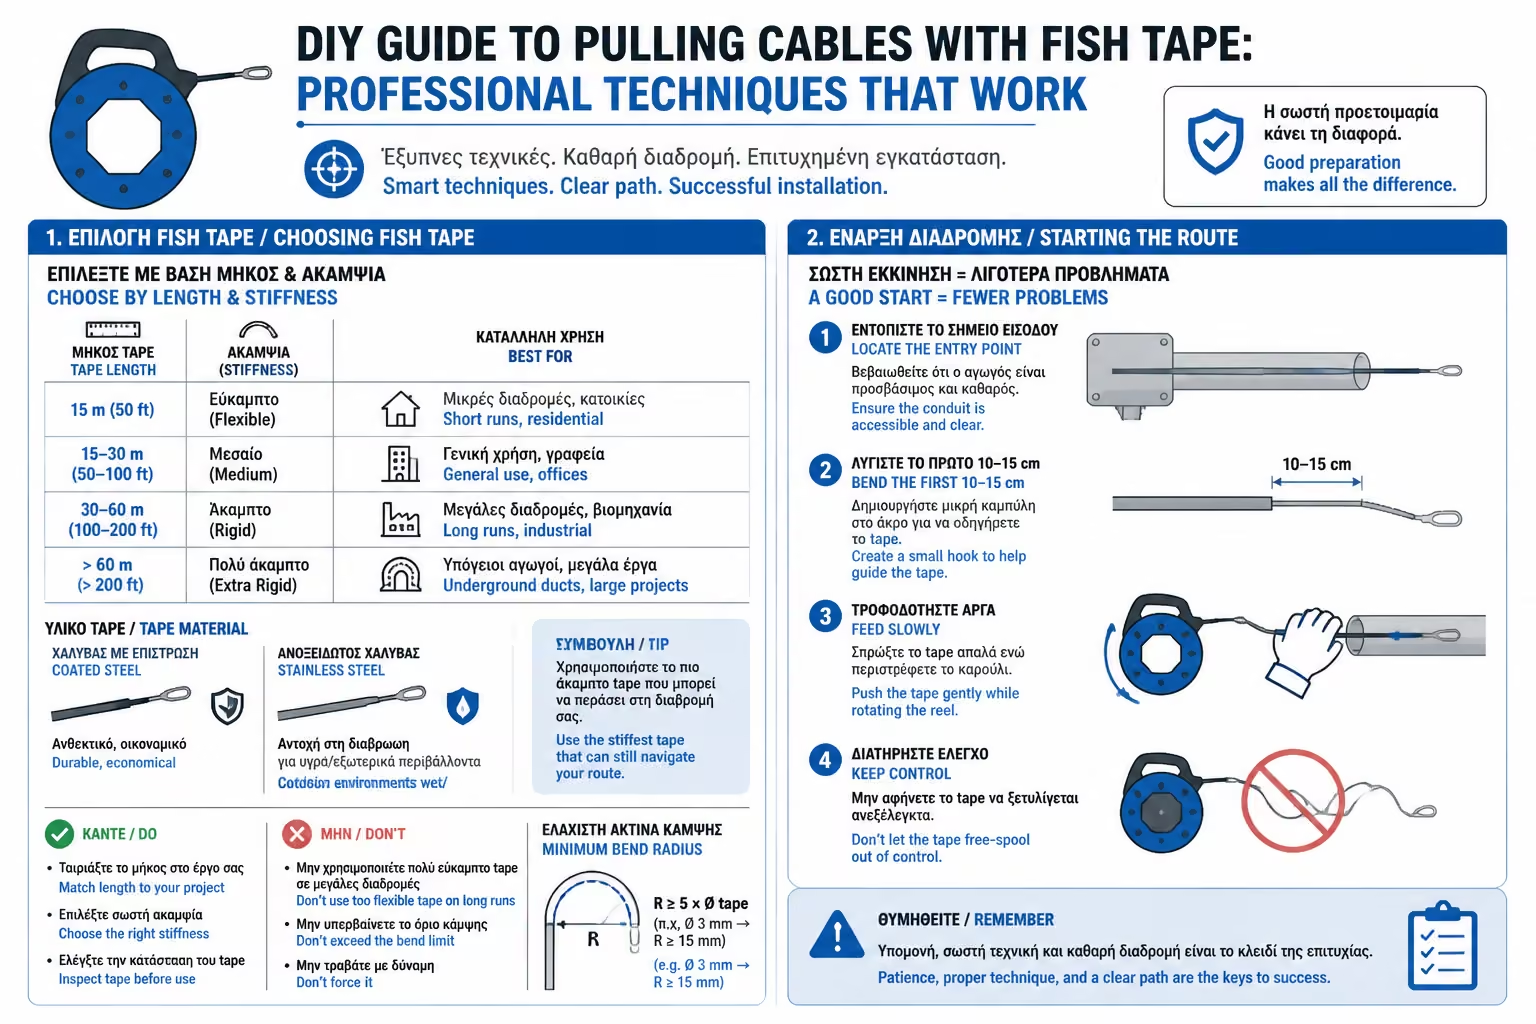
Not every fish tape suits every pull. Nylon tapes are more flexible and work well in short residential routes with many bends. Steel tapes push better through longer straights, while fiberglass versions are meant for large underground routes.
The right choice depends on length, bends and whether live conductors already exist in the same conduit. Steel fish tape in particular needs great caution wherever it may touch energised circuits.
That is why selecting the right fish tape material matters from the beginning: one tool suits short domestic routes with many bends, while another suits long straight underground conduits.
Good flexibility for short runs and tight residential bends.
Better on long straights, but much more sensitive around existing circuits.
Strong and rigid, yet not ideal for compact domestic turns.
The process starts only after confirming that the circuit is isolated.
The fish tape goes first and travels the route on its own before any conductors are attached. If it jams, the answer is not to force it. Pull back slightly, rotate it a little and try again.
That lets the spring tip change angle and clear small obstructions or bad bends without damaging the tool itself.
Feeding the guide should always be done with patience and control. If you feel serious resistance, you do not force it, because that is usually how the tape buckles or jams permanently in the line.
Advance steadily rather than with sudden aggressive pushes.
A slight retreat often clears a jam at a corner.
Changing its orientation can unlock the route without damage.
Conductors are attached only after the route has been confirmed open.
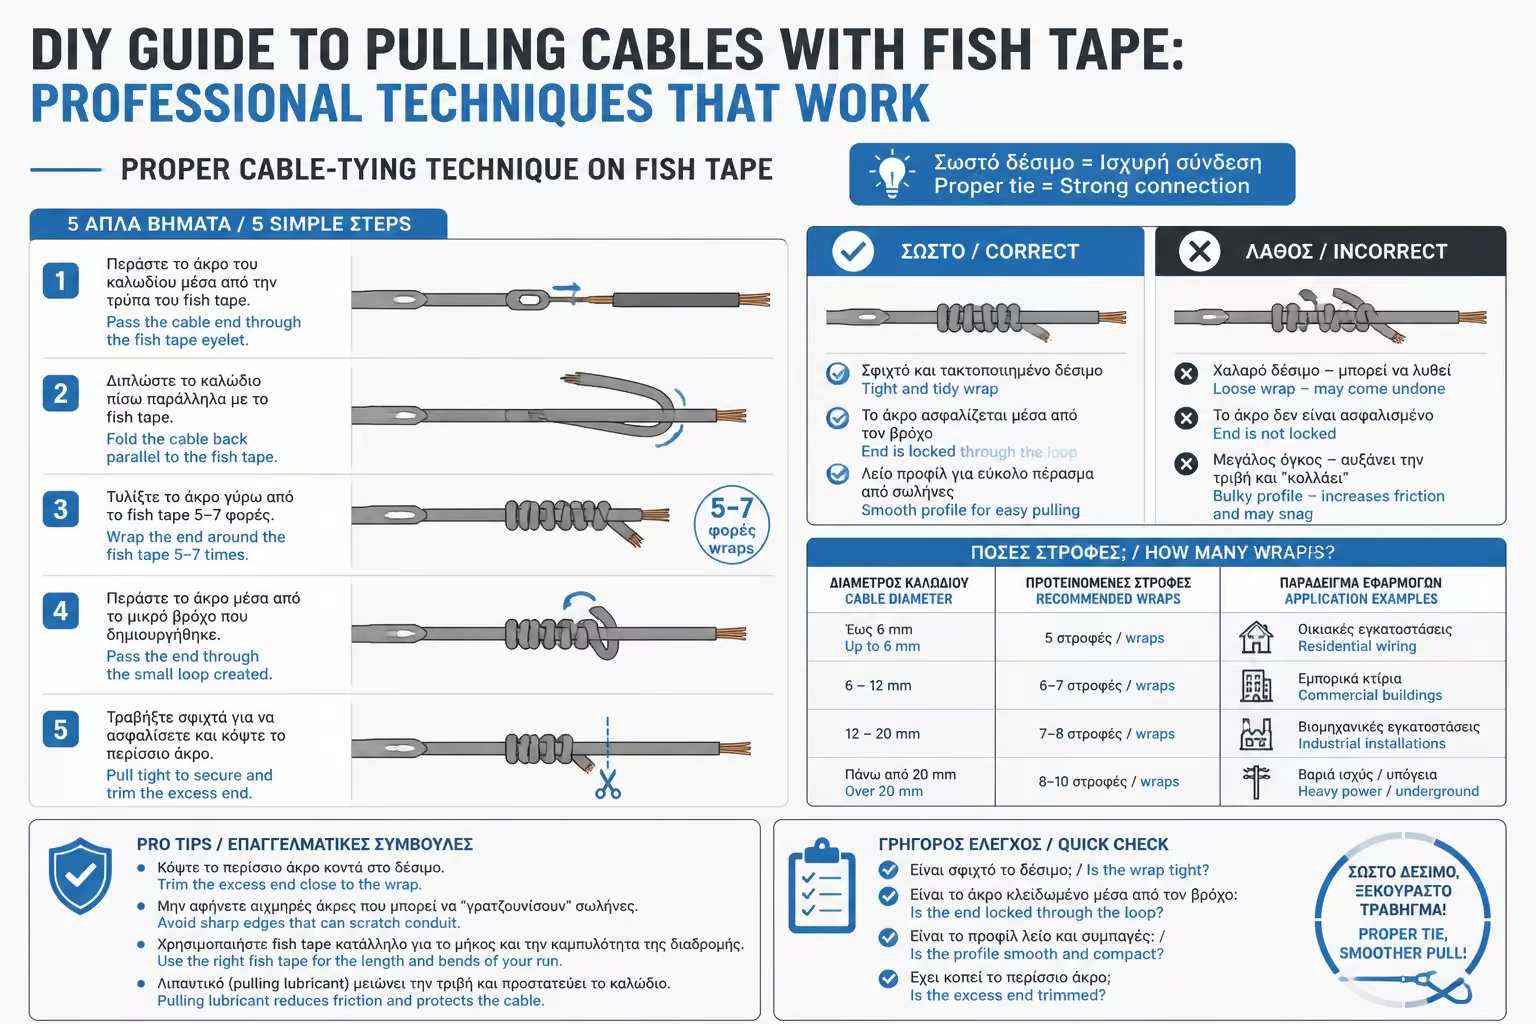
Once the fish tape reaches the far end, the most important step is how the conductors are tied to it. The goal is a slim, smooth, conical nose that will not catch on the conduit walls. A bulky knot of tape will usually stop at the first bend.
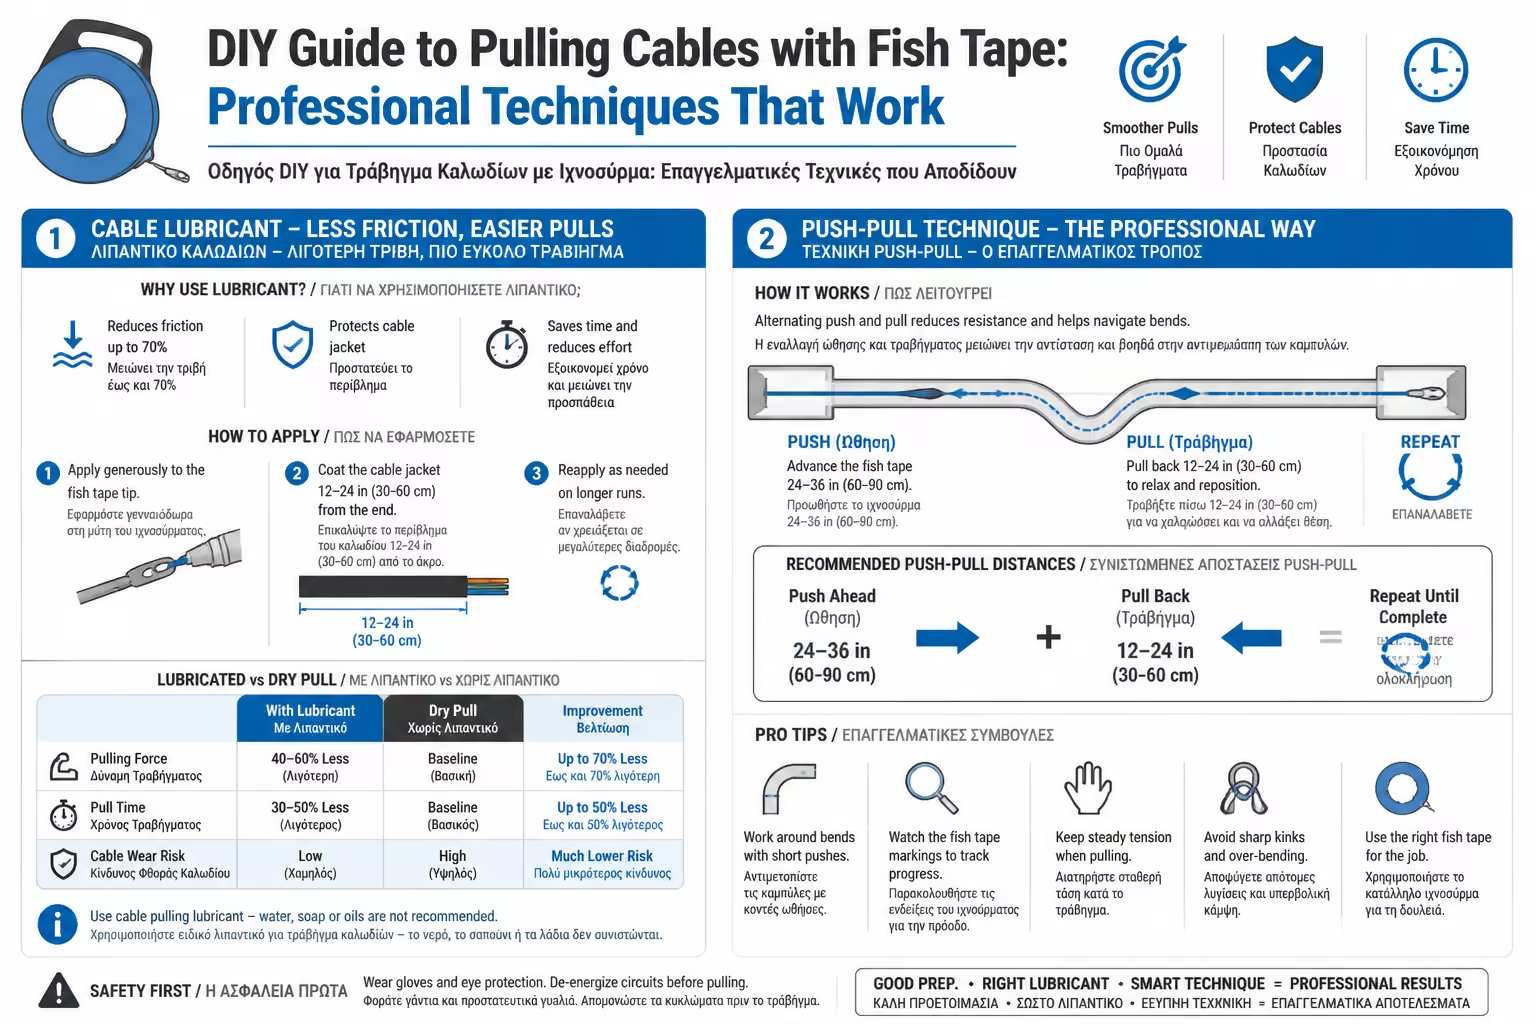
On longer or more difficult pulls, a dedicated cable lubricant also makes a major difference. It reduces friction dramatically and helps protect conductor insulation during the pull.
The same applies to the cable tie-on: a slim, smooth cone of tape and conductors travels far better than a bulky knot that will stop at the first bend or coupling.
Different lengths create a tapered shape instead of a blunt lump.
The tape should bind and streamline the joint, not add bulk.
It is the correct professional way to reduce friction in difficult runs.
Temporary tricks may work once, but they are not a replacement for the right material.
Ideally the job is done by two people. One pulls the fish tape at the outlet end while the other feeds the conductors smoothly at the entry point without loops or jerks. That greatly reduces stress on both the joint and the cable itself.
If the cable emerges with deep scratches, damaged insulation or clear resistance at a specific point, the conduit probably has an internal defect or severe kink. At that stage you stop and reassess the route rather than forcing the pull.
Finally, two-person coordination and proper cable lubricant make a huge difference. The pull becomes smoother, the stress drops and the chance of scraping the insulation is greatly reduced.
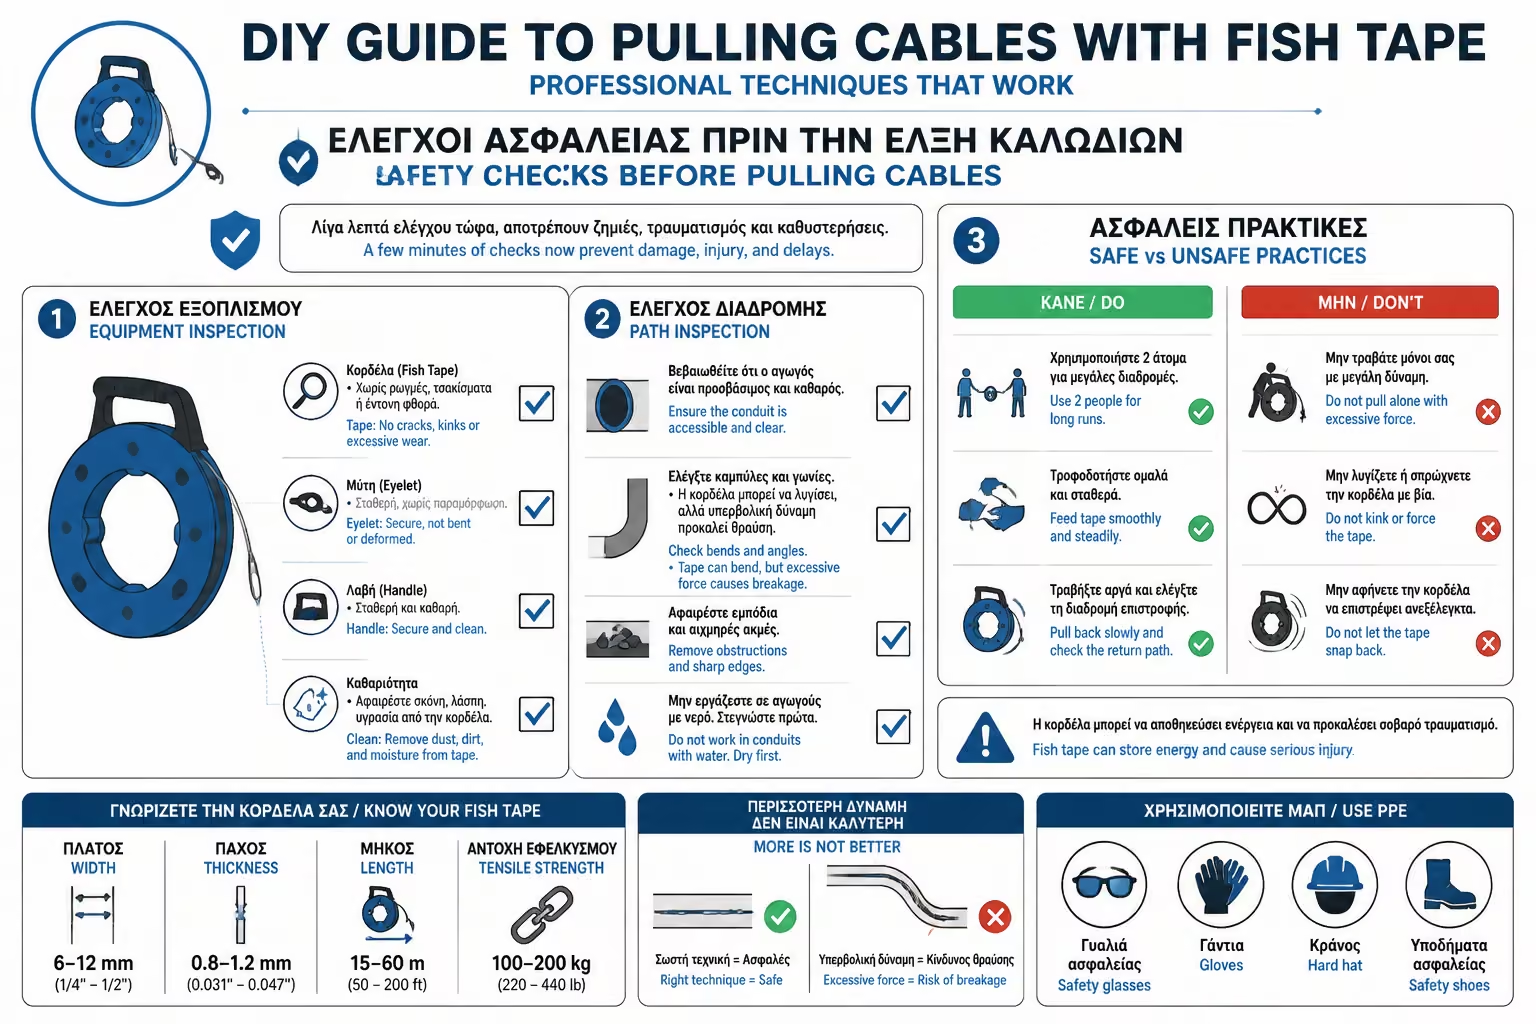
Coordinated pulling and feeding makes a major difference in difficult routes.
Sharp jerks can undo the tie and damage the insulation.
The conductors should emerge without cuts, scraping or stress marks.
Real obstructions are not solved by force alone.
Successful cable pulling is measured not by force, but by how cleanly the line arrives at the other end.
Return to category.
Go to categoryReturn to the central guide.
Go to guide