
Smart Home, Building Automation (BMS) & Security
Return to category.
Go to categoryIf you've already successfully installed your first smart relay (eg Shelly) on a simple switch, you might feel ready to conquer the whole house. Until you reach the hallway or bedroom. There, you open the switch and see a "maze" of wires (three or more), which make no sense compared to what you knew.
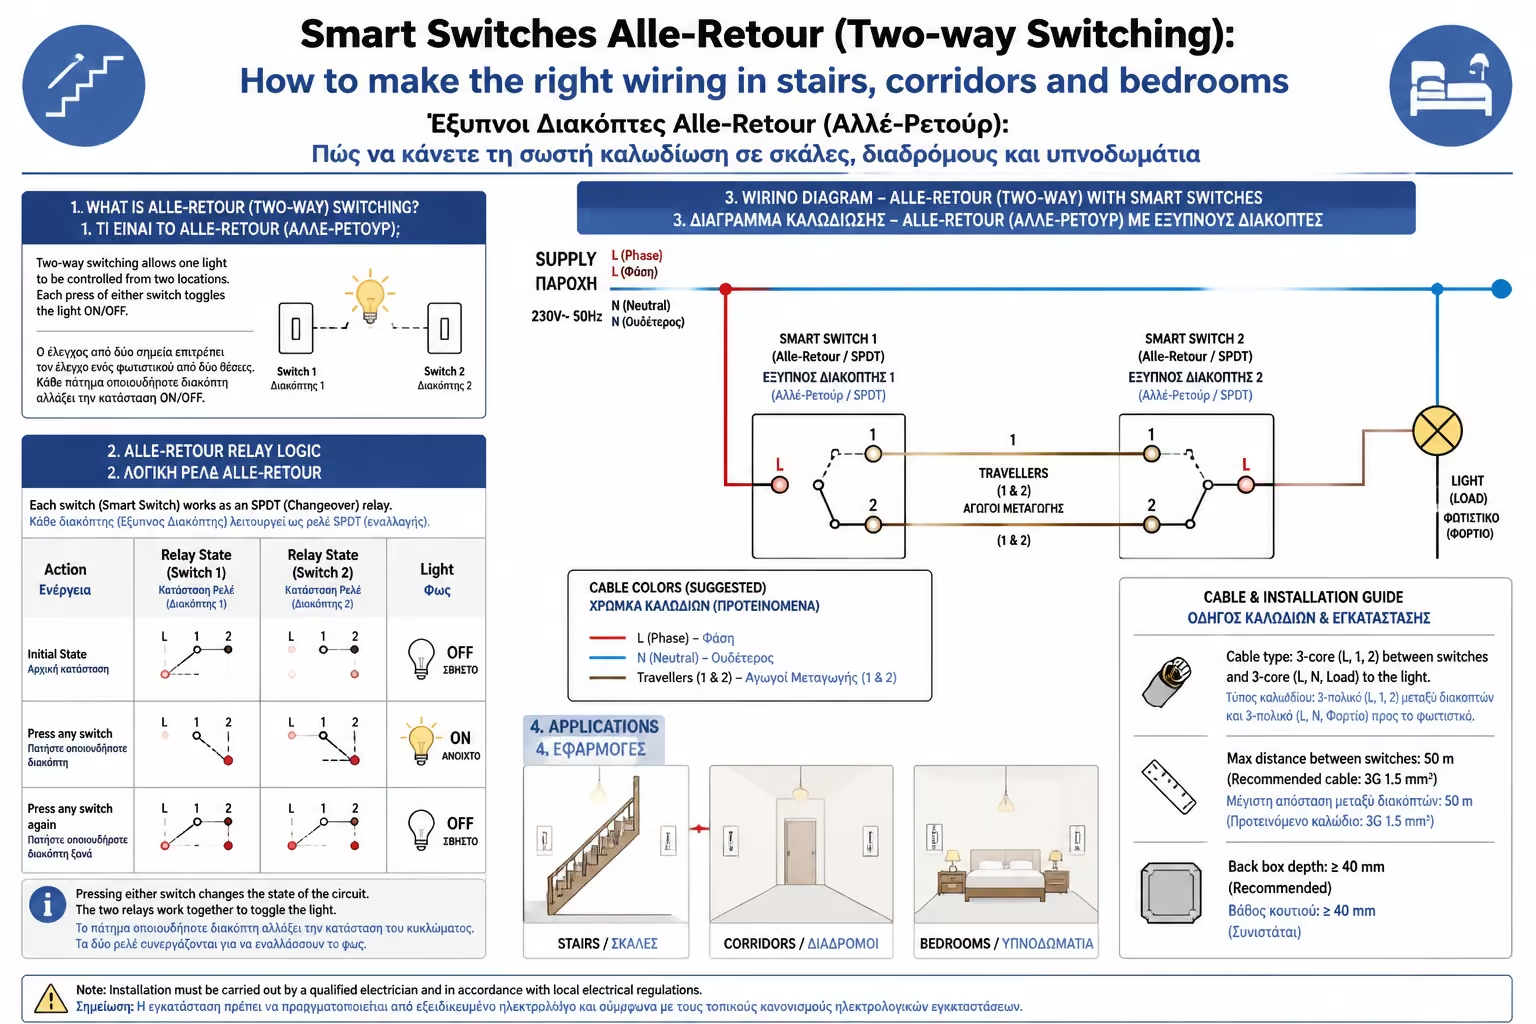
Welcome to the Alle-Retour (Two-way Switching) circuit. This is the system where a lamp (e.g. in the corridor) is switched on at one end (Switch A) and switched off at the other (Switch B). This is the most classic "trap" that "burns" boards (and blows fuses) in the hands of novice DIYers.
As engineers, we'll let you in on the biggest secret of the market: You don't need to buy anything different, or run new wires. Let's decode the ale-retour and see how to make it "smart" in absolute safety.
In a simple switch, current (Phase) goes in and out directly to the bulb. In the Ale-Retour circuit, the situation is slightly more complicated, but makes perfect sense:
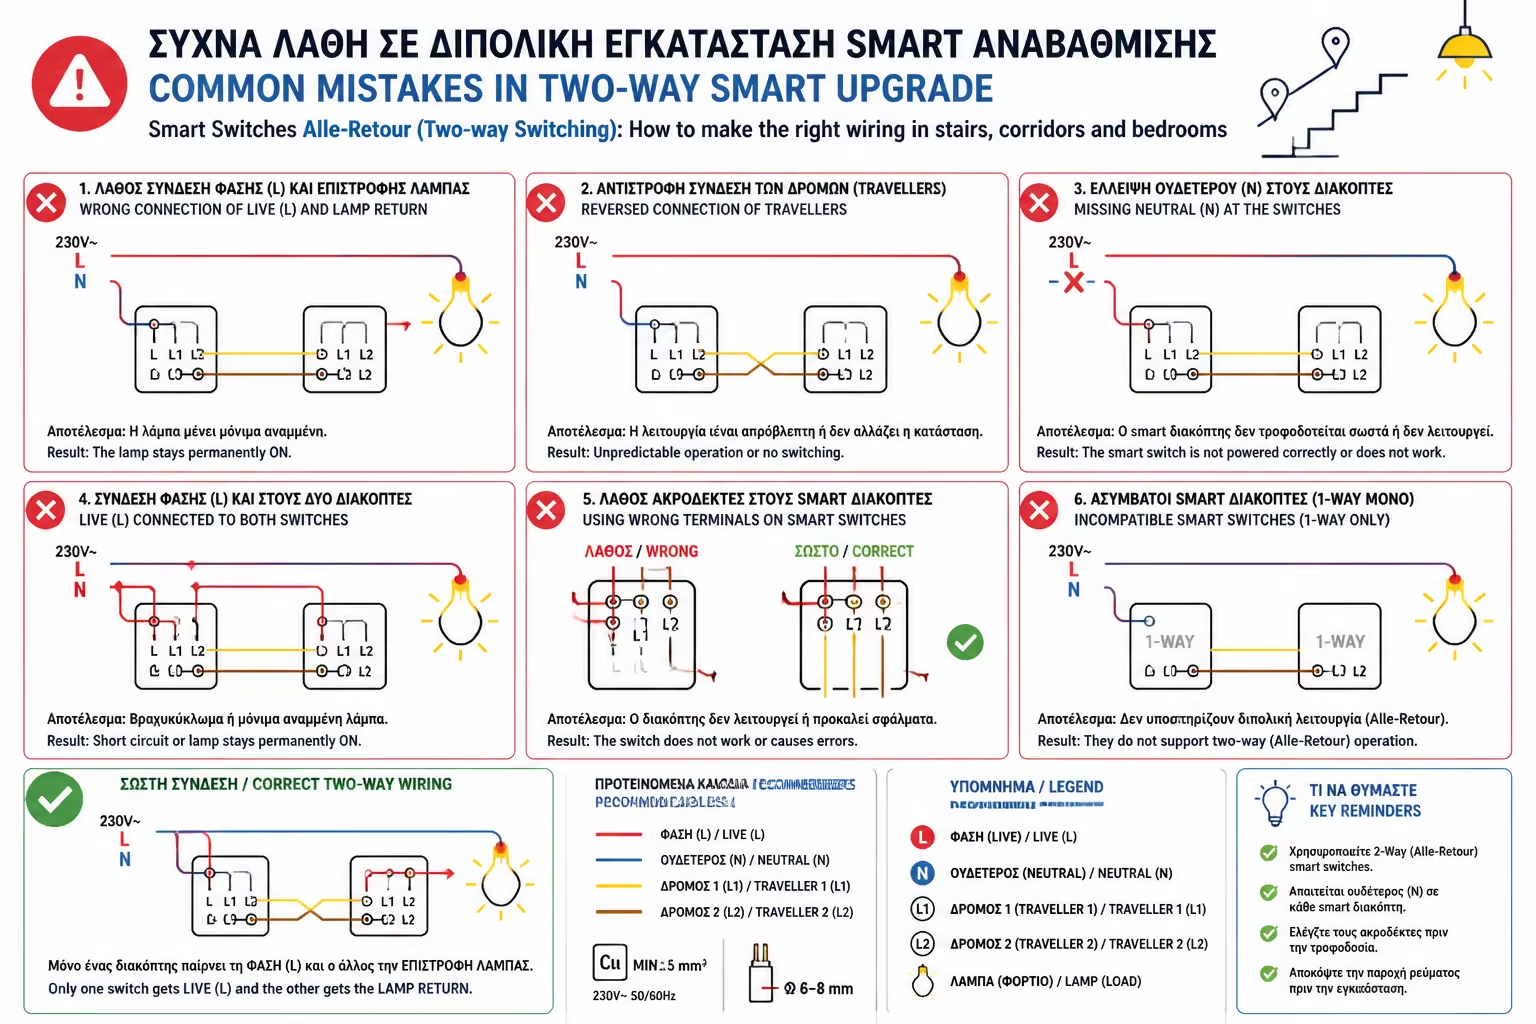
The most common mistake beginners make is to buy two smart relays (one for each switch) and try to synchronize them. This is wrong and a waste of money.
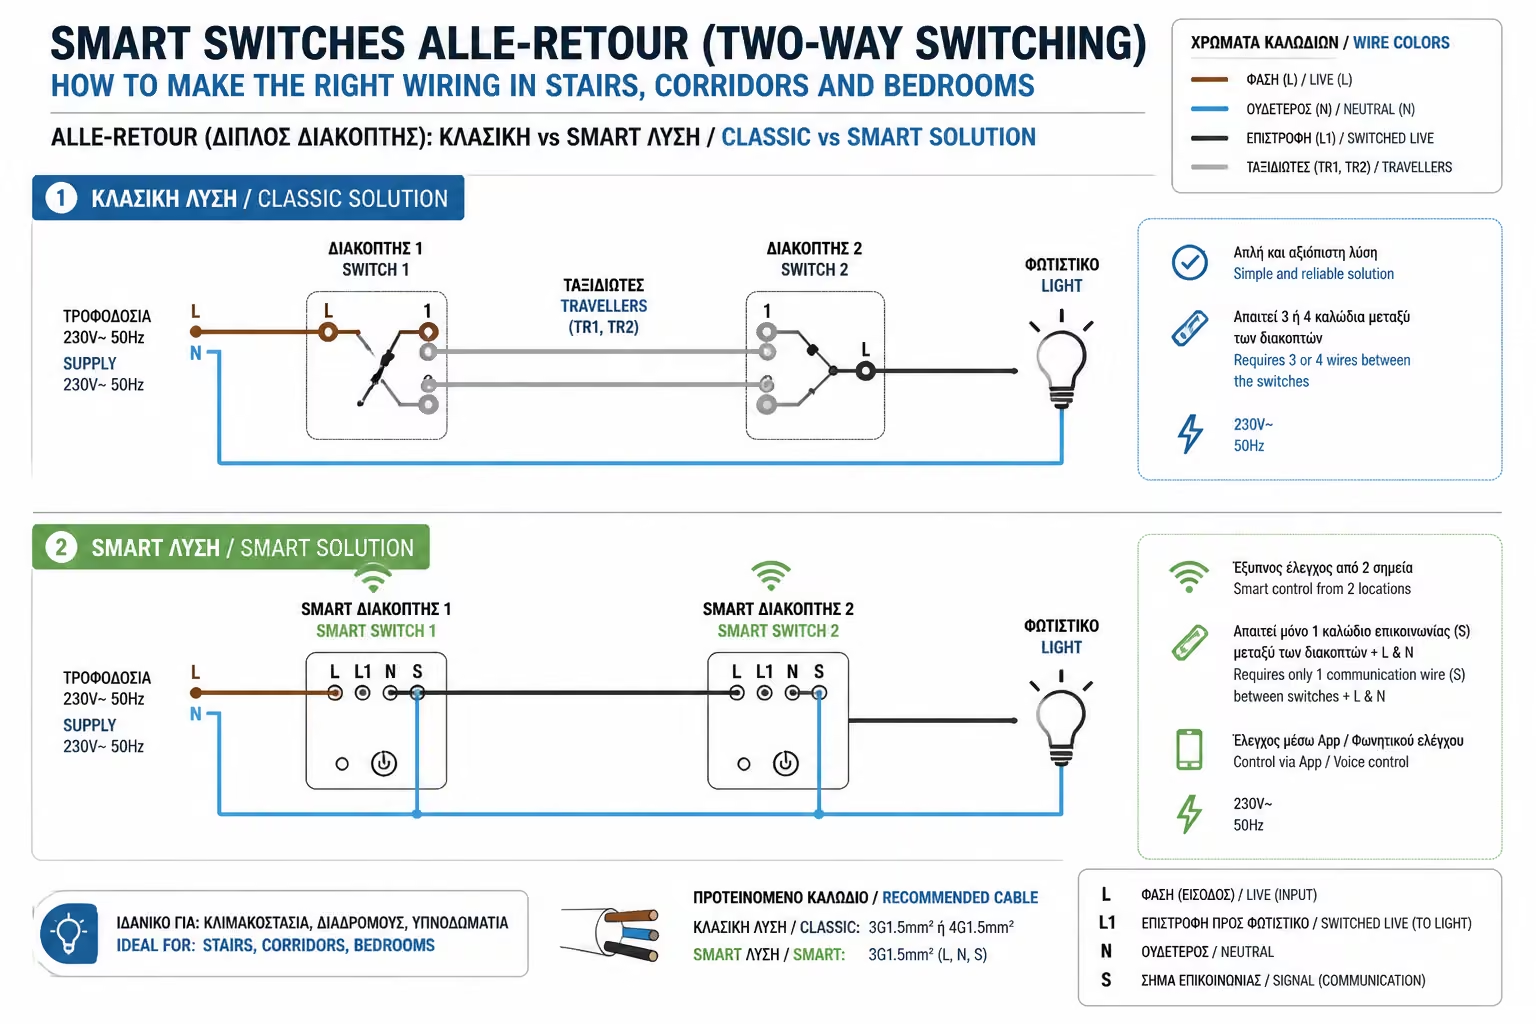
We treat the entire circuit of the two switches (with the cables running between them) as one, single mechanism. The current passes through them and comes out of a single outlet. All we want to do is put our "smart controller" (the smart relay) right at the end of that path, before the current goes to the bulb.
Since we only need one relay, which of the two switches should we put it on? In the hallway or bedroom?
The answer is technical: The relay ALWAYS goes into the switch from which the wire (the return) goes to the lamp.
How to find him (Requires a test screwdriver and caution):
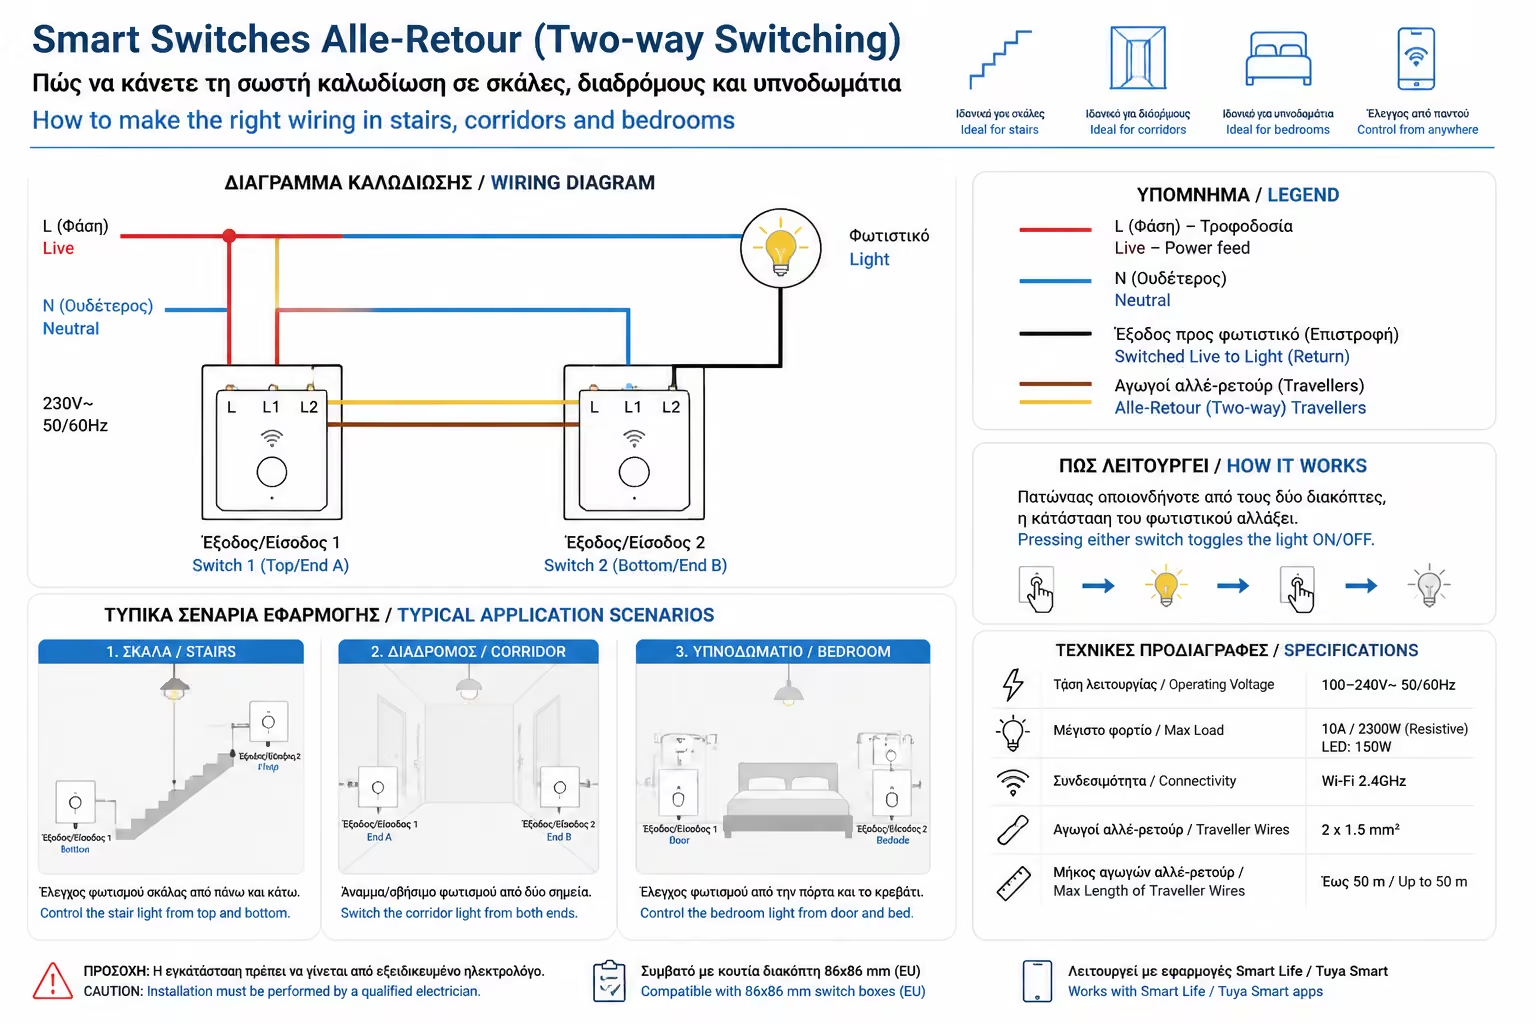
Suppose you have a classic smart relay (eg Shelly 1 or Sonoff Mini) and found the right switch. The process is as follows:
The Result: You press Switch A. It sends current through the switches to Switch B. Switch B gives current to the input (SW) of the relay. The relay "senses" the movement and turns on the lamp. Perfect, analog and digital harmony!
If your home's wiring is a total mess, or if you want to put in whole Smart Switches (glass switches with a touch screen) rather than hidden relays, physical wiring is often not convenient.
In this case, professionals use "Virtual Routing":
Thus, you completely avoid the hassle of complicated wiring, creating an ale-retre purely through software.
Making an alle-retour circuit "smart" sounds scary, but it really just requires you to locate the "last mile" of the path (the wire that goes to the bulb) and "plant" your relay right there. Once you do it the first time, the mystery is solved. Always, however, with general board security down during your tests!
Next Step: We saw how to "hide" relays inside the walls for individual lamps. But what about when we are doing a complete renovation or want to control "heavy" loads (like the water heater, the pool pump or all the garden lights bundled together)?
We continue to the next guide, moving to the professional level: DIN Rail Equipment (eg Shelly Pro): Professional smart installations directly inside the central electrical panel.
Return to category.
Go to categoryReturn to the central guide.
Go to guide