
Smart Home, Building Automation (BMS) & Security
Return to category.
Go to categoryControlling the natural light and heat that enters your home is probably the most underrated energy saving factor. In summer, a lowered awning saves the air conditioner from hours of hard work, while in winter, open blinds at midday "capture" the sun's free heat (solar gains).
But to achieve absolute control, your electric roller blinds and awnings must become "smart". Many times, consumers buy expensive motors with their own closed remote controls, making their integration into the Smart Home a real nightmare.
As engineers, our advice at the beginning of every project is one: Choose the most "simple", standard (Standard) motors on the market. We will not get the "intelligence" from the motor, but from the switch that we will put on the wall. Let's see how they are connected and how they are regulated.
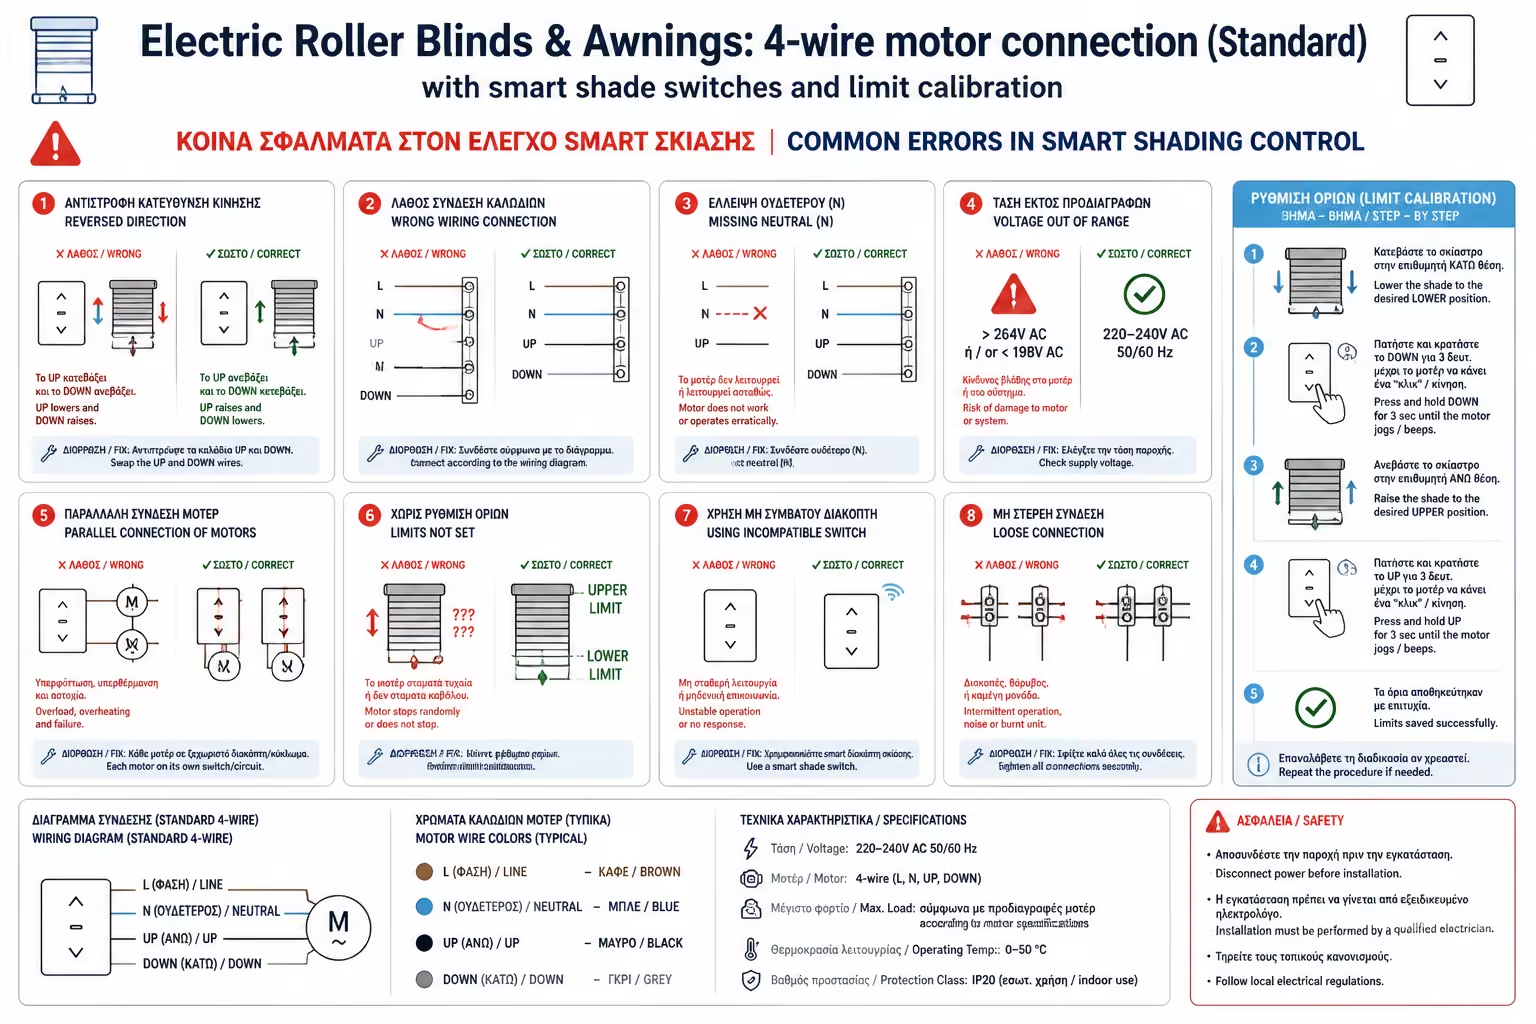
If you buy a classic, tubular motor for your roller (e.g. from Somfy or other companies) without built-in remote control receivers, the cable coming out of the motor has 4 individual wires (conductors) inside it:
Attention: Top/Bottom colors may vary depending on which side of the window the motor is mounted on, so we always test.
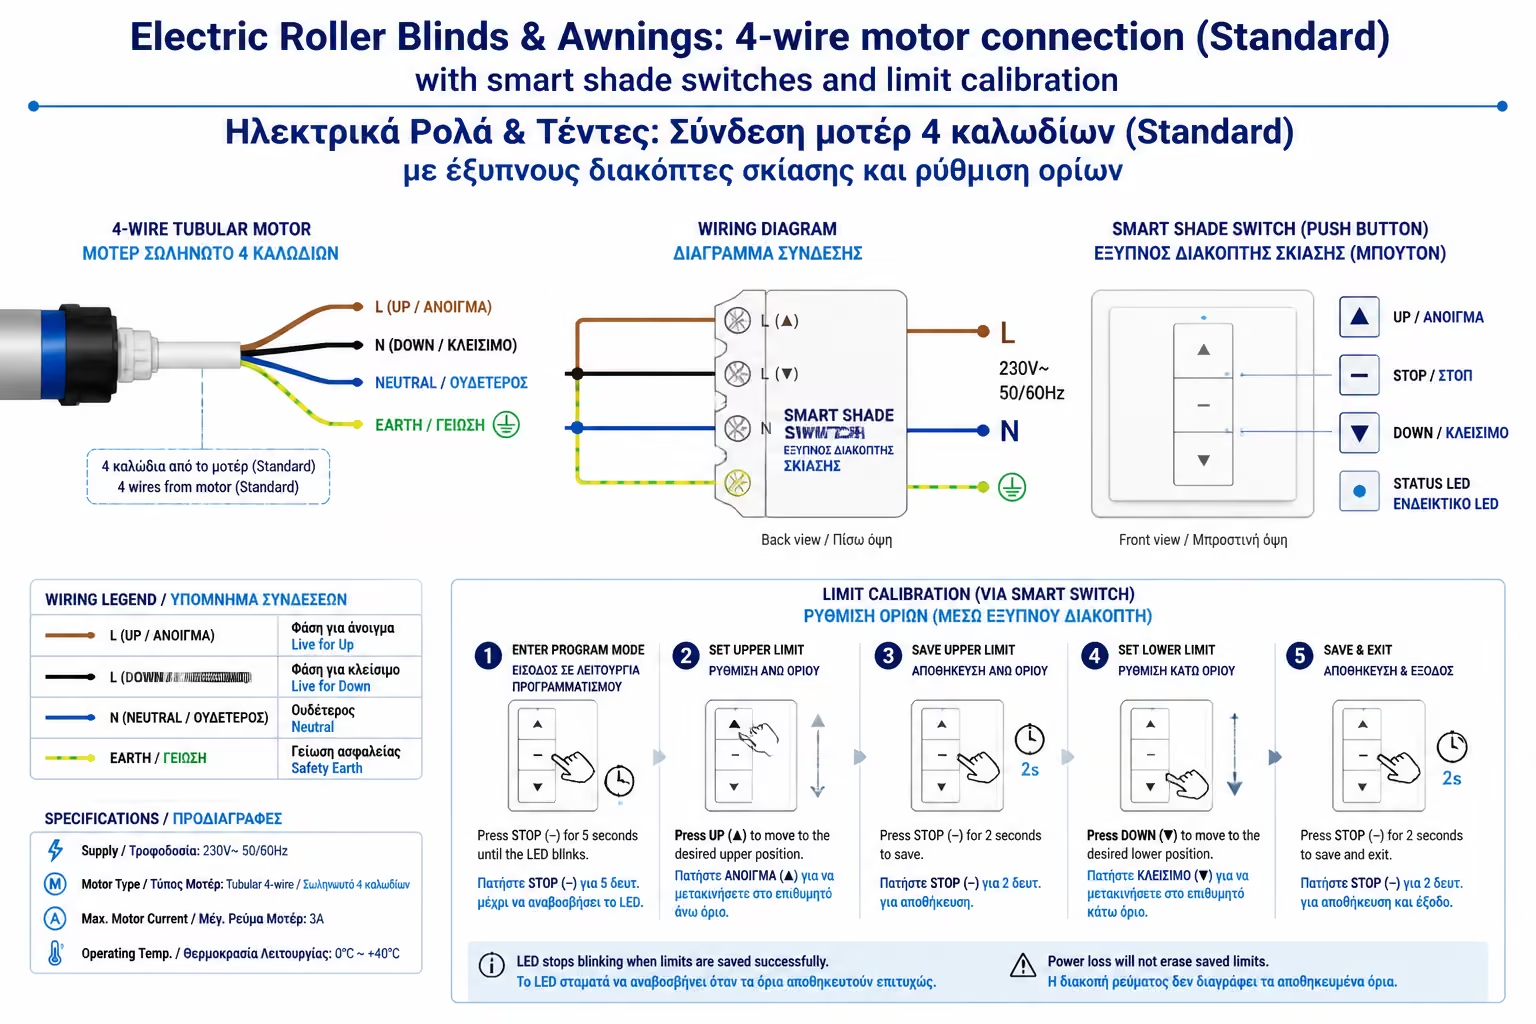
What happens if you apply current to both the Brown (Anode) and Black (Cathode) wires at the same time? The motor will try to turn in both directions at once, the coils will overheat, and the motor will burn out.
To avoid this, classic wall roller switches have a mechanical barrier (Interlocking). They don't let you press "Up" and "Down" together.
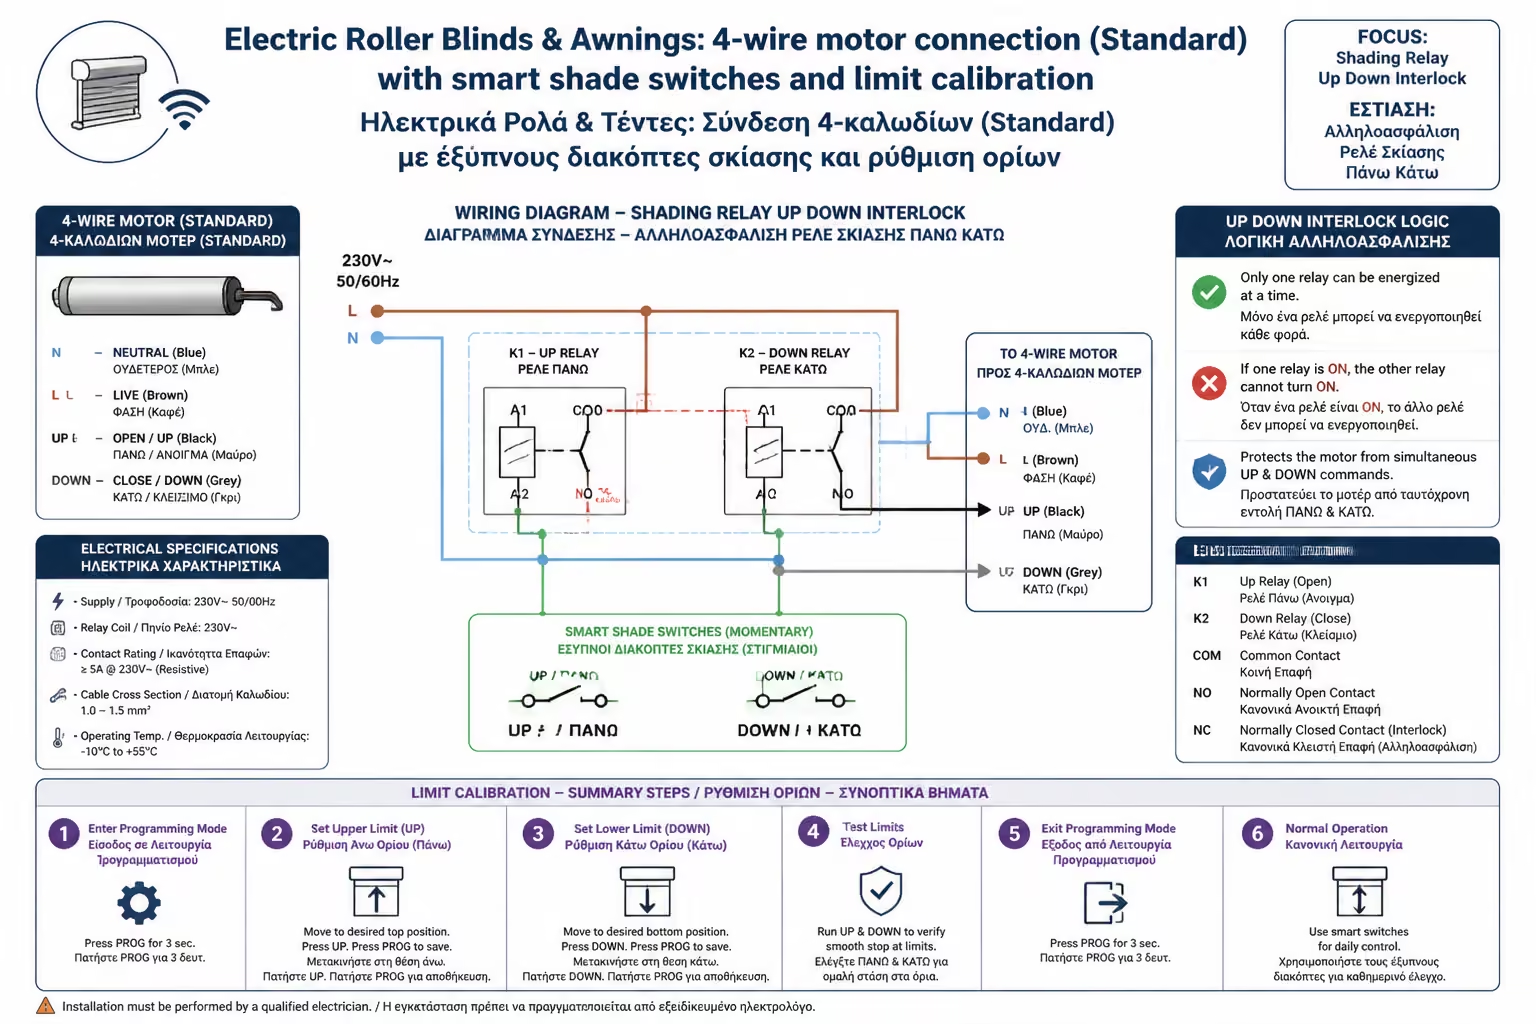
When we make the shutters smart, we use special Smart Shutter Relays (Roller Shutter Modules, e.g. Shelly Plus 2PM, Fibaro Roller Shutter) or special smart shade switches. These devices have TWO power outputs (O1 and O2) and have built-in Software & Hardware Interlock circuitry. Even if the system "stuck" or someone pressed all the buttons at the same time, the relay will never let current pass through both outputs at the same time. Thus saving your motor.
If you put a smart relay (like the Shelly Plus 2PM) behind your traditional roller switch, the connection (simplified) looks like this:
Now, when you press the switch (or give a command from the mobile), the smart relay safely supplies power to the corresponding motor wire.
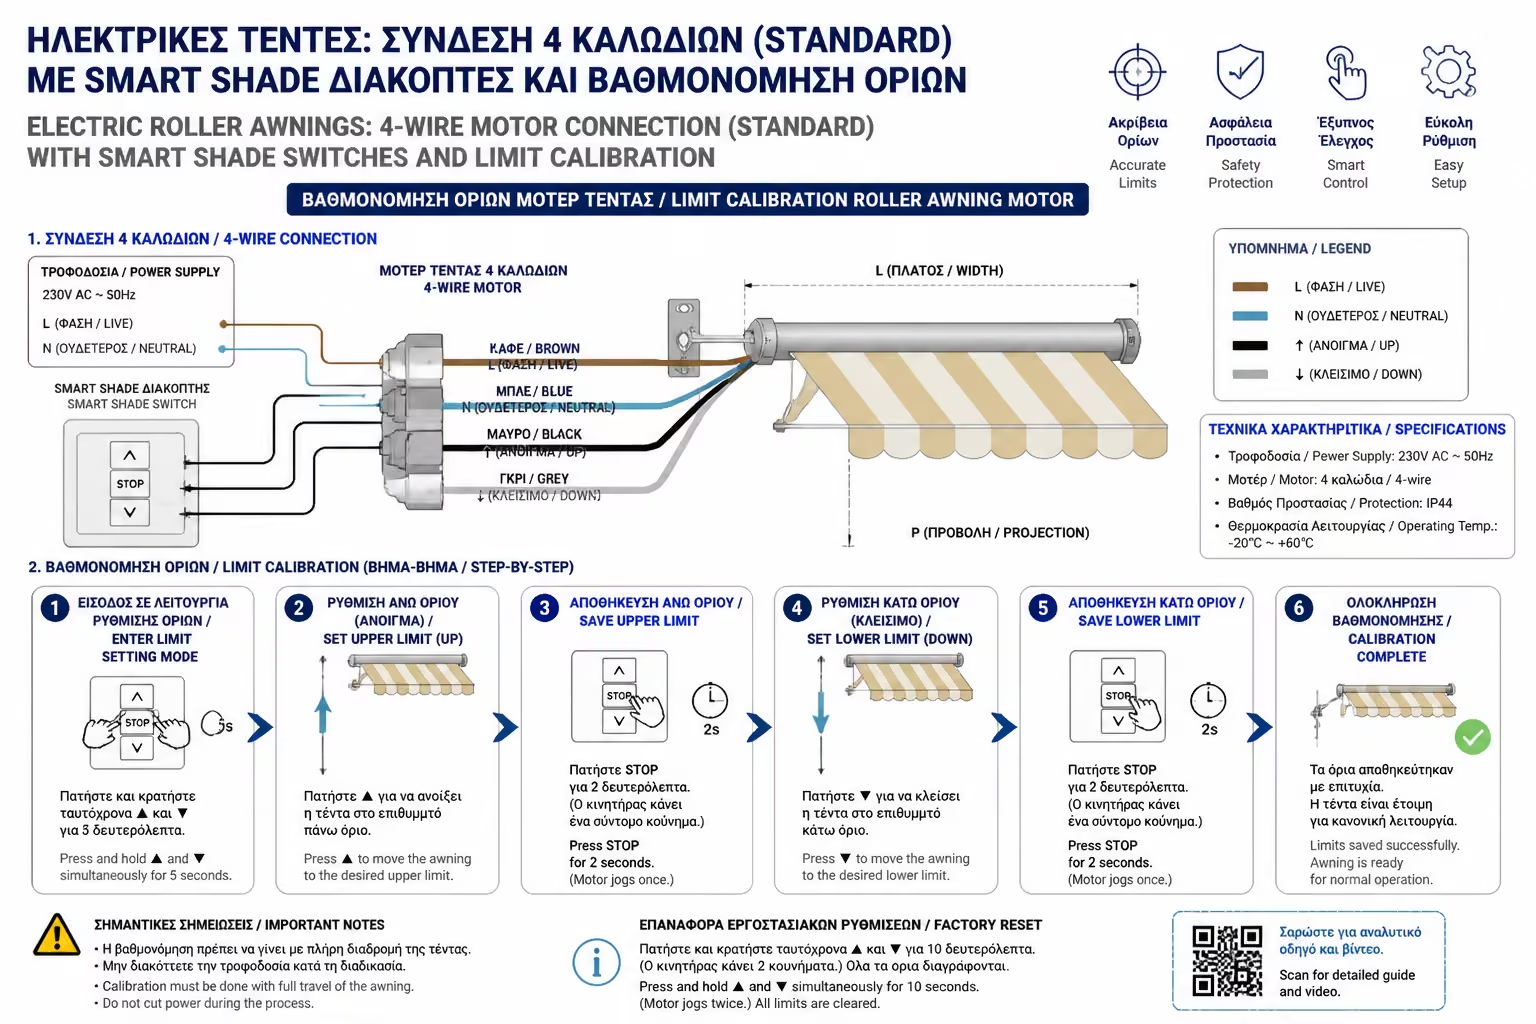
You have made the connection and you press the "Upgrade" button. The roll goes all the way up, hits its natural limit switch, and the motor stops.
Here's a problem: The smart relay doesn't "see" the roll. He doesn't know that the roll has stopped. It keeps sending power! Also, if you tell it to "Open the roll to 50%", how will it know exactly where 50% is since it has no "eyes"?
The solution is Calibration. Quality relays have a built-in power meter (Power Metering).
The process: Through the mobile application, you press the "Calibration" option. The relay does the following by itself:
The Result: Now, the smart relay has "learned" that it takes 20 seconds for the roller to go from 0 to 100%. When you tell it "Alexa, open the roller blind to 50%", the relay will power the motor for exactly 10 seconds! Control is now absolute.
To get the perfect smart roller blinds, the rule is not to buy motors with integrated radio frequency boards and closed remote controls. Go for the absolutely "dumb" and cheaper, 4-wire wired motors. By placing a quality relay with Calibration function behind them, you turn the heaviest metal roller into a high-precision device, ready to be integrated into your home automation.
Next Step: Now that the blinds and awnings "listen" to our commands in percentages, how can we get the weather to move them for us?
We continue to perhaps the most impressive scenario of a smart home: Smart Shading based on Weather Conditions: How to set the automatic closing of the awning in strong wind and the lowering of the blinds in the hot sun.
Return to category.
Go to categoryReturn to the central guide.
Go to guide