
Bathroom Waterproofing & Moisture Protection
Return to category.
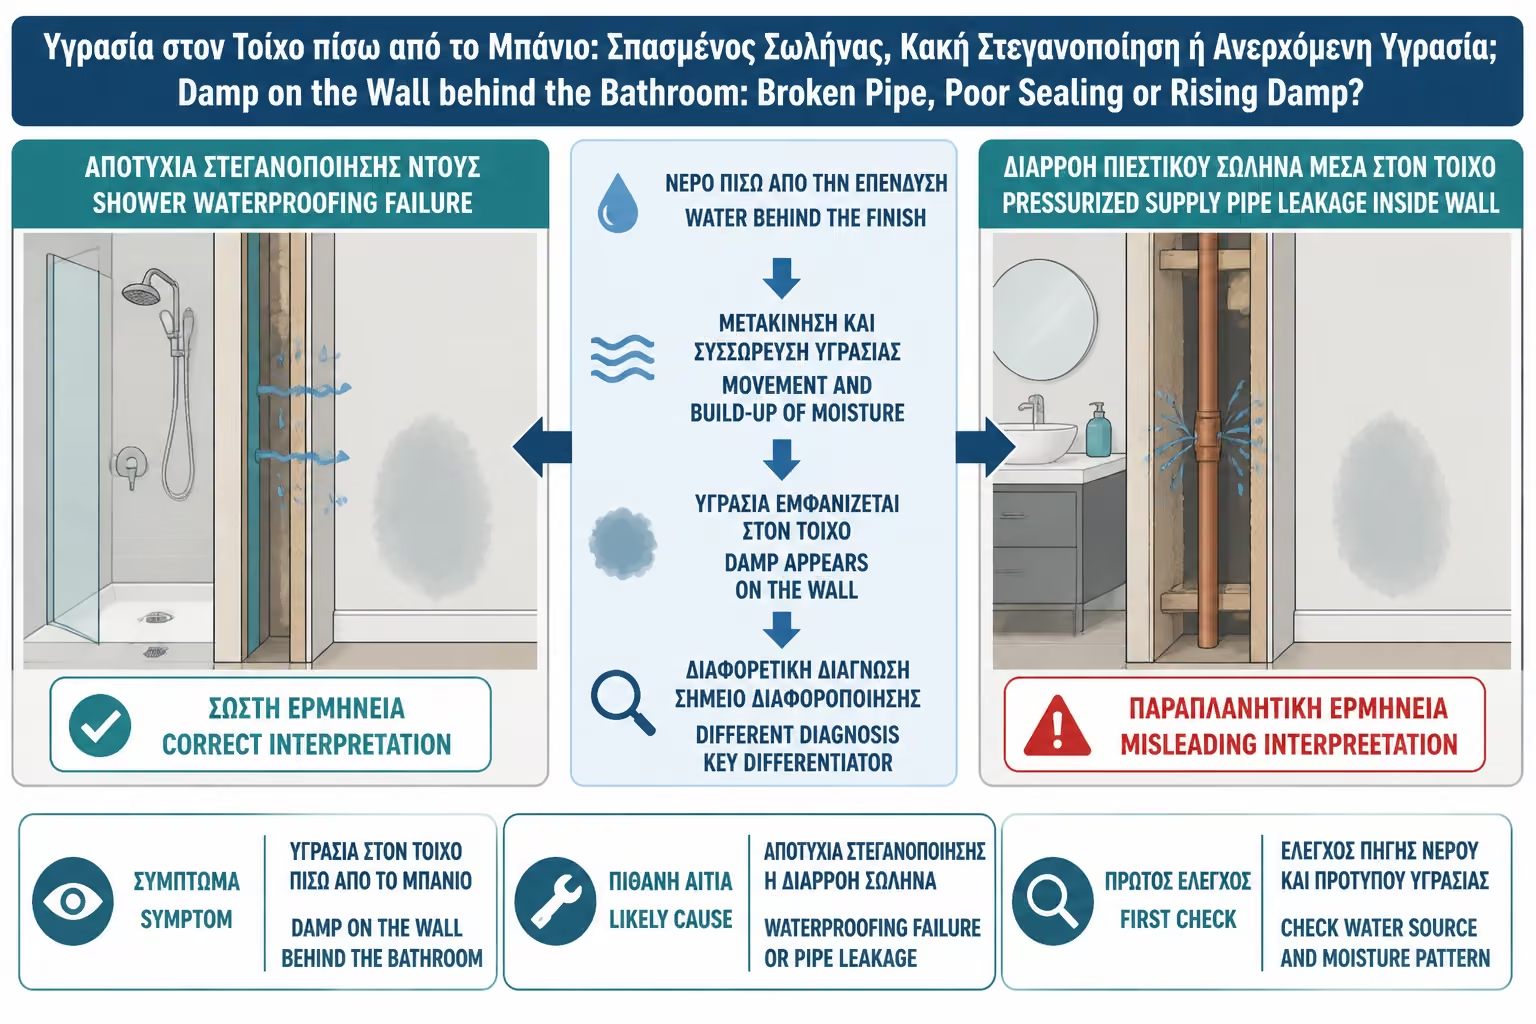
Go to categoryDamp on a wall behind the bathroom is one of the most stressful problems in a home. It can appear in the bedroom behind the shower, in the hallway next to the bathroom, on the wall behind the basin, low near the baseboard or even on the downstairs ceiling. The first thing the owner usually thinks is: "Did a pipe break?" Sometimes yes. But very often the cause is different.
Damp behind the bathroom can come from a broken water pipe, drain leak, poor shower seal, failure around the faucet, water getting behind the faucet rosettes, leaking faucet, tub surround, window, threshold, or even condensation and poor ventilation. In ground floor or old buildings there may also be rising damp, i.e. damp rising from the ground or from low zones of the masonry.
The difficult thing is that the symptoms are similar. A swollen wall below may indicate a shower leak, but it could also be rising damp. A growing stain may indicate a hose under pressure, but it may also be related to shower use. A musty smell can come from hidden moisture behind tiles, but it can also be the result of poor ventilation. That is why the correct diagnosis cannot be made at a glance.
The first step is not to break tiles. Let's not even paint the wall. Nor should we apply silicone everywhere "for good measure". The first step is to notice when the moisture appears, where it is, if it grows, if it dries out, if it is related to a specific use and if there is water under pressure or only after a shower. The right sequence of checks can save needless extractions and lead to the real cause.
This guide explains how to read moisture on the wall behind the bathroom, how to distinguish the possible causes and what steps to take before deciding whether a plumber, sealer, engineer or local opening is needed.
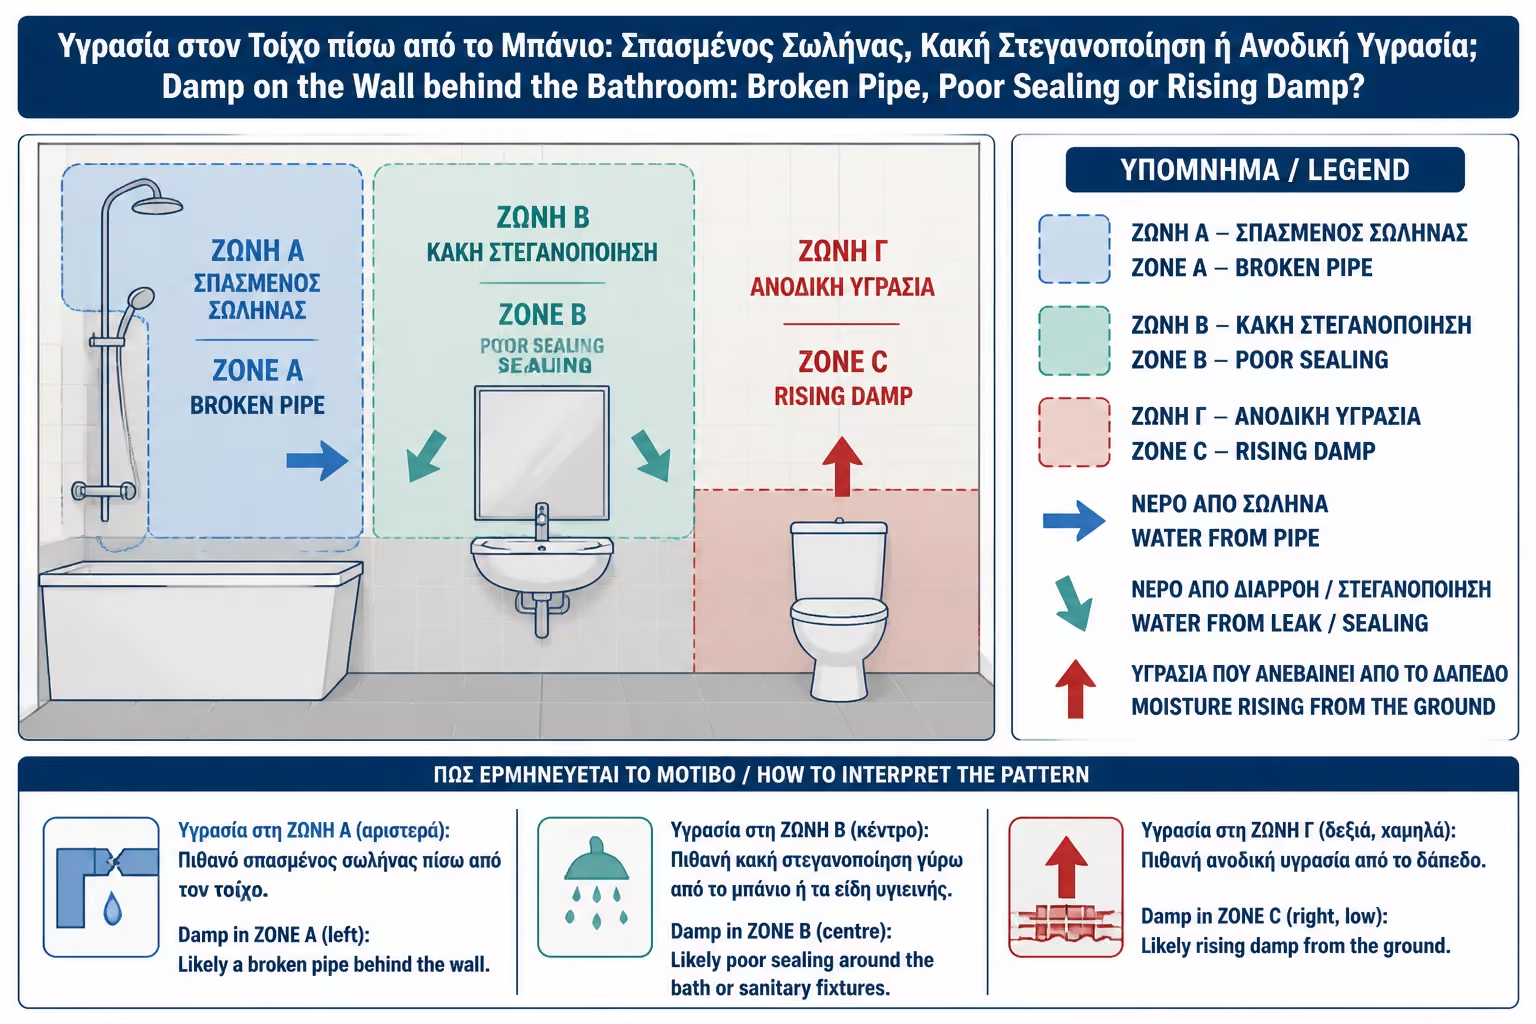
The location of the stain gives the first clues. If damp occurs low on the wall behind the shower, near the skirting board, then the floor-to-wall joint, drain, drips, floor waterproofing and low corners should be checked. Water from poor waterproofing often moves low, behind the tiles or into the grout, and out onto the adjacent wall.
If the moisture is about the height of the shower or sink faucet, the thought goes to the facilities. There may be a small leak at a connection, a built-in battery, a corner switch or where the pipe goes through the wall. Service water may also pass behind the rosettes if there are no sealing sleeves.
If the moisture is behind the basin or near the cistern, we check the cistern supply, cistern, drain pipe, hoses and connections. If there is a built-in cistern, the diagnosis is more demanding, because the leak can be hidden inside the false wall.
If the stain is high on or near the ceiling, especially in a room with an exterior wall, it may be condensation. If there is a bathroom upstairs, it could be a leak from the upper floor. The position does not always give the final answer, but it determines where the check starts.
Timing behavior is very important. If the stain grows even when the bathroom is not in use, then the suspicion of a pressurized water pipe is raised. Water pipes have water under pressure all the time. If there is a small leak, it can supply moisture day and night.
If dampness occurs or worsens after showering, suspicion is more likely to be the shower seal, spout, corners, joints, tub-to-tile joint, or faucet supplies that get wet during use. In this case the moisture may not be continuous, but return after each use.
If it appears after the cistern or when the sink is used, we check drains and connections. A leaking sewer does not have water all the time. Appears when water passes through that line. That's why it can be more difficult to diagnose than a water pipe.
If the moisture appears mainly in the winter, after a hot shower, around corners, windows or the ceiling, it may be condensation. If it appears after rain on an external wall, the external side, frames or facade should be checked.
A broken or cracked water pipe is one of the most serious causes because the water is under pressure. Even a small leak can give continuous moisture. We usually suspect a pipe when the wall remains damp regardless of bathroom use, when the stain grows steadily, or when there is moisture near supply lines.
A practical sign is if the water meter moves while all taps are closed and no appliances are running. This is not always easy to interpret, but may indicate a leak in the water mains. In apartment buildings or complex facilities, care is needed, because there may be shared services or other loads.
A water leak can appear behind a battery, in old joints, in manifolds, in corner switches, in corroded copper pipes, in laminated joints or in places where work has been done recently. If there is a built-in battery, the hidden body and connections must be seriously checked.
If a pipe under pressure is suspected, there is no point in making surface repairs. A hydraulic check is needed, possibly a pressure check, a thermal imager or some other method of detection. If the leak continues, any painting or grouting will fail.
Poor shower sealing usually occurs in relation to use. The stain may get worse after showering and partially dry when the shower is not in use. It often appears low on the adjacent wall, near the floor, or on the other side of the shower wall.
The most suspect points are floor-wall corners, faucet, faucet supplies, tub or base perimeter joint, linear faucets, niches, and cabin perforations. If the waterproofing did not have tapes on the corners, if it was not properly connected to the siphon or if the supplies did not have pipe collars, water can pass under the tiles.
A characteristic sign is that moisture appears not immediately, but a few hours after the shower. Water can slowly seep through joints, glue gaps or weak spots and appear on the adjacent wall with a delay. This often confuses the diagnosis.
Poor sealing doesn't necessarily mean no insulation went in at all. It may have gone in, but it was too thin, didn't have the right drying times, didn't have tapes, was punctured afterwards, or wasn't properly attached to the critical points. That is why the control must focus on the details and not only on the existence of "some insulation".
A sewer leak behaves differently than a water leak. It doesn't usually have water under pressure all the time. Appears when the corresponding fixture is used: sink, shower, bathtub, washing machine, cistern or basin. That's why it can be more "insidious", because it doesn't always give a permanent wet stain.
If moisture appears after using a sink, check the sink faucet, drain pipe in the wall and joints. If it occurs after a shower, check the floor or bathtub drain, drain connection and area around the drain. If it appears after the washing machine, we check the drain hose, washing machine siphon and overflow.
A leaking sewer can be accompanied by an odor, especially if there is a problem with an odor trap, a bad connection, or a worn pipe. It can also leave stains with a stronger smell than a simple water damp.
Diagnosis is often made by controlled use of each component separately. We use only the sink, then only the shower, then the cistern, observing if and when moisture appears. This should be done with care and, in serious trouble, with a plumber.
Rising damp is moisture that rises from below within the masonry, usually due to contact with soil, insufficient horizontal waterproofing or old construction. In upper floor apartments it is less likely to cause moisture behind a bathroom. In ground floors, semi-basements, old houses or walls that rest on the ground, it is more likely.
It usually occurs low on the wall, in a relatively horizontal zone, and may be accompanied by swollen plaster, spalling and white salts. Not necessarily related to using the bathroom. It can persist or change depending on seasons, rainfall and soil moisture.
The important thing is not to attribute every low humidity to rising. If the wall adjoins a shower, if moisture appeared after a bathroom renovation or if it gets worse after using a shower, the waterproofing should be checked first. If there is a pipe inside the wall, the water supply is also checked.
Rising humidity is a real phenomenon, but it is often hastily used as an explanation. The correct diagnosis requires correlation with location, season, water use and construction of the building.
Moisture on the wall behind the bathroom does not always mean that water is passing through the bathroom. In some cases, especially in bedrooms and hallways, there may be condensation due to thermal bridging or poor ventilation. A wall bordering a bathroom may have a different temperature or be located in an area with high air humidity.
Condensation usually appears as black spots, surface mold, moisture in cold corners or behind furniture that leans against the wall. If the wall has a wardrobe in front of it, the air does not circulate and moisture can collect. This can be mistaken for a bathroom leak.
A useful distinction is post-ventilation behavior. If the problem is noticeably reduced with better ventilation, moving furniture away from the wall and heating, condensation is likely. If the plaster is swollen, soft, wet in depth or the stain grows in a certain place, the leak should be checked.
Condensation needs a different solution than leakage. It wants ventilation, thermal improvement and moisture management. No breaking tiles for no reason.
A simple but very useful step is to temporarily stop using the shower or bathtub for a few days, as long as there is another possibility of use. If moisture begins to dry and does not rise, the potential for use-related seal or drainage failure increases. If it continues to grow, a pressure pipe or other continuous source should be considered.
The test should be done with caution. It is not enough to not use the shower, but to continue to use the sink, the faucet and the washing machine without observation. Better to check each part separately. If only the shower stops and the humidity decreases, we have an indication. If nothing changes, the cause may be elsewhere.
However, the wait should not be extended if the humidity is intense or affects electrical, wooden floors or the lower floor. In such a case, an immediate technical inspection is needed.
Discontinuation of use is not a final diagnosis. It is a directional tool.
If a water pipe leak is suspected, checking the meter can give an indication. We turn off all taps, do not use a faucet, washing machine or other device, and observe if the meter moves. If it moves while everything is closed, there may be a leak in the water mains.
This test has limits. In apartment buildings, common utilities, boilers, automatic systems or small cistern leaks, the picture can be confused. Also a very small leak may not be seen immediately. Nevertheless, it is a useful first step before the upheavals begin.
If the meter shows consumption without use, a plumber is needed. Pressure testing, line isolation or instrumentation can be done. The wall should not be accidentally opened without an attempt at detection.
If the meter does not move, not all leaks can be ruled out. There may be a drainage or sealing problem that only appears with use. So we continue the diagnosis.
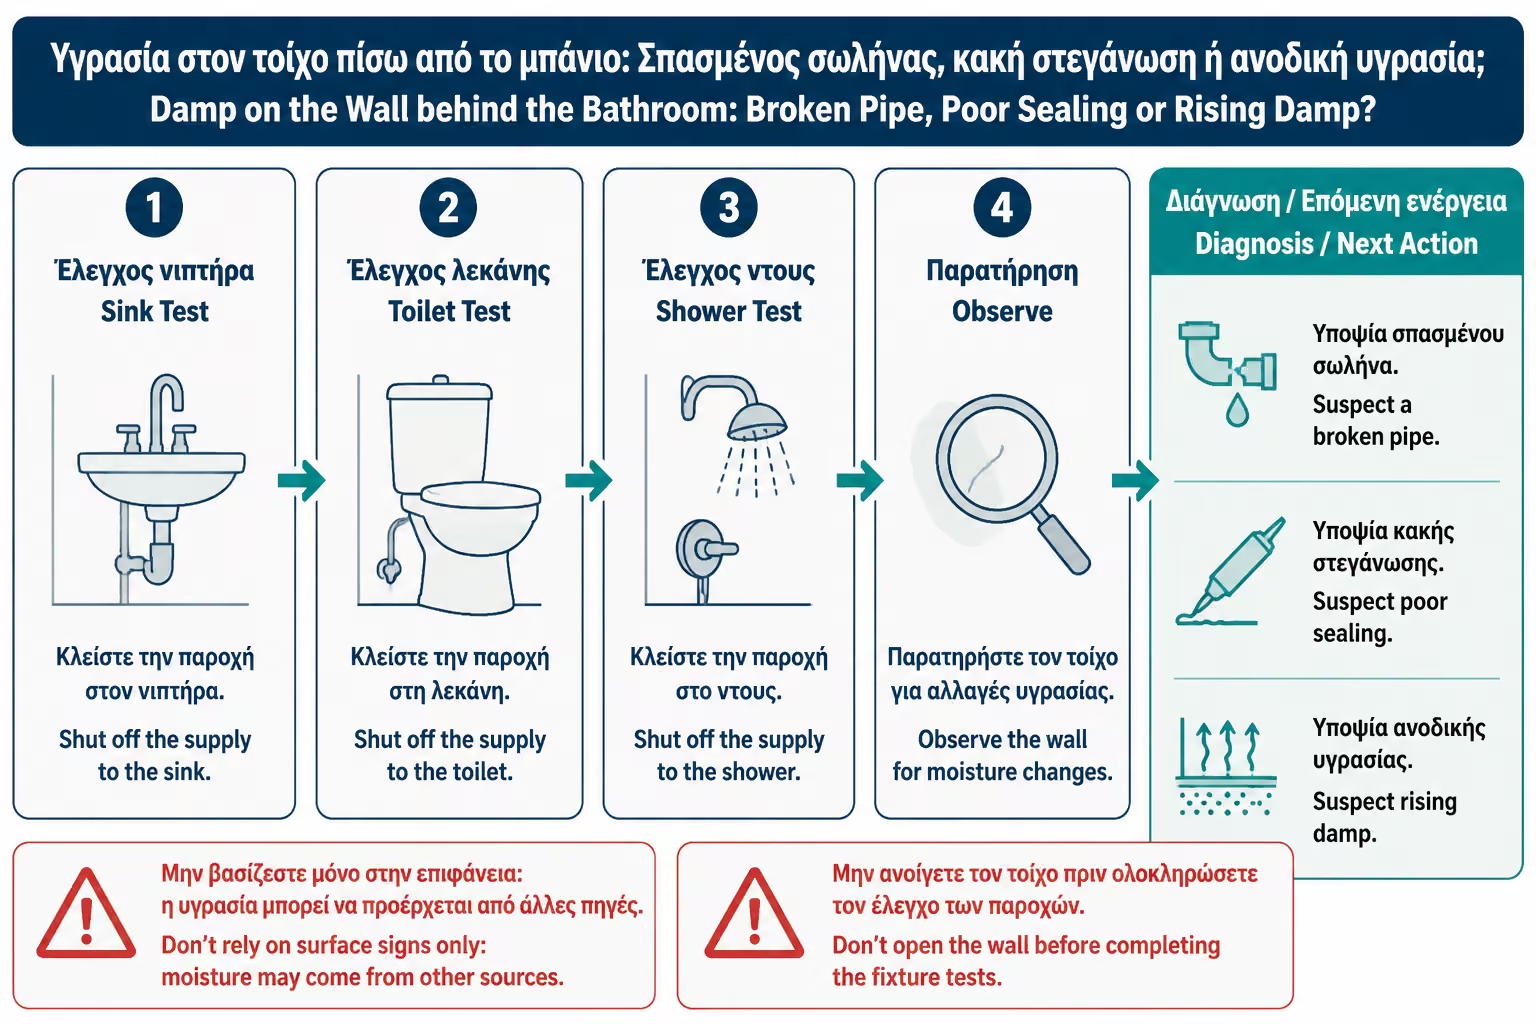
To distinguish drainage, sealing and supply, we can use the components one by one. For example, we run water only in the sink and observe. Then only in the cistern. Then only in the shower, without wetting the walls as much as possible, to check drainage. Then we wet the walls of the shower to check surface sealing.
This is not always easy and should not be done if there is a risk of causing more damage. But as a diagnostic logic it is very useful. If the damp appears when water is running down the drain but without the walls getting wet, it may be a siphon or drain. If it appears when the walls or corners get wet, the waterproofing is more suspect.
In a shower, we can think of three zones: faucet supplies, wall/corner surfaces and siphon. Each one can leak differently. Getting everything wet together every time makes diagnosis more difficult.
The technician who makes a correct diagnosis is not only looking for "where the stain is". It tries to reproduce the problem in a controlled way.
In several cases, the diagnosis can be aided by instruments. A hygrometer can tell if the moisture is surface or if there is moisture deep down. It can also show how moisture spreads across the wall. The thermal imager can help identify cold or wet zones, although it takes experience to interpret correctly.
The instruments do not always give an absolute answer. A cold wall can look like liquid. A thermal camera shows temperature differences, not "humidity cause" per se. A hygrometer can be affected by salts or wall materials. That is why the results must be combined with observation and history.
In difficult cases, pipe pressure control, sewer camera or local opening at a specific point may be needed. The important thing is not to perform a blind excision of a large area without a logical diagnosis.
Non-destructive testing is not magic, but it can greatly limit the scope of work.
There are cases where we don't wait. If the moisture is near electrical points, if water is dripping, if the lower floor is affected, if the wood floor is swelling, if the stain is growing quickly, or if there is active consumption on the meter without use, immediate action is needed.
Also, if there is a musty smell and the wall is soft, or if the moisture is in dry construction, the delay can increase the damage. Plasterboard, MDF, wood and insulating materials do not withstand constant moisture like a cement mortar.
If the cause appears to be a water pipe, shut off the supply where possible and call a plumber. If it appears to be an overflow or drain, avoid using the part until checked. If it appears to be a shower, we limit use until a diagnosis is made.
Moisture is a problem that grows with time. Quick reaction reduces repair costs.
The first mistake is to think that any moisture behind a bathroom is a broken pipe. This leads to unnecessary breakage, while the cause may be poor sealing or silicone. The second mistake is the opposite: to think that everything is "joints" and to ignore a possible water supply leak.
The third mistake is to paint the wall before it dries and before the cause is solved. The fourth is to put silicone in the shower without knowing where the water is coming from. The fifth is to accept a diagnosis without checking, just from a photo or a look.
Correct diagnosis requires order: location, time of appearance, relationship to use, gauge control, component control, instruments where necessary, and only after operations. If we break first and think later, we may do more damage than the problem.
Moisture often has a route. The point seen is not always the source. This must be remembered in every diagnosis.
| Symptom | More likely cause | First check |
|---|---|---|
| Moisture that grows without using a bath | Water supply pipe under pressure | Water meter, hydraulic control |
| Moisture after a shower | Shower or drain sealing | Corners, siphon, facilities, surfaces |
| Dampness after using the sink | Siphon or sink drain | Controlled use of wash basin |
| Moisture behind pelvis | Cistern, supply, drainage | Check connections and cistern |
| Low horizontal zone on ground floor | Rising damp or low leakage | Relationship with bathroom use and seasons |
| Black spots on top | Condensation / poor ventilation | Ventilation, thermal bridges |
| White salts low | Moisture that carries salts | Reappearance after cleaning |
| Blown wood in the hallway | Water from threshold or sides of case | Marble skirting, tears, sealings |
| Brown stain on ceiling under bathroom | Leak from above | Siphon, drain, shower upstairs |
The table shows directions, not a final diagnosis. The actual cause is confirmed by inspection.
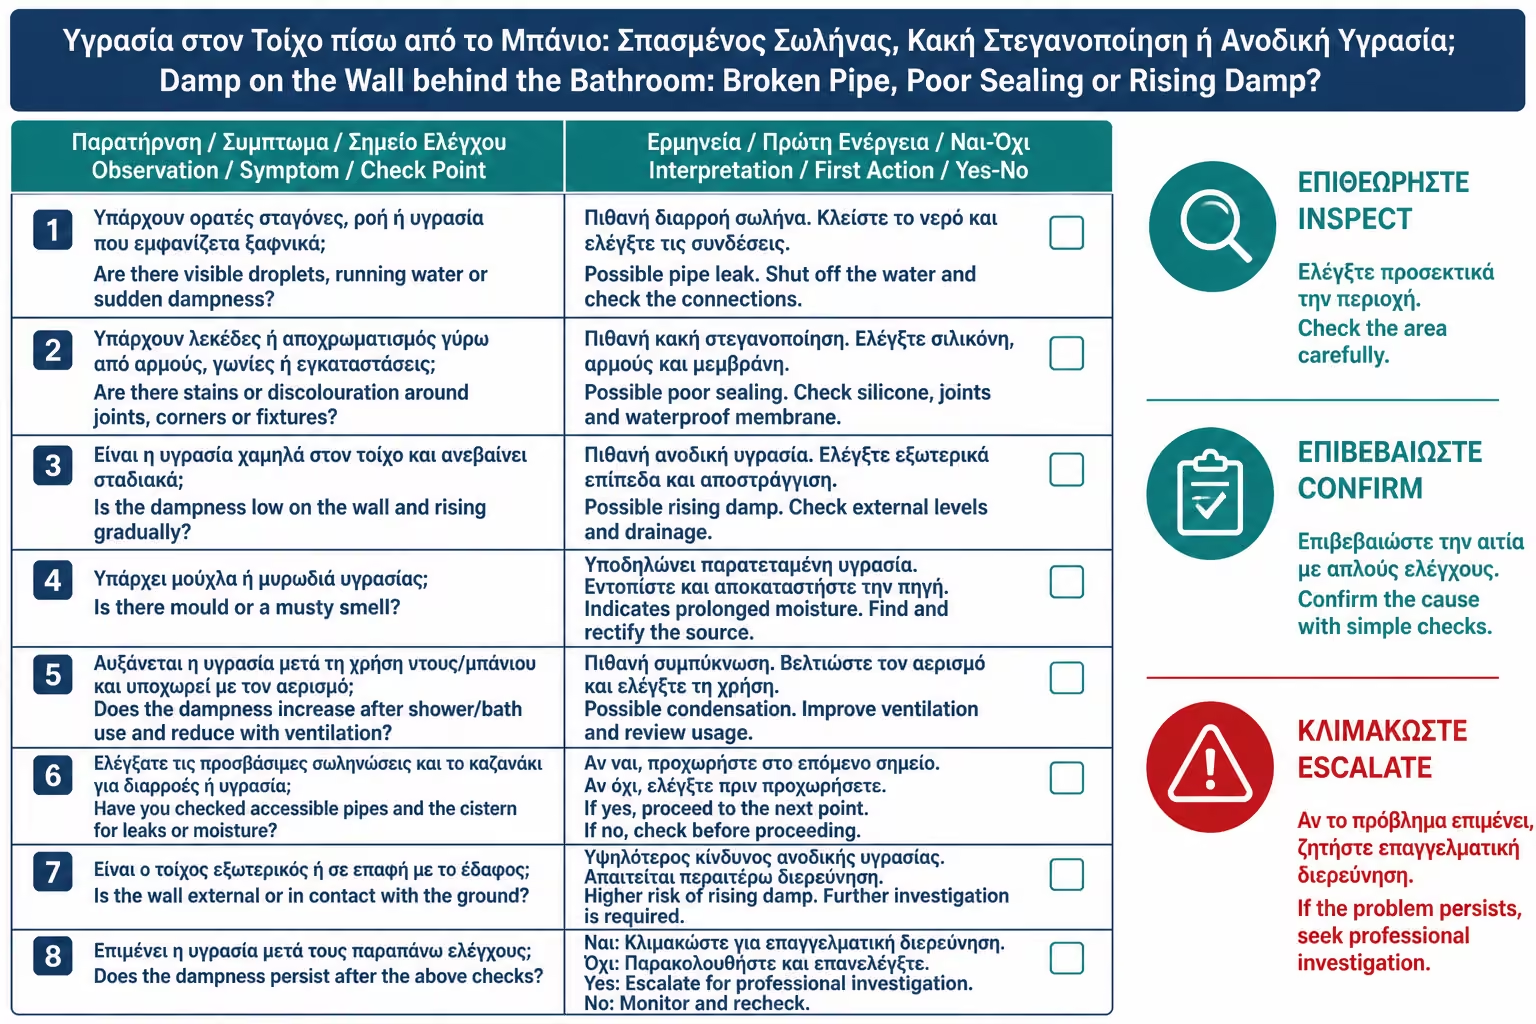
Correct diagnosis must follow sequence. First we photograph the mark and write down the date. Then we observe if and when it grows. We temporarily stop using certain components where possible and see if it changes. We check the water meter for a possible water supply leak. We use the components one by one to see which one is related.
Then we check the visible points: silicones, joints, corners, supplies, siphons, cistern, washing machine, threshold, window. If there are obvious openings or wear and tear, we note them, but don't automatically assume they are the only cause. An open grout can be a symptom, not a source.
If the indicator shows a pipe, call a plumber to check. If it shows a shower seal, call a bathroom technician or engineer, especially if there is a basement or dry building. If it shows condensation, we improve ventilation and thermal conditions before breaking.
Only when there is a clear indication or confirmation do we proceed with opening. And when we open, we open at the most likely point, not randomly.
A correct technical assessment should not simply say "it has moisture". It should describe the location, extent, probable cause, control steps taken, and proposed intervention. He must also distinguish between what is certain and what is conjecture.
If the estimate says "probably a pipe" without a gauge or pressure check, it is incomplete. If it says "joints are to blame" without checking siphon, angles and usage, it is also incomplete. If it says "rising moisture" on a wall behind a shower without excluding the use of water, you need to be careful.
The assessment should suggest a logical sequence: first non-destructive testing where possible, then targeted intervention, then drying, then restoration. If the solution is simply "painting with insulating paint", without stopping the cause, it is not a solution.
In serious cases, especially with a lower floor or insurance process, documentation with photos and measurements is very helpful.
| Inquiry | Yes / No |
|---|---|
| Does the dampness appear even without using a bathroom? | Yes / No |
| Does it grow after a shower? | Yes / No |
| Does it grow after using a sink, cistern or washing machine? | Yes / No |
| Does the water meter move while everything is closed? | Yes / No |
| Is the sign low on the wall behind the shower? | Yes / No |
| Are there black silicones, cracked joints or white salts? | Yes / No |
| Are there hollow tiles near the spot? | Yes / No |
| Is there a musty or musty smell? | Yes / No |
| Is there a wooden floor or inflatable case? | Yes / No |
| Does the problem occur mainly in winter or after steaming? | Yes / No |
| Any pictures to see if it's progressing? | Yes / No |
| Has a test been done before an excision is recommended? | Yes / No |
If the answers show a relationship with water use, the diagnosis should be turned to the bathroom. If they show continuous moisture without use, water supply or rising humidity is higher on the list.
> If you have to keep only one thing, keep this: the dampness behind the bathroom does not always have the same cause. Don't start from the excision and immediately end up with a "broken pipe". Notice when it appears, check if it is related to shower use or if there is continuous water consumption, examine siphons, corners, supplies and threshold, and only then open purposefully. Correct diagnosis saves money, time and unnecessary destruction.
Damp on the wall behind the bathroom is a symptom, not a diagnosis. It can come from a broken pipe, poor shower seal, drain leak, faucet, tub surround, window, threshold, condensation, or rising damp. The same bulge in the wall can have different causes depending on its location and time behavior.
The right approach is to follow steps. Where is the sign located? When does it appear? Does it grow without use? Is it worse after showering? Is there consumption on the meter? Are there marks on the joints, siphon, battery or threshold? These questions lead to a much better diagnosis than randomly breaking tiles.
If the cause is a pipe, a hydraulic check and line repair is needed. If it is a seal, the failing belt needs technical repair. If it is condensation, it needs ventilation and thermal improvement. If it is rising damp, another construction approach is needed. Each cause has a different solution.
For the owner, the most important thing is not to rush to cover the mark. Paint, putty, and silicone can temporarily hide moisture, but they don't stop water. Correct diagnosis is the real beginning of repair.
Return to category.
Go to categoryReturn to the central guide.
Go to guide