
Bathroom Surface Materials & Finishes
Return to category.
Go to categorySilicone in the bathroom is one of those materials that no one notices when properly applied, but everyone sees when it breaks. A clean, straight, elastic line of silicone around the tub, shower, sink or basin makes the bathroom look finished and protected. A blackened, peeling or roughly pressed silicone makes even an expensive bathroom look old, dirty and technically suspect.
Silicone is not a decorative finish. It is a rubber sealant. It enters where two surfaces meet and can move differently: wall-floor corners, tile-to-bathtub junction, countertop-to-washbasin, basin-to-floor, shower cubicle to tile, kitchen counter to wall. We should not use hard cementitious grout there, because it can crack. We need elastic material that follows micro-movements and prevents water from passing into the joint.
In the bathroom, however, silicone receives the most difficult use: water, steam, soaps, shampoos, salts, cleaners, hot-cold, poor air circulation and often stagnant humidity. That's why any "simple silicone" is not enough. We want sanitary silicone, i.e. silicone sealant suitable for sanitary/wet areas, with anti-mold additives and the ability to remain elastic in humid conditions. Sika describes, for example, sanitary silicone for kitchen and bathroom as one-component neutral-curing wet area silicone that cures with atmospheric moisture and creates a tough but flexible waterproof seal.
But realism is needed. "Anti-mold" silicone does not mean that it will never turn black under any conditions. It means it contains fungicides/antifungal additives or special technology that delays and reduces mold growth on the surface. But if the compound holds water, if the bathroom is not ventilated, if the old silicone was not properly removed, or if soaps and dirt remain on it for days, even the best sanitary silicone will turn black over time. Sika typically mentions that choosing the right sealant is key to preventing mold and that premium sanitary silicone contains an anti-fungal compound for high-humidity areas.
In this guide we'll look at the difference between regular and sanitary silicone, when to choose acetate or neutral silicone, why silicone turns black, how to properly remove the old one, how to professionally apply it to corners and sanitary ware, and what you need to do to keep the seal as clean as possible.
Silicone is an elastic sealant. It is applied to joints and joints where a tight but elastic connection is needed. Unlike cementitious grout, it does not become hard and rigid. It remains elastic so it can follow small movements between different materials.
This is critical in the bathroom. The tile, the tub, the basin, the vanity, the shower glass and the floor do not all move in the same way. An acrylic tub can flex slightly when it fills with water or when someone steps into it. Bathroom furniture behaves differently from tile. A wall-to-floor corner can open a hairline crack if it is filled with hard grout.
Silicone goes in to seal these joints. It is not a solution to cover large gaps, crooked structures or incorrect sealing. If the joint is too wide, if the substrate is wet, or if there is a leak behind the tiles, silicone will not solve the problem. It will hide it temporarily.
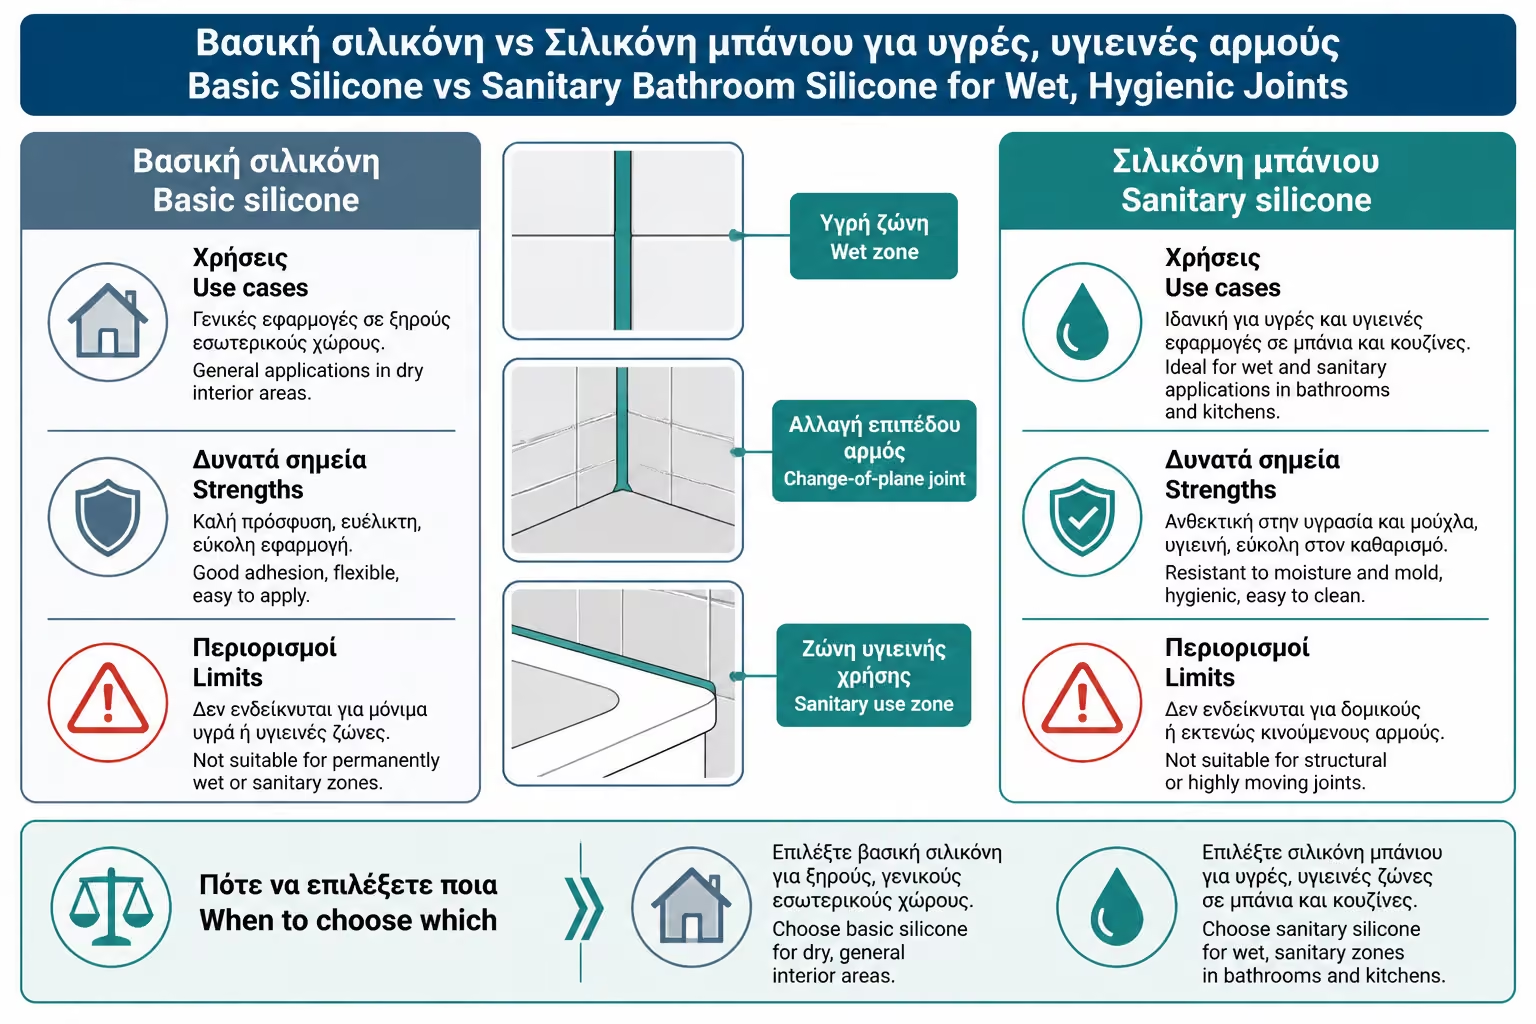
Plain silicone may be suitable for general applications, glazing, structures or areas without intense moisture. Sanitary silicone is designed for bathrooms, kitchens, showers, sanitary ware and places where there is permanent or frequent moisture. The main difference is that the sanitary has additives that reduce mold growth and better behavior in wet conditions.
For example, Mapei describes Mapesil AC as a pure acetate, mould-resistant silicone sealant with BioBlock® technology, suitable for ceramics, glass and anodised aluminium, with movement in operation up to 25%. This type of product is not just “white silicone”. It is a material specifically for elastic, anti-mold seals in wet areas.
In a bathroom remodel, using plain silicone because "it's cheaper" is false economy. The cost difference per cartridge is small compared to the overall project. The difference in mold resistance and image after a few months can be big.
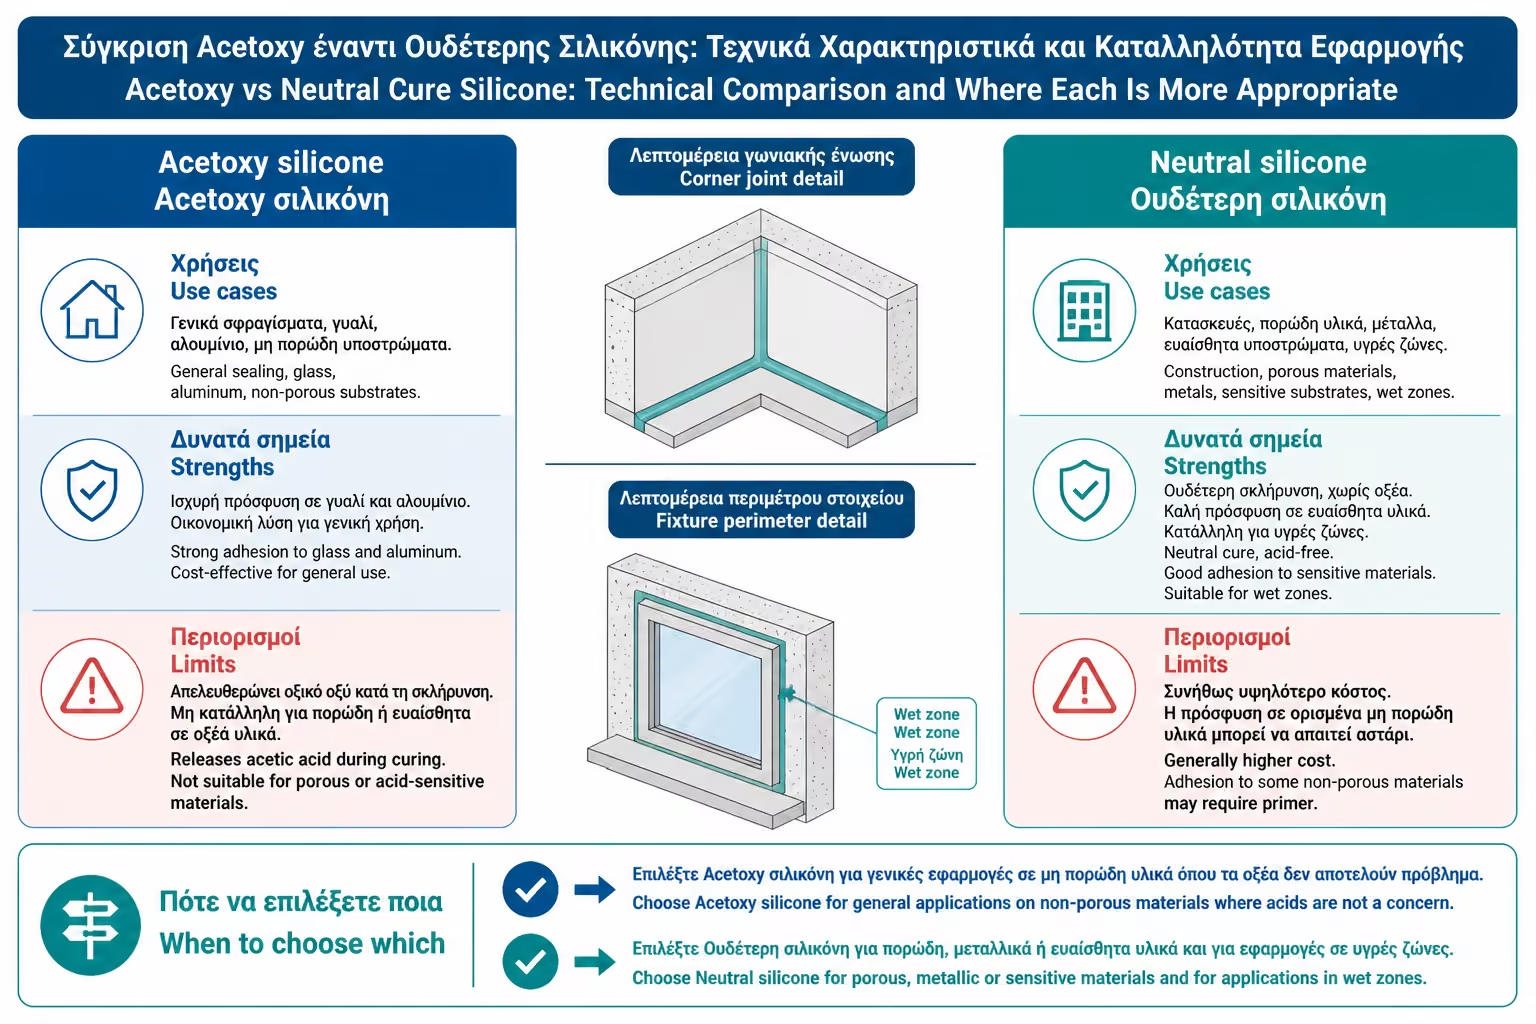
Silicones are often divided into acetate-cured and neutral-cured. Silicone acetate has the characteristic strong vinegar smell during application. It usually has very good adhesion to glass, ceramics and glazed surfaces. For this reason it is often used in bathrooms with tiles, sinks, bathtubs and glass surfaces.
Neutral silicone has a lower odor and is more suitable for sensitive materials, metals, natural stones or where acetate may cause an adhesion or corrosion problem. SikaSeal Kitchen and Bathroom, for example, is described as a neutral-curing, low odor wet area silicone with good adhesion and a resilient waterproof seal.
In practice, we don't just choose from the word “sanitary”. We also look at the materials of the union. Ceramic to ceramic? Sanitary silicone acetate may be suitable. Natural stone, marble, metal elements, special panels, acrylics or sensitive surfaces? Need to check datasheet and possibly neutral silicone.
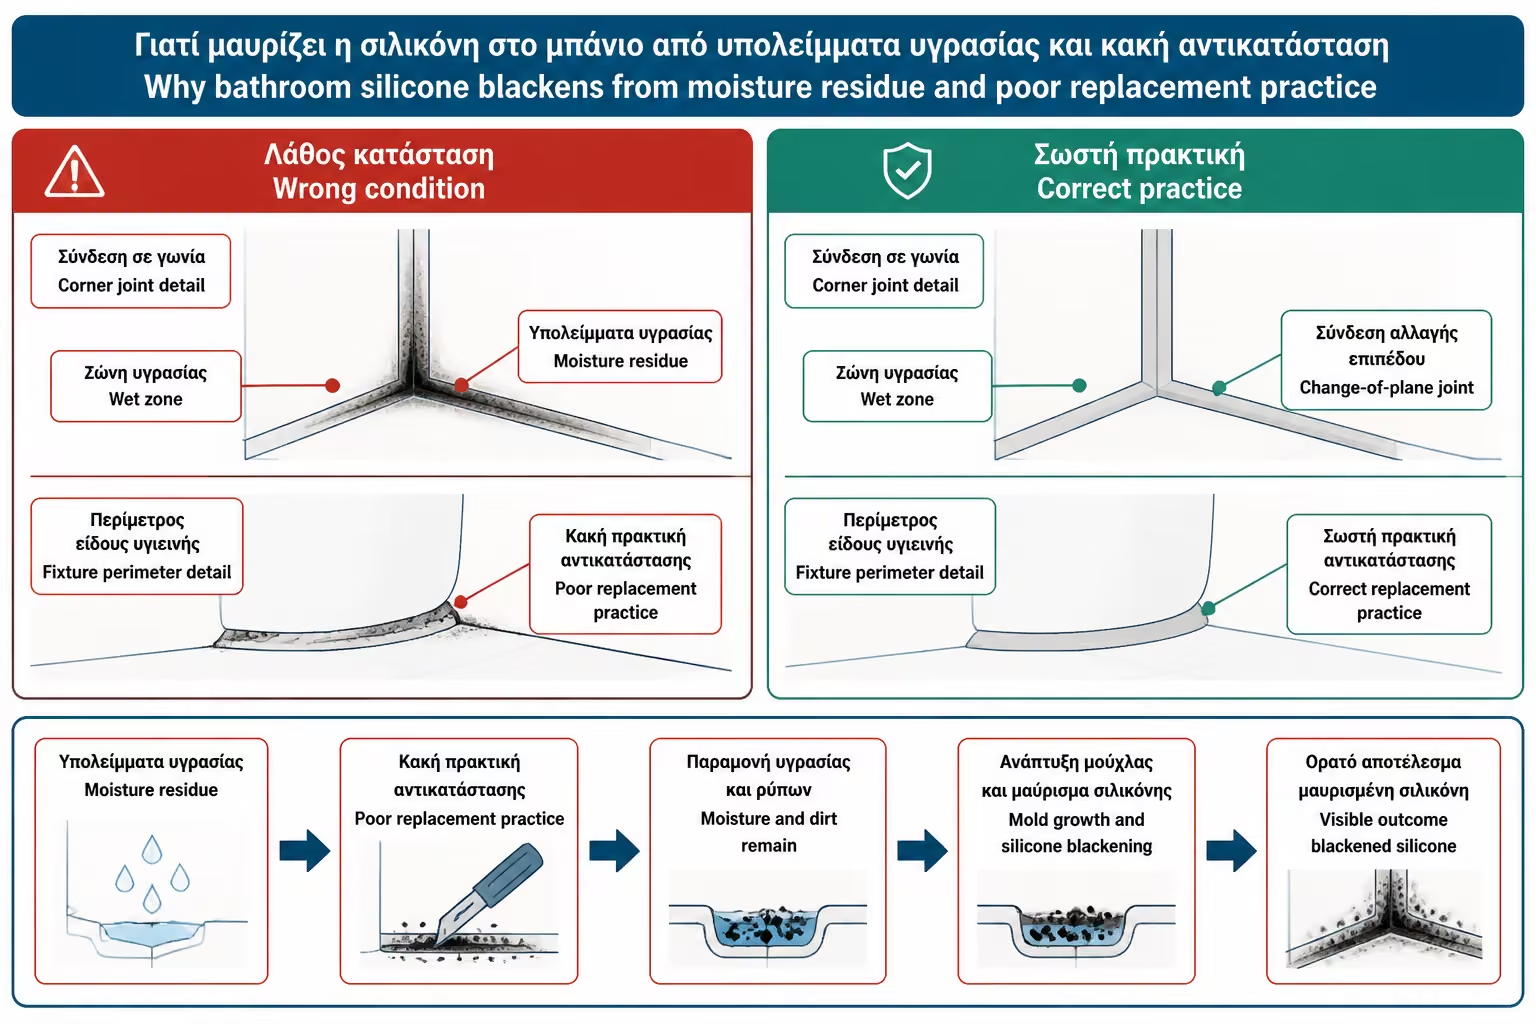
Silicone turns black when fungus/mould grows on or within its surface or when dirt, soaps and organic residues become trapped. The bathroom offers ideal conditions: humidity, heat, soap, poor air circulation and surfaces that stay wet.
Tanning does not always mean that the silicone was of poor quality. It may mean that it was applied over a dirty or wet base, that the old mold was not completely removed, that the compound holds water, that there is no ventilation, or that very aggressive cleaners are used that wear down the surface of the silicone.
Anti-mold silicone delays the problem, but does not negate biological and environmental factors. If after every shower water remains in a bad corner and the bathroom is closed, the silicone will suffer. Hardware helps, but the use of space plays a big role.
"Never tan" is a commercially attractive phrase, but technically exaggerated. Proper fit and good sanitary silicone can keep the seal clean for much longer, but there is no material that stays flawless forever in a wet, poorly ventilated area without cleaning.
A realistic goal is to drastically reduce the chances of browning: correct material selection, complete removal of old silicone, dry and degreased surface, correct joint cross-section, smooth finish without "pools" that hold water, good ventilation and regular wiping. If these are done, a good sanitary silicone can be kept clean for years.
But if the joint is wrongly designed, i.e. it holds stagnant water, mold will find a way. The problem is not only the hardware. It's the geometry and the humidity.
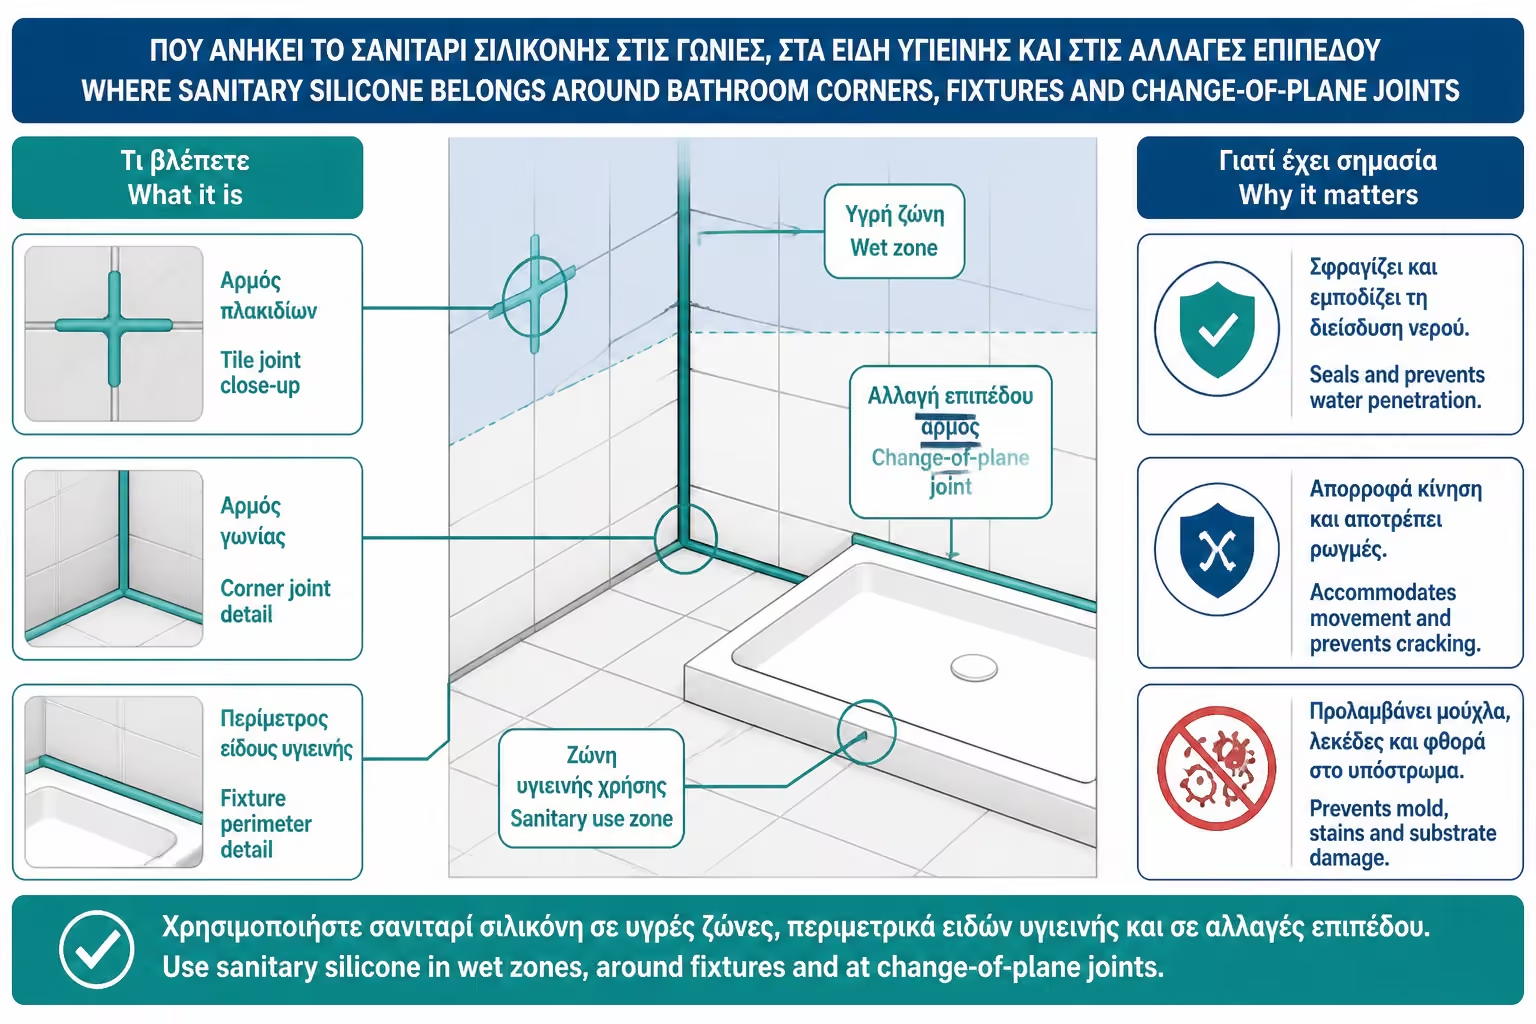
Sanitary silicone must be used in joints that receive water or water vapor: bathtub with tile, shower with wall, floor with wall in the shower zone, tile corners, sink with counter, counter with wall, basin with floor, shower cubicle with tile, glass panels and trim around sanitary ware.
It should not be used as a general glue for everything. It is not putty to fill big holes. It is not a substitute for tile adhesive. It is not waterproofing behind the tiles. It is a final elastic sealant in joints and joints.
It is especially important to use it on the inner corners of the tiles. That's where many craftsmen put cement-based grout, which often cracks because the two surfaces move differently. Silicone is the best material for these level changes if applied correctly.
The new silicone should not be placed on top of the old. This is one of the most common mistakes. If the old silicone has blackened, peeled off or lost its grip, applying a new layer on top will not solve the problem. It will stick to a bad substrate and likely peel off quickly or blacken again.
The old silicone must be removed mechanically with a suitable cutter, removal tool or silicone remover, without injuring the tiles, tub or counter. Then the remains are removed. Spots with mold must be cleaned and dried completely. If there is any small residue of silicone or dirt left, the new silicone will not adhere properly.
Caulking application guides emphasize removing the old material and cleaning the surface of dust, debris, soap scum and grease as the first step before applying new silicone. This is especially important in the bathroom, where the surfaces have years of soap and limescale.
Silicone does not adhere well to a wet, greasy or dusty surface. In the bathroom, even if the surface looks clean, it may have soaps, salts, cleansers, body oils or old silicone residue. All of these reduce traction.
After removing the old silicone, the surface is cleaned, rinsed where necessary and completely dried. In many cases, degreasing with a suitable product, always compatible with the materials around the joint, helps. We do not use strong solvents on sensitive materials without instructions.
Moisture is critical. If we seal water behind the new silicone, we will create an ideal condition for mold and poor adhesion. Ideally, the area should be dry for several hours before application, especially in showers and bathtubs that are used daily.
The silicone must have the correct cross-section to work elastically. If the line is too thin, it does not have enough material and may tear. If they are too wide and too deep, they may shrink, delay ripening, or malfunction. In large joints, a backer rod is often needed, so that the silicone has the correct depth and does not stick to three sides.
The goal is for the silicone to stick to both sides of the joint and be able to move. If it also sticks to the bottom of the joint, its movement is restricted and it can tear. This is a technical detail that is often overlooked in home applications.
In ordinary tub or shower joints, a backer rod is not always needed, but correct geometry is needed. If there is a huge gap, we don't just fill it with a lot of silicone. First we correct or properly bridge the gap.
Using tape on both sides of the joint helps to produce a clean, straight line. It is particularly useful for DIY applications or for strong color contrasts, e.g. black silicone on white tile. But the tape must be removed at the right time, before a film starts to form on the silicone.
If the tape is left on too long, it can "pull" the silicone and leave an ugly pimple. If removed too quickly without proper finishing, the line may be damaged. The correct procedure is: apply tapes, apply silicone, immediate finish, remove tapes, minor final touch-up where necessary.
Professionals often work without tape, with a steady hand and finishing tool. For the owner or less experienced handyman, tape greatly reduces mistakes.
The tip of the cartridge is cut at an angle, usually about 45°, to the width corresponding to the joint. If it is cut too large, excess material will come out and stain the surrounding surfaces. If it is cut too small, the joint may not fill properly.
The application is done with constant pressure and constant speed. The tip should drive the silicone into the joint, not just leave it on the surface. We want full contact with both sides. The line should be continuous, without gaps, bubbles or interruptions.
In a bath or shower, it is best to make the entire joint in one continuous motion where possible. Stops create points that are seen and can be weaker. If the application has to be stopped, it is done at a point where it can be worked on smoothly.
The finished silicone bead is not there only to look neat. It has to bond properly to the sides, form a smooth surface and avoid holding water. A bad, wavy or overly hollow bead collects soap and dirt. A correctly formed silicone joint sheds water better and is easier to clean.
The finishing is done immediately, within the working time of the product. For example, technical data of Mapesil AC mention a workability time of about 10 minutes, which shows that the time for proper laying is limited. If time passes and a film begins to form, the finish pulls the surface and breaks the adhesion.
Special finishing tools or silicone spatulas are used. A soapy finger is an old practice, but it's not always the best, especially if too much soap gets in which can affect edge adhesion. The tools give a more stable result.
Silicone can form a surface film quickly, but it does not mean that it is fully cured. Complete curing depends on the product, temperature, humidity, application thickness and ventilation. If it gets wet too soon, it can damage the surface, reduce adhesion or trap moisture.
The manufacturer's instructions must be followed. In many domestic applications, it is best not to use the shower or bathtub for at least 24 hours, unless the product gives a different time. Application guides for sealing baths often state waiting about 24 hours for proper curing before using with water.
In bathtubs, there is also the practice of filling the tub with water during application so that it takes its load and does not pull the silicone later when it is full. This depends on the type of tub and the craftsman's instruction, but it shows how important small movements are.
White silicone is the classic choice with white sanitary ware and white tiles. Clear silicone is often used around glass, shower enclosures or joints where we do not want a hard visual line. Colored silicones are very useful when we want to match the grout or the tile.
Many modern systems have silicones in the same color palette as the grouts. Mapei, for example, says that Mapesil AC is available in colors that complement the Mapei grout line, which helps to have a uniform aesthetic in corners and joints.
The choice of color also has a practical dimension. White silicone shows yellowing and mold more easily. Clear may show dirt behind it if not applied to a perfectly clean substrate. Gray, beige or colored silicones are more forgiving, but must match the rest of the system.
The base of the pelvis is a special case. Many seal it with silicone for aesthetics, cleanliness and to avoid water from mopping that enters from below. This may be correct, but should be done with caution. If there is a leak from the pelvis, a fully sealed silicone can temporarily hide it.
In many practical applications a small inconspicuous gap is left at the back so that if there is a leak, water will be seen instead of trapped. This depends on the plumber and installation detail. But certainly silicone at the base of the pelvis should not be the way to "stabilize" a poorly positioned pelvis. The pelvis must be properly mechanically fastened.
The line should be thin, clean and sanitary. Thick mass of silicone around the basin looks rough and holds dirt.
Joining a bathtub or shower with a tile is one of the most critical points. Water falls there every day and there is traffic. If the silicone opens, water can seep behind the tub or under the shower and create moisture on the wall, floor or adjacent space.
The old silicone must be completely removed, the area dried and the new applied in a correct cross-section. The tub, especially if it is acrylic or lightweight, must be stable. If it moves too much when someone gets in, the silicone will tear no matter how good it is. In such a case, first the support of the bathtub is corrected and then sealing is done.
In the shower, silicone is not a substitute for sealing the base or walls. It is a final elastic finish at the joint. If the shower has a bad slope or holds water in the joint, the silicone will suffer.
To prevent the silicone from turning black, it must dry. After showering, a pass with a water spatula or cloth in the corners greatly reduces residual moisture. The ventilation must work. A window, fan, door open after the shower or a dehumidifier in difficult areas help.
Cleaners must be compatible with silicone. Very harsh chemicals, bleach in constant use or abrasive sponges can wear down the surface and make it more vulnerable. Periodic gentle cleaning is better than infrequent aggressive scrubbing.
Cleaning and mold prevention guides point out that mopping after showering and good ventilation greatly reduce mold growth on sealants. Silicone is not self-cleaning. It wants a drying environment.
Silicone should be replaced when it is deeply blackened, has come off on one side, is torn, hardened, has gaps, or when water is leaking from behind. If the tan is superficial, it can be cleaned. If it has gotten into the mass or behind the silicone, replacement is a better solution.
It makes no sense to put new silicone over a damaged one. The result will be temporary. The correct procedure is remove, clean, dry, reapply. If the silicone deteriorates again very quickly, we need to look for the cause: stagnant water, poor ventilation, tub movement, poor adhesion or leakage.
In daily use bathrooms, silicone is not "forever". It is a consumable technical finish that lasts a long time when done right, but will need replacement at some point.
Use the table below as a quick reference for the key points of this section.
| Criterion | Simple silicone | Hygienic / anti-mold silicone |
|---|---|---|
| Use | General applications | Bathrooms, kitchens, showers, sanitary ware |
| Mold resistance | Limited | Improved due to antifungal additives |
| Moisture | Not always suitable for continuous wet use | Designed for wet areas |
| Elasticity | Depending on the product | Usually high for bathroom compounds |
| Colors | Limited or general | Often available in white, clear and joint colors |
| Suitable for shower | Not unless explicitly stated | Yes, if the technical brochure allows it |
| Cost | Lower | A little higher but more suitable for bathing |
For bathing, the choice is almost always sanitary silicone, not simple universal.
Use the table below as a quick reference for the key points of this section.
| Step | what are we doing | Because it matters |
|---|---|---|
| 1. Removal of old silicone | Cut and remove completely | The new one doesn't stick properly on the old one |
| 2. Cleaning | We remove soaps, salts, fats | Adhesion needs a clean surface |
| 3. Drying | We wait for the moisture to go away | Moisture behind the silicone leads to mold |
| 4. Masking | We put tape on both sides | Clean line and less smudges |
| 5. Application | We pass a continuous line with the right pressure | To fill the union without gaps |
| 6. Finishing | We lay with a tool within working time | Smooth surface that does not hold water |
| 7. Remove tape | Take out before it films | Clear acne |
| 8. Ripening | We do not rain before the manufacturer time | Durability and grip |
| 9. Maintenance | Sweeping, airing, gentle cleaning | Tan prevention |
The application is simple in concept, but durability is judged in small steps.
In the Greek market of 2026, the cost difference between simple and good sanitary silicone is small in the context of a bathroom renovation. A good sanitary silicone can cost more than a general-purpose one, but we are usually talking about a small amount compared to tiles, adhesives, grout, sanitary ware and labor.
The silicone replacement job depends on the length, condition of the old one, need for cleaning, how difficult access is, and if there is mold or moisture behind. On small surfaces it can be used as a meremet. In a whole bathroom with bathtub, shower, counters and corners, it should be treated more organized.
The economy should not be made in the quality of the material or in the removal of the old silicone. The cheap effect that tans in a few months is more expensive in time and discomfort.
The first mistake is putting new silicone on top of the old one. This almost always fails quickly.
The second mistake is applying on a wet or soapy surface. The grip will not be right.
The third mistake is using simple silicone instead of sanitary silicone.
The fourth mistake is too thick a line that holds water and dirt.
The fifth mistake is using hard grout in the corners instead of elastic silicone.
The sixth mistake is not to solve the cause of the dampness. If the corner holds water or the tub moves, the silicone will fail again.
Use the table below as a quick reference for the key points of this section.
| Question | Yes / No |
|---|---|
| Has the old silicone been completely removed? | Yes / No |
| Is the surface clean of soaps, salts and grease? | Yes / No |
| Is the compound completely dry? | Yes / No |
| Is the silicone sanitary / mold-resistant? | Yes / No |
| Is it acetic or neutral depending on the materials? | Yes / No |
| Is the width and depth of the joint correct? | Yes / No |
| Need a backer rod in a big gap? | Yes / No |
| Has masking been done for a clean line? | Yes / No |
| Will the curing time be met before water falls? | Yes / No |
| Is there good ventilation for the compound to dry daily? | Yes / No |
If several answers are "no", the tan will not be due to silicone alone. It will be due to the process.
The best anti-mold silicone is not the one that just says “anti-mould” on the cartridge. It is the one applied on perfectly clean, dry and properly prepared compound. Completely remove the old silicone, choose sanitary silicone compatible with the materials, lay it with the correct cross-section and let it cure before water falls. If the corner holds water or the bathroom is not ventilated, no silicone will stay flawless forever. The hardware helps; the detail and maintenance keep it alive.
Anti-mold silicones are a necessary material in every proper bathroom. Their difference from simple silicones lies in suitability for wet areas, flexibility, water resistance and additives that reduce mold growth. That is why they are used in bathtubs, showers, washbasins, basins, tile corners and joints with glass or sanitary ware.
But they should not be treated as magical material. Silicone turns black in the presence of moisture, dirt, soap and poor ventilation. If applied over old silicone, liquid compound, or a surface with salts, it will fail quickly. If the tub moves, if the corner holds water, or if there is a leak from behind, the problem will return.
The right result comes from a combination of: good sanitary silicone, correct choice of acetic or neutral curing, complete removal of old material, cleaning, dry base, correct cross-section, careful finishing and good ventilation. So we do not guarantee that the silicone will never turn black, but we drastically reduce the chances and keep the bathroom clean, watertight and aesthetically correct for much longer.
Return to category.
Go to categoryReturn to the central guide.
Go to guide