The Cables (Probes)
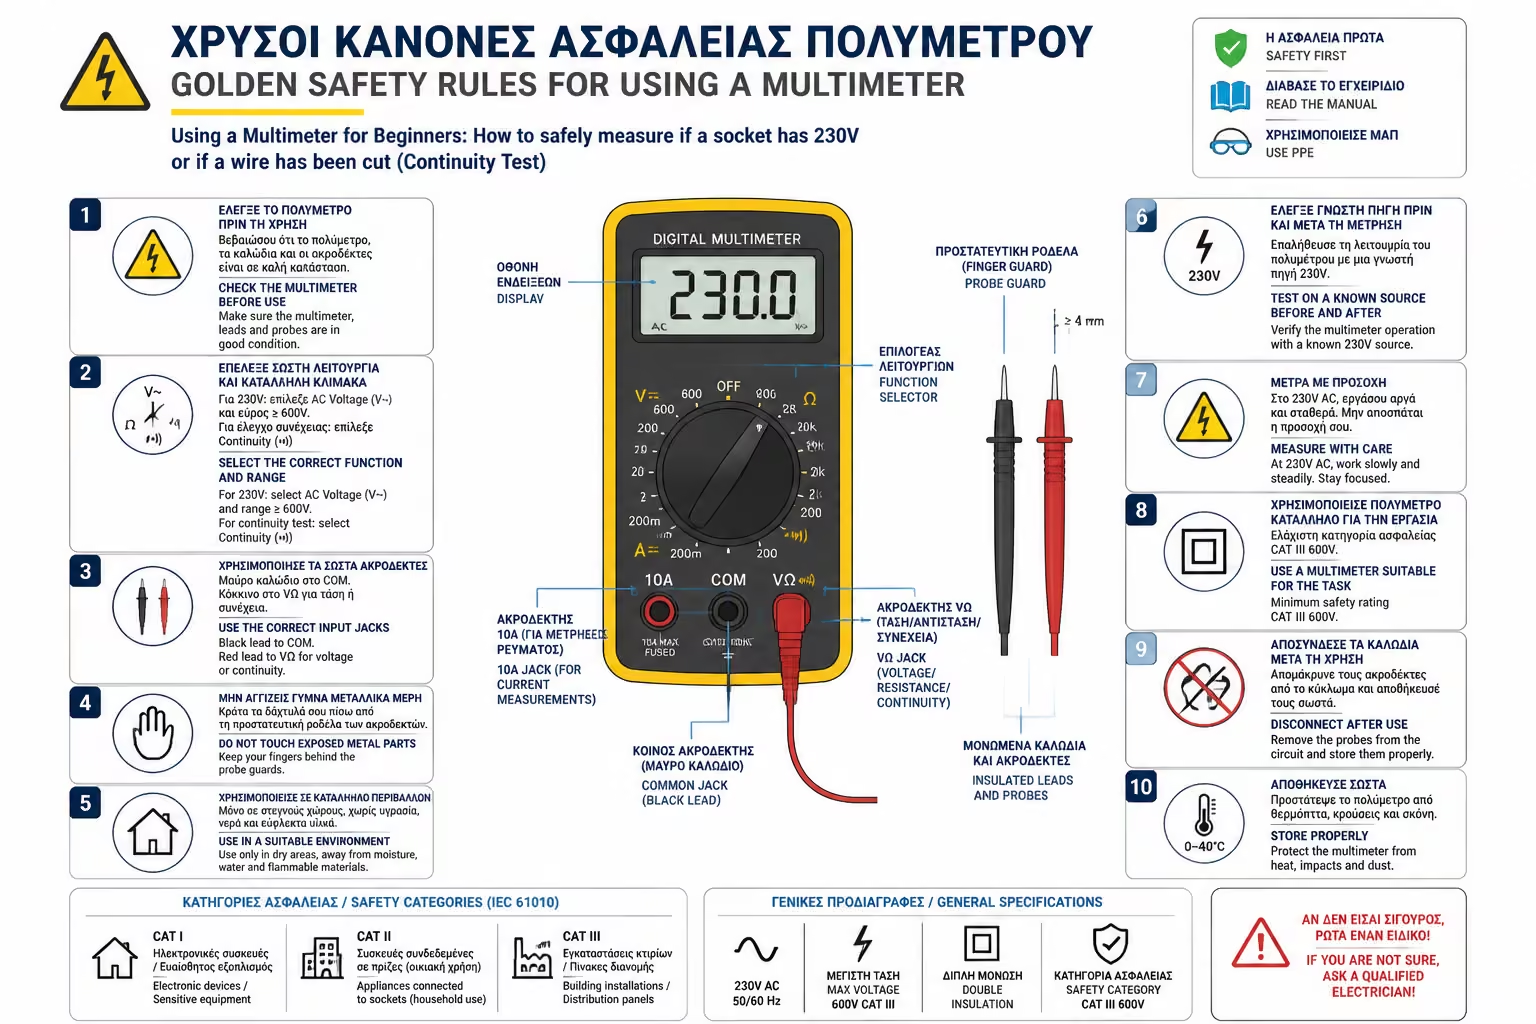
The black lead goes in the `COM` socket. For the checks in this article, the red lead goes in the socket marked `V`, `VΩ`, or `VΩmA`. Do not place the red lead in the high-current `10A` socket for outlet testing.
Many homes still rely on the classic test screwdriver, the transparent one with the tiny lamp inside. It is common, cheap and often misleading.
The problem is that a test screwdriver can give false confidence. It may glow from induced voltage and suggest danger where there is none, or fail to give a clear answer when a real hazard exists.
A digital multimeter is far more reliable because it gives you an actual reading rather than a vague hint. Even an inexpensive unit is enough for simple checks, provided you use it correctly and respect the safety limits.
Don't be intimidated by the dozens of symbols around the rotary switch. As a beginner, you only need three things:
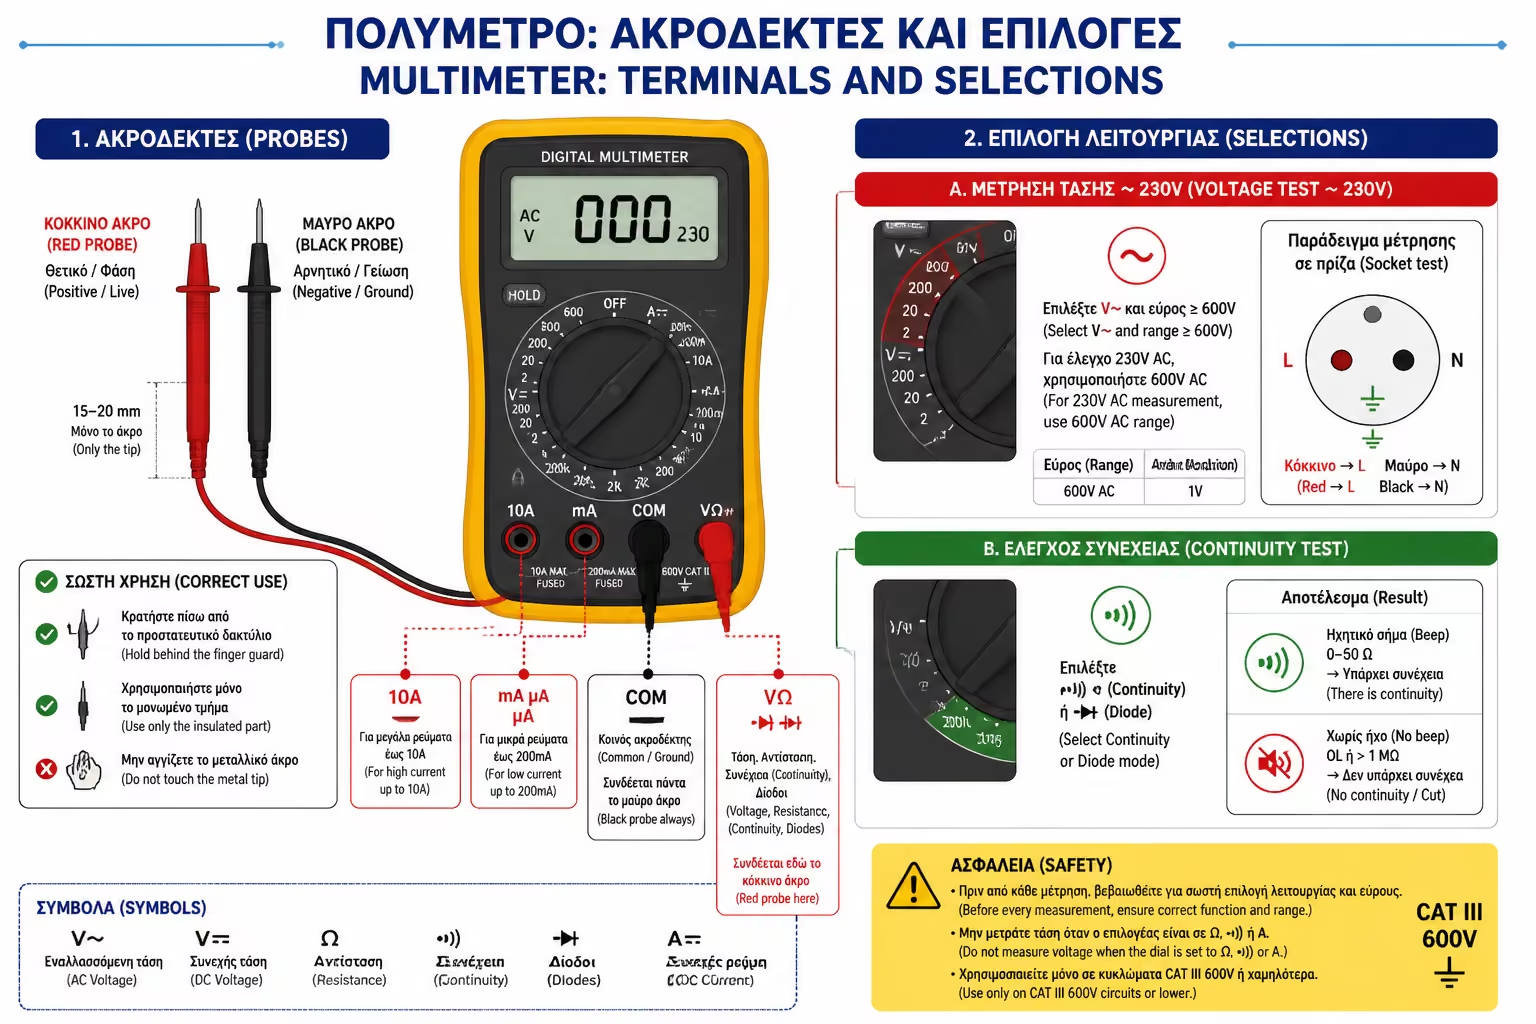
The black lead goes in the `COM` socket. For the checks in this article, the red lead goes in the socket marked `V`, `VΩ`, or `VΩmA`. Do not place the red lead in the high-current `10A` socket for outlet testing.
A common beginner check is simple: is the appliance faulty, or is the outlet dead?
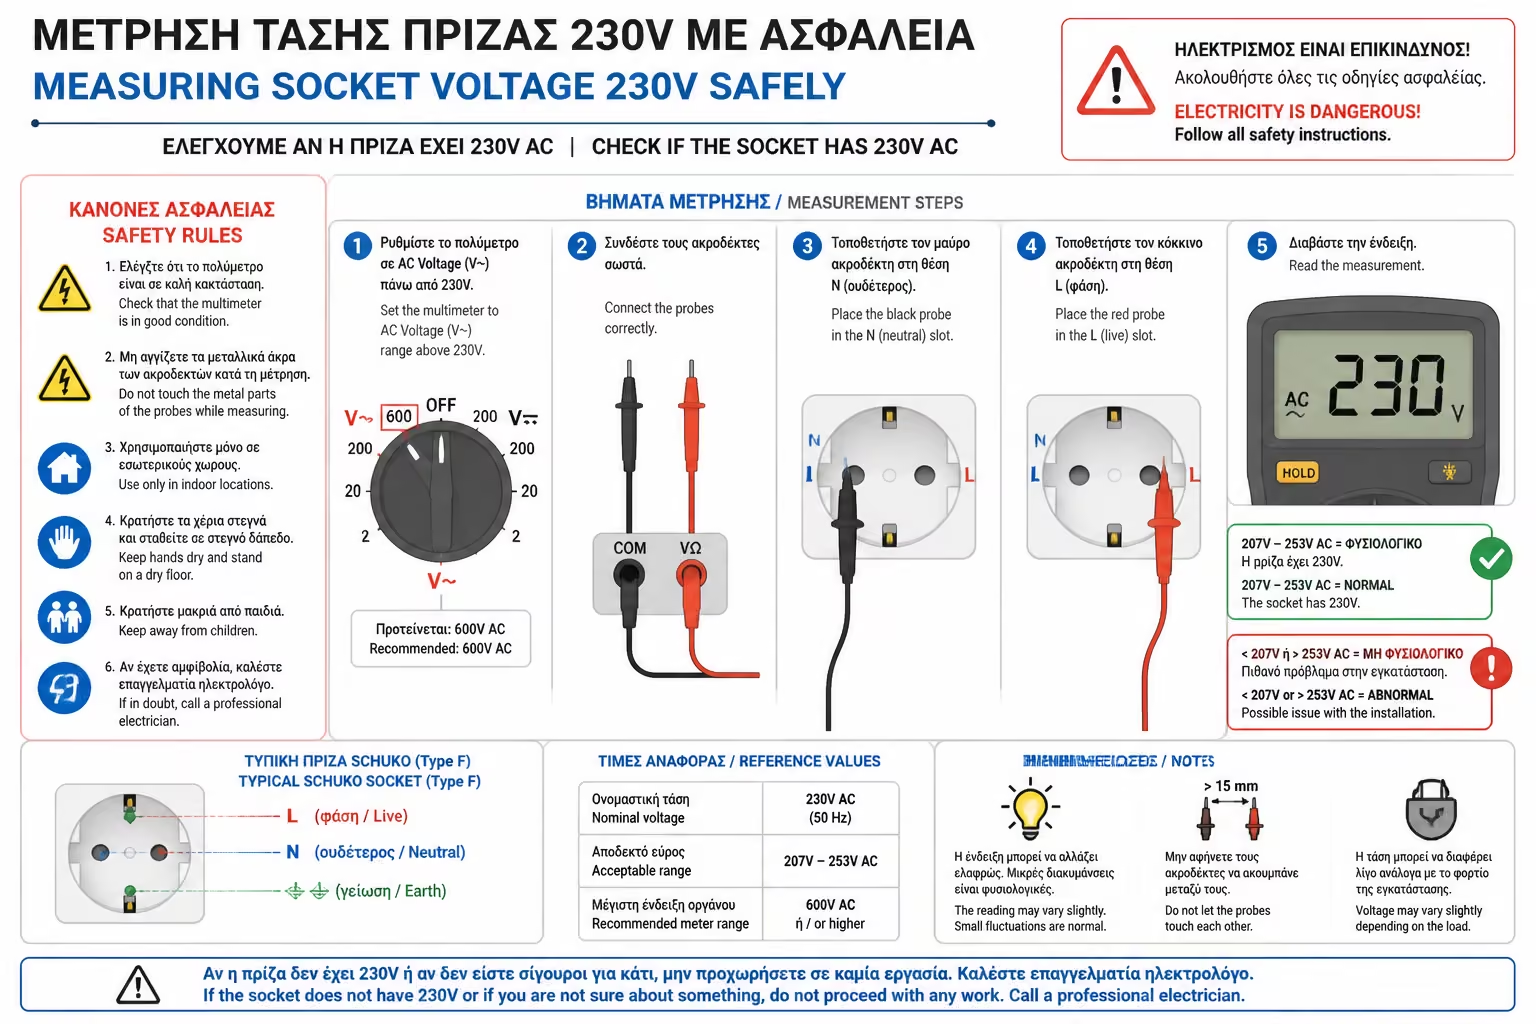
Set the meter to `V~` or `VAC`. If your meter is not auto-ranging, select a range above 230V, typically `600V` or `750V`. Hold the insulated parts of the probes only and place one probe in each outlet slot. For AC outlet testing, polarity does not matter. A reading around `220V` to `240V` means the outlet is live. A reading close to zero means the outlet is not supplying voltage.
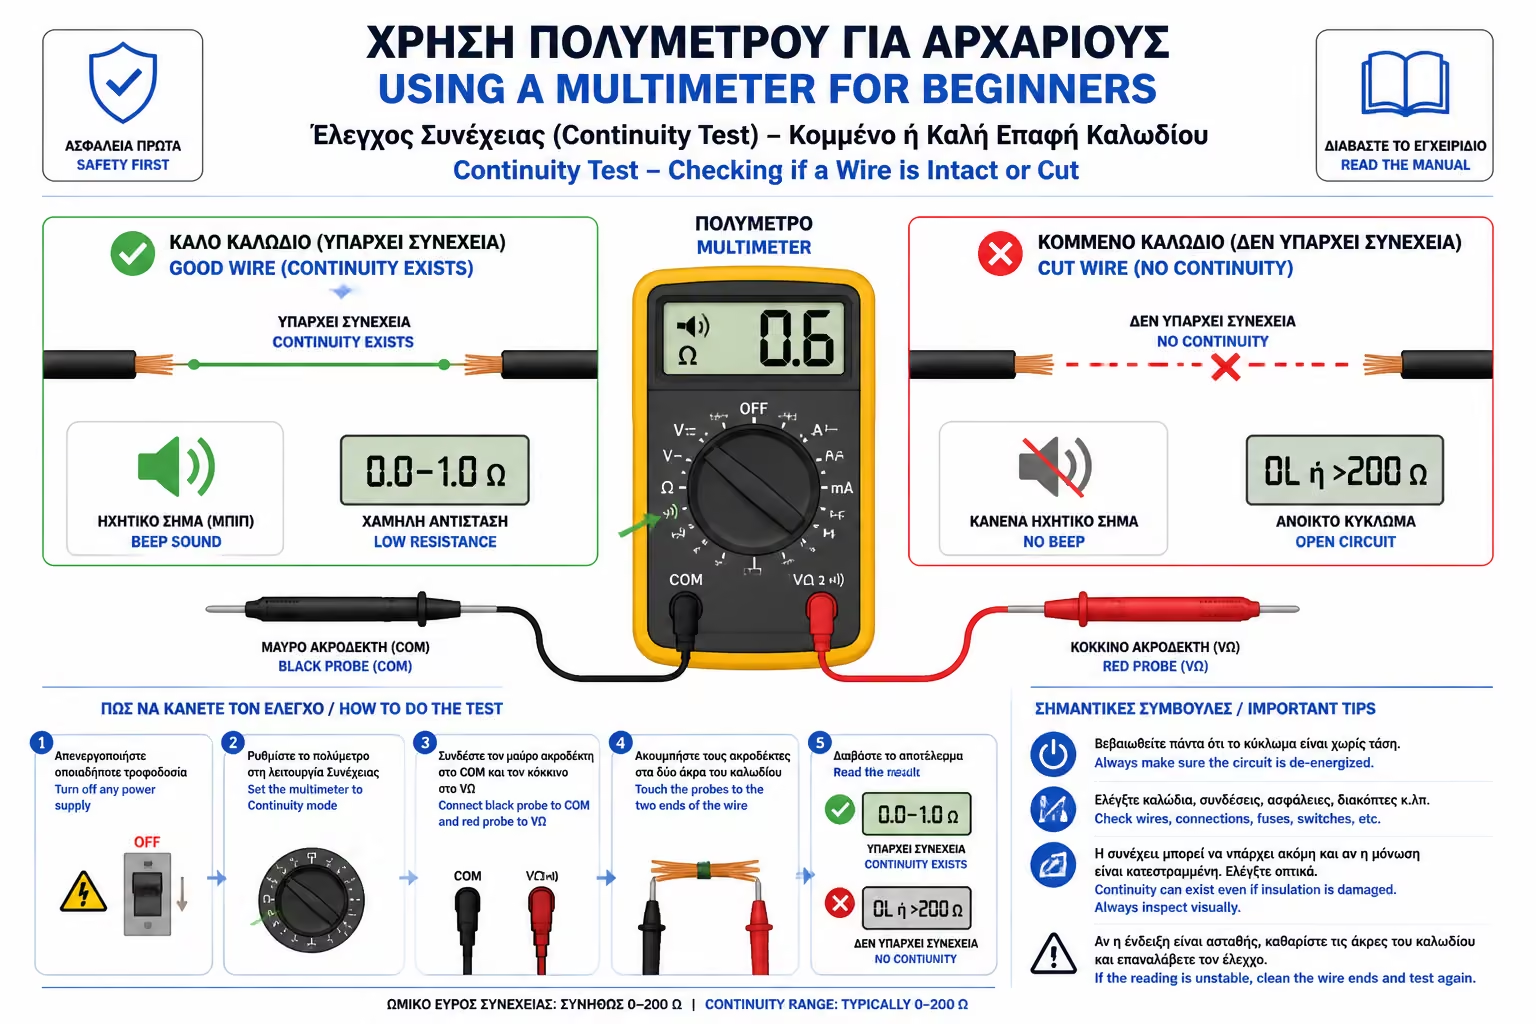
Continuity mode is one of the most useful functions for simple fault-finding. It helps you check whether a cable, fuse or switch is still electrically connected from one end to the other.
The essential rule is this: continuity testing is always done on a de-energised circuit. The appliance must be unplugged and isolated before you begin.
Switch to the continuity or buzzer symbol and touch the two probe tips together first. The meter should beep, confirming that the mode is working. Then place the probes across the two points you want to test. If the meter beeps or shows near-zero resistance, the path is continuous. If it shows `OL`, `1`, or no beep at all, the conductor is open somewhere.
In addition to the above, remember:
A multimeter replaces guesswork with measurement. Once you understand basic AC voltage checks and continuity testing, you can separate a dead outlet from a dead appliance and identify simple wiring faults more confidently. But the rule never changes: if a circuit might be live, treat it with respect and do not improvise.
Next Step: We trained in measurement. But what happens when the multimeter in the socket, instead of 230V, suddenly shows you 400V? If this happens, your TVs are probably smoking right now.
We continue with the most devastating and insidious failure of modern networks: The "Loss of Neutral" (Floating Neutral): The silent killer of electrical appliances in three-phase current (Why TVs burn).
Return to category.
Go to categoryReturn to the central guide.
Go to guide