
The Supply Pipe (AC)
Pass a pipe (at least Φ32) that connects the Inverter space with the central panel. From there will pass the thick supply cable (eg 3x6mm² or 5x6mm² for three-phase).
If you are in the phase of building a new home or doing a radical renovation ("in beta"), you have a golden opportunity in your hands that should not be missed. Pre-installation for PV is probably the most "value for money" move you can make.
The cost for the electrician to run a few empty pipes through the walls while the house is being built is literally zero. But if you decide to put photovoltaics on a finished house 5 years later, you will be faced with a dilemma: Either you will have to dig up freshly painted walls, or you will fill the facades of your house with ugly, exterior plastic channels that will descend from the roof to the ground floor.
As engineers, we've put together a handy guide on exactly what to ask your electrician at the pre-installation stage to make your home 100% "Solar Ready".
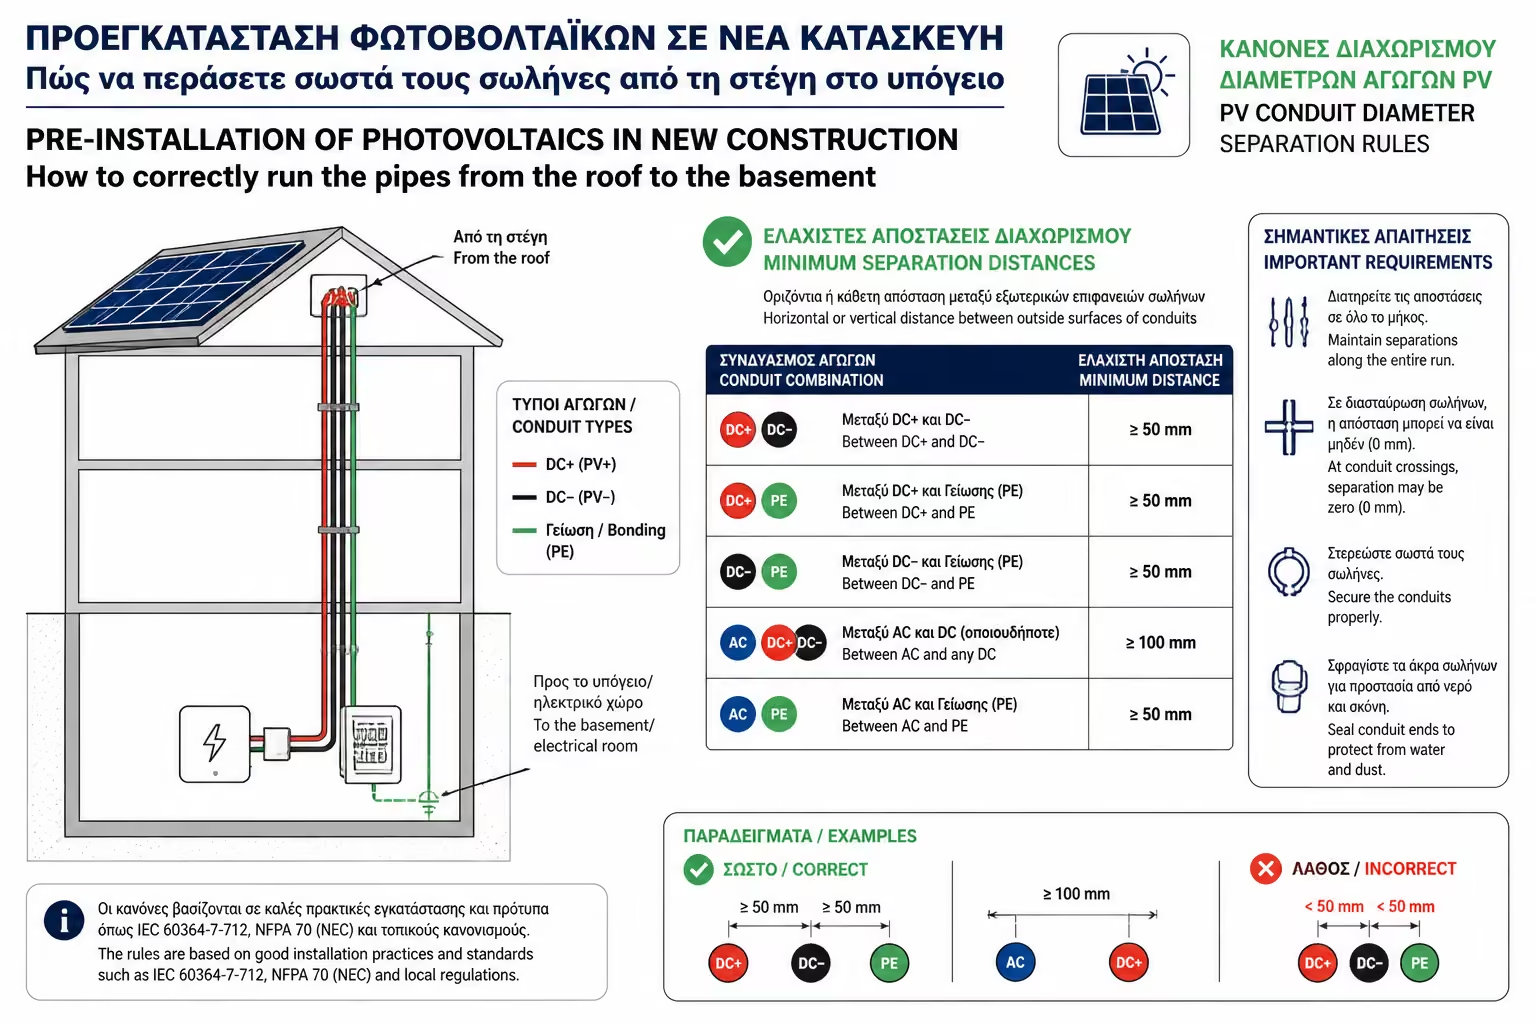
A PV system requires the connection of three different "hubs" in your home:
The challenge is to create "avenues" (empty pipes) that connect these three points, allowing the cables to pass comfortably.
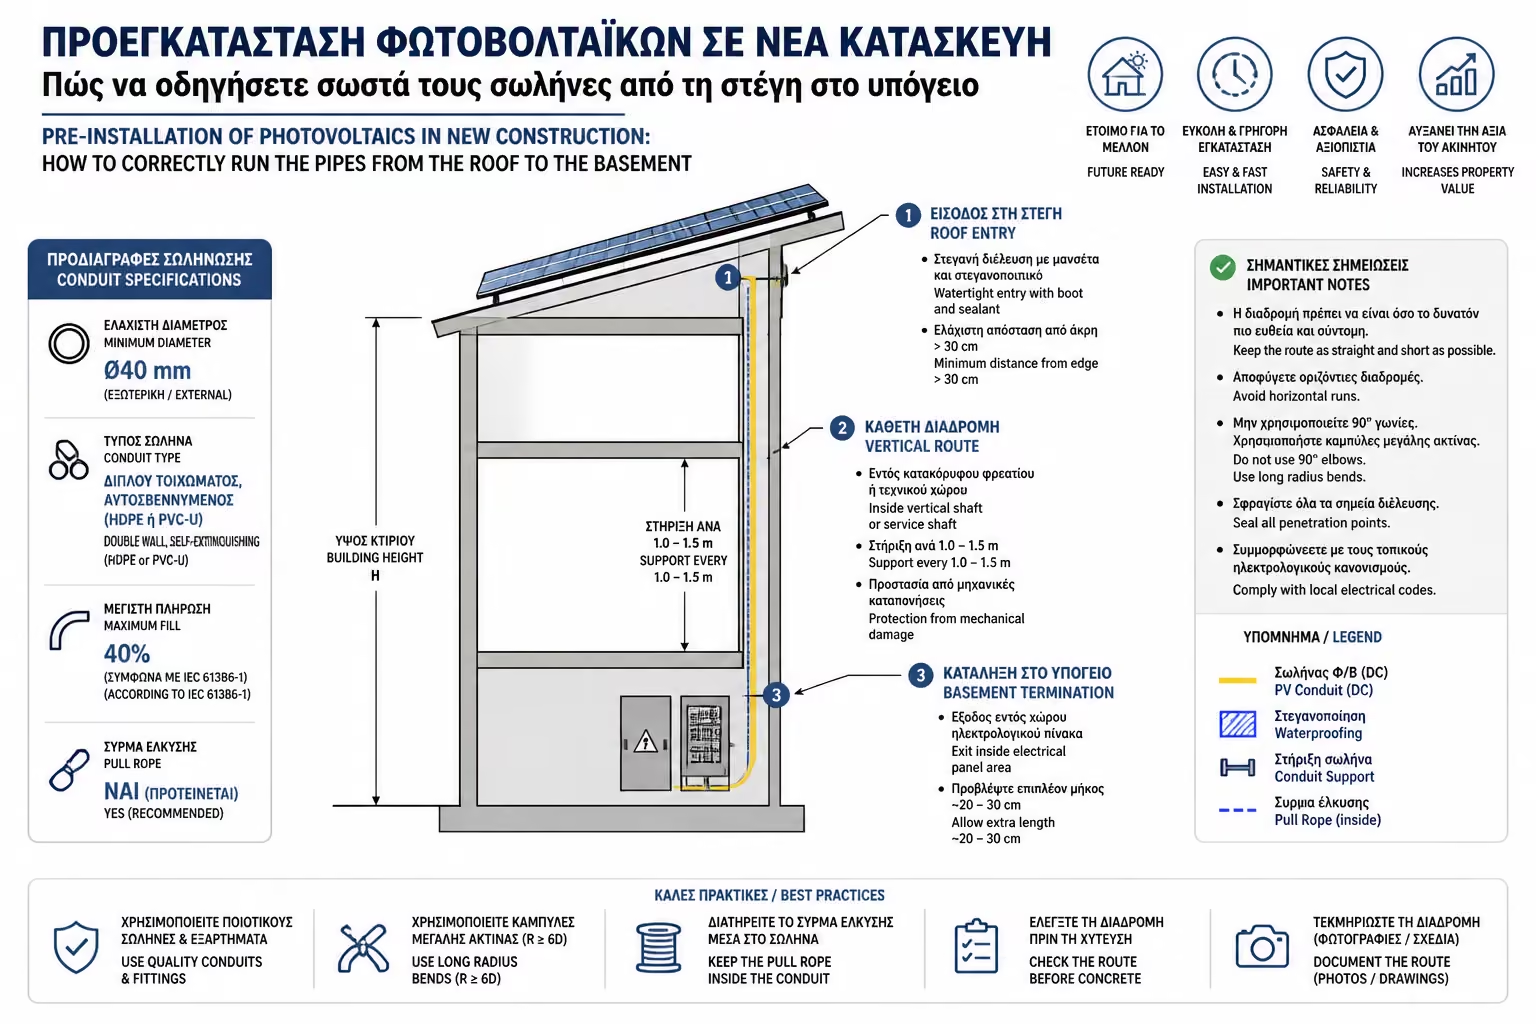
The biggest mistake contractors make is that they leave a simple, thin electrician's pipe (eg Φ16 or Φ20) thinking it will suffice. PV cables (DC cables, communication cables, thick grounding) are many and rigid.
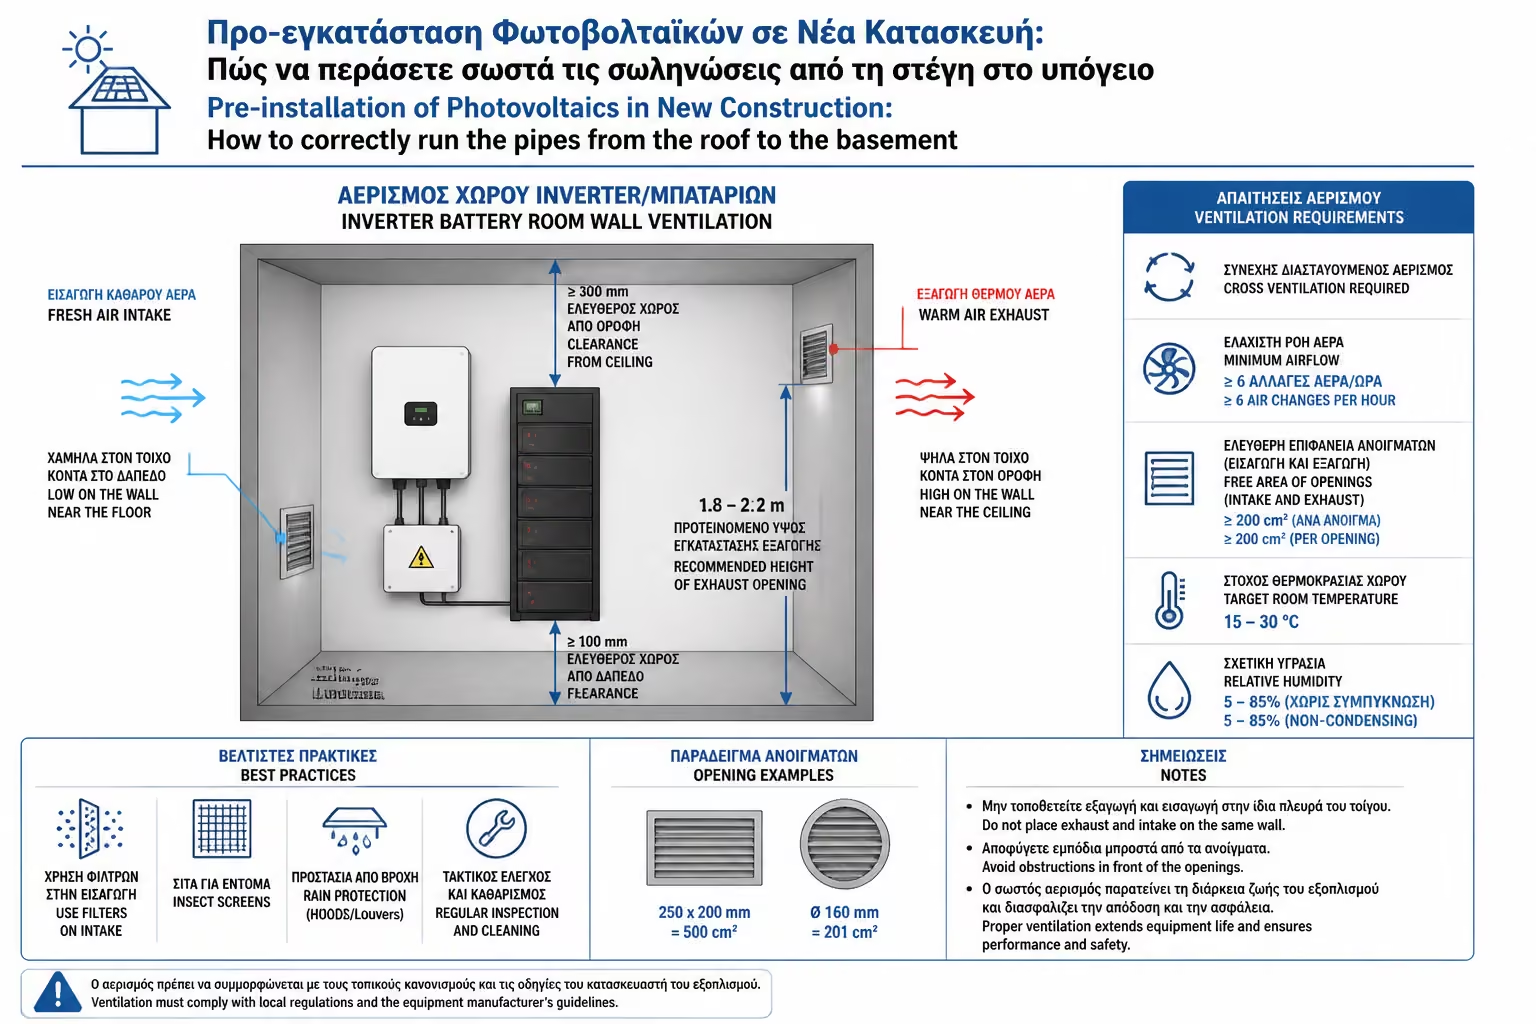
The Inverter is not a decorative element that enters the living room. It is a power machine that has specific requirements:
After determining where the Inverter will go in the basement, you must take care of its connection to the central electrical panel of the house.
Pass a pipe (at least Φ32) that connects the Inverter space with the central panel. From there will pass the thick supply cable (eg 3x6mm² or 5x6mm² for three-phase).
You definitely need a second, thinner tube for the Communication Cable (UTP/CAT6). This cable will connect the Inverter to the "Smart Meter" we mentioned in the previous chapter, which will be placed inside the central panel.
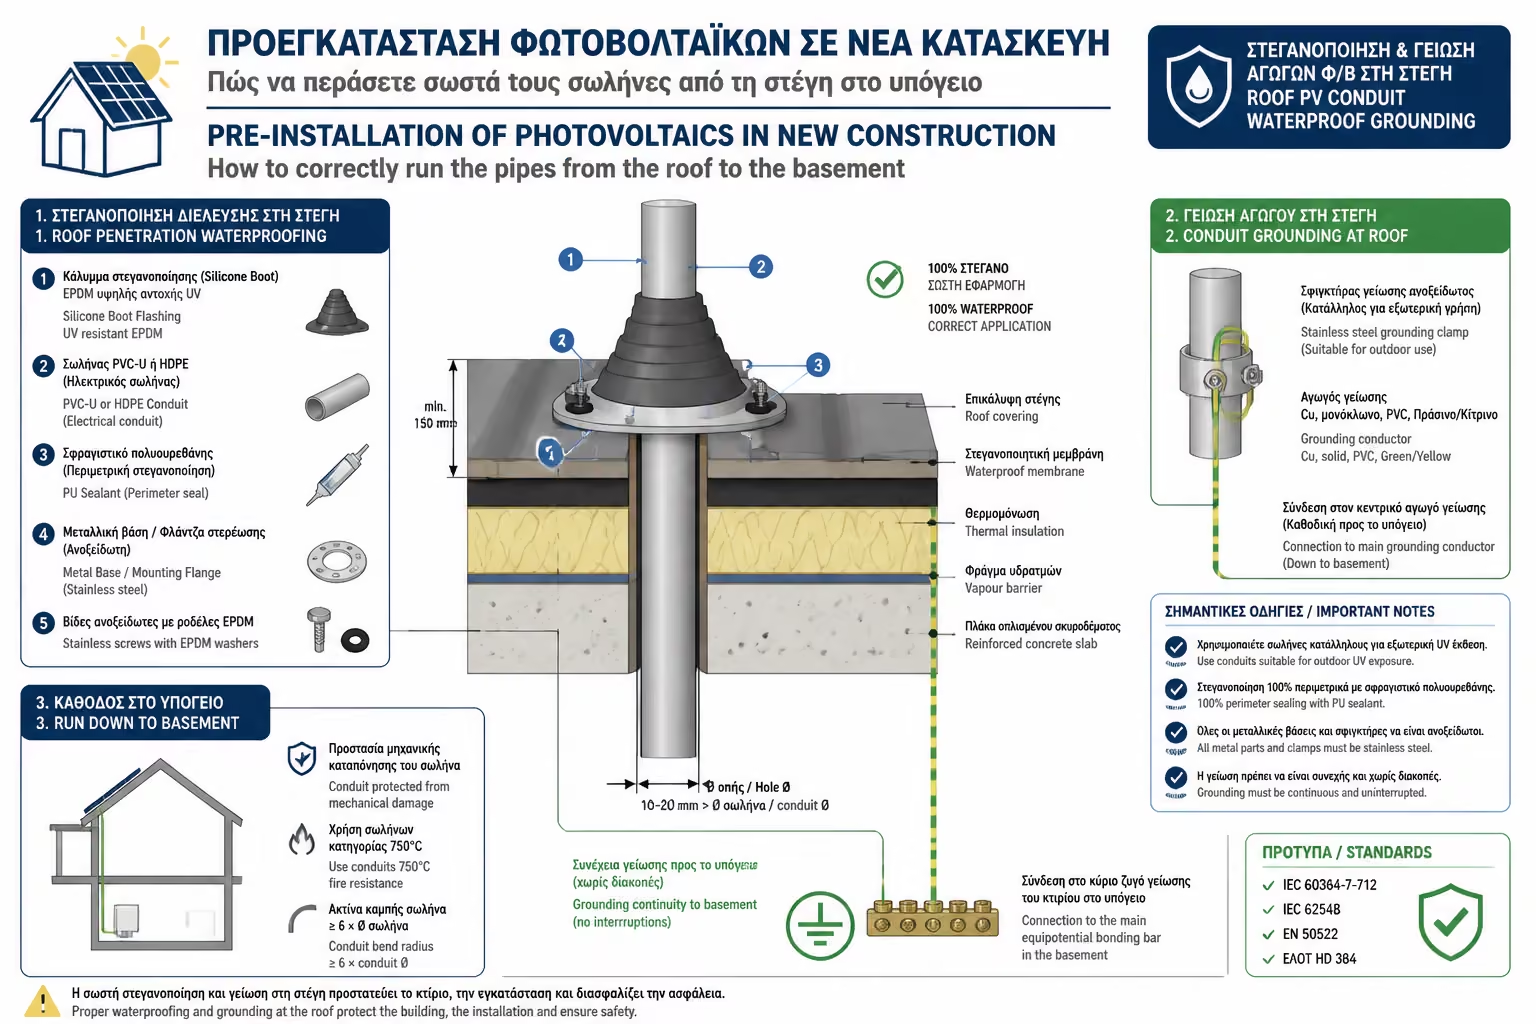
Finally, where the pipes end on the roof, make sure:
Pre-installation for PV in a newly built home is mainly a matter of proper piping design and space planning. Ask your mechanic and electrician to work together to leave you large diameter "empty roads". This move will cost you less than €100 in plastic pipes today, but will save you thousands of euros in digging and unsightly interventions tomorrow.
Next Step: All this is great if you have your own rooftop or roof. But what if you live in an apartment building? Is there hope for you? We answer the most "hot" question of the time: Balcony Photovoltaics (Plug & Play): Are they legal? How they are connected to the socket and what you should pay attention to.
Return to category.
Go to categoryReturn to the central guide.
Go to guide